Don't know if this is a good deal (Rayovac Flashlight)

Solomoriah

Newly Enlightened
Joined
Sep 8, 2020
Messages
8
I hit a local antique consignment mall in Hannibal, MO this morning and found this:

Rayovac%20Flashlight%2020200908_163601-online.jpg


I'd seen the aluminum flashlights before and loved them, but they were always kind of high and often looked beat up. I didn't even know they came in copper. The glass is intact, the switch seems to work, but there is no bulb and I'm pretty sure there should be something in the tail end to make contact with the negative side of the battery stack. So I need to do the research to find out what I have to do to get this restored properly, which is what led me here.

I've worked on computers for years, and own three more or less vintage Japanese motorcycles, but never did anything like a flashlight restoration before... how hard can it be? :D
 

Solomoriah

Newly Enlightened
Joined
Sep 8, 2020
Messages
8
Okay, dang. This is proving a lot harder to Google than I expected.

Can anyone point me to a teardown of this kind of flashlight, so I can see what the missing part looks like?
 

bykfixer

Flashaholic
Joined
Aug 9, 2015
Messages
20,450
Location
Dust in the Wind
Good score. Is it perhaps a (Sears brand) Homart or Tru-spot?

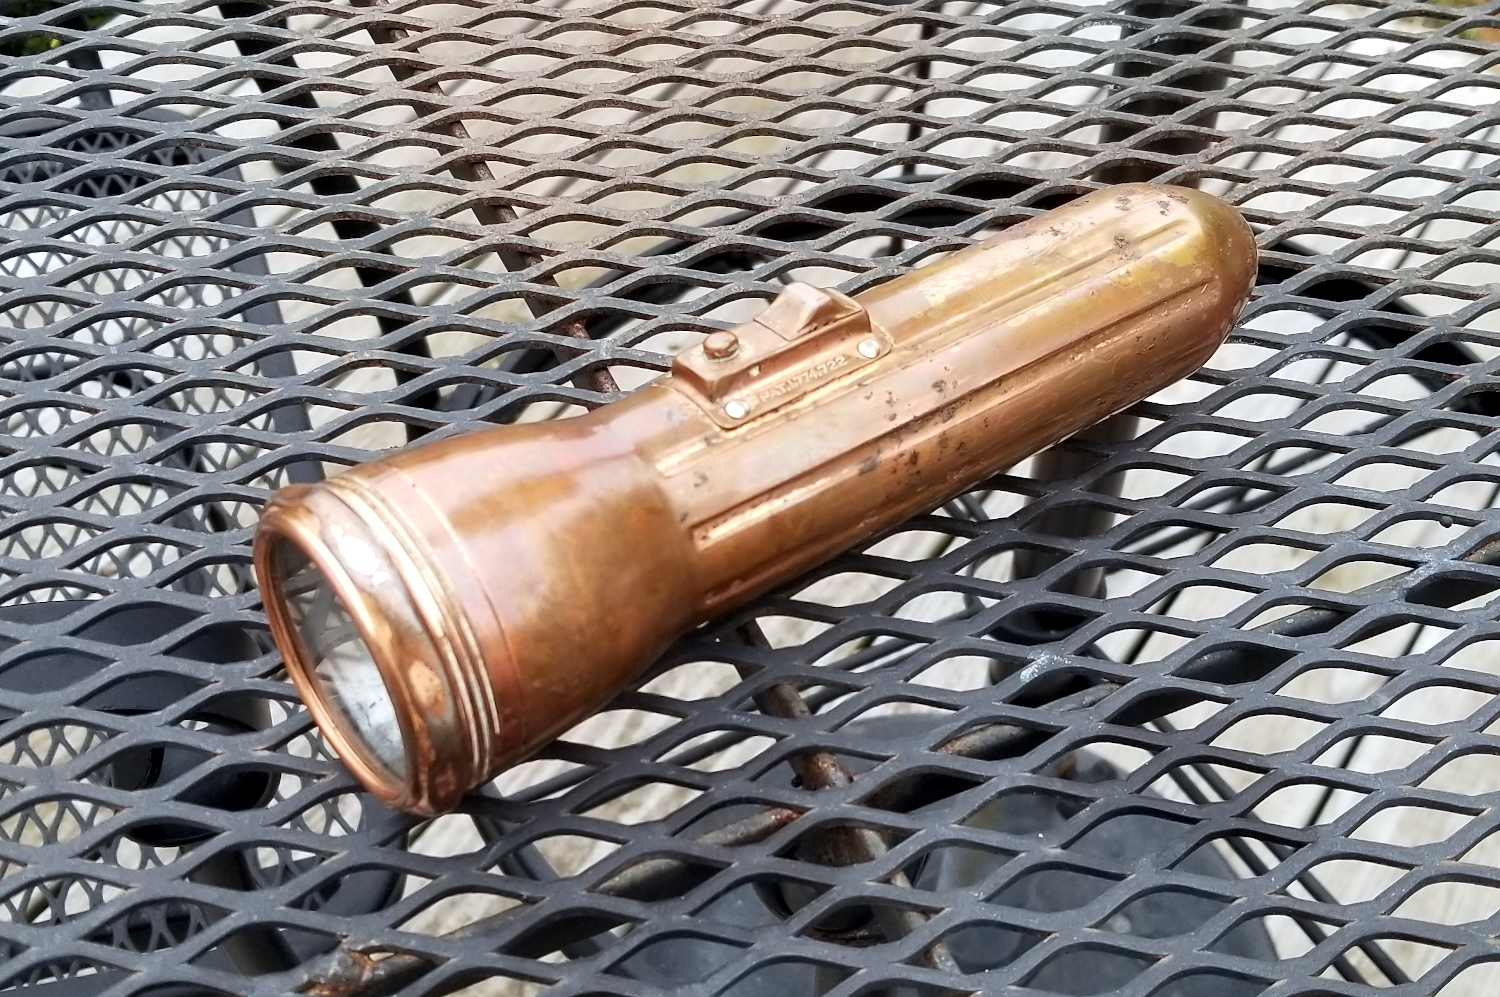
That kind was called "bullet light" due to the shape of the tail. It should have a spring inside the end. Being a bullet shaped tail would mean the OD of the spring would be about the size of a C cell light spring. Springs are not hard to find on the internet or you can make your own using a drill and piano wire. Lots of how to articles for that out there.

Next, the bulb fastener. Some are male, some are female. It depends on the reflector tooling. But the reflector tooling threads should indicate whether it is male or female. Most male were a plastic piece with a spring inside to help isolate shock to the bulb. Female type just threaded over the reflector with a small hole that allowed the tip of the bulb to make contact with the positive end of the battery. Your light used a PR-2 bulb. Not real hard to find on the internet. Kel-Lite dot com has some male bulb fasterners. If yours is a female you can purchase a "small head" reflector set at Kel Lite or search eBay for flashlight parts. If it is the E10 type you are golden. No parts missing as those just threaded into the reflector. Just search for 3 volt E10 bulbs.

The switch is likely sort of like a tongue depressor. It slides forward to make contact with the reflector. Slides away to remove contact. The signaler button presses the switch against the reflector when pushed.

Now the reflector itself should have a collar between the lens and bezel ring. That breaks contact between the light body and reflector. If the collar is missing or damaged the light will always be on when it has batteries in it. I use electrical tape around the collar. It takes a couple of layers. Or you can use duct tape that only takes one layer.

So you have all your parts but the light won't light. Using a multimeter with pins set to check ohms (set to beep) will show you where the break in flow is. Often it's just a dirty contact point. Even a slight amount can cause it to fail. I've had some that appeared pretty clean that had just enough to cut the flow. One thing to know also is the less resistance the brighter the light will be. I've had some that burn a dim orange that read like 17 ohms at first. Cleaning it would result in like 5 ohms and a much brighter output.
9-A1-AF974-5-A83-4-B99-8203-B08-EB2-E63429.jpg

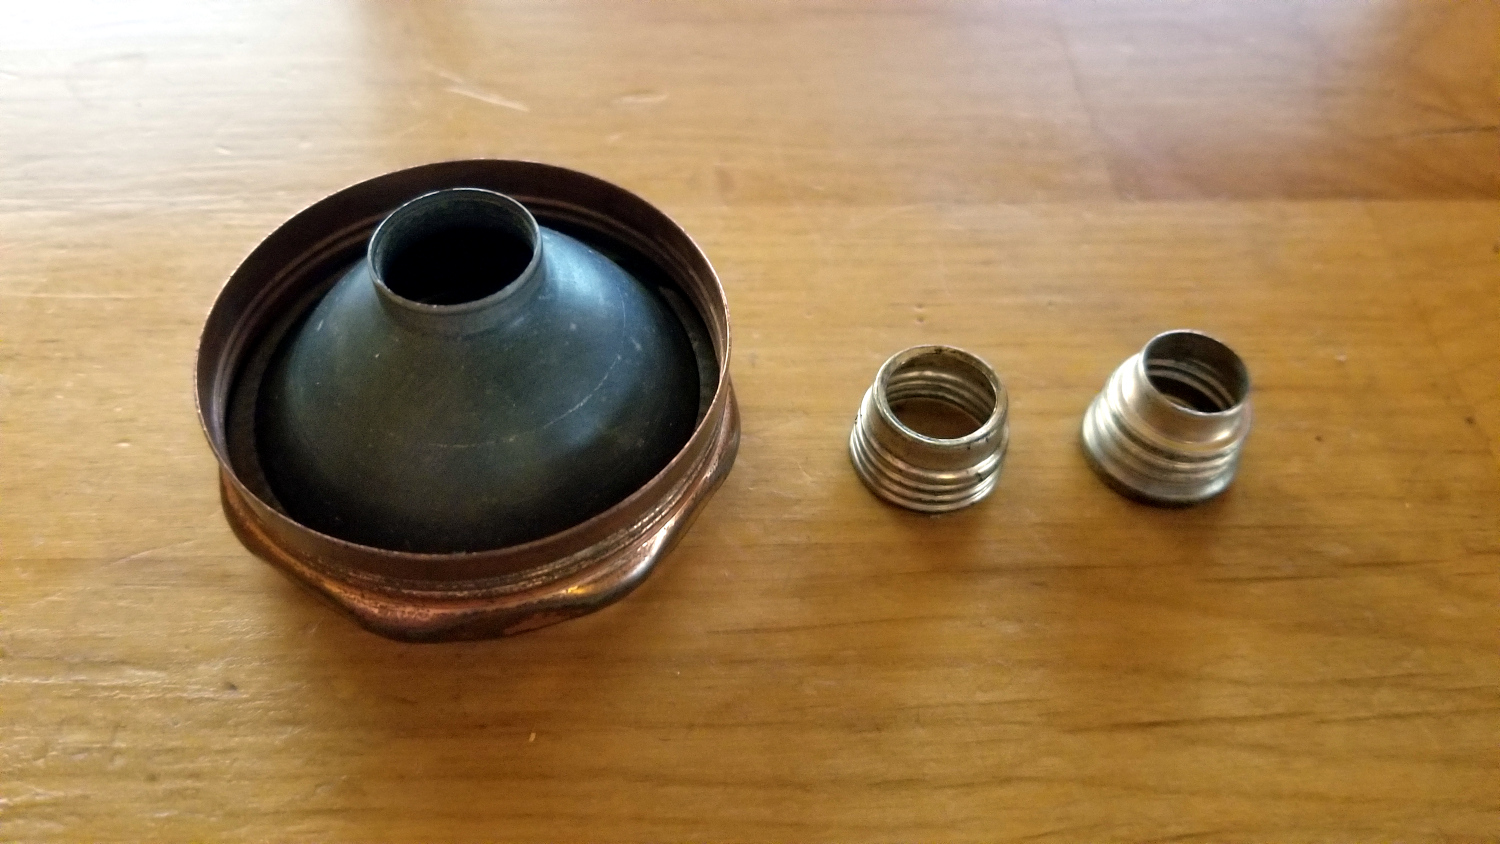
Female fastener and C sized spring.

91-C15592-5-FF4-462-F-BEA9-70-C1784-DE92-D.jpg

Male fastener and shows collar around reflector

21876726-2903-4-B5-F-A7-F3-BFE149277381.jpg

A typical spring
Also shows the tongue depressor style slider switch.

Old lights began with E10 style bulbs. 10mm Edison thread. Eventually they used PR base type. Pre-focused. The male fastener soon followed with it's shock isolating spring but some chose to stay with a female bulb fastener. SureFire and Streamlight used bi-pin bulbs later on.

You can find KPR bulbs (krypton) or HPR (Halogen) bulbs these days. I stick with regular PR bulbs that used argon gas as they have that nice old school glow. Eiko makes nice ones or you can find vintage ones at eBay by US made Tung Sol or Chicago Miniature who made bulbs for cars and radios so they tended to outlast the GE, Phillips and Eveready brands. Osram and Norellco made nice bulbs too. Holland made Norelco and German made Osram were better than bulbs from their other countries of origin.

Best regards.
 
Last edited:

Solomoriah

Newly Enlightened
Joined
Sep 8, 2020
Messages
8
bykfixer, thank you! I appreciate the guidance, but it appears I have a somewhat different model here. First, as to the brand:

Rayovac%20Flashlight%2020200910_171852.jpg


So it's a Ray-o-vac, anyway.

The bulb retention is like this:

Rayovac%20Flashlight%2020200910_171507.jpg


The two parts to the right thread together, and then friction fit into the reflector. It seems pretty obvious how it works, and I'm assuming this part is all here.

The switch isn't the "tongue depressor" version; the metal strip is backed with tag board as an insulator (there's another name for it but I have forgotten) and the metal strip doesn't move. I got out my meter and checked resistance, and the switch appears to work fine (didn't test the pushbutton, as I don't have enough hands).

So it appears the spring is all I'm missing. The butt end of mine doesn't thread off, so I'm going to have to figure out how to clean the corrosion out of the inside somehow. Long Q-tip? Dunno. Suggestions welcome!
 

bykfixer

Flashaholic
Joined
Aug 9, 2015
Messages
20,450
Location
Dust in the Wind
Very good. You have the hardest parts to find.

Looks like it uses E10 bulbs (screw in) bulbs.

I made "sandpaper drill bits" from a wooden dowel then once the crud chunks of crud were gone soak a rag in deoxidizer (I used TarnX) and swab it out doing that. When done use a paper towel or other moisture absorbing material to dry.

Yeah, the bullet light often had a permanent tail end.
 

chillinn

Flashlight Enthusiast
Joined
Jul 19, 2014
Messages
2,527
Location
Mobjack Bay
The butt end of mine doesn't thread off, so I'm going to have to figure out how to clean the corrosion out of the inside somehow. Long Q-tip? Dunno. Suggestions welcome!

bykfixer knows.

Maybe not such a good idea, but I clean my copper aaa lights by soaking them in ketchup. It is probably the vinegar that does it. Perhaps you can fashion a stick sort of tool with part of a scrubby sponge soaked in vinegar and do your best to apply force, or simply fill the tube with vinegar and let it sit for 15 minutes. White vinegar is sold for cleaning purposes by the quart, half gallon and gallon at your local grocery store, but not in the cleaning aisle. Check with bykfixer first, as this may be crazy and I do not actually know what I'm talking about. Perhaps a solution of baking soda might clean corrosion better, and vinegar is just for polishing. YMMV
 

Solomoriah

Newly Enlightened
Joined
Sep 8, 2020
Messages
8
Very good. You have the hardest parts to find.
Well that's good news.

Looks like it uses E10 bulbs (screw in) bulbs.
I don't think so. The "front" end of that two piece assembly is narrower than any of the internal threading. I'm pretty sure the two pieces hold a PR2-type bulb by the collar, pinched between the narrow ends with the tail-end contact of the bulb exposed to touch the battery. I did wonder if there was supposed to be a plastic piece like in your second picture, but I think this is an alternative version of the design in your first picture. I did try reversing the tail (inner) piece but it won't thread in that way, as the larger end flares out.

I'll know better when I get my hands on one of those bulbs for a test fit. I don't just wander around a store these days like I used to.

I made "sandpaper drill bits" from a wooden dowel then once the crud chunks of crud were gone soak a rag in deoxidizer (I used TarnX) and swab it out doing that. When done use a paper towel or other moisture absorbing material to dry.

Yeah, the bullet light often had a permanent tail end.
I have dowels and sandpaper. This will work for me.

bykfixer knows.

Maybe not such a good idea, but I clean my copper aaa lights by soaking them in ketchup. It is probably the vinegar that does it. Perhaps you can fashion a stick sort of tool with part of a scrubby sponge soaked in vinegar and do your best to apply force, or simply fill the tube with vinegar and let it sit for 15 minutes. White vinegar is sold for cleaning purposes by the quart, half gallon and gallon at your local grocery store, but not in the cleaning aisle. Check with bykfixer first, as this may be crazy and I do not actually know what I'm talking about. Perhaps a solution of baking soda might clean corrosion better, and vinegar is just for polishing. YMMV
My wife is a heavy user of white vinegar for cleaning, so I won't have to look far. We have cats in the house; most detergent or "chemical" cleaners are dangerous for cats, but vinegar isn't.

Removing corrosion from copper is done, she tells me, with diluted vinegar (so it's not too harsh) and polishing with a mixture of vinegar and salt applied with a paper towel or rag. But I've read that removing the patina harms the value of the piece, which one one hand I understand but on the other annoys me. You can see in the pics I posted that the outer surface has some rough bits I'd like to smooth out, and I'm perhaps prepared for the loss of value to get it smooth and nice.
 

chillinn

Flashlight Enthusiast
Joined
Jul 19, 2014
Messages
2,527
Location
Mobjack Bay
Removing patina from coins and collectable items does reduce value. With a flashlight, no matter how many times you remove the patina, it is coming back. I don't know how anyone could tell it had been shined before after the patina forms again (I never wipe or polish, just soak). Shiny copper doesn't stay shiny too long. It is interesting how the patina forms differently to a flashlight depending on whether it is handled or shelved.
 
Last edited:

bykfixer

Flashaholic
Joined
Aug 9, 2015
Messages
20,450
Location
Dust in the Wind
It aint like a Mona Lisa or a treasured coin. The value of vintage flashlights is never very much except for the super rare extremely low production really early ones.
In other words, shine it to your hearts content.
 

Solomoriah

Newly Enlightened
Joined
Sep 8, 2020
Messages
8
Thanks guys. If I didn't have those rough spots to take down, it wouldn't be an issue at all, but it's nice to know it's not an issue anyway. If that makes any sense.

I'll post pics when I get it done. Thanks again!
 

jabe1

Flashlight Enthusiast
Joined
Apr 25, 2008
Messages
3,105
Location
Cleveland,Oh
I own a very similar light. Your light has probably been "cleaned" the example I have is chrome or nickel plated, with a bit of copper showing through, and the front bezel is brass. I use a maglite 5 cell bulb with a 6s AA adapter for a bit more fun.
6 enelooos push it just far enough.
The spring is a double ended one; looks like a regular spring, just has decreasing radius spirals on both ends. If I can remember how to post a pic, I"ll do so.

EMcM88g.jpg
 
Last edited:

Solomoriah

Newly Enlightened
Joined
Sep 8, 2020
Messages
8
Nice jabe1, thank you! This is a big help. I wonder if I can solder and/or wire two normal C springs back-to-back to achieve this result...

And I hadn't considered that it might be missing a plated layer. Hmm. Examining it closely, I see no signs of nickel, even around the switch where I'd think some might persist. The rivets securing the switch appear to be nickel plated. Strange.

That cardboard tube... is that part of the unit also? I can easily enough make a tube to replace it.
 

bykfixer

Flashaholic
Joined
Aug 9, 2015
Messages
20,450
Location
Dust in the Wind
Some over sized lights used a cardboard tube as a gap filler.
There was a point in battery history where a standard casing size had not been adopted. It was long before that light was made. However some factories still made tubes from machinery built in the pre-standard case size days. Before Charles Burgess invented the standard size casing many companies made battery packs that were nothing more than AA batteries stacked and surrounded by a card board casing with the company logo on it.

The carboard space filler reduces battery rattle also.

These days alkalines are a bit broader than the carbon zinc cells of the day so wobble may not be an issue.
 

Solomoriah

Newly Enlightened
Joined
Sep 8, 2020
Messages
8
Yeah, when I get to that point I may roll up an appropriate tube. I build model rockets as another of my hobbies, and while we usually use premade tubing I've rolled a tube or two before.

Jabe1, can you do me a favor? Can you give me the length and largest diameter of that spring? I'm thinking I can use two of the Keystone springs back-to-back as a substitute, with a short machine screw, washers and tap to hold them together (as the base of that spring has a small loop that should work for this). But I want to verify the dimensions first, given that I can't find a source that will sell me less than 10 of those things at once without ridiculous shipping... I'm actually money ahead to buy too many and "throw some away" (not really, but you get the point).
 

Solomoriah

Newly Enlightened
Joined
Sep 8, 2020
Messages
8
Okay, an update... I tried an old trick using wet aluminum foil to remove the rough bits of corrosion, and it did not work. That stuff is hard. I reviewed some restoration pages regarding brass and copper and decided to try sanding them off, using fine grit first and working up to very fine. As it is, 320 grit is the best I have, but I'm going to get some 600 to remove the sanding scratches.

So funny thing, where the rough stuff finally came off it revealed a white metal underneath, nickel by the look of it but I don't know for sure. I had noticed white metal showing on the knurling on the head of the flashlight, but had assumed it was some remaining nickel plating based on your posts above.

Evidently, it's copper-plated nickel, rather than nickel-plated copper. Or something like that. I don't feel bad about sanding through the copper, as the areas where the underlying metal is showing are areas where the copper had already corroded or worn away. In other words, I don't believe there was any copper there to save.

No pics right now. I'll post something when I have gone over all of it and have it looking a bit better.
 
Top