
Warning: pic heavy, as usual. 
Reviewer's Note: This is a review of a custom modified light from the CPF modder Vinh Nguyen (V54). For more information on Vinh's lights, please check out his subforum of the CPF Custom Flashlight Builders and Modders forum.
SR52 (stock):
SR52vn:

Vinh was kind enough to send me a "Fiat Lux" version of the SR52vn (i.e., this sample meets his highest beam quality standards). This sample features Vinh's PDTc ("premium dedome tint – cool white"). For more information about the SR52vn, please see Vinh's SR52vn discussion thread here on CPF. For more information on the PDT, please see this thread from Vinh.
I recently reviewed the stock SR52 from Olight – which is a nice update to their Search & Rescue line. As always, the question here is what have Vinh's ministrations brought to the table?
Let's see how the modified SR52vn compares to the stock form, and to other high-output throwers in my collection. As always, I will be relying on some of the stock photos from my earlier SR52 review (supplemented with the specifics of testing here, of course).
Stock Olight SR52 Reported Specifications:
(note: as always, these are simply what the manufacturer provides – scroll down to see my actual testing results).
SR52 (Stock):
SR52vn:
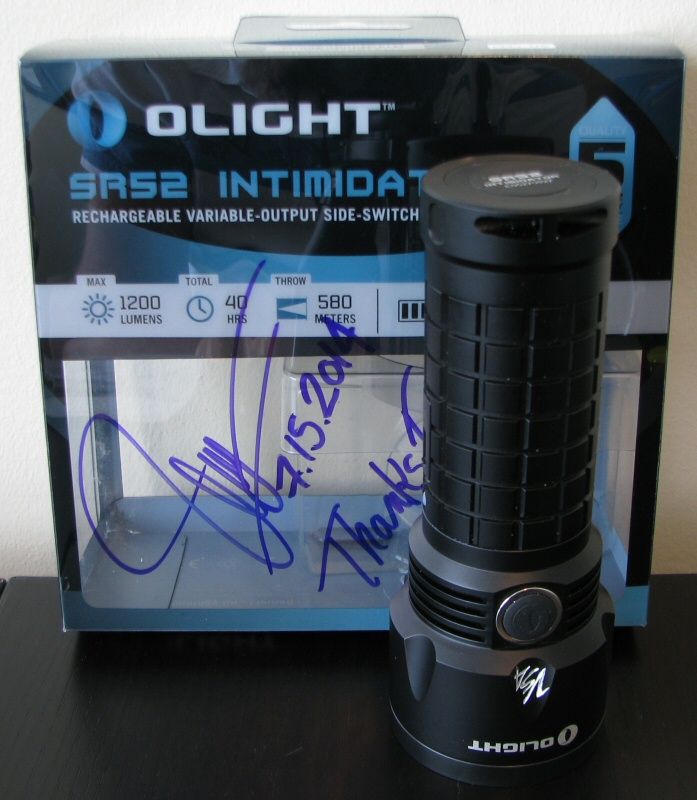
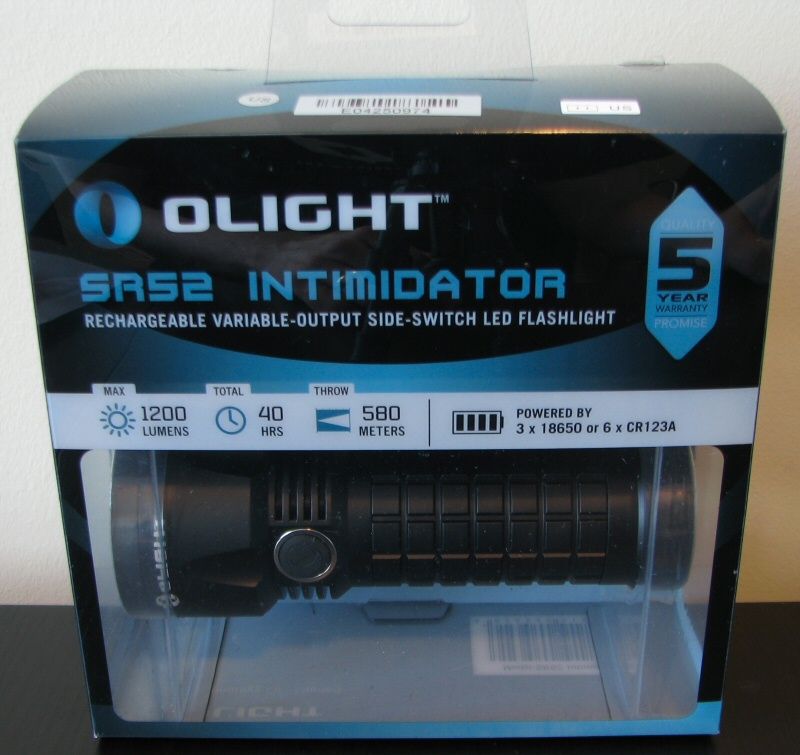
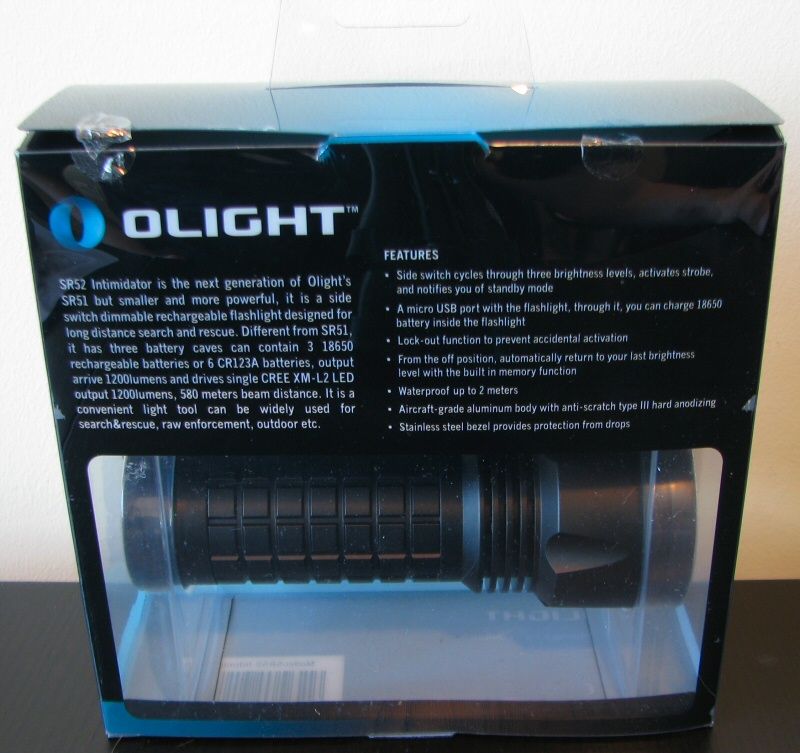
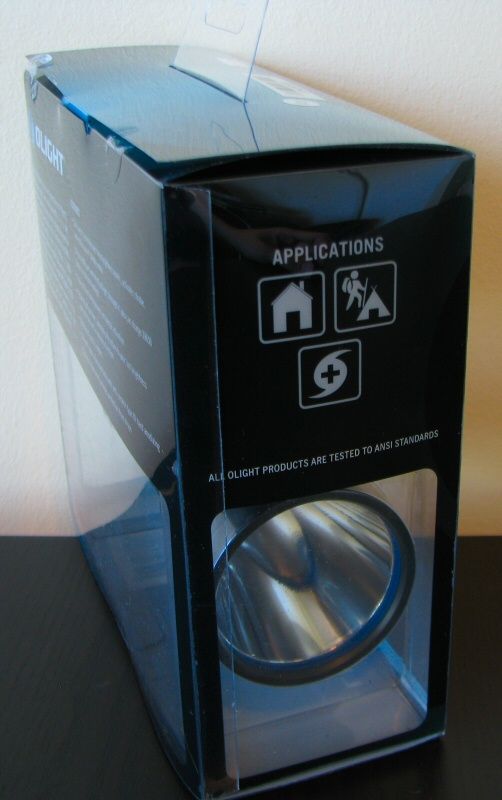
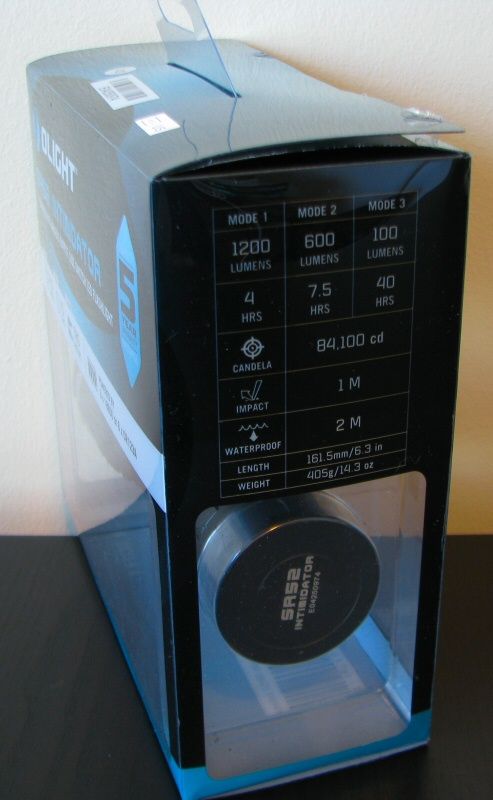
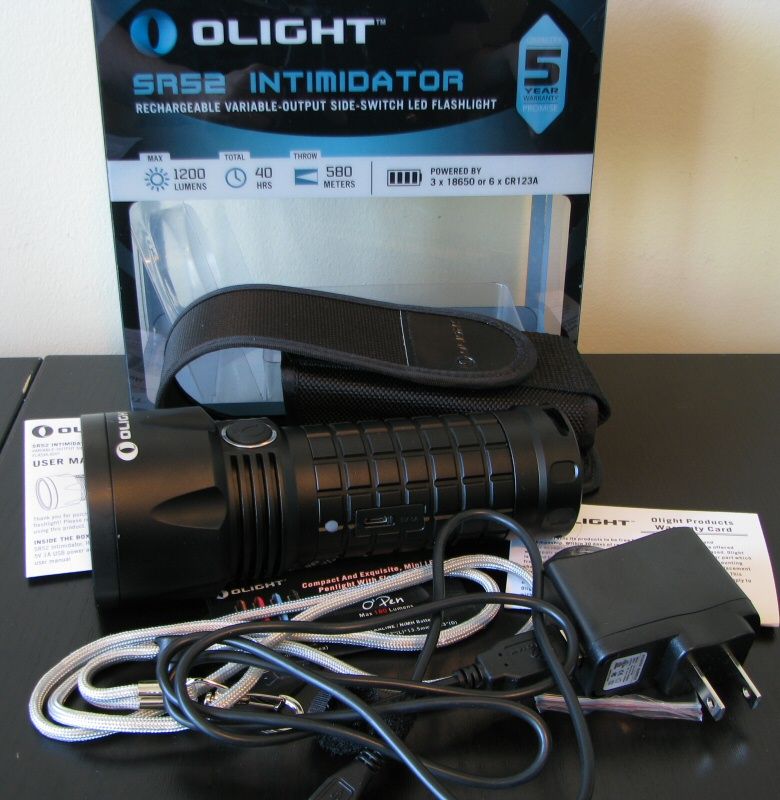
As per usual for a V54-modded light, packaging of the SR52vn is the standard stock retail packaging of the SR52 (signed and dated by Vinh). Printed on the sides and back are the key characteristics of the light. Inside, included with the light are spare O-rings, good quality lanyard, holster, micro-USB cable with AC adapter, warranty card and manual.
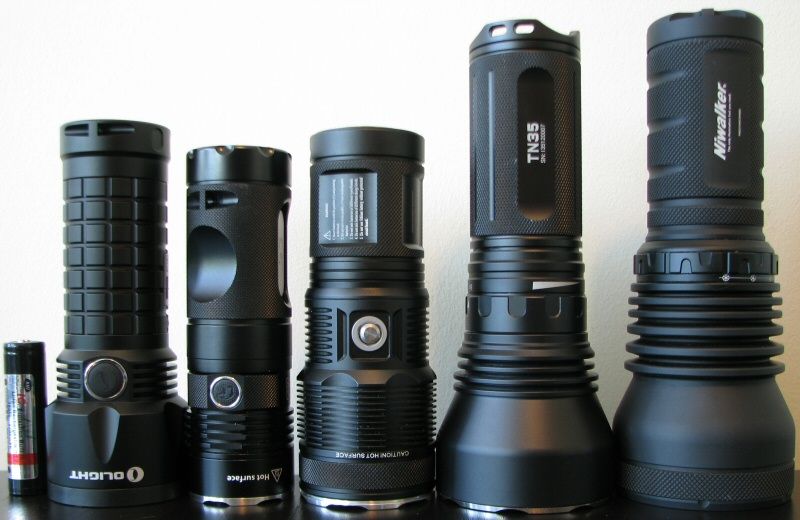
From left to right: AW Protected 18650 2200mAh; Olight SR52; Eagletac SX25L3; Nitecore TM15; Thrunite TN35; Niwalker BK-FA01.
All dimensions directly measured, and given with no batteries installed (unless indicated), and without the handle:
Olight SR52vn: Weight: 401.1g (501g with 6xCR123A), Length: 162mm, Width (bezel): 63.1mm
Olight SR52: Weight: 396.7g (497g with 6xCR123A), Length: 162mm, Width (bezel): 63.1mm
Olight SR51: Weight: 405.0g (505g with 6xCR123A), Length: 190mm, Width (bezel) 62.0mm
Olight SR Mini: Weight: 285.5g, Length: 126.9mm, Width (bezel): 48.1mm
ArmyTek Barracuda (XM-L2): Weight 400.8g, Length 264mm, Width (bezel): 64.0mm
Eagletac SX25L3: Weight: 315.9g, Length: 150.2mm, Weight (bezel): 47.0mm
Fenix TK61: Weight: 605.7g (790g with 4x18650), Length: 218mm, Width (bezel): 96.0mm
Niwalker BK-FA01 (XM-L2): Weight: 682.3g (864g with 4x18650), Length: 209mm, Width (bezel): 80.0mm, Width (tailcap): 50.3mm
SupBeam K50: Weight: 645.0g, Length: 230mm, Width (bezel): 90.1mm
Thrunite TN32 (XM-L2): Weight: 655.9g (808g with 3x18650), Length: 201mm, Width (bezel): 79.0mm
Stock SR52:

SR52vn:
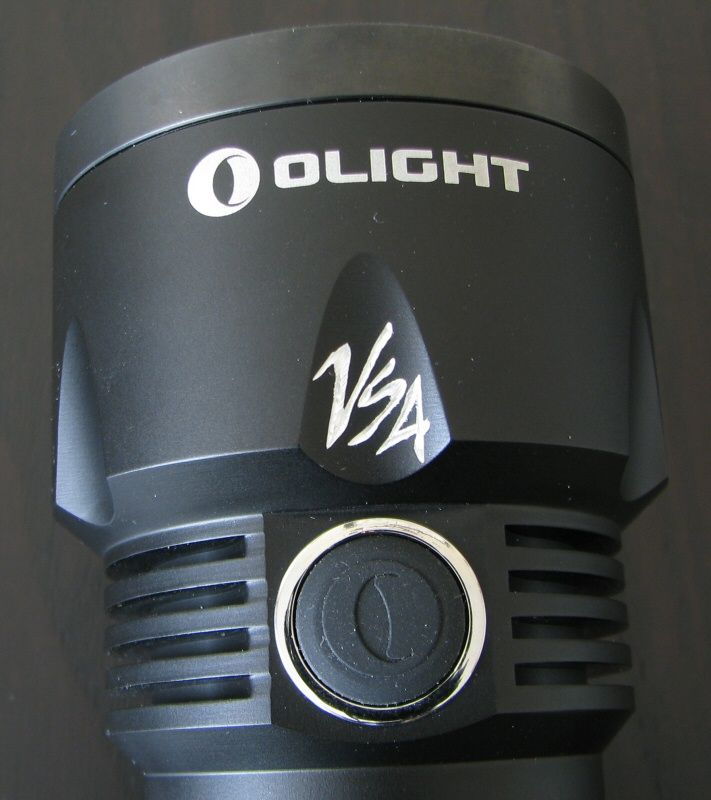
The only obvious difference to the external styling of the light is the custom "V54" and "2014 FIAT LUX" engraving on my SR52vn sample. Otherwise, I will just repeat my general build comments from the stock SR52 review.
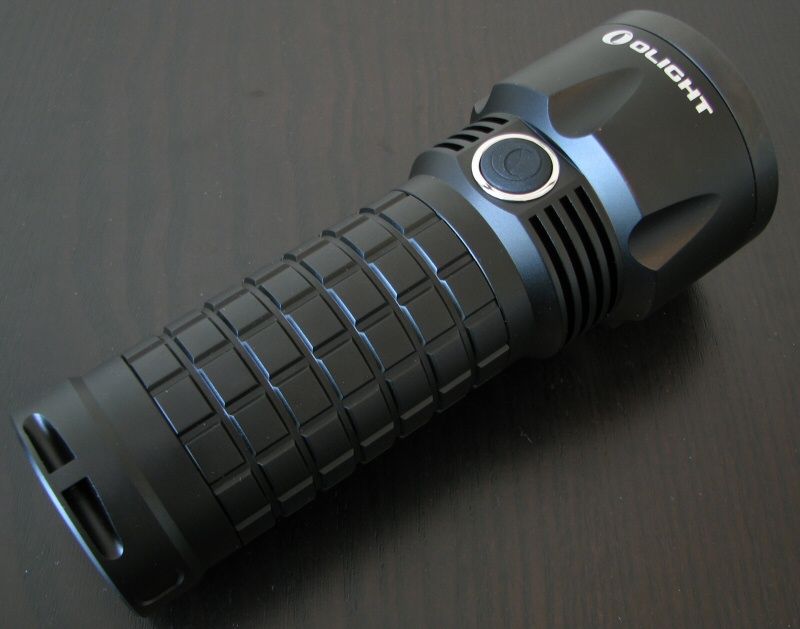
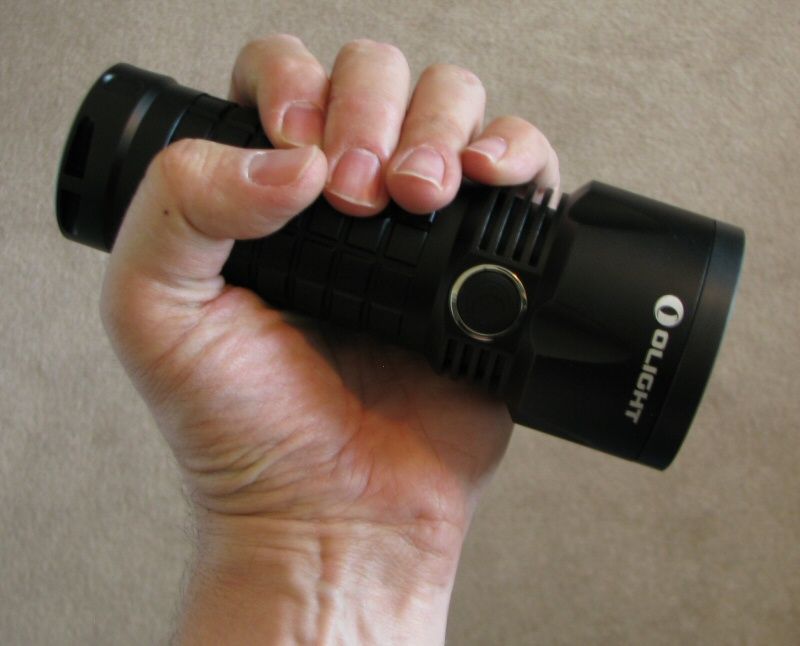
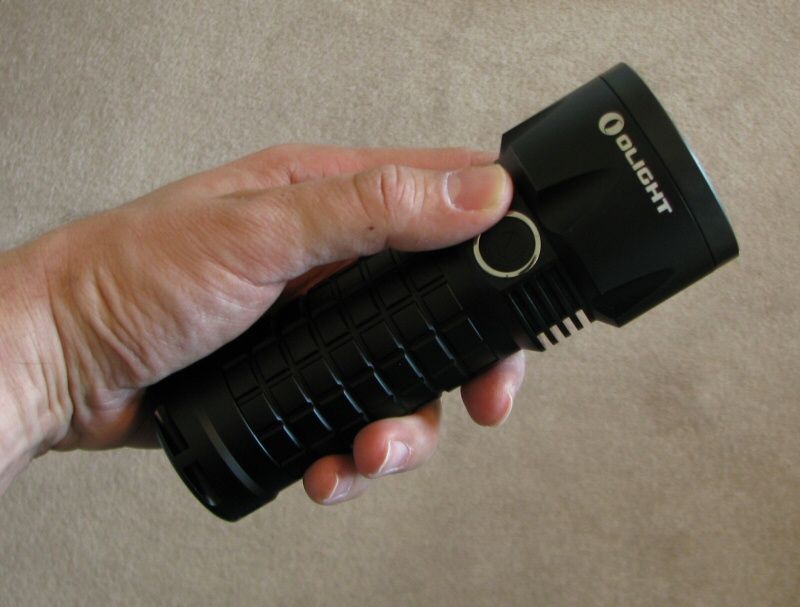
The SR52 is reasonably compact for a 3x18650 thrower light – but of course, it has a larger head compared to the more traditional members of this class. It is certainly quite small by the typical Olight SR-series standards (outside the SR Mini, that is). The SR52 feels solid and more substantial than the earlier SR51, due to the built-in cut-out wells for the batteries (i.e., no carrier is used any more).
Anodizing is matte black finish. There is no real knurling to speak of, but there is a large checkered grid pattern all over the handle. Grip is pretty good.
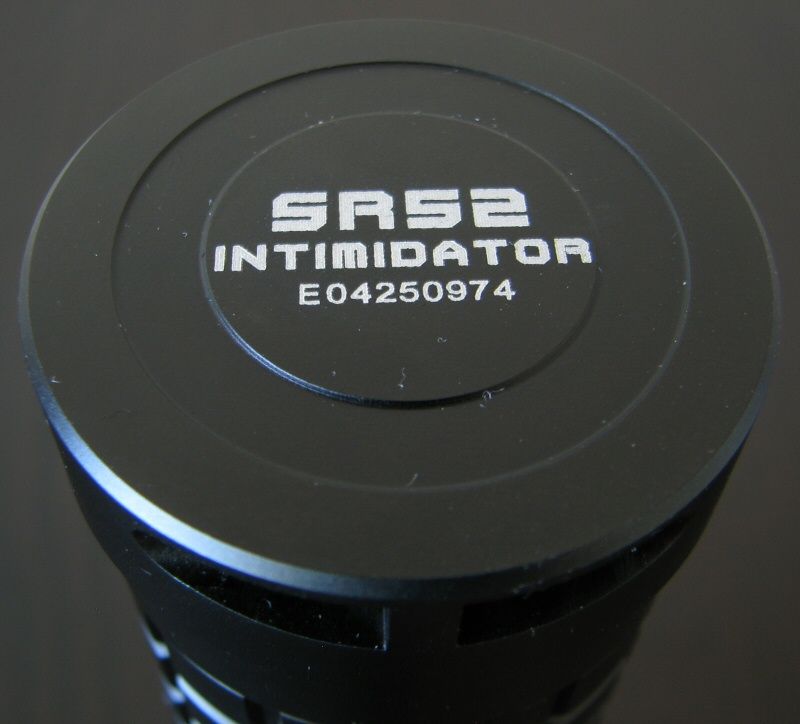
Stock body labels are minimal, with most of the info on the tail cap. Lettering is bright white and clear against the black background.
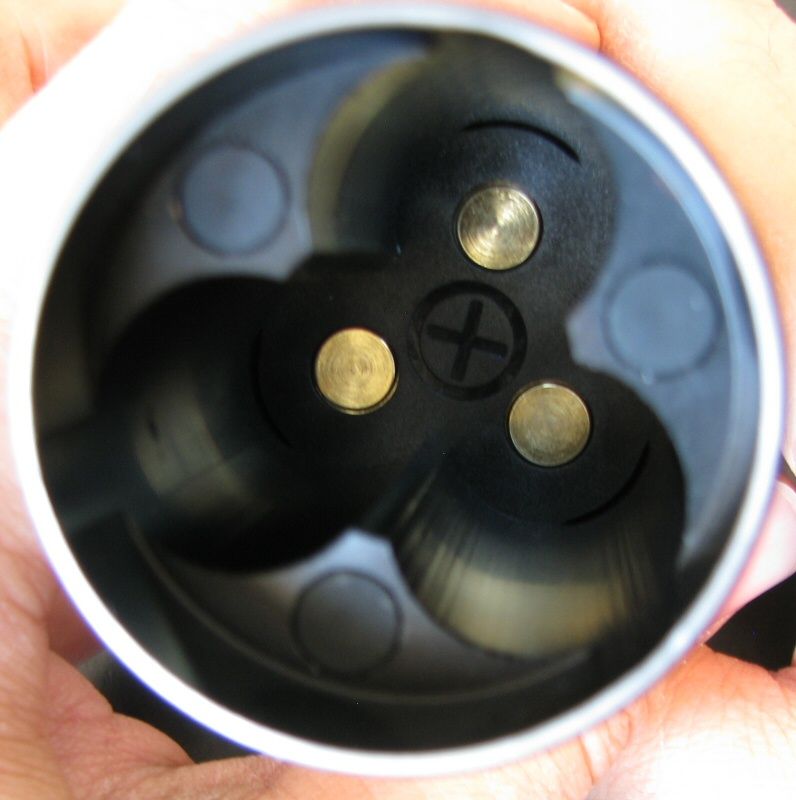
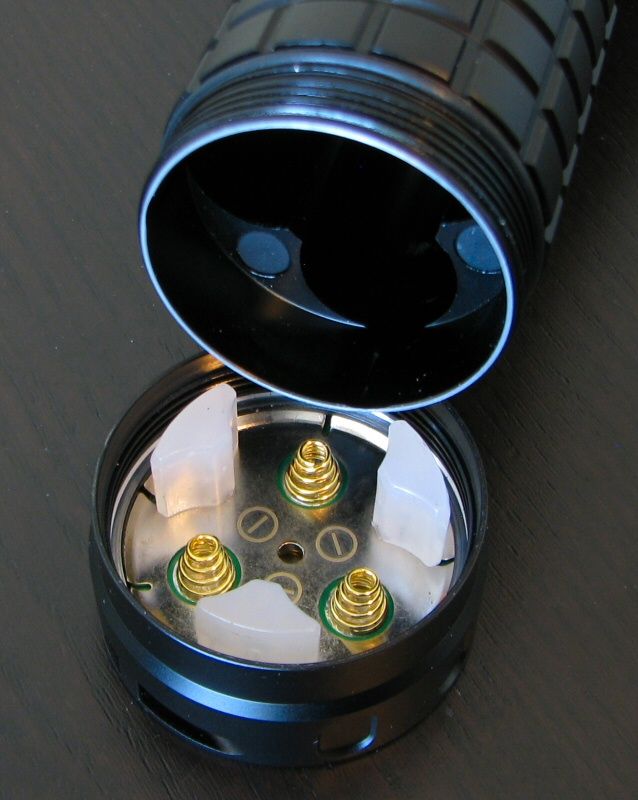
The light opens at the tailcap only. Tail threads are square-cut, and anodized for lock out. Tailcap design is distinctive – there are three large plastic inserts to hold the tailcap internals in place as you screw down the tail. Unlike the SR Mini, the SR52 does indeed have the three batteries running in parallel (i.e., 1s3p), with the positive terminals of the cells all going toward the head. As a result of this arrangement, you could run the light on a reduced number of cells.
The built-in wells take all widths of 18650s in my collection. However, only button-top cells would reliably work on my stock SR52 and SR52vn. I understand that this has been updated on newer batches of the light (i.e., the positive contact points in the head are apparently now raised).
There is a raised hard soft rubber switch for on/off. Switch feel and traverse are about typical for this class. Scroll down for an interface discussion.
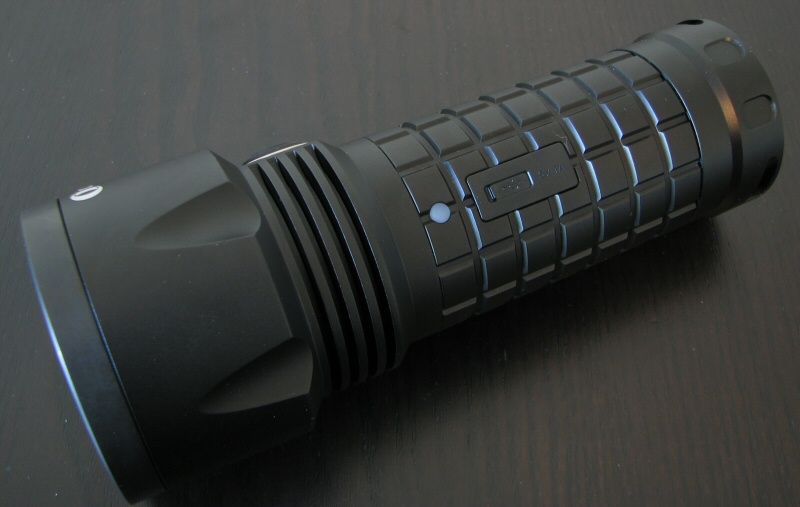
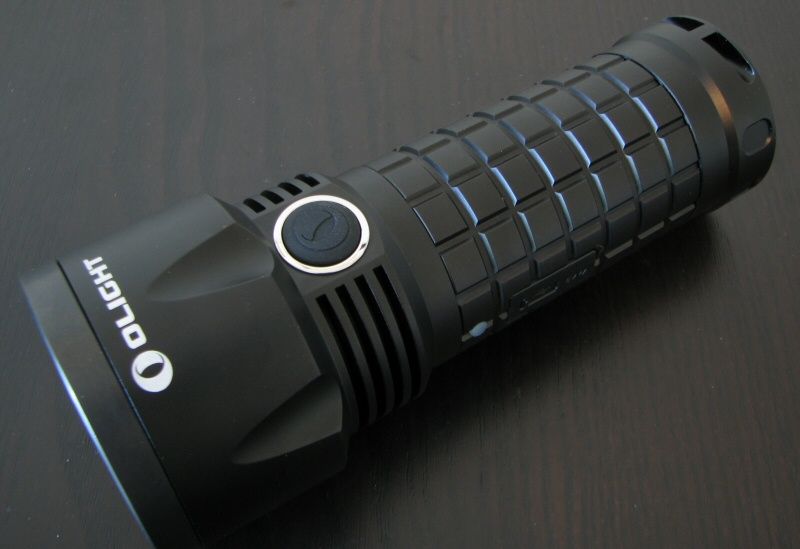
One of the more interesting new features of the SR52 is the in-light charging option:
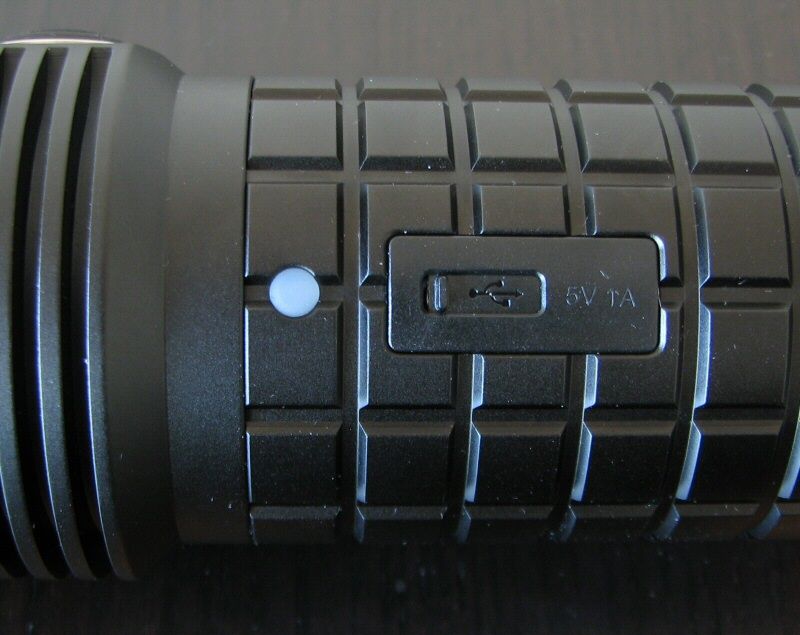
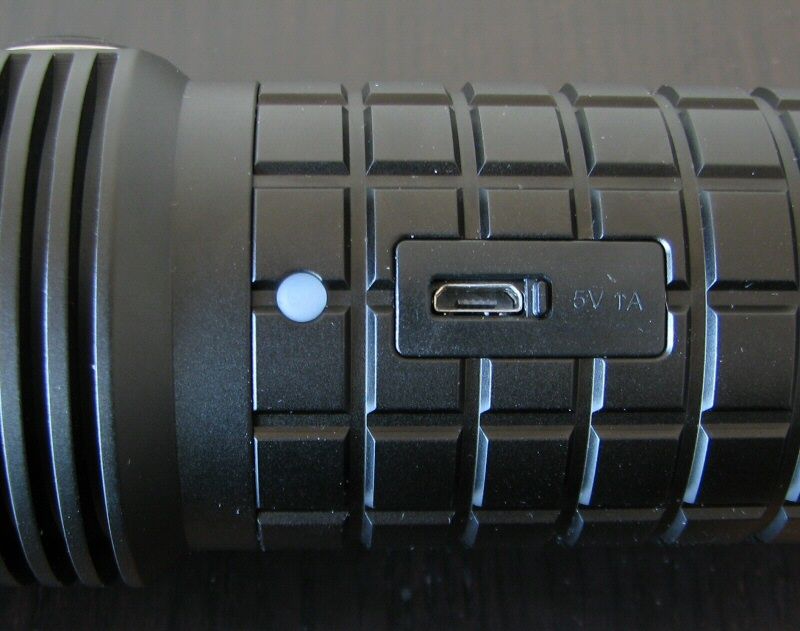
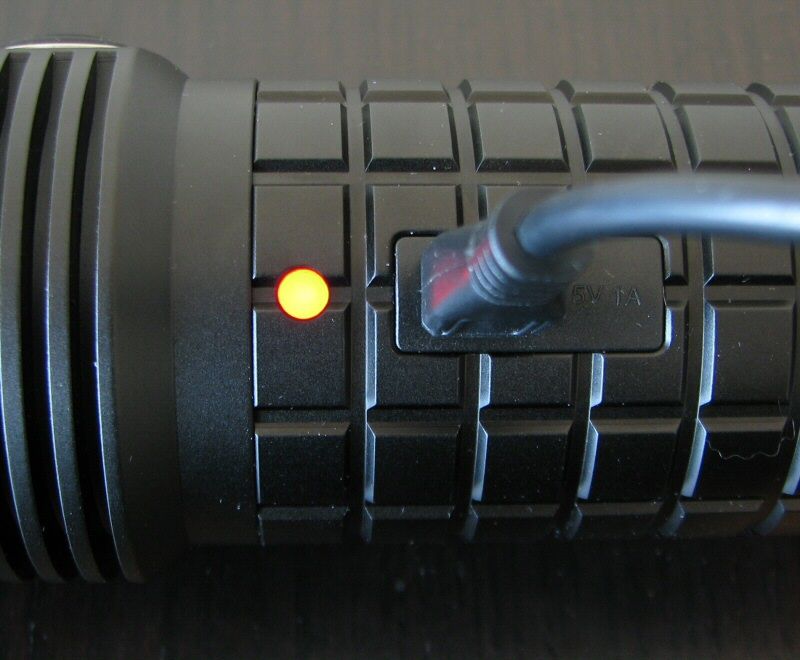
As you can see, there is a small micro-USB port hidden behind a sliding cover. When you plug the light into a power source, the LED indicator beside the port will light up red (to indicate charging). It goes green once the charger terminates.
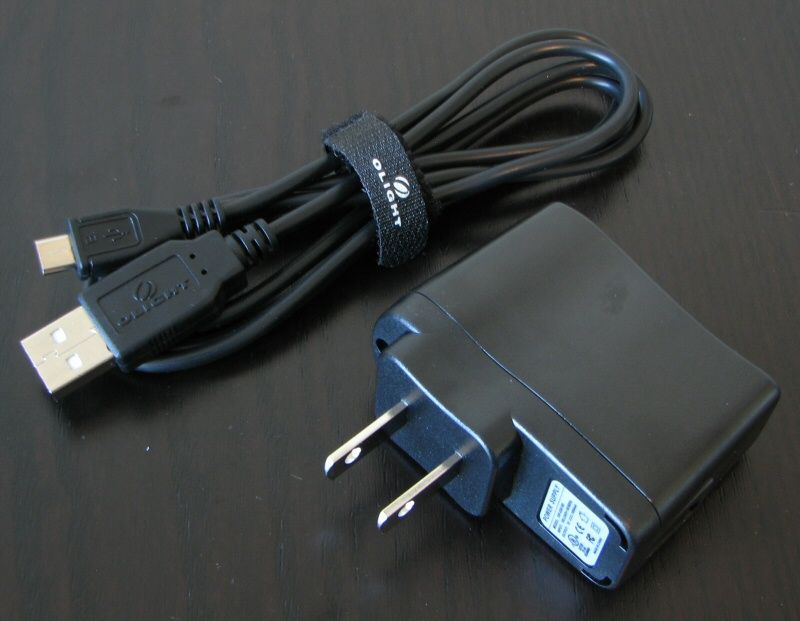
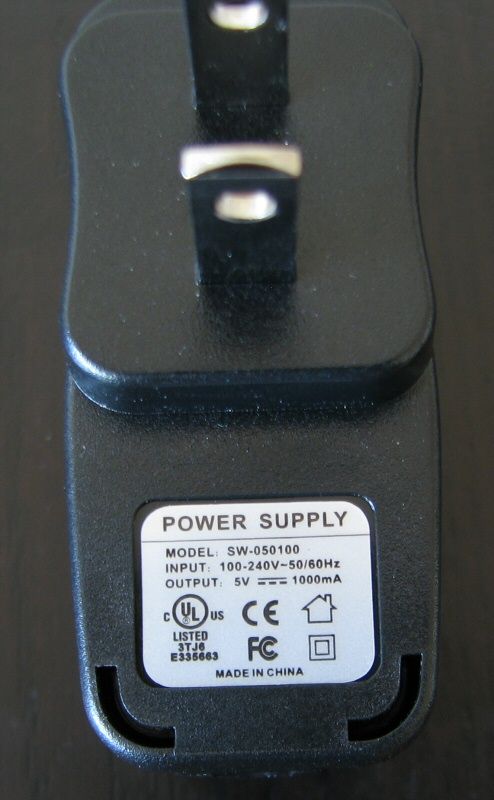
Bundled with the light is a USB-AC adapter, rated at up to 1A charge current. Please see my charging analysis later in this review.
One comment here – due to the parallel well arrangement, you could run the light on a reduced number of cells (i.e., 2x18650/4xCR123A or even 1x18650/2xCR123A). Of course, this will produce lower runtimes. Similarly, you could charge the light on 1x, 2x, or 3x 18650 – the difference is that the light will charge much faster on fewer cells (since the current won't need to be split across the cells). Again, scroll down for more info.
All of the above was common for both the stock SR52 and the SR52vn. Let's now turn to where things look different ….
Stock SR52:
SR52vn:
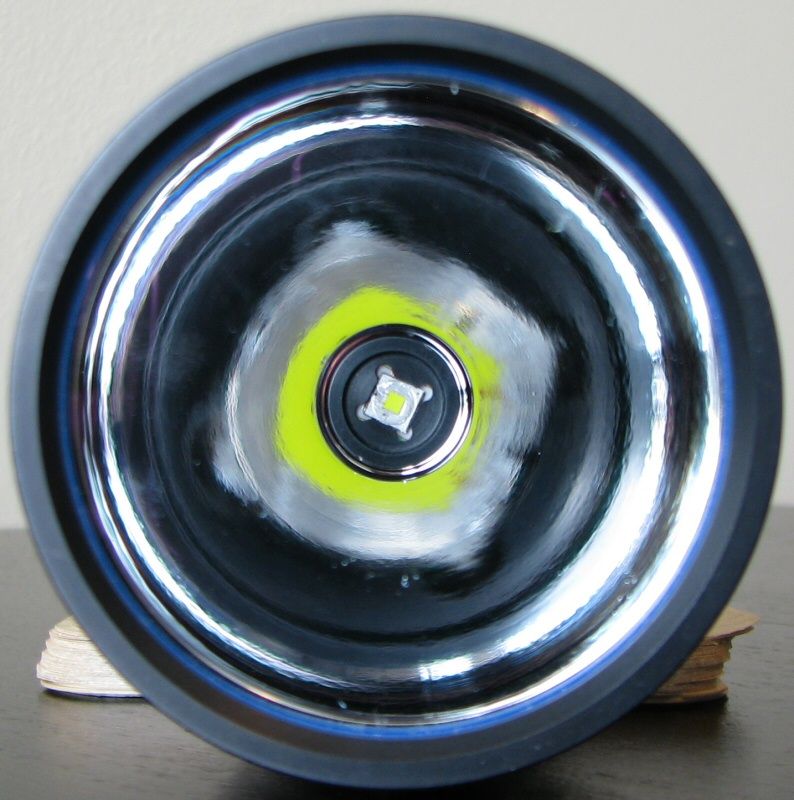
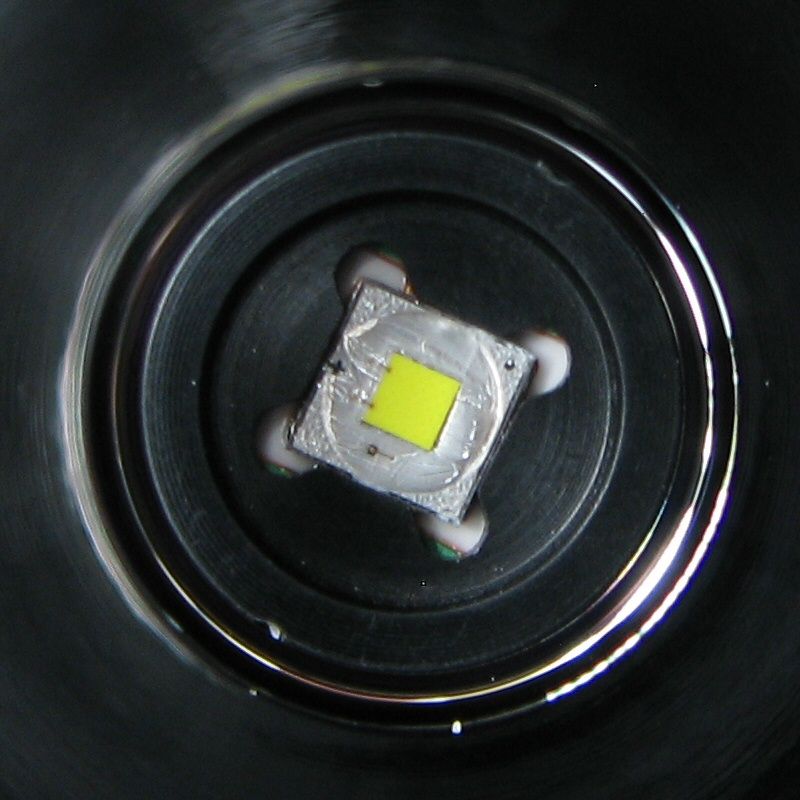
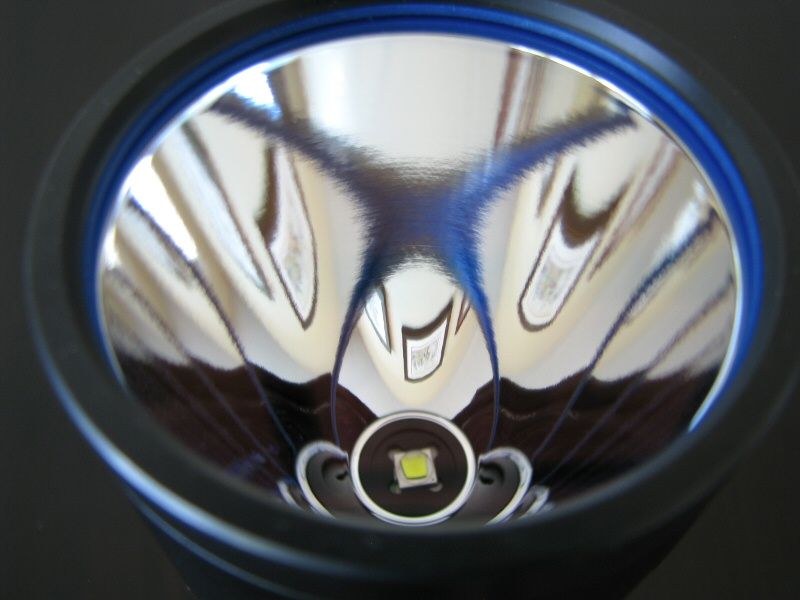
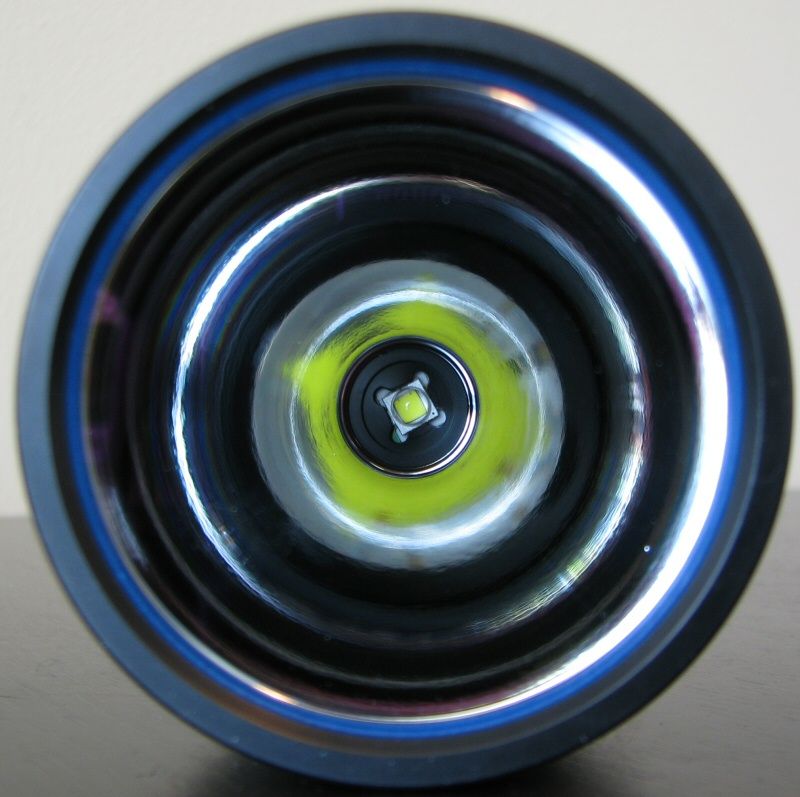
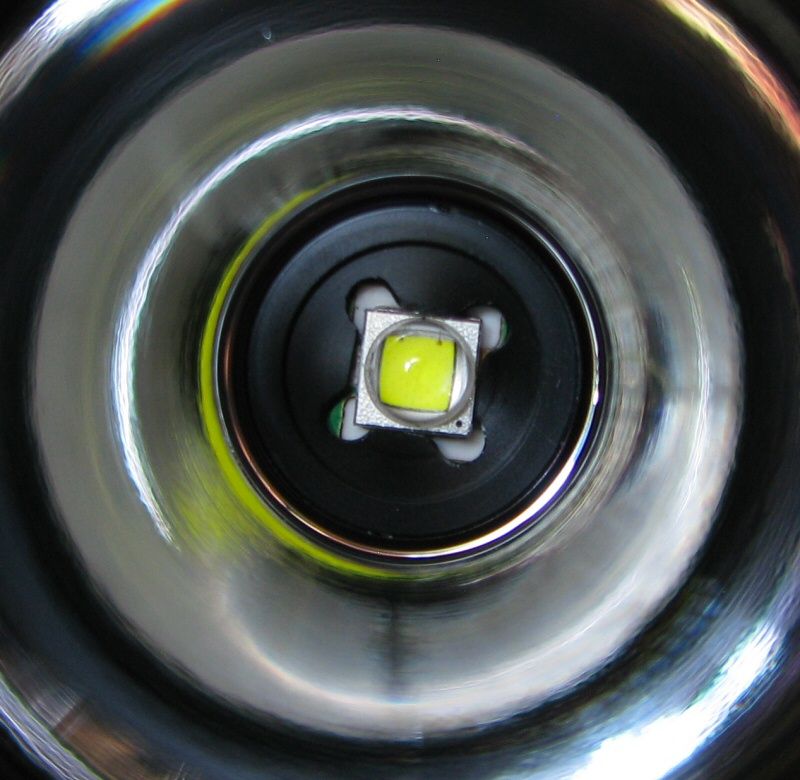
On both versions, the XM-L2 emitter is at the base of a large smooth reflector. You'll note that centering was off on my stock SR52 (although this didn't noticeably affect the beam). Centering was much better on my SR52vn … but of course, the most noticeable different is the dedomed emitter (PDTc - premium dedome tint, cool white). :devil:
The dedoming process greatly improves the focusing of the light. Although Vinh offers a number of emitter choices with the light, it is typically the dedome models that most people crave.
Scroll down for beamshots and direct intensity measures. :wave:
User Interface
The UI is unaffected by the mod. Turn the light on or off by a single click of the switch (i.e., press-release).
Change output modes by pressing and holding the switch. Mode sequence is Lo > Med > Hi, in a repeating loop (release the switch to select). The light has mode memory, and returns to the last level used after off-on.
Double-clicking the switch from on or off gives you the strobe mode.
There is a lock-out mode – hold the switch down for >2 secs from Off, and the light will turn itself off and be locked out (note that it comes on during those 2 secs in the previously memorized mode). You can unlock the light by holding the switch down for ~1 sec (which isn't that much of a lockout, really). Although oddly, memory of being locked out persists even after a battery change.
Video:
For more information on the modded SR52vn, please see my brief overview here:
For more detailed information on the stock SR52, including general build and user interface, please see my video overview:
As with all my videos, I recommend you have annotations turned on. I commonly update the commentary with additional information or clarifications before publicly releasing the video.
PWM/Strobe
Reviewer's note: I have recently updated my oscilloscope software, so the traces below may look a little different from my earlier reviews.
There is no sign of flicker or PWM that I can see, at any output level – I believe the light is current-controlled.
Strobe:
The strobe mode was a fairly typical ~10Hz fast strobe on both my stock SR52 and SR52vn.
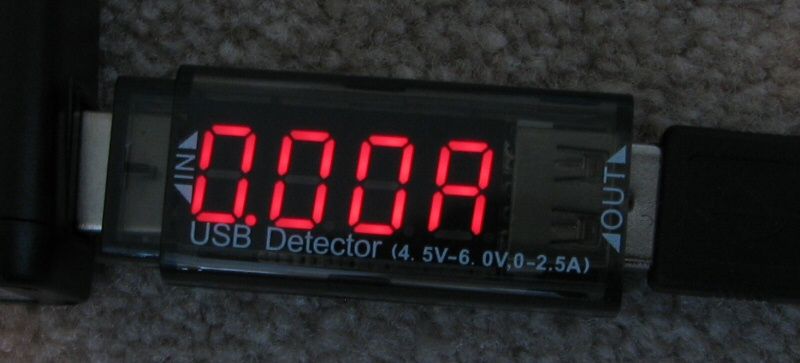
Charging Current
For these measures, I am using the new Xtar VI01 "USB Detector" (basically a specialized USB current/voltage meter). This model has recently been favorably reviewed by HKJ here.
For charging tests, I started with discharged AW protected 18650 cells, measuring ~2.8-3.0V at rest (i.e., heavily depleted). For all these tests, I left the USB detector in place for all readings. Note that the voltage reading on this device refers to the input voltage (i.e., from the charging brick). Since there is no difference in charging between the stock SR52 and SR52vn, I am showing my original analysis here.
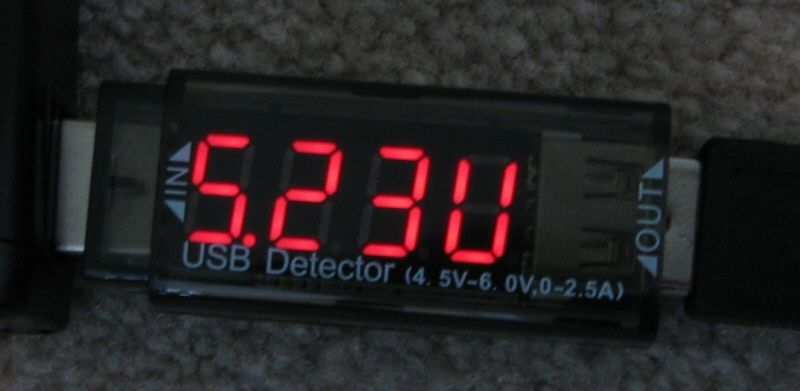
Initial charging current and input voltage of the stock SR52:

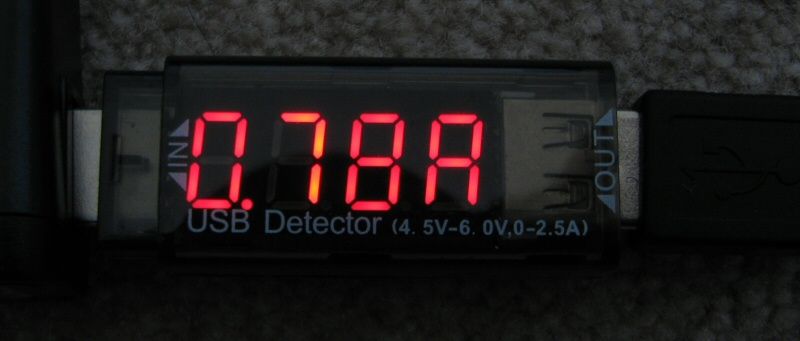
As you can see, charging started at 0.78A with a typical USB ~5.4V input voltage ("U" is meant to represent Volts on the top display above). I won't bother continuing to show the input voltage, since it doesn't change much over the charge cycle (ranged from ~5.36V at the lowest charging current, to ~5.43V at the highest).
After 30 mins of charging, the charging current was up to:
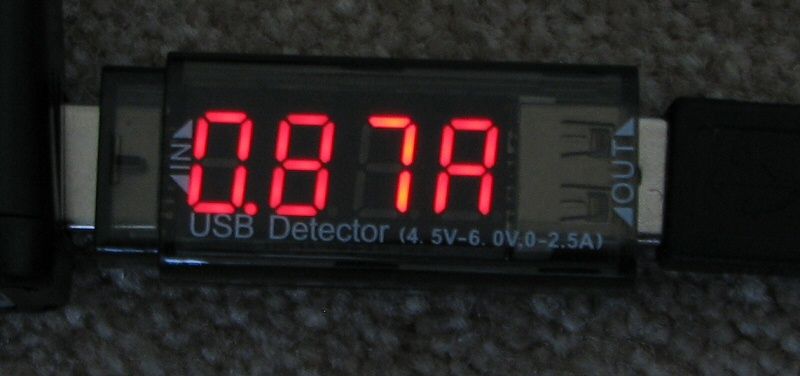
~0.87A at this point. Depending on how depleted your cells were to start, you may find an initial charging current somewhere between this current and the one reported above (e.g., I got ~0.82A initial current when the cells were all between ~3.2-3.4V to start)
After 4 hours of charging:
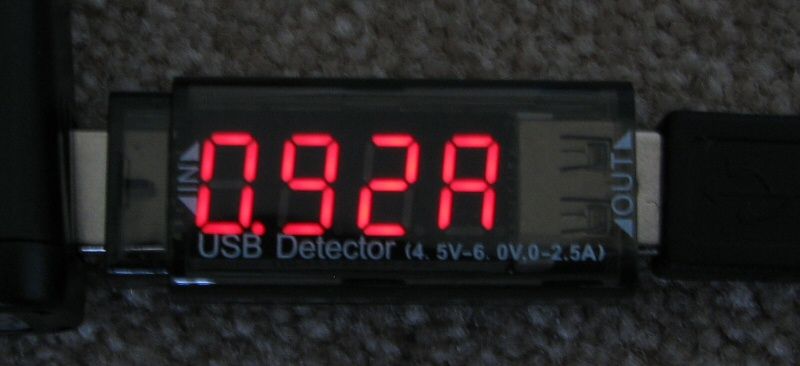
Charging current has reached ~0.92A. In my testing, the charger appeared to peak ~0.95A.
After 5 hours and 30 mins of charging:
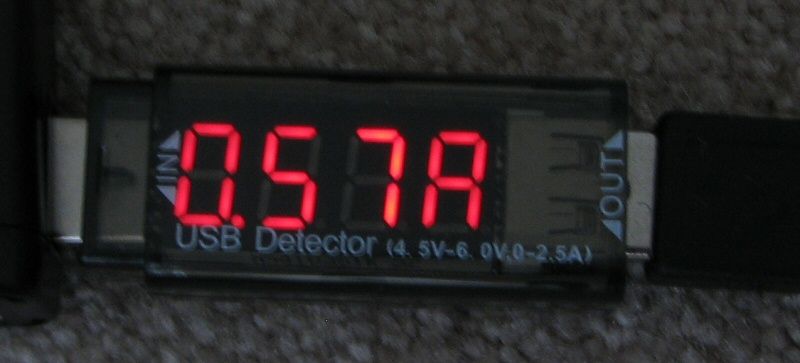
You can see charging has dropped out of the Constant Current (CC) phase, and is now charging at a much lower rate (~0.57A).
The charging indicator went green and the current dropped to zero after a charging time of ~7 hours.
Resting voltage of the AW 2200mAh batteries was ~4.19-4.20V at this point. This is very reasonable charging time and acceptable resting voltage at termination.
For second attempt on 3x 3100mAh cells, it took ~10 hours to fully charge the cells. All three cells came out reading ~4.19V. :thumbsup:
Note that I always recommend you re-confirm the voltage of all cells with a DMM after charging batteries inside a light. See my earlier SR52 review for a discussion.
Standby Drain
A standby current drain is inevitable on this light, due to the electronic switch. As the body design appears, the three wells are run in parallel (i.e. 1s3p arrangement).
When first connecting the leads, my DMM reports ~155uA standby drain – but this immediately drops to a ridiculously low 2.0uA (confrmed on my SR52vn as well). This standby drain is stable on the SR52, suggesting the cells would self-discharge long before you actually drained them in this light. :thumbsup:
Note that the lock-out mode has no effect on the standby current. But you can always lock out the light physically by a simple turn of the tailcap.
Beamshots:
And now, what you have all been waiting for. All lights are on AW protected 18650 2200mAh. Lights are about ~0.75 meter from a white wall (with the camera ~1.25 meters back from the wall). Automatic white balance used on the stock lights (to minimize tint differences), and Daylight white balance used on the V54 modded lights.
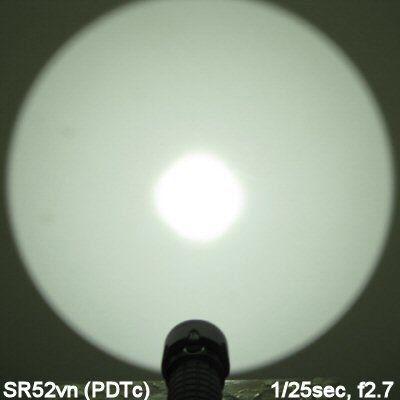
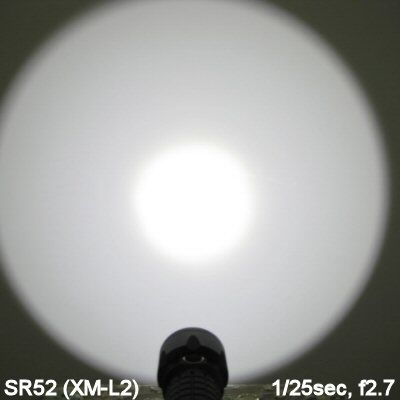
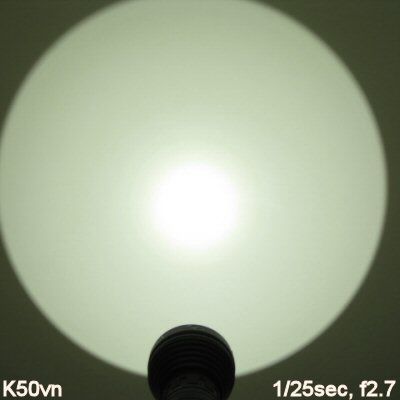

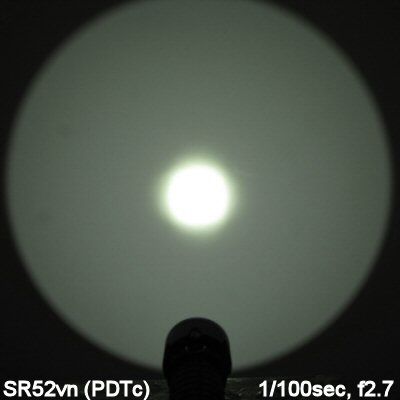
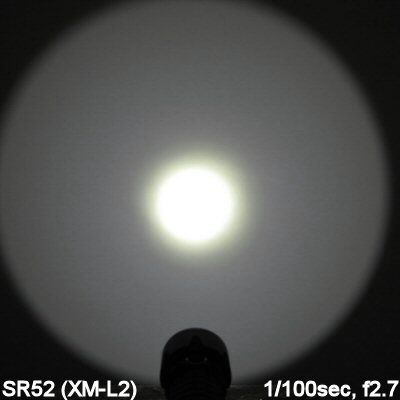
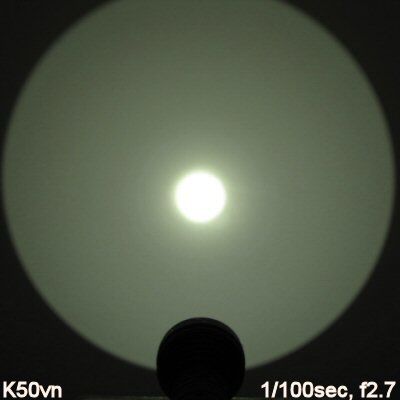
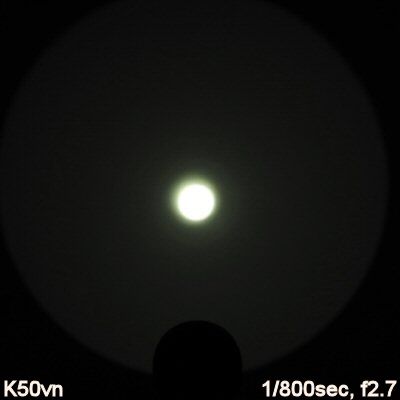

As always, it's hard to tell much about peak intensity throw at such ridiculously close distances. The most obvious observation is that the PDTc-equipped SR52vn has a more focused beam for greater throw, compared to the stock SR52. The PDTc is a very close match to my K50vn (and are slightly greener in tint compared to the earlier PDT on my TK61vn - which I believe Vinh now refers to as PDTn).
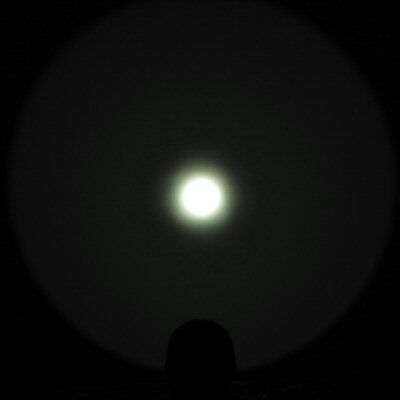
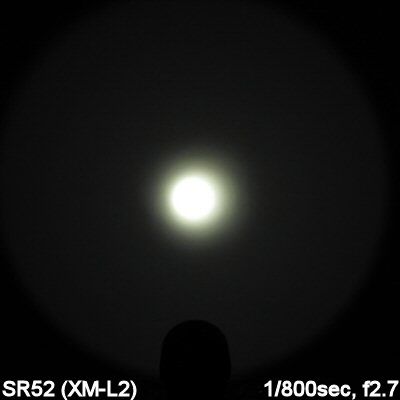
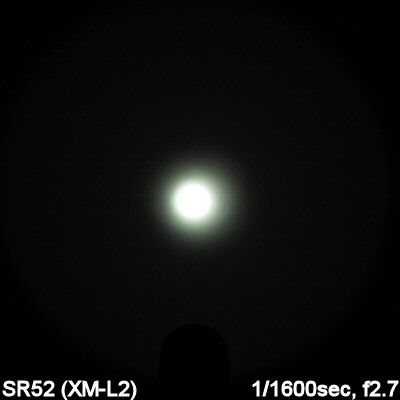
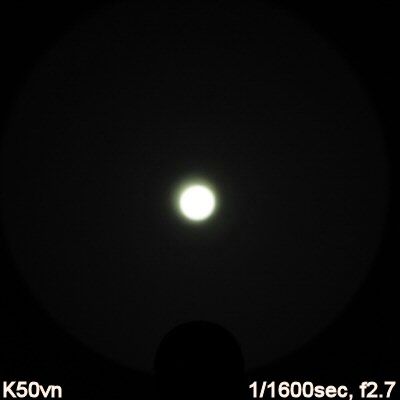
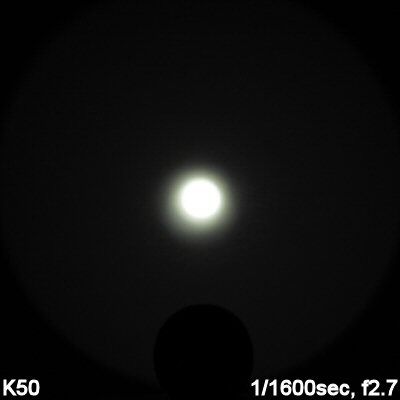
So, let's move along to my standard basement beamshots. As usual, the back of the couch is about 7 feet away (~2.3m) from the opening of the light, and the far wall is about 18 feet away (~5.9m). Below I am showing a couple of exposures, to allow you to better compare hotspot and spill, and am comparing the SR52, SR52vn and K50vn.

Again, you can see that the SR52vn is more focused for center beam throw than the stock SR52 – although not to the same degree as the larger K50vn.
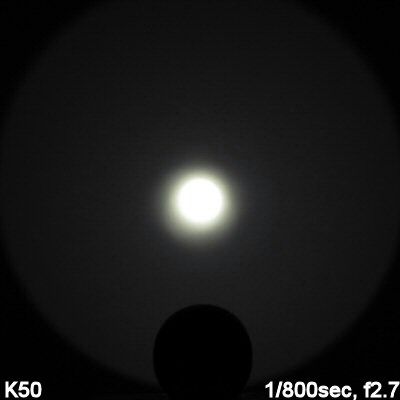
For outdoor shots, these are done in the style of my earlier 100-yard round-up review. Please see that thread for a discussion of the topography. In order to compare the various tints of different lights, I have locked the camera to Daylight (~5200K) white balance.
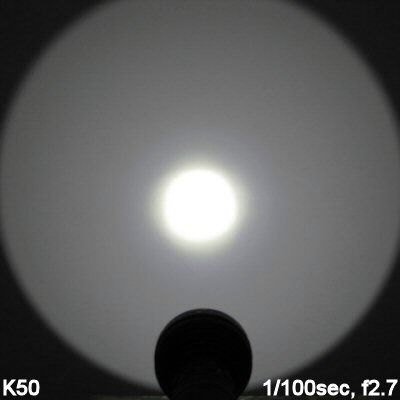
Let's start with the stock SR52, SR52vn, and stock K50.
Clearly, the SR52vn has a much more focused beam than the stock SR52. But now let's see how all three of my modded throwers from Vinh perform: the SR52vn, K50vn, and TK61vn
The SR52vn doesn't throw as the K50vn and TK61vn - due to their higher output and larger heads (i.e., designed for even greater throw). But it is still quite respectable.
As always, scroll down for direct measures.
Testing Method:
All my output numbers are relative for my home-made light box setup, as described on my flashlightreviews.ca website. You can directly compare all my relative output values from different reviews - i.e. an output value of "10" in one graph is the same as "10" in another. All runtimes are done under a cooling fan, except for any extended run Lo/Min modes (i.e. >12 hours) which are done without cooling.
I have devised a method for converting my lightbox relative output values (ROV) to estimated Lumens. See my How to convert Selfbuilt's Lightbox values to Lumens thread for more info.
Throw/Output Summary Chart:
My summary tables are reported in a manner consistent with the ANSI FL-1 standard for flashlight testing. Please see http://www.flashlightreviews.ca/FL1.htm for a discussion, and a description of all the terms used in these tables. Effective July 2012, I have updated all my Peak Intensity/Beam Distance measures with a NIST-certified Extech EA31 lightmeter (orange highlights).
Although dedoming an emitter always increases throw, it is variable how much Vinh can increase the current of stock lights (and thus increase their overall output). As you can see above, the TK61vn produced a significant increase in both peak intensity throw and overall output, compared to its stock form. In contrast, the increase in overall output on the K50vn mod was very modest. In this case, there is a slightly more substantial bump in output on the SR52vn, but it is still not a major factor in the throw increase. For that, we can thank dedoming the emitter.
Let's see how the rest of the output levels compare:

This is one case where Vinh's mod seems to increase current at all levels, from ~10-25%.
Output/Runtime Graphs:
As always, all runtimes are done under a cooling fan. My standard runtimes below are done on AW protected 18650 2200mAh cells.
I realize the graphs above are a little busy, but you should be able to see that the SR52vn mod reduces runtime in proportion to the increase in output. Overall regulation pattern and output/runtime efficiency remain unchanged (and very good for the class).
Let's see how my standard AW protected 2200mAh cells compare against the more common Panasonic NCR18650B 3100mAh cells (Xtar protected in this case):
As expected, the higher capacity 3100mAh cells give you longer runtime at all levels (compared to my standard AW 2200mAh cells). You also see a greater period of relatively flat output at the beginning of the runs (i.e., when the cells are freshly charged).
Potential Issues
Stock SR52
Flat-top cells cannot be used in early batches of the light, given the flat contacts in the head. I understand that this has been changed on later batches, and flat-top cells can now be used.
There is a standby drain when the tailcap is fully connected, but this is ridiculous low at 2uA, and will not impact the charge status of your cells. There are also both electronic and physical lock out options.
SR52vn
The standard potential issues of the stock SR52 apply to the SR52vn.
Dedoming of the emitter (to increase throw) also tends to produce a warmer overall beam tint. As expected the "premium dedome tint – cool white (PDTc)" gave a slightly green-yellow tint (even moreso than the earlier PDT on my TK61vn). Long-term reliability of dedomed emitters is unknown.
Modding of course voids all manufacturer warranties, but Vinh stands behind his products. Vinh also typically shores up circuit soldering and wires, which could lead to even greater longevity on the modded lights.
Preliminary Observations
The Olight SR52 has quickly established itself as a popular choice here. And you can see why – a very good build, great throw for the size, straightforward interface, and in-light USB recharging. What's not to like?
So, as always, there is also a lot of interest in what Vinh can do to soup things up further. :devil:
In the case of drive levels, there was a modest increase in overall output on my SR52vn, compared to stock (typically ~10-25%, depending on the level). This is greater than what I saw on my recently reviewed K50vn, but still modest compared to the TK61vn. As an aside, the stock SR52 apparently already comes with an excellent heatsink.
As such, it is really in the dedoming that you will see the greatest impact of the SR52vn. As usual for a Vinh mod, peak beam intensity more than doubled on my PDTc sample. :thumbsup: This makes the SR52vn the furthest throwing light I've tested in this "compact 3x18650" size. Beam pattern was excellent on my sample, with no obvious irregularities or artifacts (i.e., this one qualified as a "Fiat Lux" version). If you prefer a more neutral beam color, you may want to go for the PDTn.
Aside from these mods, not much has changed about the light. As with the stock version, you get a good quality in-light 18650 charger (in parallel, which is safer than in-series charging). See my earlier stock SR52 review for a more detailed discussion.
Regulation and output/runtime performance of the SR52vn are as you would expect. Basically, due to the slightly higher output, you can expect a similarly modest reduction in total runtime (compared to stock). But the overall efficiency of the circuit remains unchanged. And unlike some of the competition, the SR52/SR52vn can take 6xCR123A.
The stock SR52 was a great upgrade from the original SR51 – and the SR52vn takes things a step further. My sample certainly has a great beam. A strong contender if you are looking for a compact thrower with excellent build quality and features. :wave:
----
SR52vn provided by Vinh Nguyen (V54) for review.
Reviewer's Note: This is a review of a custom modified light from the CPF modder Vinh Nguyen (V54). For more information on Vinh's lights, please check out his subforum of the CPF Custom Flashlight Builders and Modders forum.
SR52 (stock):
SR52vn:
Vinh was kind enough to send me a "Fiat Lux" version of the SR52vn (i.e., this sample meets his highest beam quality standards). This sample features Vinh's PDTc ("premium dedome tint – cool white"). For more information about the SR52vn, please see Vinh's SR52vn discussion thread here on CPF. For more information on the PDT, please see this thread from Vinh.
I recently reviewed the stock SR52 from Olight – which is a nice update to their Search & Rescue line. As always, the question here is what have Vinh's ministrations brought to the table?
Let's see how the modified SR52vn compares to the stock form, and to other high-output throwers in my collection. As always, I will be relying on some of the stock photos from my earlier SR52 review (supplemented with the specifics of testing here, of course).
Stock Olight SR52 Reported Specifications:
(note: as always, these are simply what the manufacturer provides – scroll down to see my actual testing results).
- LED: 1 x Cree XM-L2 CW
- Light output / runtime: Hi: 1,200 lumens / 4 hrs – Med: 600 lumens / 7.5 hrs - Lo: 100 lumens / 40 hrs - Strobe: 1,200 lumens / 8 hrs
- Max beam distance: 580 meters
- Peak beam intensity: 84,100 cd
- VOLTAGE: 3V to 9V
- BATTERY SOURCE: 3 x 18650, 6 x CR123A
- Side switch cycles through three brightness levels and activates strobe
- A micro-USB port allows rechargeable batteries to be charged while inside the light
- A battery power LED indicator notifies you when light is fully charged and when batteries are low
- From the off position, automatically return to your last brightness level with the built-in memory function
- Lock-out function to prevent accidental activation
- LENS: Tough ultra-clear tempering glass with anti-reflective coating
- Waterproof up to 2 meters
- Impact resistant up to 1 meter
- Aircraft-grade aluminum body with anti-scratch type III hard anodizing
- DIMENSIONS: Length: 6.3in / 161.5mm, Bezel Diameter: 2.5 in / 63mm, Weight: 14.3 oz / 405 g (without batteries)
- WARRANTY: Olight's 5 Year warranty. Visit olightworld.com/warranty
- ACCESSORIES: Spare O-rings x 2, Holster x 1, 5V 1A USB power adapter x 1,
USB Cable x 1, lanyard x 1 - MSRP: $120
- LED: Dedome XM-L2 is of course outstanding in this light. 100% perfect beam
- Dome on Neutral such as 4000K-5000K is extremely nice also
- Physically this is an extremely well made light
- Excellent heat sinking design. The light heat sink so well its hard for me to solder.
- Current boosted to 4A for 1400 LED Lumen
- $140 Factory 6500K Dedome Shipped USA
- $160 Factory 6500K Dedome Shipped International
- +$10 for Dome/Dedome 5000K or 4000K
- +$20 XML2 PDTc ~ 6000K
- +$15 XML2 PDTw ~ 4000K-4500K
- +$20 XML2 PDTn ~ 5000-5500K
- +$0 6500K Dome On
- +$5 "V54" Engraving
SR52 (Stock):
SR52vn:
As per usual for a V54-modded light, packaging of the SR52vn is the standard stock retail packaging of the SR52 (signed and dated by Vinh). Printed on the sides and back are the key characteristics of the light. Inside, included with the light are spare O-rings, good quality lanyard, holster, micro-USB cable with AC adapter, warranty card and manual.
From left to right: AW Protected 18650 2200mAh; Olight SR52; Eagletac SX25L3; Nitecore TM15; Thrunite TN35; Niwalker BK-FA01.
All dimensions directly measured, and given with no batteries installed (unless indicated), and without the handle:
Olight SR52vn: Weight: 401.1g (501g with 6xCR123A), Length: 162mm, Width (bezel): 63.1mm
Olight SR52: Weight: 396.7g (497g with 6xCR123A), Length: 162mm, Width (bezel): 63.1mm
Olight SR51: Weight: 405.0g (505g with 6xCR123A), Length: 190mm, Width (bezel) 62.0mm
Olight SR Mini: Weight: 285.5g, Length: 126.9mm, Width (bezel): 48.1mm
ArmyTek Barracuda (XM-L2): Weight 400.8g, Length 264mm, Width (bezel): 64.0mm
Eagletac SX25L3: Weight: 315.9g, Length: 150.2mm, Weight (bezel): 47.0mm
Fenix TK61: Weight: 605.7g (790g with 4x18650), Length: 218mm, Width (bezel): 96.0mm
Niwalker BK-FA01 (XM-L2): Weight: 682.3g (864g with 4x18650), Length: 209mm, Width (bezel): 80.0mm, Width (tailcap): 50.3mm
SupBeam K50: Weight: 645.0g, Length: 230mm, Width (bezel): 90.1mm
Thrunite TN32 (XM-L2): Weight: 655.9g (808g with 3x18650), Length: 201mm, Width (bezel): 79.0mm
Stock SR52:
SR52vn:
The only obvious difference to the external styling of the light is the custom "V54" and "2014 FIAT LUX" engraving on my SR52vn sample. Otherwise, I will just repeat my general build comments from the stock SR52 review.
The SR52 is reasonably compact for a 3x18650 thrower light – but of course, it has a larger head compared to the more traditional members of this class. It is certainly quite small by the typical Olight SR-series standards (outside the SR Mini, that is). The SR52 feels solid and more substantial than the earlier SR51, due to the built-in cut-out wells for the batteries (i.e., no carrier is used any more).
Anodizing is matte black finish. There is no real knurling to speak of, but there is a large checkered grid pattern all over the handle. Grip is pretty good.
Stock body labels are minimal, with most of the info on the tail cap. Lettering is bright white and clear against the black background.
The light opens at the tailcap only. Tail threads are square-cut, and anodized for lock out. Tailcap design is distinctive – there are three large plastic inserts to hold the tailcap internals in place as you screw down the tail. Unlike the SR Mini, the SR52 does indeed have the three batteries running in parallel (i.e., 1s3p), with the positive terminals of the cells all going toward the head. As a result of this arrangement, you could run the light on a reduced number of cells.
The built-in wells take all widths of 18650s in my collection. However, only button-top cells would reliably work on my stock SR52 and SR52vn. I understand that this has been updated on newer batches of the light (i.e., the positive contact points in the head are apparently now raised).
There is a raised hard soft rubber switch for on/off. Switch feel and traverse are about typical for this class. Scroll down for an interface discussion.
One of the more interesting new features of the SR52 is the in-light charging option:
As you can see, there is a small micro-USB port hidden behind a sliding cover. When you plug the light into a power source, the LED indicator beside the port will light up red (to indicate charging). It goes green once the charger terminates.
Bundled with the light is a USB-AC adapter, rated at up to 1A charge current. Please see my charging analysis later in this review.
One comment here – due to the parallel well arrangement, you could run the light on a reduced number of cells (i.e., 2x18650/4xCR123A or even 1x18650/2xCR123A). Of course, this will produce lower runtimes. Similarly, you could charge the light on 1x, 2x, or 3x 18650 – the difference is that the light will charge much faster on fewer cells (since the current won't need to be split across the cells). Again, scroll down for more info.
All of the above was common for both the stock SR52 and the SR52vn. Let's now turn to where things look different ….
Stock SR52:
SR52vn:
On both versions, the XM-L2 emitter is at the base of a large smooth reflector. You'll note that centering was off on my stock SR52 (although this didn't noticeably affect the beam). Centering was much better on my SR52vn … but of course, the most noticeable different is the dedomed emitter (PDTc - premium dedome tint, cool white). :devil:
The dedoming process greatly improves the focusing of the light. Although Vinh offers a number of emitter choices with the light, it is typically the dedome models that most people crave.
Scroll down for beamshots and direct intensity measures. :wave:
User Interface
The UI is unaffected by the mod. Turn the light on or off by a single click of the switch (i.e., press-release).
Change output modes by pressing and holding the switch. Mode sequence is Lo > Med > Hi, in a repeating loop (release the switch to select). The light has mode memory, and returns to the last level used after off-on.
Double-clicking the switch from on or off gives you the strobe mode.
There is a lock-out mode – hold the switch down for >2 secs from Off, and the light will turn itself off and be locked out (note that it comes on during those 2 secs in the previously memorized mode). You can unlock the light by holding the switch down for ~1 sec (which isn't that much of a lockout, really). Although oddly, memory of being locked out persists even after a battery change.
Video:
For more information on the modded SR52vn, please see my brief overview here:
For more detailed information on the stock SR52, including general build and user interface, please see my video overview:
As with all my videos, I recommend you have annotations turned on. I commonly update the commentary with additional information or clarifications before publicly releasing the video.
PWM/Strobe
Reviewer's note: I have recently updated my oscilloscope software, so the traces below may look a little different from my earlier reviews.
There is no sign of flicker or PWM that I can see, at any output level – I believe the light is current-controlled.
Strobe:
The strobe mode was a fairly typical ~10Hz fast strobe on both my stock SR52 and SR52vn.
Charging Current
For these measures, I am using the new Xtar VI01 "USB Detector" (basically a specialized USB current/voltage meter). This model has recently been favorably reviewed by HKJ here.
For charging tests, I started with discharged AW protected 18650 cells, measuring ~2.8-3.0V at rest (i.e., heavily depleted). For all these tests, I left the USB detector in place for all readings. Note that the voltage reading on this device refers to the input voltage (i.e., from the charging brick). Since there is no difference in charging between the stock SR52 and SR52vn, I am showing my original analysis here.
Initial charging current and input voltage of the stock SR52:
As you can see, charging started at 0.78A with a typical USB ~5.4V input voltage ("U" is meant to represent Volts on the top display above). I won't bother continuing to show the input voltage, since it doesn't change much over the charge cycle (ranged from ~5.36V at the lowest charging current, to ~5.43V at the highest).
After 30 mins of charging, the charging current was up to:
~0.87A at this point. Depending on how depleted your cells were to start, you may find an initial charging current somewhere between this current and the one reported above (e.g., I got ~0.82A initial current when the cells were all between ~3.2-3.4V to start)
After 4 hours of charging:
Charging current has reached ~0.92A. In my testing, the charger appeared to peak ~0.95A.
After 5 hours and 30 mins of charging:
You can see charging has dropped out of the Constant Current (CC) phase, and is now charging at a much lower rate (~0.57A).
The charging indicator went green and the current dropped to zero after a charging time of ~7 hours.
Resting voltage of the AW 2200mAh batteries was ~4.19-4.20V at this point. This is very reasonable charging time and acceptable resting voltage at termination.
For second attempt on 3x 3100mAh cells, it took ~10 hours to fully charge the cells. All three cells came out reading ~4.19V. :thumbsup:
Note that I always recommend you re-confirm the voltage of all cells with a DMM after charging batteries inside a light. See my earlier SR52 review for a discussion.
Standby Drain
A standby current drain is inevitable on this light, due to the electronic switch. As the body design appears, the three wells are run in parallel (i.e. 1s3p arrangement).
When first connecting the leads, my DMM reports ~155uA standby drain – but this immediately drops to a ridiculously low 2.0uA (confrmed on my SR52vn as well). This standby drain is stable on the SR52, suggesting the cells would self-discharge long before you actually drained them in this light. :thumbsup:
Note that the lock-out mode has no effect on the standby current. But you can always lock out the light physically by a simple turn of the tailcap.
Beamshots:
And now, what you have all been waiting for.
All lights are on AW protected 18650 2200mAh. Lights are about ~0.75 meter from a white wall (with the camera ~1.25 meters back from the wall). Automatic white balance used on the stock lights (to minimize tint differences), and Daylight white balance used on the V54 modded lights.
As always, it's hard to tell much about peak intensity throw at such ridiculously close distances.
The most obvious observation is that the PDTc-equipped SR52vn has a more focused beam for greater throw, compared to the stock SR52. The PDTc is a very close match to my K50vn (and are slightly greener in tint compared to the earlier PDT on my TK61vn - which I believe Vinh now refers to as PDTn). So, let's move along to my standard basement beamshots. As usual, the back of the couch is about 7 feet away (~2.3m) from the opening of the light, and the far wall is about 18 feet away (~5.9m). Below I am showing a couple of exposures, to allow you to better compare hotspot and spill, and am comparing the SR52, SR52vn and K50vn.
Again, you can see that the SR52vn is more focused for center beam throw than the stock SR52 – although not to the same degree as the larger K50vn.
For outdoor shots, these are done in the style of my earlier 100-yard round-up review. Please see that thread for a discussion of the topography. In order to compare the various tints of different lights, I have locked the camera to Daylight (~5200K) white balance.
Let's start with the stock SR52, SR52vn, and stock K50.
Clearly, the SR52vn has a much more focused beam than the stock SR52. But now let's see how all three of my modded throwers from Vinh perform: the SR52vn, K50vn, and TK61vn
The SR52vn doesn't throw as the K50vn and TK61vn - due to their higher output and larger heads (i.e., designed for even greater throw). But it is still quite respectable.
As always, scroll down for direct measures.
Testing Method:
All my output numbers are relative for my home-made light box setup, as described on my flashlightreviews.ca website. You can directly compare all my relative output values from different reviews - i.e. an output value of "10" in one graph is the same as "10" in another. All runtimes are done under a cooling fan, except for any extended run Lo/Min modes (i.e. >12 hours) which are done without cooling.
I have devised a method for converting my lightbox relative output values (ROV) to estimated Lumens. See my How to convert Selfbuilt's Lightbox values to Lumens thread for more info.
Throw/Output Summary Chart:
My summary tables are reported in a manner consistent with the ANSI FL-1 standard for flashlight testing. Please see http://www.flashlightreviews.ca/FL1.htm for a discussion, and a description of all the terms used in these tables. Effective July 2012, I have updated all my Peak Intensity/Beam Distance measures with a NIST-certified Extech EA31 lightmeter (orange highlights).
Although dedoming an emitter always increases throw, it is variable how much Vinh can increase the current of stock lights (and thus increase their overall output). As you can see above, the TK61vn produced a significant increase in both peak intensity throw and overall output, compared to its stock form. In contrast, the increase in overall output on the K50vn mod was very modest. In this case, there is a slightly more substantial bump in output on the SR52vn, but it is still not a major factor in the throw increase. For that, we can thank dedoming the emitter.
Let's see how the rest of the output levels compare:
This is one case where Vinh's mod seems to increase current at all levels, from ~10-25%.
Output/Runtime Graphs:
As always, all runtimes are done under a cooling fan. My standard runtimes below are done on AW protected 18650 2200mAh cells.
I realize the graphs above are a little busy, but you should be able to see that the SR52vn mod reduces runtime in proportion to the increase in output. Overall regulation pattern and output/runtime efficiency remain unchanged (and very good for the class).
Let's see how my standard AW protected 2200mAh cells compare against the more common Panasonic NCR18650B 3100mAh cells (Xtar protected in this case):
As expected, the higher capacity 3100mAh cells give you longer runtime at all levels (compared to my standard AW 2200mAh cells). You also see a greater period of relatively flat output at the beginning of the runs (i.e., when the cells are freshly charged).
Potential Issues
Stock SR52
Flat-top cells cannot be used in early batches of the light, given the flat contacts in the head. I understand that this has been changed on later batches, and flat-top cells can now be used.
There is a standby drain when the tailcap is fully connected, but this is ridiculous low at 2uA, and will not impact the charge status of your cells. There are also both electronic and physical lock out options.
SR52vn
The standard potential issues of the stock SR52 apply to the SR52vn.
Dedoming of the emitter (to increase throw) also tends to produce a warmer overall beam tint. As expected the "premium dedome tint – cool white (PDTc)" gave a slightly green-yellow tint (even moreso than the earlier PDT on my TK61vn). Long-term reliability of dedomed emitters is unknown.
Modding of course voids all manufacturer warranties, but Vinh stands behind his products. Vinh also typically shores up circuit soldering and wires, which could lead to even greater longevity on the modded lights.
Preliminary Observations
The Olight SR52 has quickly established itself as a popular choice here. And you can see why – a very good build, great throw for the size, straightforward interface, and in-light USB recharging. What's not to like?
So, as always, there is also a lot of interest in what Vinh can do to soup things up further. :devil:
In the case of drive levels, there was a modest increase in overall output on my SR52vn, compared to stock (typically ~10-25%, depending on the level). This is greater than what I saw on my recently reviewed K50vn, but still modest compared to the TK61vn. As an aside, the stock SR52 apparently already comes with an excellent heatsink.
As such, it is really in the dedoming that you will see the greatest impact of the SR52vn. As usual for a Vinh mod, peak beam intensity more than doubled on my PDTc sample. :thumbsup: This makes the SR52vn the furthest throwing light I've tested in this "compact 3x18650" size. Beam pattern was excellent on my sample, with no obvious irregularities or artifacts (i.e., this one qualified as a "Fiat Lux" version). If you prefer a more neutral beam color, you may want to go for the PDTn.
Aside from these mods, not much has changed about the light. As with the stock version, you get a good quality in-light 18650 charger (in parallel, which is safer than in-series charging). See my earlier stock SR52 review for a more detailed discussion.
Regulation and output/runtime performance of the SR52vn are as you would expect. Basically, due to the slightly higher output, you can expect a similarly modest reduction in total runtime (compared to stock). But the overall efficiency of the circuit remains unchanged.
And unlike some of the competition, the SR52/SR52vn can take 6xCR123A.The stock SR52 was a great upgrade from the original SR51 – and the SR52vn takes things a step further. My sample certainly has a great beam. A strong contender if you are looking for a compact thrower with excellent build quality and features. :wave:
----
SR52vn provided by Vinh Nguyen (V54) for review.