Manker Quinlan U11
LED: CREE XP-L V5
Battery: 1× 18650
Modes: 16 (13 intensities, 3 stroboscopic, programmable)
Switch: Electronic switch at the head
Date: February 2016
INTRODUCTION:
The latest offering from Manker, after its recent surprising T01 launch, is this new Manker Quinlan U11, a single 18650 rechargeable compact flashlight not so focused on the search for extreme throw but with outstanding specifications for its size.

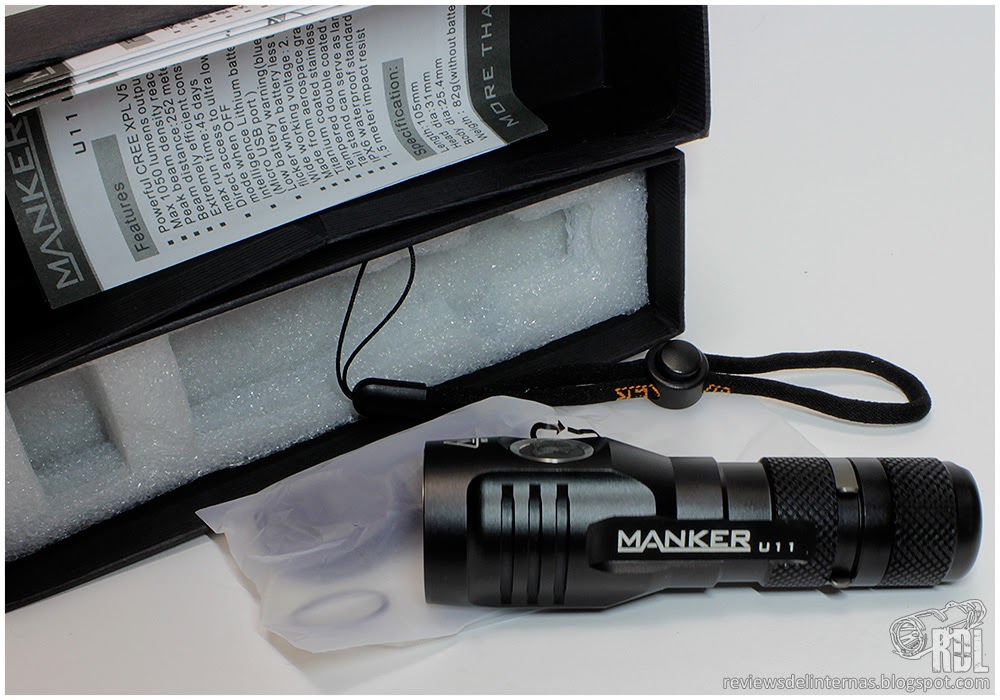
The product presentation is very similar to what we find in the production version of the T01, since the flashlight comes in a rather compact cardboard box with protective foam cut outs perfectly fitted to the dimensions of the flashlight and in which we find a user manual in two languages (English, Chinese), a set of replacement o-rings, a wrist strap and a USB charge cable.
EXTERIOR FINISH:
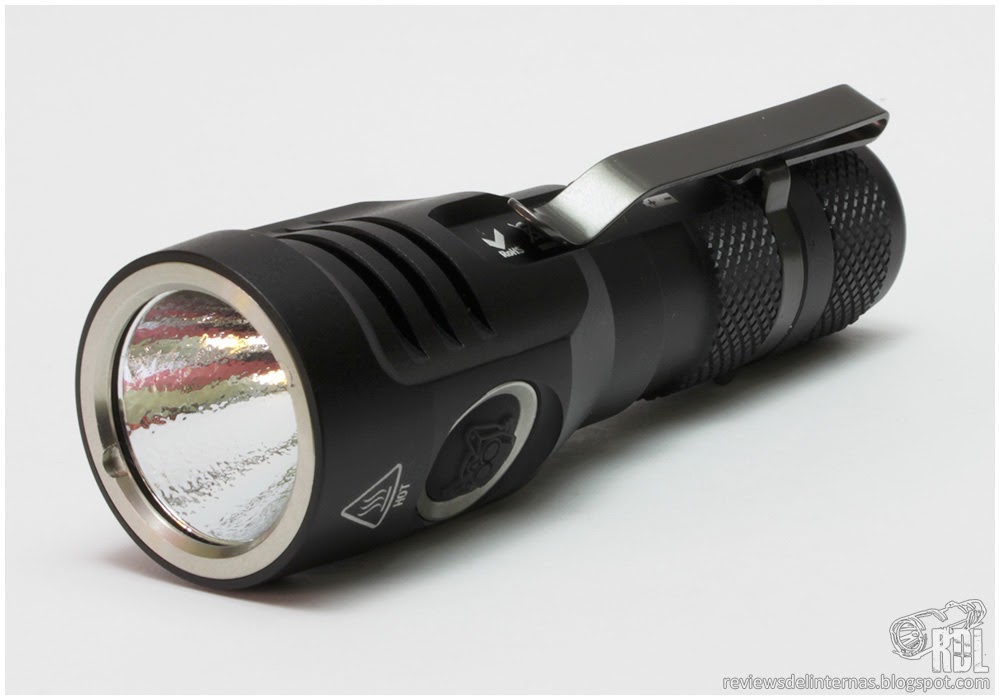
The machining of the U11 is quite similar to the T01. The entire machined aluminum of the flashlight is anodized in matte black. It is especially this lustrous anodized finish with its porosity free of any cheap-looking glossiness which gives a special touch to the lantern and blends perfectly with the accents in steel and the sandblast-finished clip.
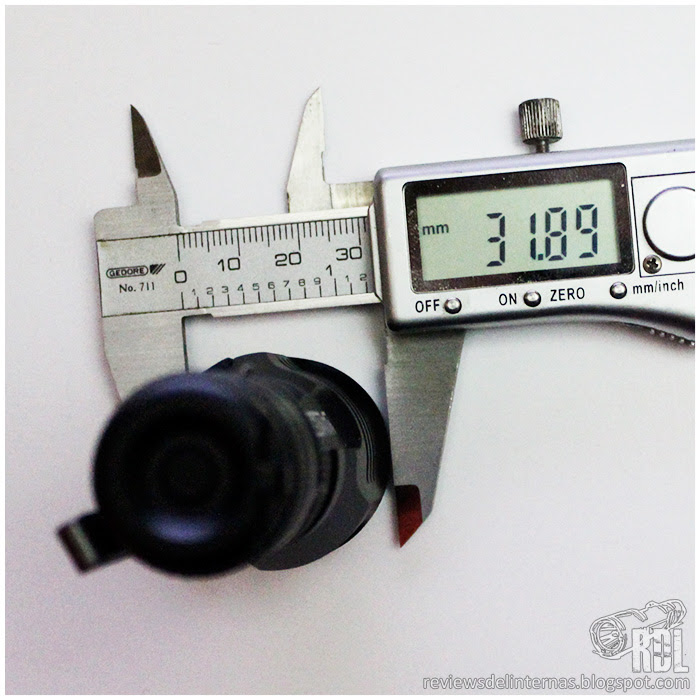
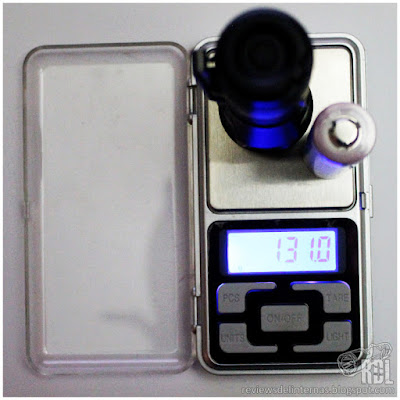
The dimensions of this flashlight are certainly compact. It looks similar to the MH20 by NiteCore or the TX25C2 by Eagletac in size, with dimensions and weight that make it more suitable for daily-use EDC, and that fits in most pockets.


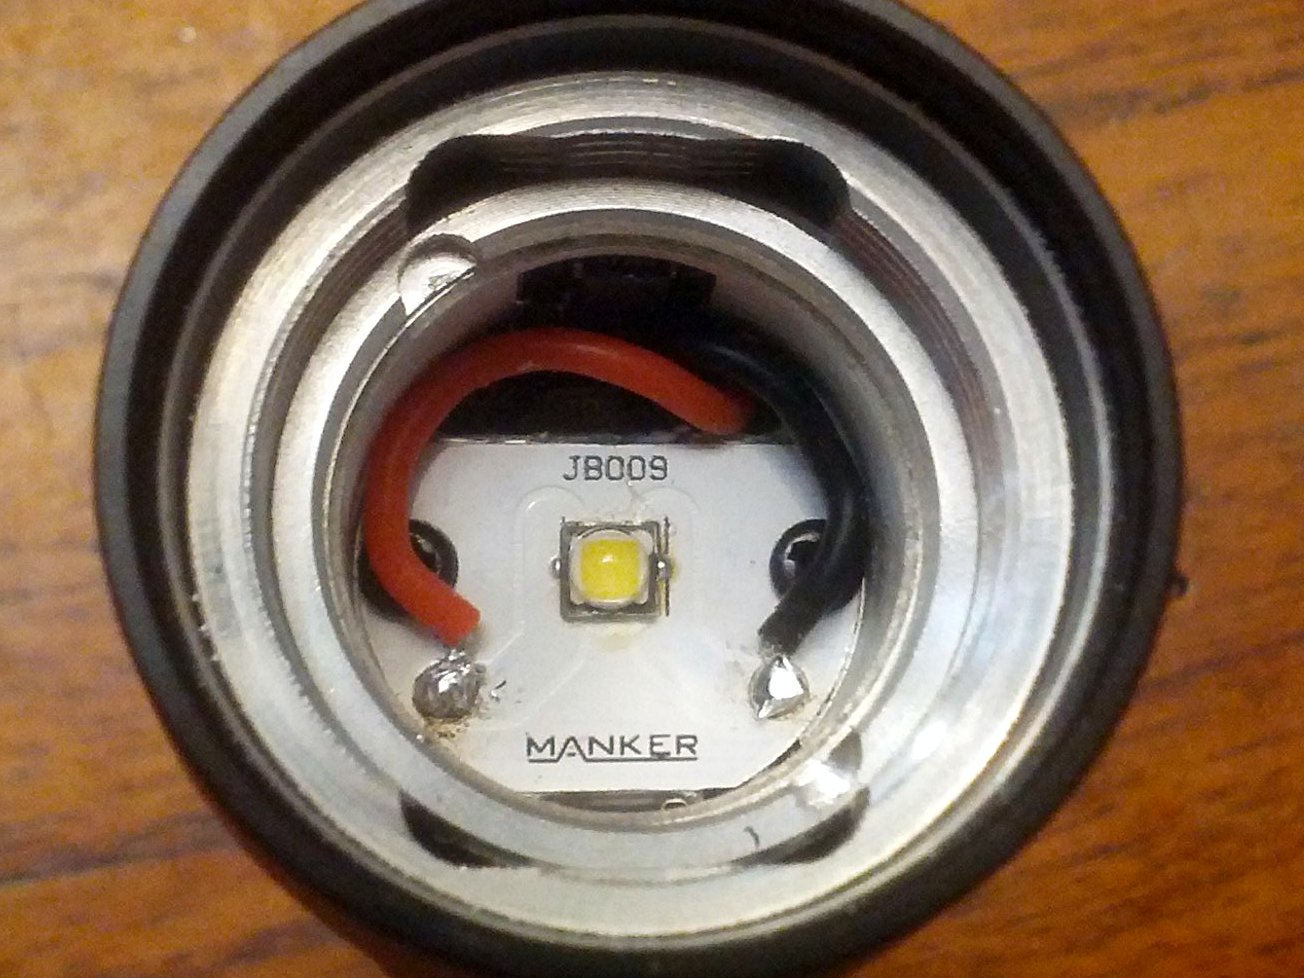
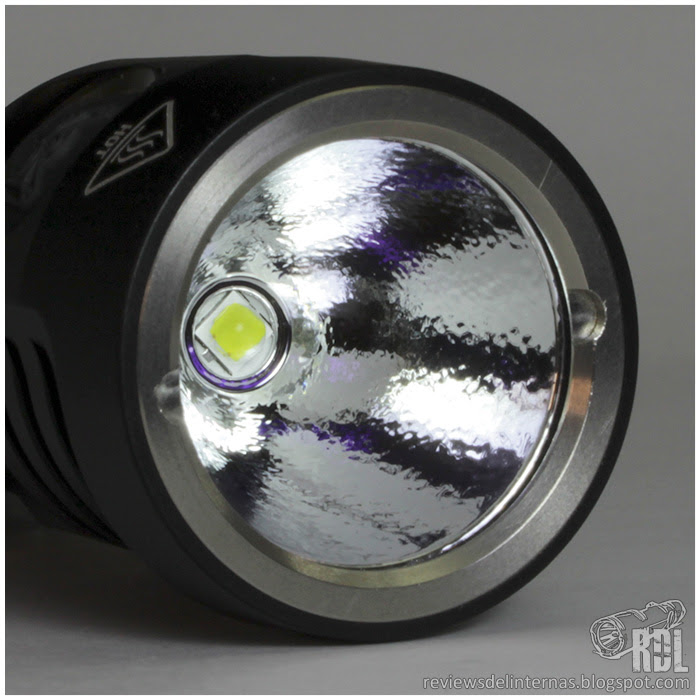
This time the Manker head optics don't focus on far-reaching throw but feature an XP-L V5 (with dome) and OP reflector for a more balanced projection. An ultra-clear lens with AR treatment concludes the optics enclosed behind a smooth steel bezel.

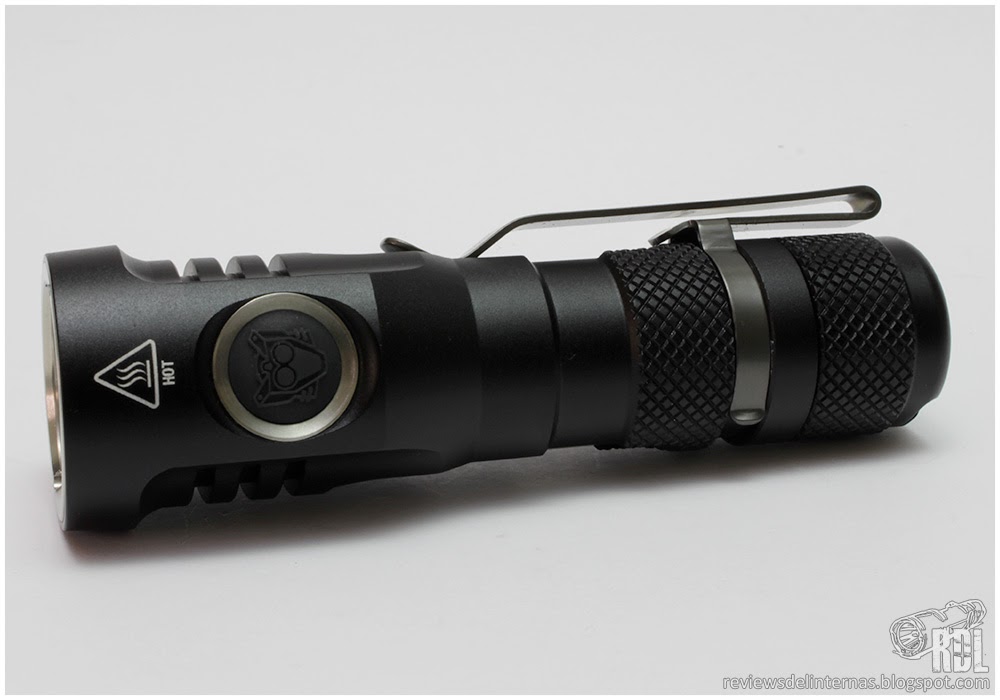
The head has a laterally placed switch, seemingly identical to the one seen on the T01, only now it has a backlight. On the opposite side of the switch, we have a microUSB port through which we can recharge our flashlight battery in place.

The head is surrounded with few massive cooling fins. As with the T01, the whole body of the flashlight is machined in one single piece of aluminum, with the tailcap being the only removable part.
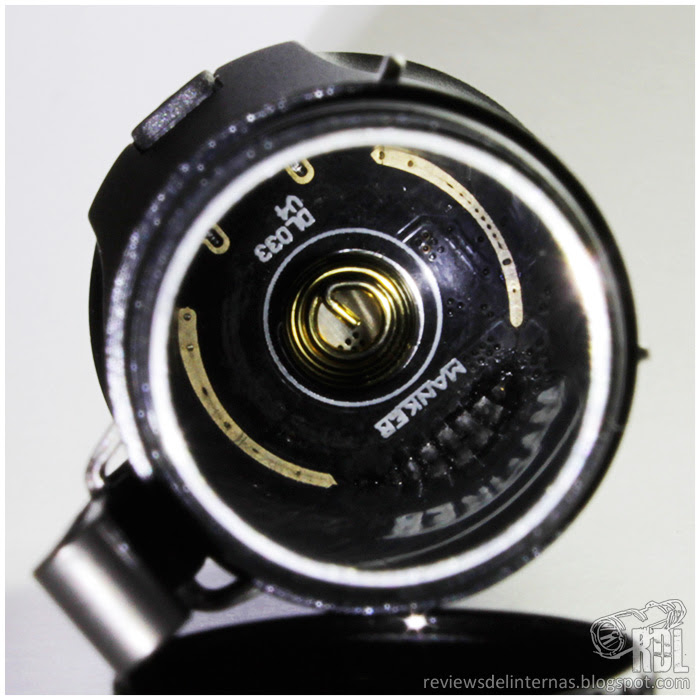
Inside the body we can make out the spring as the positive contact on the driver disc. The spring will make the flashlight run on any type of 18650 battery, be it button tops or flat tops.
The body of this compact flashlight has very elaborate machining, with many details and complicated forms, but the angles are all well finished with no sharp edges remaining. The ergonomics of the flashlight leaves, in my opinion, some room for improvement. Much of this evaluation is due to the unlikable pocket clip, which hinders comfortable holding of the torch. The clip itself is decent enough, very similar to what can be found on the T01, which the user anchors near the end of the flashlight body by snapping it with pressure into a machined groove. The finish of the clip is in the classic "bathed titanium", with that dark metallic color and suppressed shininess. Being of the "low carry" type also doesn't help with the comfort when unscrewing the tailcap of the flashlight.

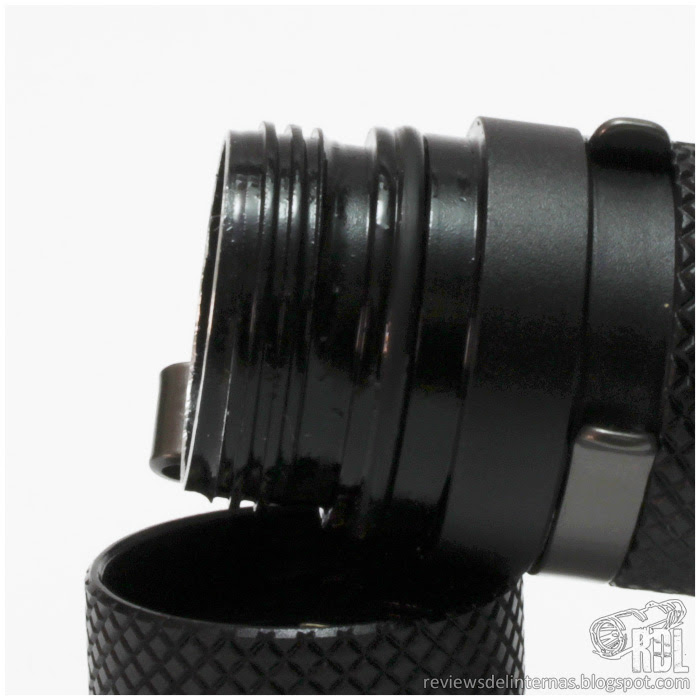
The threads are anodized and have a trapezoidal cut. They came clean and properly lubricated off the factory.
Finally, we have the tailcap of the flashlight which is machined to a flat base in order to allow stable tailstand. The knurling around the tailcap greatly facilitates grip for the screwing and unscrewing. This time Manker has machined a tiny hole through which we can attach a wrist strap or any other accessory item to let the torch hang safely.

The tailcap design really allows you to leave the flashlight in a solid tailstand.
USER INTERFACE:
The Manker U11 has a really complex user interface consisting of two separate mode groups. In the "General" mode group we have five fixed intensities and two hidden strobe modes, and in the "Pro" group mode we can set the intensity of the five brightness levels, while the hidden blinky modes have some interesting features which are not present in the General mode group.

- On and off: You need to keep the switch pressed for half a second, for turning on the flashlight or turning off.
- Changing modes: With the flashlight on, a simple click on the switch will advance through the five brightness levels, in ascending order.
- Strobe modes: The sequence of blinky modes is accessed through a double click, no matter from flashlight on or off. It starts off with strobe. Single clicks further, in the "General mode", we have SOS followed by the "breath light" mode.
- Direct access to moonlight mode: A single click from the flashlight off activates the moonlight mode.

- "Breath light": This curious feature lets the blue backlight behind the switch cover perform a fade-in and fade-out while the flashlight is in stand-by mode, so that we can locate it easily in complete darkness.
- Mode memory: U11 remembers the last used brightness level and reactivates it when the flashlight is turned on again from off (by pressing half a second). Blinky modes are not remembered.
- Mode groups: We have two distinct groups of modes. The "General" mode has default values, which include five predefined intensities (Moonlight, L1, M1, H1, T3) and the three aforementioned strobe modes. To switch between the "General mode" and "Pro mode", from the flashlight off position, we need to keep the switch pressed down for about 5 seconds (10s according to the manual) until a confirmation signal is emitted at the end of this selection procedure (1 flash for having entered the "General mode", 2 flashes for "Pro mode").
- "Pro Mode": This is an alternative group of modes in which we have more control over the intensity of each brightness mode, a "constant" turbo mode, an indicator of the state of charge of our battery, and a beacon mode.
- Programming: In the "Pro Mode" group, you can select the preferred intensity for each brightness mode by choosing among three different available levels. To program, you need to enter the sequence of
- blinky modes and progress to reach "custom setting": The torch will start with the low mode, alternate between three different available intensities (L1, L2, L3) in intervals of about two seconds. When we have the desired intensity, simply make a simple click to memorize it and go to the next set of intensities (M1, M2, M3) where we repeat the procedure with the memorization. These memorized modes are only available within the "Pro mode" group, since in the "General mode" group the brightness modes always default to the pre-fixed intensities (L1, M1, H1, T3).
- Charge status indicator: In "Pro mode", within the special modes, we have a battery charge status indicator. It is a number of flashes that will indicate roughly the state of charge of the battery with 1 flash for every 25% of available capacity: 4 flashes fully charged, 3 flashes for ~ 75%, 2 flashes for ~ 50% and 1 flash for ~ 25% or less. Moreover, the switch backlight will also signal low battery voltage with a warning light.
- Constant turbo: As discussed in the next review section, the U11 has by default time-controlled stepdowns in its Turbo modes. Being aware of the controversy which such practice can provoke among users, Manker has provided a "constant" Turbo mode hidden in the series of blinky modes and programming options. This function will use the previously programmed Turbo mode (T1, T2, or T3) and try to maintain it "constant" throughout its runtime. This function causes an excessive flashlight temperature, so it should be used with caution.
- Blockout: We may lock out the flashlight by partially unscrewing the tailcap, thus preventing accidental or unintentional activation during transportation.

(All measurements are taken following the ANSI/NEMA FL1 procedure, taking as value the highest reading between 30 and 120 seconds after initial activation on a fully charged battery. More details here.)
Measurements of the different modes in the integrating sphere show a very good agreement with the manufacturer's specifications, with small variations in some ways. The intensity distribution is quite homogeneous, and the ability to program the intensity modes, except for the moonlight, gives us the ability to finely adjust the distribution of intensities to our tastes or needs.
PERFORMANCE:
Leaving aside the power limitations of the 14500 or NiMH batteries in AA format which the T01 had to deal with, the new U11 powered by a powerful 18650 should, on paper, perform much stronger and more spectacularly than its sister pocket rocket.

The test result of runtime vs output in the integrating sphere is really good. All three Turbo levels have a stunningly high output. T3, the brightest of all, maintains its output above 1000LM for over one minute.
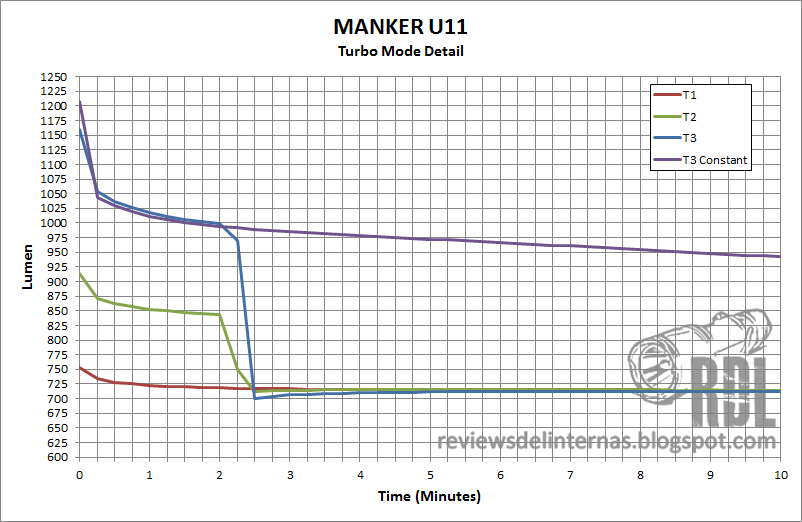
The ability to "override" the stepdown by the hidden "constant current" mode also allows us to see the difference between the two T3 power methods.
After the stepdown, the brightness always lands on the T1 level. For a better understanding of the overall performance, here a comparison against competitive lights.

Compared with other similar lights, the U11 is to date the brightest, most powerful single LED single 18650 flashlight which has passed through my hands. Click here for a higher resolution image.(link is external)
BEAM PROFILE:
Manker has equipped the U11 with a balanced combo of LED emitter and reflector, because its XP-L and OP reflector generate a very versatile mixed projection together.


The projection is very similar to what we would find with an XM-L2, a medium-sized hotspot with smoothed corona and uniform spill, without particular artifacts or rings as seen in the T01 with XP-L HI emitter and smooth reflector.

The XP-L V5 tint is pretty good, cool white with a very slightly tinted smoothed out corona surrounding the hotspot.
PERSONAL CONCLUSION:
These people from Manker, relatively new on the block, again surprised me with an exceptional torch, small in size and with outstanding performance.
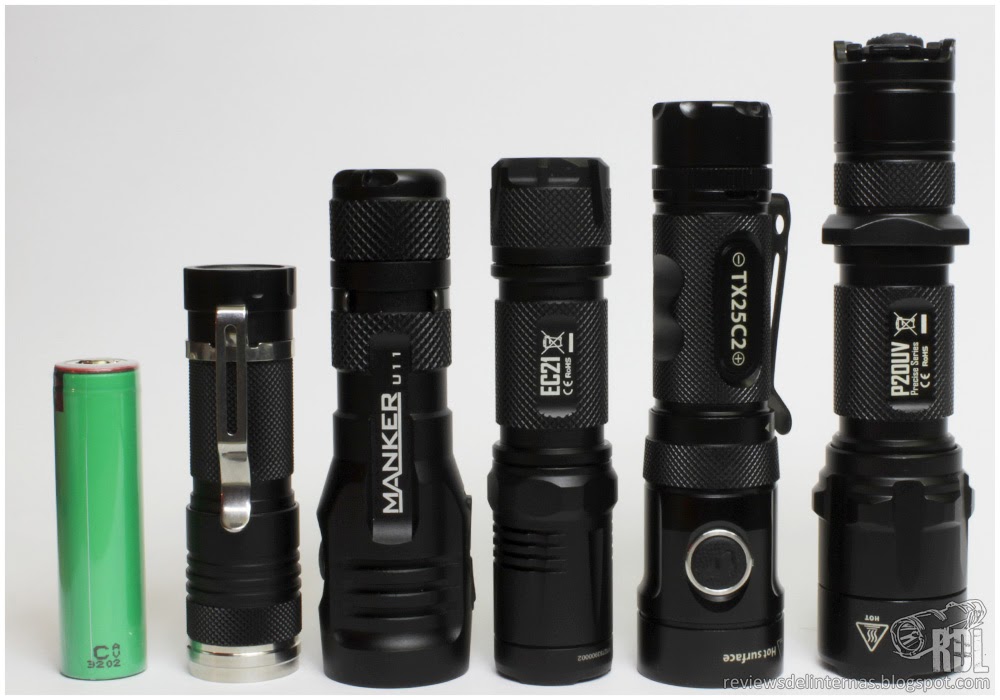

DQG Tiny18650 · Manker U11 · Nitecore EC21 · Eagletac TX25C2 · Nitecore P20UV
Negatives: The only improvable point of the U11 is in my opinion the system whereby the clip has been incorporated, as to me personally it generates two notable drawbacks, both related to the ergonomics of the flashlight usage. On the one hand, the clip is extremely annoying when you hold the flashlight, as its natural position is rotated 90° to the switch location, so it is in a hardly comfortable position for the hand when you try to grasp the flashlight with the switch pointing upwards. On the other hand, it is very cumbersome to unscrew the tailcap because we cannot unscrew the cap in full turns but have to do fractions of rotation with the finger tips.
Positives: Remarkable output combined with good regulation and an intelligent way to manage the multiple modes including customization make the U11 a great flashlight for all those enthusiasts or just "ordinary" users who like to have the greatest control over the possibilities that a device can offer. Manker has not only added some improvements to the prior known T01 interface but also enhanced it with some new features and packaged everything in a much more versatile flashlight.
Manker U11 sample provided by manufacturer for review.
Last edited:
")