
PhotonFanatic
Flashlight Enthusiast
A CPF'er has requested a custom worklight for use in his modding activities. The light would be attached to a flexible gooseneck arm and used to illuminate objects being worked on.
The requirements presented were:
1/4-20 socket built in
Detachable for everyday carry
Multiple levels--mini-FluPIC
CR2 battery
Twisty, due to socket
Reflector, stippled Khatod
Seoul P4 LED
Possible Delrin slip-on diffuser
O-Ring sealed
Exterior designed to hide fingerprints
Possibly EN plated
First, I modeled the light in SolidWorks--here's a section view (note: converter module was for a standard .55" converter, not the mini FluPIC):

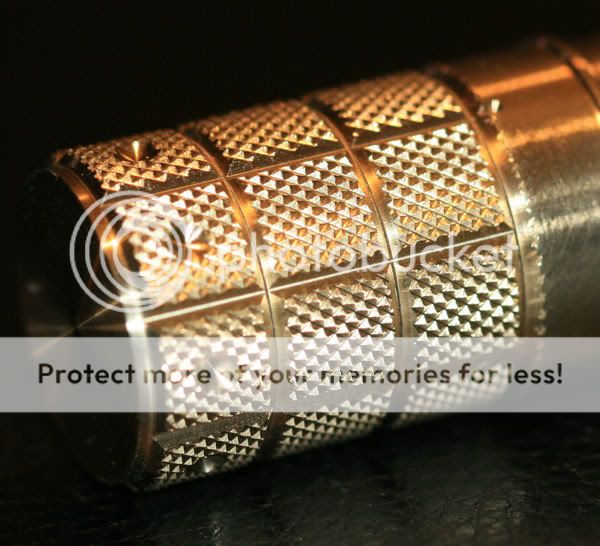
To address the issue of hiding fingerprints, I decided to try a knurled piece, but knurling alone is a tad boring, so I decided to segment the light, ala Blocky Boy, and then to add a few dimples. I tried a test piece in brass first:
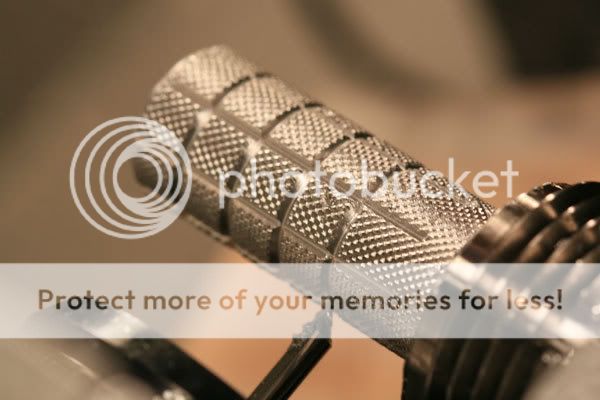
The client liked that, so a full length piece of 6061AL was knurled:

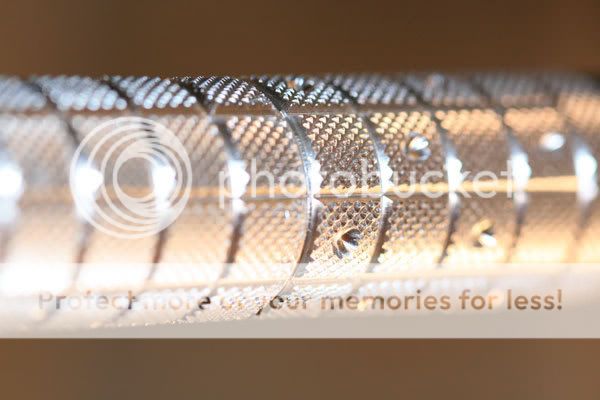
That was split into two pieces and then blocked and dimpled, as well as bored for the battery, reflector, lens, etc., and threaded. Here is one piece being segmented:
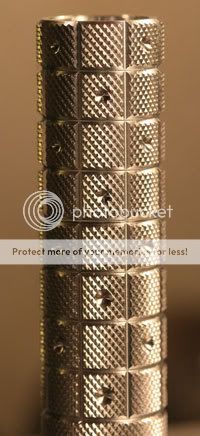
The head section was segmented first, then the battery tube which had previously been knurled was screwed into the head. At that point, the lines for the battery tube could now be located so that the segments would mate when the two pieces were screwed together:
Here's the light, almost done, except for parting off the little section of knurling showing at the bottom:
The next major step will be to install the tripod socket insert:

Why not just make some threads for the socket in the aluminum itself? Probably would be fine for something that would just be attached once and then stay in place, but the client wants to be able to remove the light and use it as a flashlight also, so multiple mountings and dismountings would wear away the soft threads of aluminum. This insert is made of stainless steel. The pins are driven into place when the socket had been inserted into the light, thus locking it in place and preventing any twisting. Should last for a lifetime--well, perhaps my lifetime.
The requirements presented were:
1/4-20 socket built in
Detachable for everyday carry
Multiple levels--mini-FluPIC
CR2 battery
Twisty, due to socket
Reflector, stippled Khatod
Seoul P4 LED
Possible Delrin slip-on diffuser
O-Ring sealed
Exterior designed to hide fingerprints
Possibly EN plated
First, I modeled the light in SolidWorks--here's a section view (note: converter module was for a standard .55" converter, not the mini FluPIC):
To address the issue of hiding fingerprints, I decided to try a knurled piece, but knurling alone is a tad boring, so I decided to segment the light, ala Blocky Boy, and then to add a few dimples. I tried a test piece in brass first:
The client liked that, so a full length piece of 6061AL was knurled:
That was split into two pieces and then blocked and dimpled, as well as bored for the battery, reflector, lens, etc., and threaded. Here is one piece being segmented:
The head section was segmented first, then the battery tube which had previously been knurled was screwed into the head. At that point, the lines for the battery tube could now be located so that the segments would mate when the two pieces were screwed together:
Here's the light, almost done, except for parting off the little section of knurling showing at the bottom:
The next major step will be to install the tripod socket insert:
Why not just make some threads for the socket in the aluminum itself? Probably would be fine for something that would just be attached once and then stay in place, but the client wants to be able to remove the light and use it as a flashlight also, so multiple mountings and dismountings would wear away the soft threads of aluminum. This insert is made of stainless steel. The pins are driven into place when the socket had been inserted into the light, thus locking it in place and preventing any twisting. Should last for a lifetime--well, perhaps my lifetime.
Last edited:
 :rock: :wave: