
thburns
Newly Enlightened
For submission to the flashlight reviews forum.
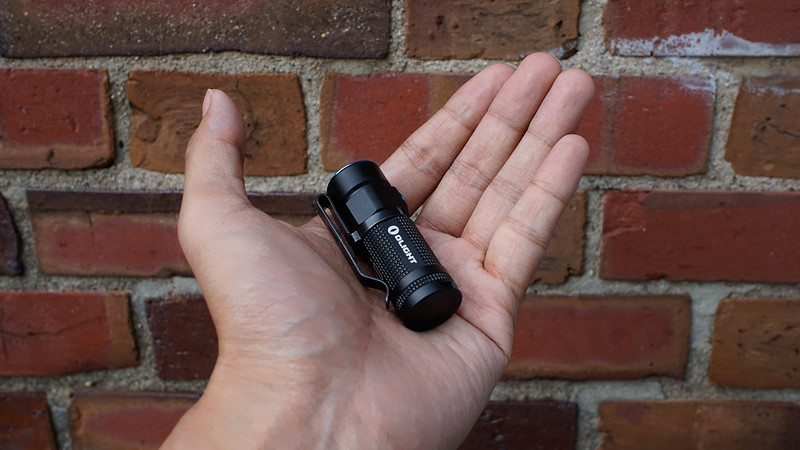
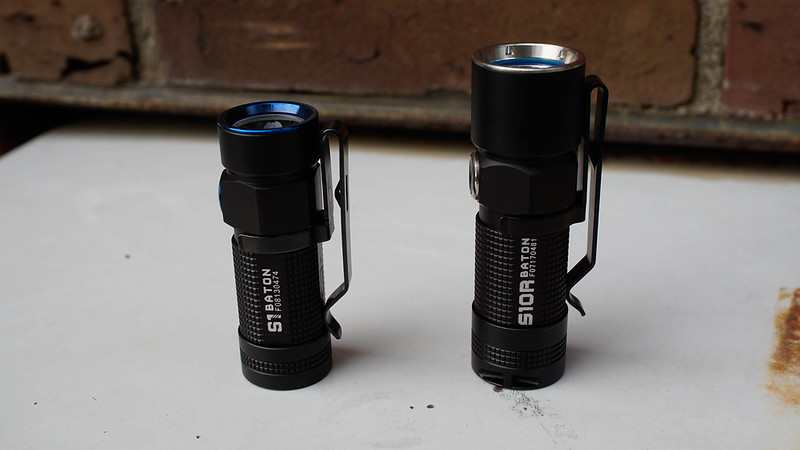
The S1 Baton is the newest entry to Olight's Baton series. I don't own an S10 Baton, but the S1 seems like it's meant to be the successor to that light as the smallest non-rechargeable 1xCR123/RCR123 light in the Baton lineup. In my review, I'll compare the S1 to the slightly larger and rechargeable S10R Baton so that you can get a good picture of the differences between the two.
Manufacturer specifications
Features:
Specifications:
Operation:
Included Items:
Unboxing
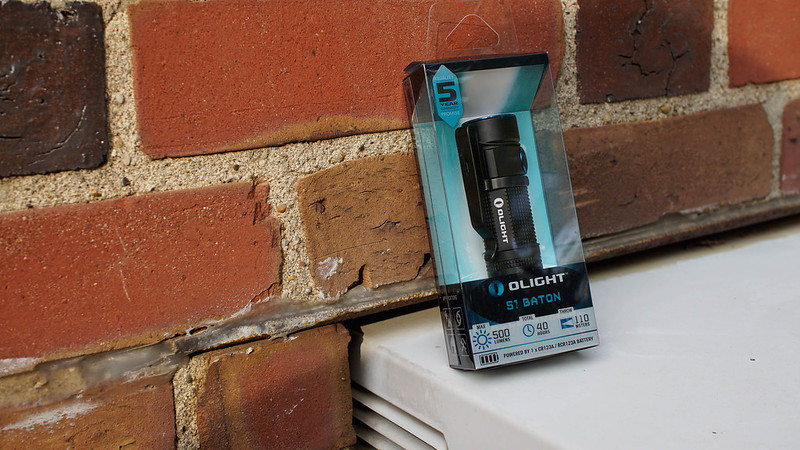
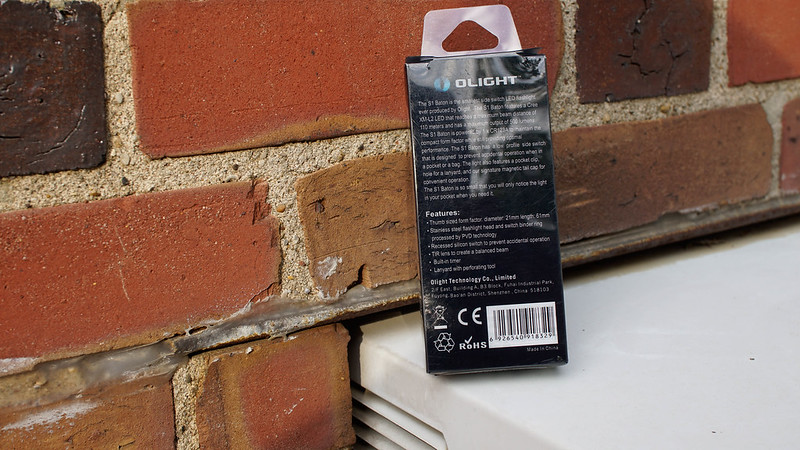
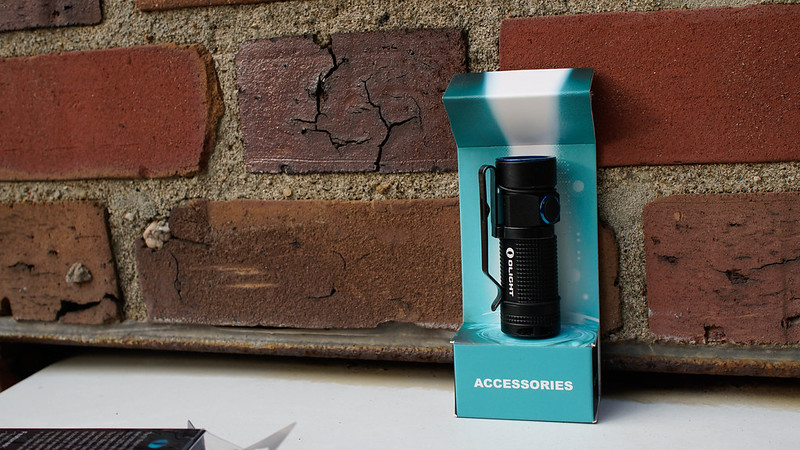
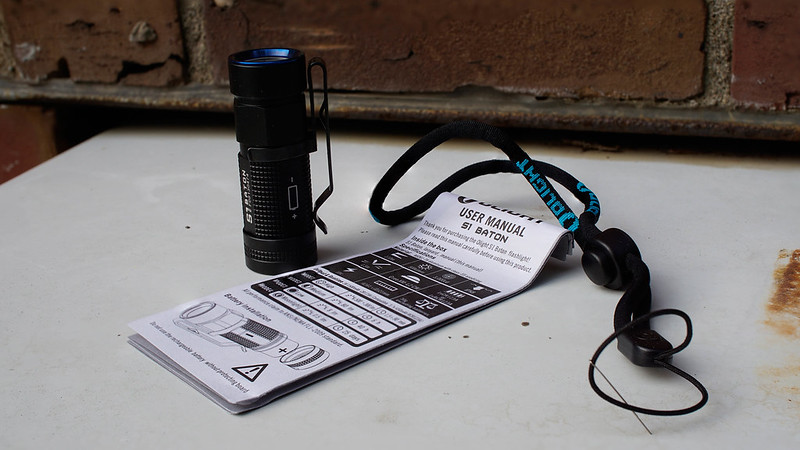
The S1 came in a transparent plastic retail package that seems to be the standard for the Baton series. The package had some summary specifications on the front, and a description of the light with a feature list on the back. Inside the package, the light was held to a cardboard insert that also enclosed the lanyard below, with the manual behind the insert.
There were what appeared to be two o-rings holding the light in place to the cardboard insert. Unfortunately, the o-rings were threaded through slits in the cardboard and I ended up cutting them to free the light. I only realized after the fact and upon closer inspection that they might have been spare o-rings for the light itself :shrug:
After inserting an Olight 650 mAh 16340 cell into the light, the S1 weighed 1.7 oz (48.19 g) on my postal scale.
Build


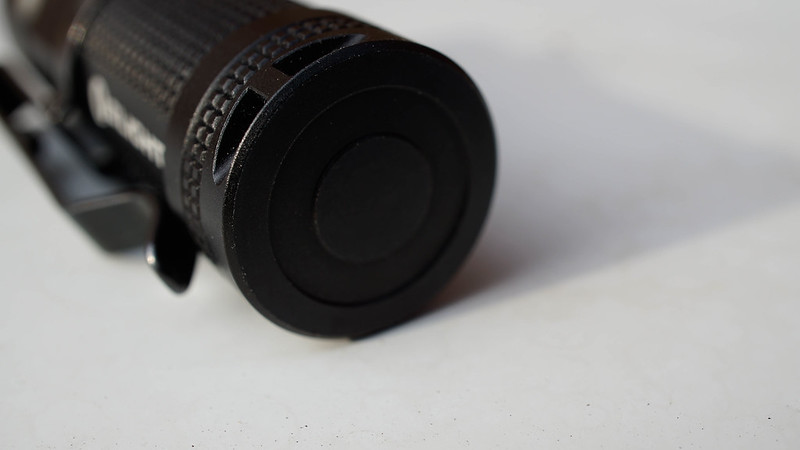

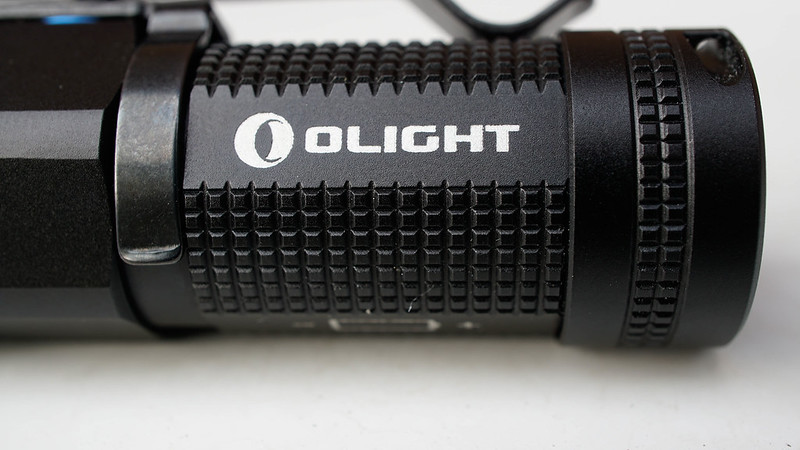

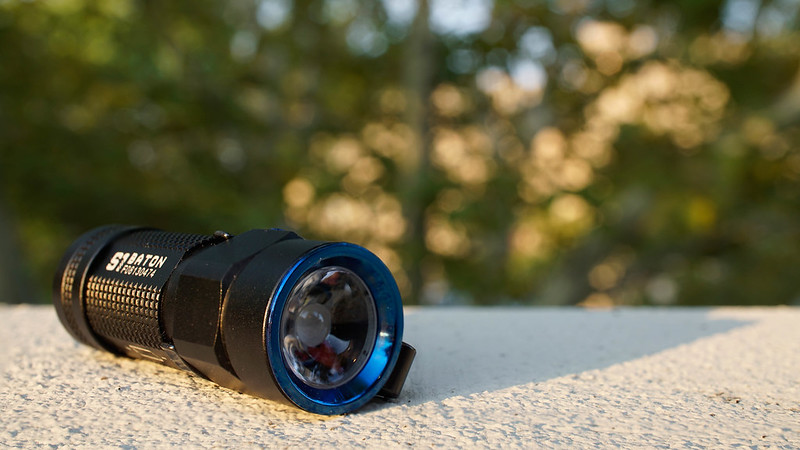
Like the other lights in the Baton series, most of the S1's battery tube has fine squared knurling, which is also present on the tailcap. The switch portion of the light has a hexagonal shape which does a good job of preventing the light from rolling when layed on its side. There are no protrusions on the tailcap, and the lanyard hole is embedded in the side of the tailcap so the S1 has no issue tailstanding even with the lanyard attached.
LED
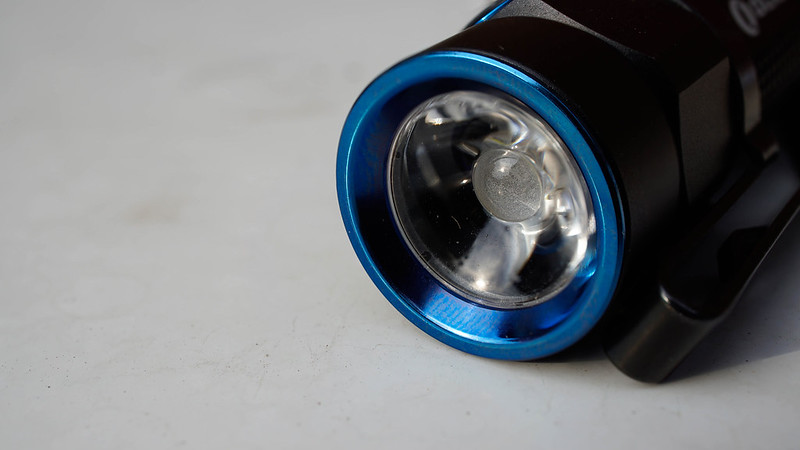
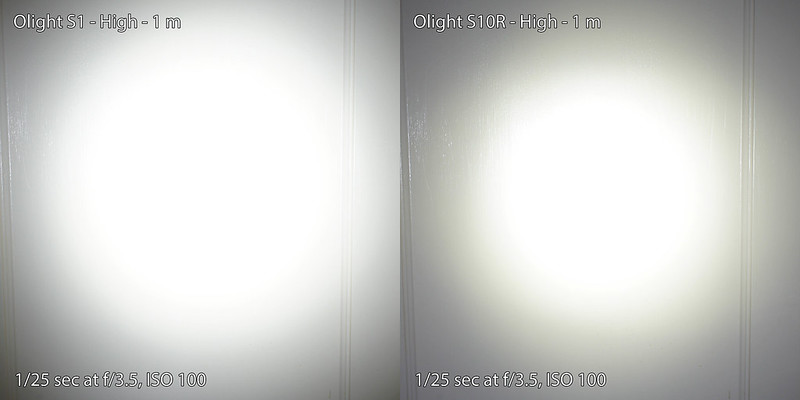
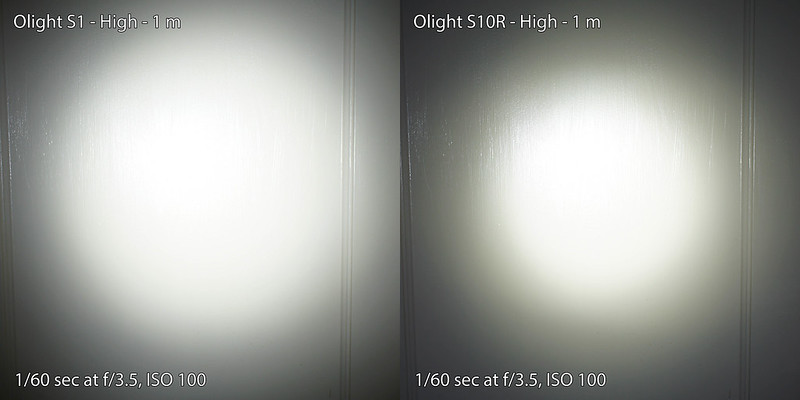
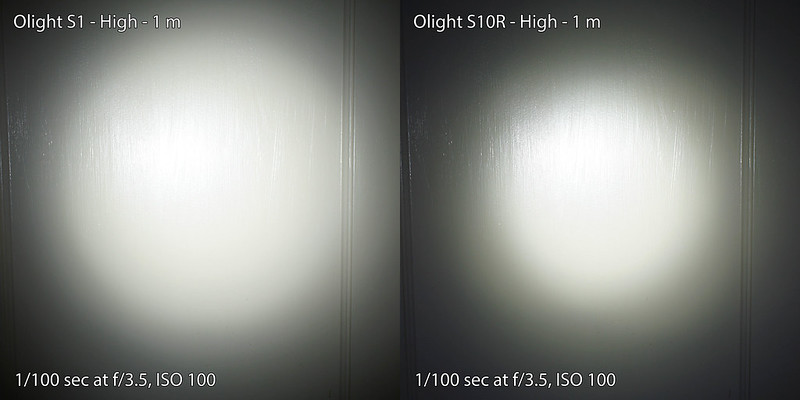
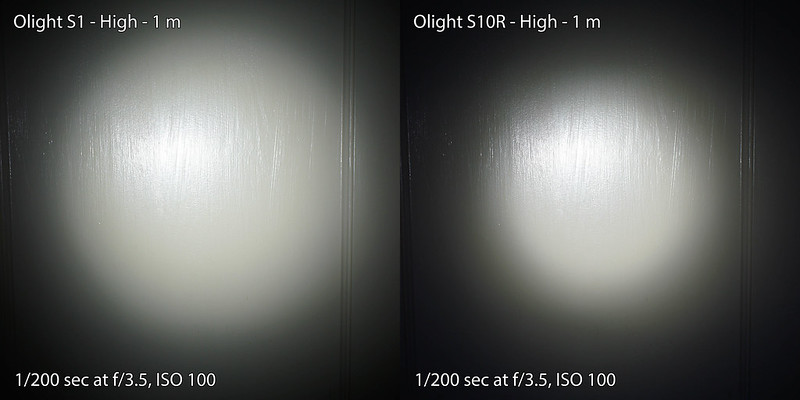
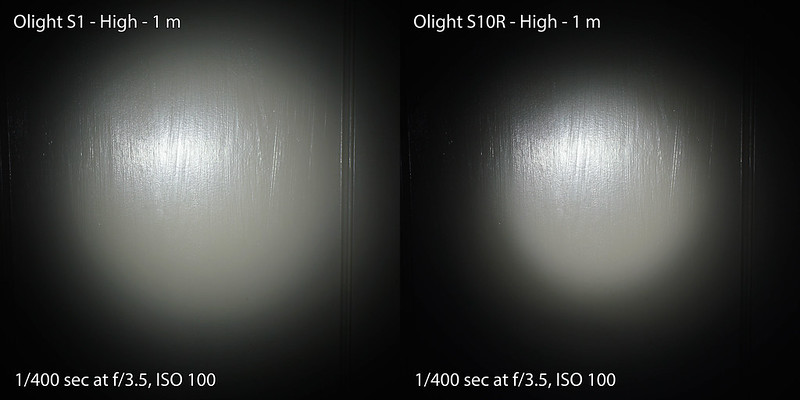
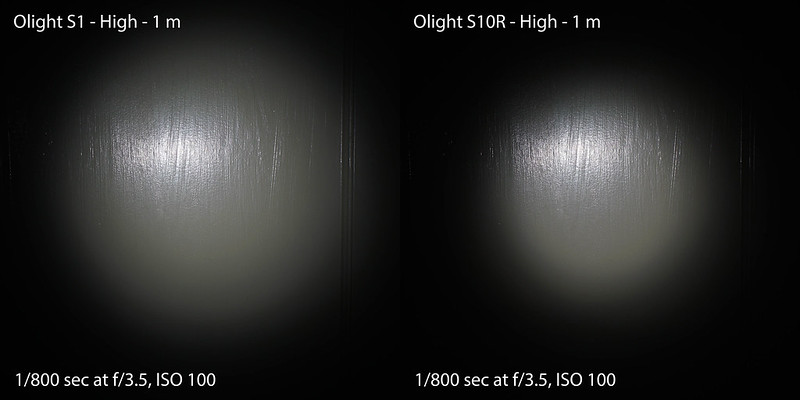
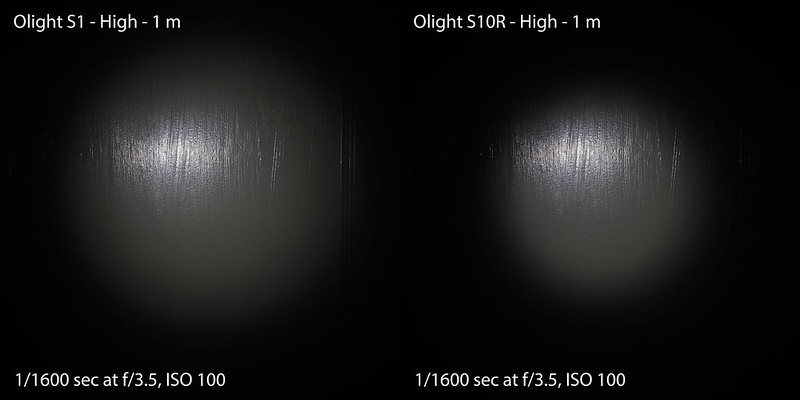
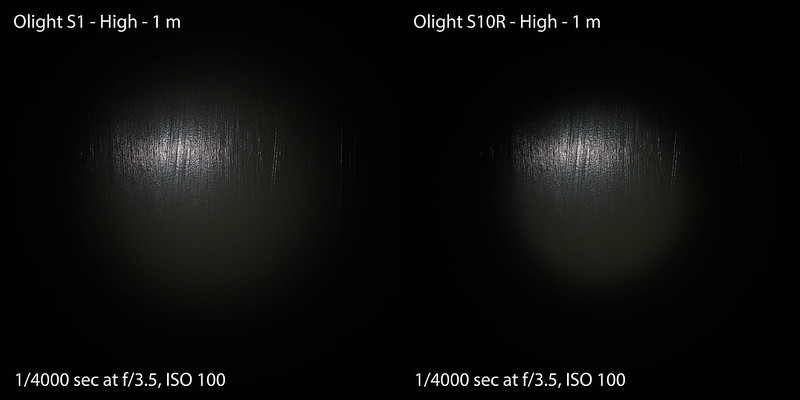
Unlike the other lights in the Baton series, the S1 uses a TIR optic instead of a reflector. As you'll see in the beam shots below, the TIR gives the S1 a beam with a large spot compared to the S10R, which can certainly help when using the light where a wider beam angle is required.
Power
The S1 can be powered by either a CR123 primary cell or a 3.7 V 16340 Li-ion battery (RCR123). _TODO: Describe output/runtime differences between CR123 and RCR123._
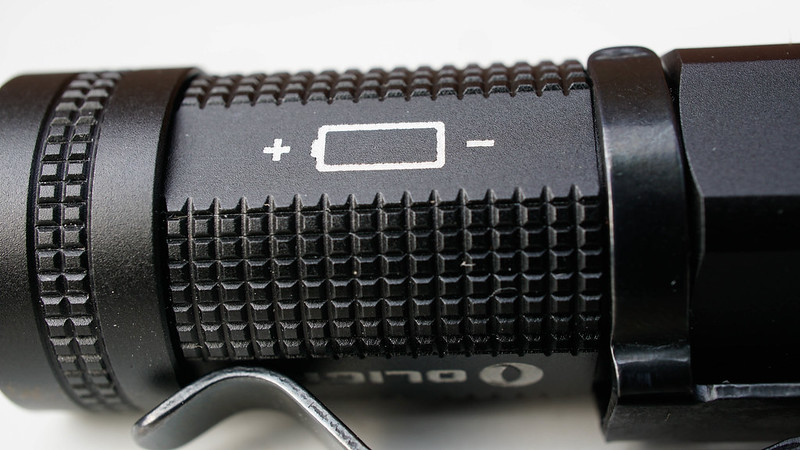
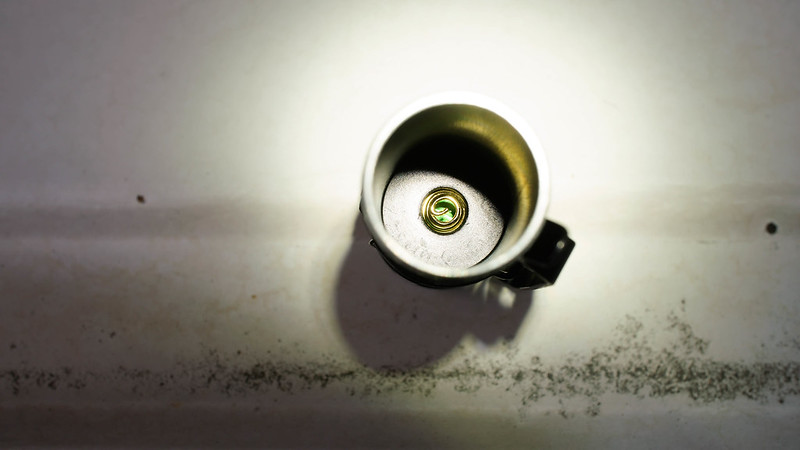
Somewhat oddly and worth noting is that the cell powering the S1 must be inserted with the anode (negative) end of the battery toward the head of the light. I'm not quite sure what the reasoning is behind this, but it may have something to do with whatever reason there is for the light being anodized on the inside as well. The only conductive part of the body once the tailcap is taken off is a thin ring of unanodized material at the end of the tailcap :shrug:
I'm told by several others that the reasoning for this might be in preparation for a rechargeable version of the light, which has not been confirmed yet.
User interface
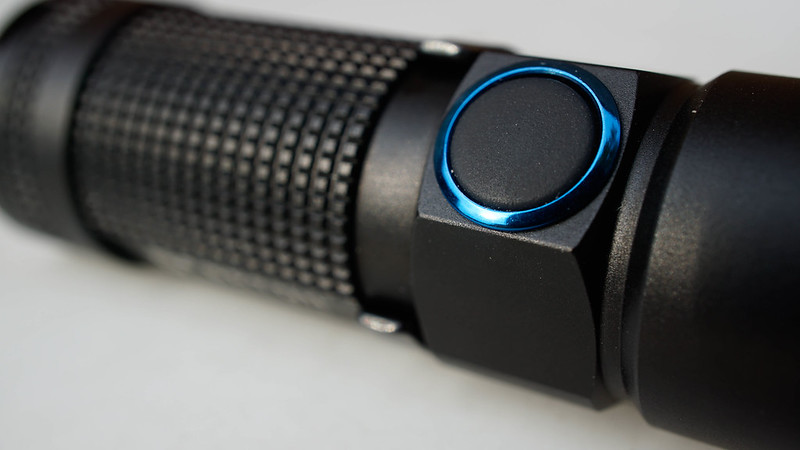
The S1 is operated with a side switch. It has moonlight, low, medium, and high output levels, and a 10 Hz strobe. It also has two timer functions that allow you to set the light to automatically turn off after either 3 minutes or 9 minutes. Let's take a look at how to use the side switch to access the various functions that the S1 has to offer.
Single-clicking the side switch of the S1 turns the light on to the last regular mode that was in use (including moonlight). Once the light is on, holding down the switch for about 1 second will begin to cycle through the other regular output levels (low, medium, and high), but will not cycle back to moonlight mode. Moonlight mode can be accessed by holding the switch for about 1 second while the light is off. High mode can be directly accessed from off by double clicking the switch.
Triple-clicking the switch while the light is on will activate the strobe mode, and holding the switch for about 1 second will return to the mode that the light was on before entering strobe. Single clicking the switch while in strobe mode will turn off the light.
The timer feature can be accessed by double clicking the switch while the light is on. When the timer is activated, the light will blink once for the 3 minute timer and twice for the 9 minute timer. Double clicking the switch again will cycle back and forth between the two timer lengths. I measured both timers with a stopwatch and both shut off the light after the correct amount of time.
While the S1 does not feature an electronic lockout ability like the S10R
Compared to the S10R, the user interface of the S1 is mostly the same, with the three notable exceptions being the lack of electronic lockout on the S1, the lack of the timer feature on the S10R, and double clicking to strobe on the S10R vs triple clicking on the S1.
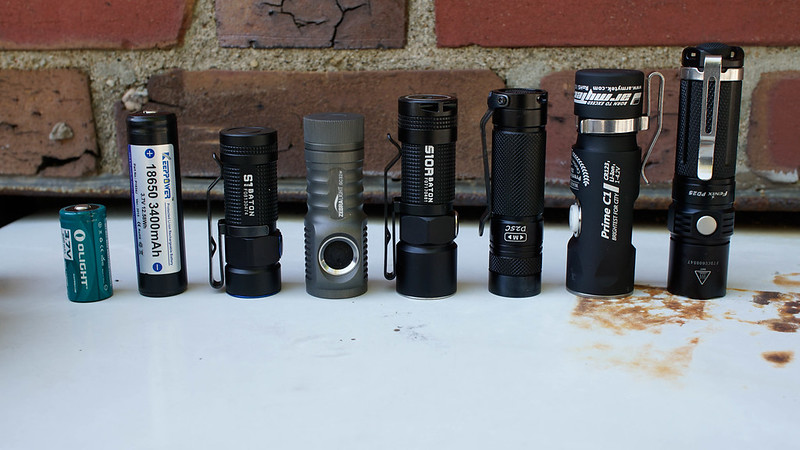
Size
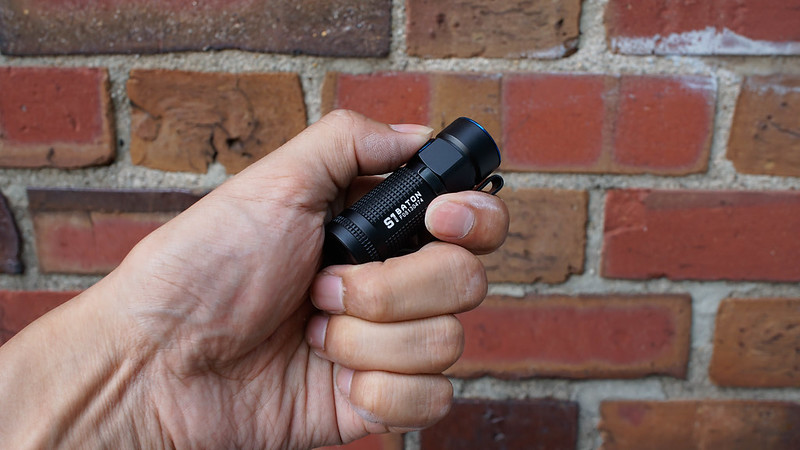
Grip
The rather fine knurling on the S1 gives it a pretty decent grip, and if the pocket clip is placed on the opposite side from the side switch provides a nice indent in the clip for your middle finger (at least for my hand size).
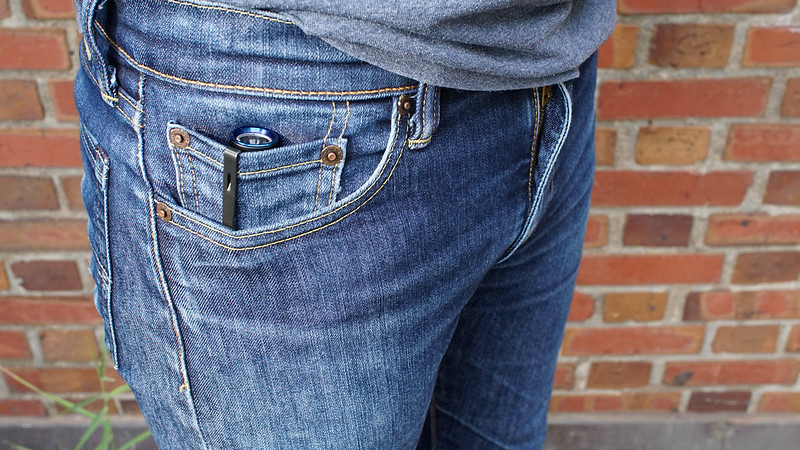
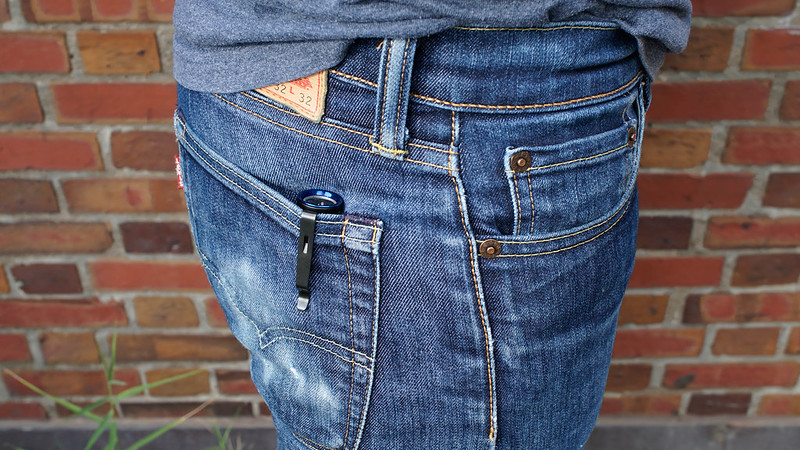
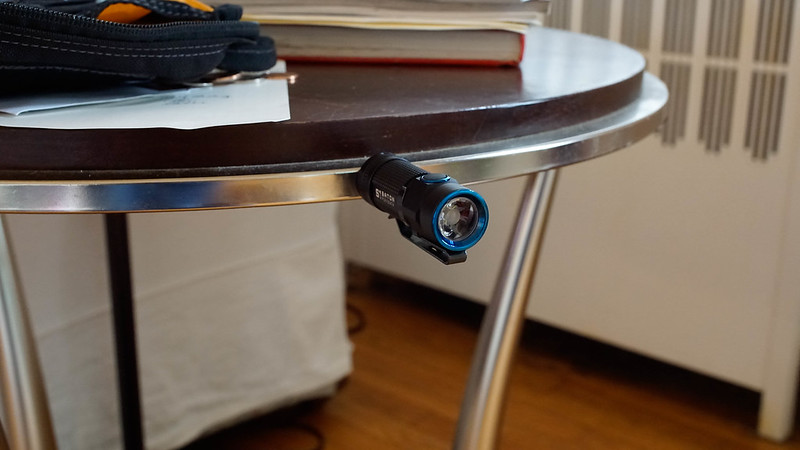
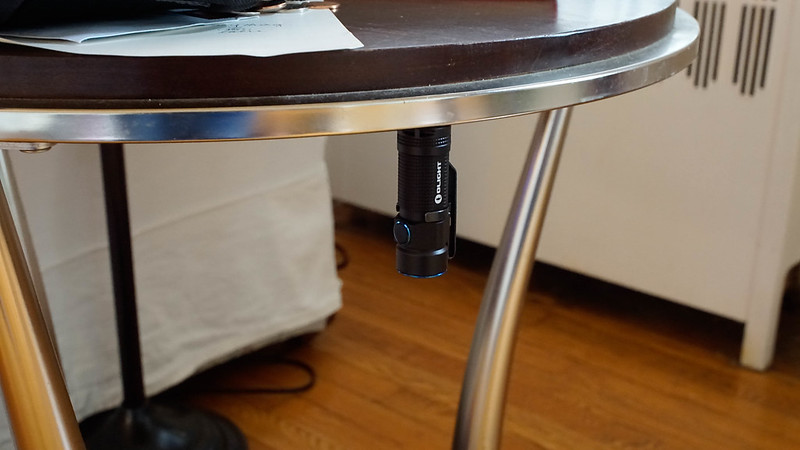
Carry
Being about the same size as a single 18650 Li-ion cell, the S1 practically disappears in your pocket until you're ready to use it. It fits perfectly in the fifth pocket, back pocket, and even inside the waistband. The pocket clip has a good amount of tension, and requires a little bit of a push to get it seated the last centimeter or so. The pocket clip is also detachable, and comes attached for bezel-up carry by default. It can be reversed for bezel-down carry, but in that configuration it will protrude slightly past the bezel.
From what I've seen in several other early reviews for the S1, the production version of the light might come with a small nylon holster for the light. My review sample did not include the holster.
The side switch on the S1 isn't as recessed as it is on the S10R, so this might pose an issue depending on how you carry the light.

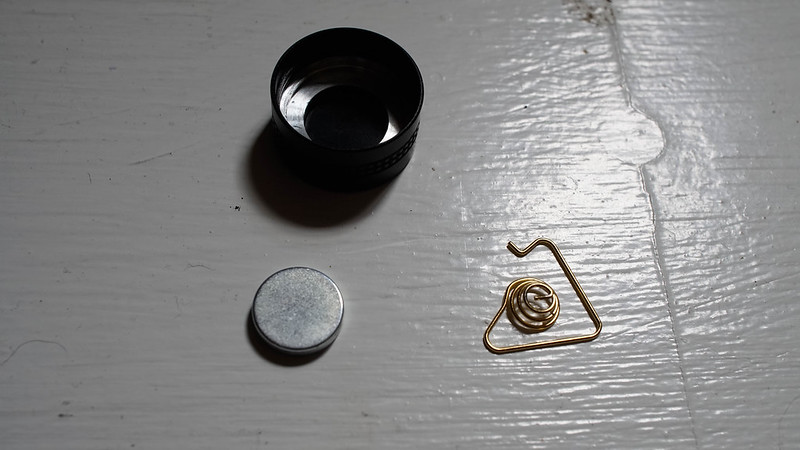
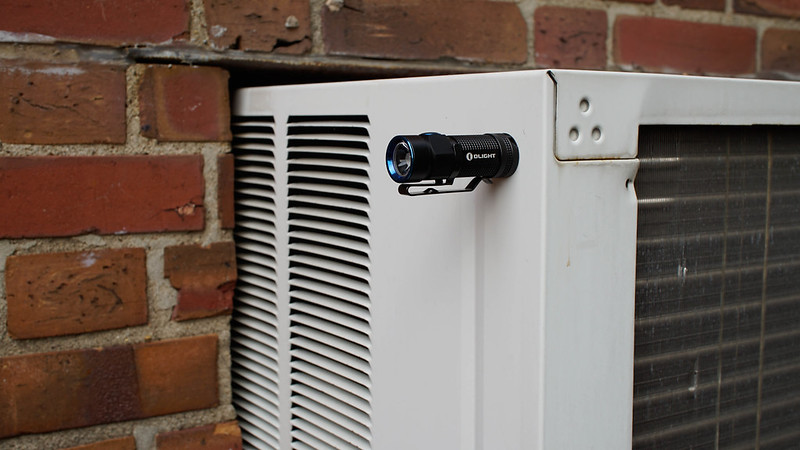
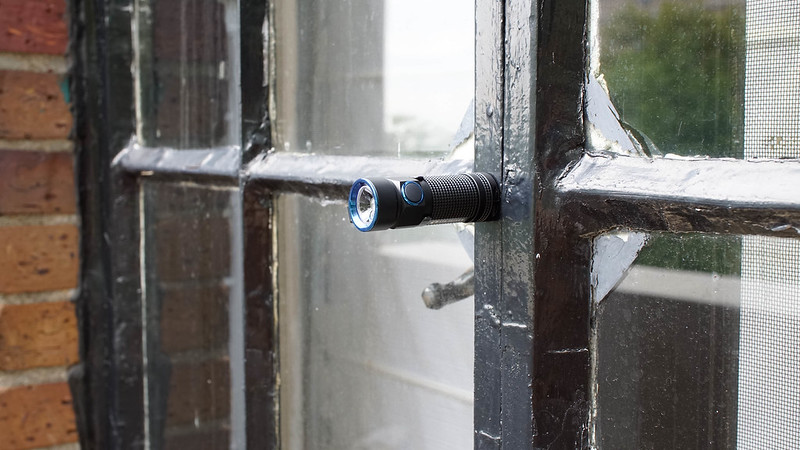
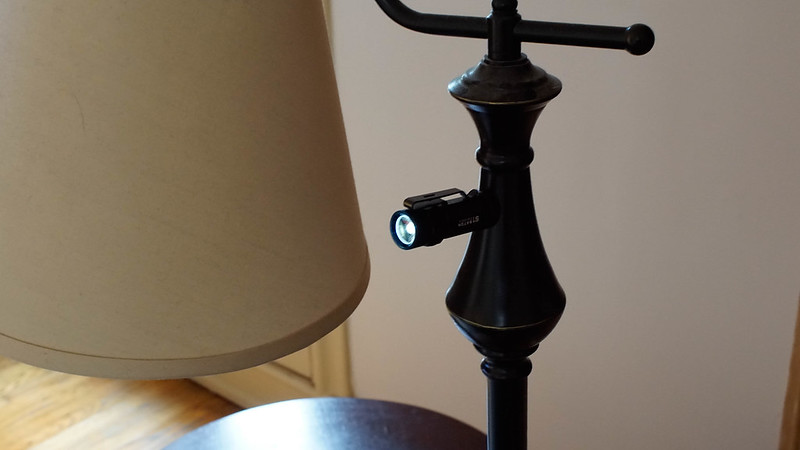
Tailcap magnet
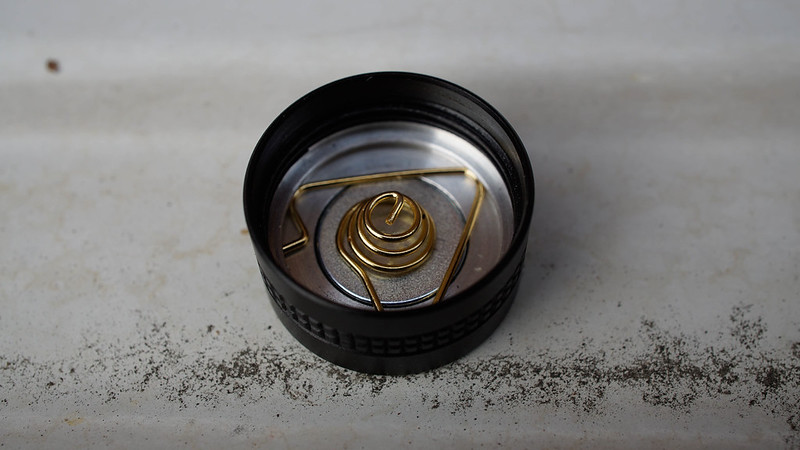
The tailcap of the S1 contains a little magnet that is fairly powerful for its size. On the various surfaces I tested it on, it attached the light firmly even sideways and upside-down. The magnet can be easily removed by squeezing the spring in the tailcap with a pair of needlenose pliers to pull it out. Due to the magnet wanting to move around, it's a little trickier getting it back in but not too difficult overall.

Beamshots
All of the beamshots were taken with a Sony Alpha a6000 camera, with a Sony E 30mm F3.5 Macro lens and automatic white balance to minimize tint differences. These shots should be an indicator of the relative difference in tints between the S1 and S10R, not an accurate representation of the tint color.
High output with multiple exposures
These high output beamshots were taken about 1 m from a white door (I don't have a white wall in my apartment), with the camera at about 1.1 m.
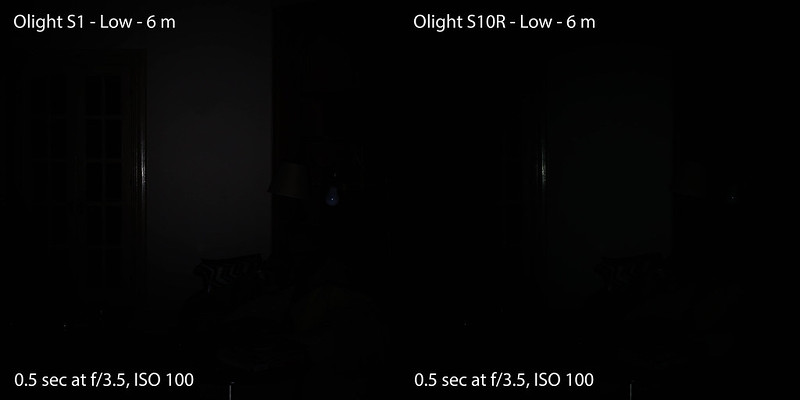
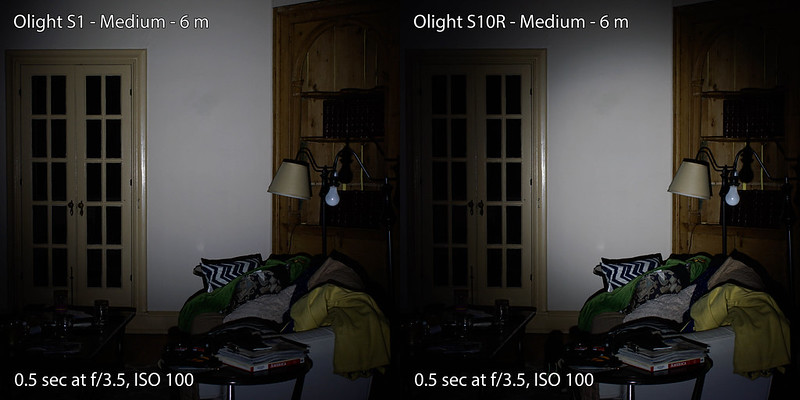
Low/medium/high output indoor at ~6 m
The wall next to the door in these indoor beamshots is about 6 meters from the light.

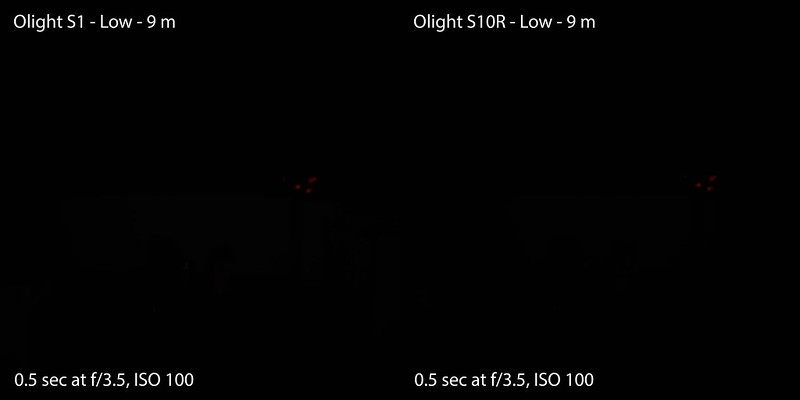
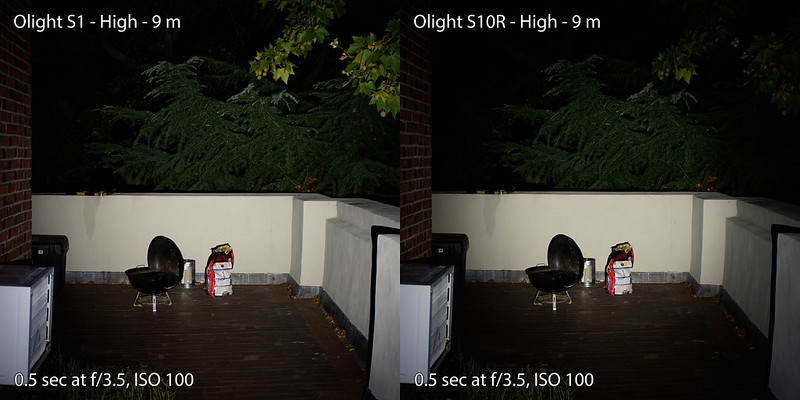
Low/medium/high output outdoor at ~9 m
The terrace wall in these outdoor beamshots is about 9 meters from the light.

Output measurements
As measured from the data 30 seconds into the runtime test below with an Olight 650 mAh 16340 battery, I've estimated the peak intensity of the S1 at 3410 cd, with a beam distance of 117 m. This is compared to 3030 cd and 110 m for the S10R. Both of these measurements are slightly higher than the manufacturer-reported specifications for the S1 :twothumbs:
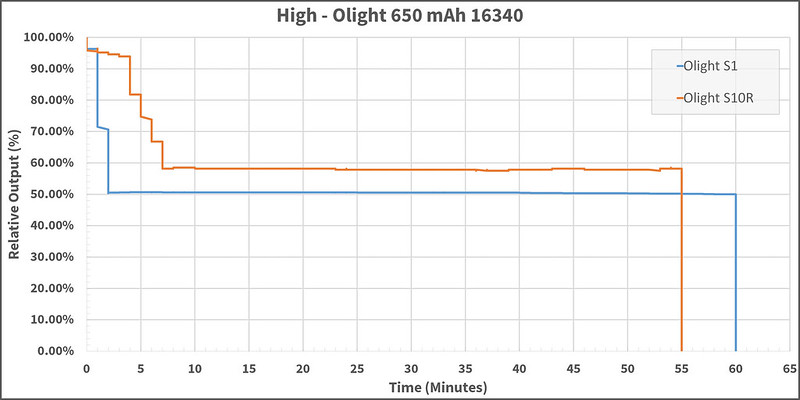
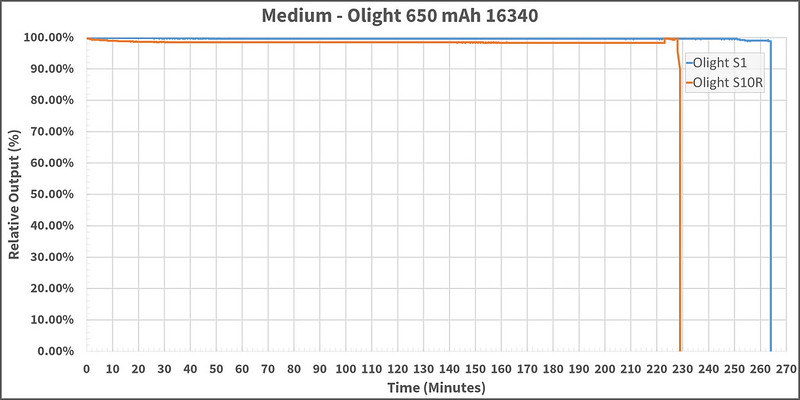
Runtime graphs
Real-world use
As part of my review, I used the S1 as my exclusive EDC light for a week to see how it would fare with some real-world use. I thought that the non-recessed button might become an issue with accidental activation, but I didn't experience that at all during my testing, in which I carried the light IWB, in my fifth pocket, and clipped into my back pocket. Due to its small size, I actually thought that I lost the light a couple times. I did find that the tension on the clip was a little too tight for my liking, and I often had to spend a little bit of extra effort to get the edge of my pants all the way into the clip. My purely subjective opinion at the end of the week though was that the S1 would make an excellent EDC for those who prefer the smaller size of a 1xCR123 light.
Conclusion
Overall I think that the S1 is a fantastic little light in the 1xCR123/RCR123 category, and a nice addition to Olight's Baton series. Despite its dimunitive size, the S1 still packs a punch with a nice beam profile thanks to the TIR optic. The tailcap magnet also makes the S1 a great utility light.
My main complaints about the light are the unintuitive battery orientation and the lack of low voltage indication. The tight regulation of the light at 50% and immediate power-off after sixty minutes on high mode might end up being an unfortunate surprise during real-world use.
Listed below are my pros and cons for the S1. Some of these might not apply to you, and some might just be my personal nitpicks, but I've tried to list things that I feel most people would agree on.
Pros
Cons
The S1 was provided by GoingGear.com for review, on behalf of Olight.
The S1 Baton is the newest entry to Olight's Baton series. I don't own an S10 Baton, but the S1 seems like it's meant to be the successor to that light as the smallest non-rechargeable 1xCR123/RCR123 light in the Baton lineup. In my review, I'll compare the S1 to the slightly larger and rechargeable S10R Baton so that you can get a good picture of the differences between the two.
Manufacturer specifications
Features:
- Thumb sized form factor. diameter: 21mm length: 61mm
- Stainless steel flashlight head and switch binder ring processed by PVD technology
- Recessed silicon switch to prevent accidental operation
- TIR lens to create a balanced beam
- Positive polarity on the battery faces the tail of the flashlight for enhanced reliability and a more compact size
- Built-in timer: 3 minutes or 9 minutes
- Lanyard with perforating tool
- Flat tail cap design contains a strong magnet providing the ability to place it upside down and use it as a hands-free work light
- Removable pocket clip that is scratch resistant
- Thermal management safety program with overheat protection by dropping high output by 50% within 1 minute of constant on. Turbo mode has a limit of 1.5 minutes.
- The S1 features a wide range current circuit and can be powered by 1 x CR123A (built-in protected board)
- Reverse polarity protection to prevent improper battery installation
Specifications:
- Cree XM-L2 LED. Maximum light output up to 500 lumens.
- 3 standard modes: 8 lumens, 80 lumens and 500 lumens.
- 2 special modes: 0.5 lumen moonlight mode and a 10Hz strobe mode.
- 6061-T6 aluminum alloy body with anti-scratch Type-III hard anodizing
- PMMA TIR lens with a 90% light transmittance rate
- Low standby current below 10uA
- Body material: 6061-T6 aluminum alloy structure, Type III hard anodizing
- Stainless steel pocket clip, stainless steel flashlight bezel, stainless steel binder ring
- Dimensions: Length: 61mm, Diameter: 21mm
- Weight : 30g (excluding batteries)
- Color (body + clip)black,(BEZEL+ side switch binder ring)blue
- Operating voltage: 2.5 to 4.2V
- Luminous Intensity: 3000 cd
- Max beam distance: 110 meters
- Waterproof: IPX8
Operation:
- Single click --- Turn ON / Turn OFF
- Click and hold --- High brightness, select timer, or activate moon light mode
- Quick double click --- Turbo brightness, or enter setting
- Quick triple click --- strobe mode
Included Items:
- 1 × Flashlight
- 1 × lanyard
- User manual
Unboxing
The S1 came in a transparent plastic retail package that seems to be the standard for the Baton series. The package had some summary specifications on the front, and a description of the light with a feature list on the back. Inside the package, the light was held to a cardboard insert that also enclosed the lanyard below, with the manual behind the insert.
There were what appeared to be two o-rings holding the light in place to the cardboard insert. Unfortunately, the o-rings were threaded through slits in the cardboard and I ended up cutting them to free the light. I only realized after the fact and upon closer inspection that they might have been spare o-rings for the light itself :shrug:
After inserting an Olight 650 mAh 16340 cell into the light, the S1 weighed 1.7 oz (48.19 g) on my postal scale.
Build
Like the other lights in the Baton series, most of the S1's battery tube has fine squared knurling, which is also present on the tailcap. The switch portion of the light has a hexagonal shape which does a good job of preventing the light from rolling when layed on its side. There are no protrusions on the tailcap, and the lanyard hole is embedded in the side of the tailcap so the S1 has no issue tailstanding even with the lanyard attached.
LED
Unlike the other lights in the Baton series, the S1 uses a TIR optic instead of a reflector. As you'll see in the beam shots below, the TIR gives the S1 a beam with a large spot compared to the S10R, which can certainly help when using the light where a wider beam angle is required.
Power
The S1 can be powered by either a CR123 primary cell or a 3.7 V 16340 Li-ion battery (RCR123). _TODO: Describe output/runtime differences between CR123 and RCR123._
Somewhat oddly and worth noting is that the cell powering the S1 must be inserted with the anode (negative) end of the battery toward the head of the light. I'm not quite sure what the reasoning is behind this, but it may have something to do with whatever reason there is for the light being anodized on the inside as well. The only conductive part of the body once the tailcap is taken off is a thin ring of unanodized material at the end of the tailcap :shrug:
I'm told by several others that the reasoning for this might be in preparation for a rechargeable version of the light, which has not been confirmed yet.
User interface
The S1 is operated with a side switch. It has moonlight, low, medium, and high output levels, and a 10 Hz strobe. It also has two timer functions that allow you to set the light to automatically turn off after either 3 minutes or 9 minutes. Let's take a look at how to use the side switch to access the various functions that the S1 has to offer.
Single-clicking the side switch of the S1 turns the light on to the last regular mode that was in use (including moonlight). Once the light is on, holding down the switch for about 1 second will begin to cycle through the other regular output levels (low, medium, and high), but will not cycle back to moonlight mode. Moonlight mode can be accessed by holding the switch for about 1 second while the light is off. High mode can be directly accessed from off by double clicking the switch.
Triple-clicking the switch while the light is on will activate the strobe mode, and holding the switch for about 1 second will return to the mode that the light was on before entering strobe. Single clicking the switch while in strobe mode will turn off the light.
The timer feature can be accessed by double clicking the switch while the light is on. When the timer is activated, the light will blink once for the 3 minute timer and twice for the 9 minute timer. Double clicking the switch again will cycle back and forth between the two timer lengths. I measured both timers with a stopwatch and both shut off the light after the correct amount of time.
While the S1 does not feature an electronic lockout ability like the S10R
Compared to the S10R, the user interface of the S1 is mostly the same, with the three notable exceptions being the lack of electronic lockout on the S1, the lack of the timer feature on the S10R, and double clicking to strobe on the S10R vs triple clicking on the S1.
Size
Grip
The rather fine knurling on the S1 gives it a pretty decent grip, and if the pocket clip is placed on the opposite side from the side switch provides a nice indent in the clip for your middle finger (at least for my hand size).
Carry
Being about the same size as a single 18650 Li-ion cell, the S1 practically disappears in your pocket until you're ready to use it. It fits perfectly in the fifth pocket, back pocket, and even inside the waistband. The pocket clip has a good amount of tension, and requires a little bit of a push to get it seated the last centimeter or so. The pocket clip is also detachable, and comes attached for bezel-up carry by default. It can be reversed for bezel-down carry, but in that configuration it will protrude slightly past the bezel.
From what I've seen in several other early reviews for the S1, the production version of the light might come with a small nylon holster for the light. My review sample did not include the holster.
The side switch on the S1 isn't as recessed as it is on the S10R, so this might pose an issue depending on how you carry the light.
Tailcap magnet
The tailcap of the S1 contains a little magnet that is fairly powerful for its size. On the various surfaces I tested it on, it attached the light firmly even sideways and upside-down. The magnet can be easily removed by squeezing the spring in the tailcap with a pair of needlenose pliers to pull it out. Due to the magnet wanting to move around, it's a little trickier getting it back in but not too difficult overall.
Beamshots
All of the beamshots were taken with a Sony Alpha a6000 camera, with a Sony E 30mm F3.5 Macro lens and automatic white balance to minimize tint differences. These shots should be an indicator of the relative difference in tints between the S1 and S10R, not an accurate representation of the tint color.
High output with multiple exposures
These high output beamshots were taken about 1 m from a white door (I don't have a white wall in my apartment), with the camera at about 1.1 m.
Low/medium/high output indoor at ~6 m
The wall next to the door in these indoor beamshots is about 6 meters from the light.
Low/medium/high output outdoor at ~9 m
The terrace wall in these outdoor beamshots is about 9 meters from the light.
Output measurements
As measured from the data 30 seconds into the runtime test below with an Olight 650 mAh 16340 battery, I've estimated the peak intensity of the S1 at 3410 cd, with a beam distance of 117 m. This is compared to 3030 cd and 110 m for the S10R. Both of these measurements are slightly higher than the manufacturer-reported specifications for the S1 :twothumbs:
Runtime graphs
Real-world use
As part of my review, I used the S1 as my exclusive EDC light for a week to see how it would fare with some real-world use. I thought that the non-recessed button might become an issue with accidental activation, but I didn't experience that at all during my testing, in which I carried the light IWB, in my fifth pocket, and clipped into my back pocket. Due to its small size, I actually thought that I lost the light a couple times. I did find that the tension on the clip was a little too tight for my liking, and I often had to spend a little bit of extra effort to get the edge of my pants all the way into the clip. My purely subjective opinion at the end of the week though was that the S1 would make an excellent EDC for those who prefer the smaller size of a 1xCR123 light.
Conclusion
Overall I think that the S1 is a fantastic little light in the 1xCR123/RCR123 category, and a nice addition to Olight's Baton series. Despite its dimunitive size, the S1 still packs a punch with a nice beam profile thanks to the TIR optic. The tailcap magnet also makes the S1 a great utility light.
My main complaints about the light are the unintuitive battery orientation and the lack of low voltage indication. The tight regulation of the light at 50% and immediate power-off after sixty minutes on high mode might end up being an unfortunate surprise during real-world use.
Listed below are my pros and cons for the S1. Some of these might not apply to you, and some might just be my personal nitpicks, but I've tried to list things that I feel most people would agree on.
Pros
- Great beam profile from the TIR
- Moonlight mode
- Excellent regulation
- Lots of output for a light smaller than a single 18650 cell
- Removable magnet in the tailcap
Cons
- Side switch might not be recessed enough to prevent accidental discharge
- No low voltage indication
- No electronic lockout
- Unintuitive battery orientation
- No GITD o-ring
- No spare o-rings included
- If those rings holding the light to the packaging insert were supposed to be the spare o-rings, more people will probably make the same mistake I did and snap them in order to get the light out
The S1 was provided by GoingGear.com for review, on behalf of Olight.