• You must be a Supporting Member to participate in the Candle Power Forums Marketplace.

    You can become a Supporting Member.

Mokume Gane Light #2 Build Pics

PhotonFanatic

Flashlight Enthusiast
Joined
Dec 17, 2003
Messages
2,338
Location
western Massachusetts
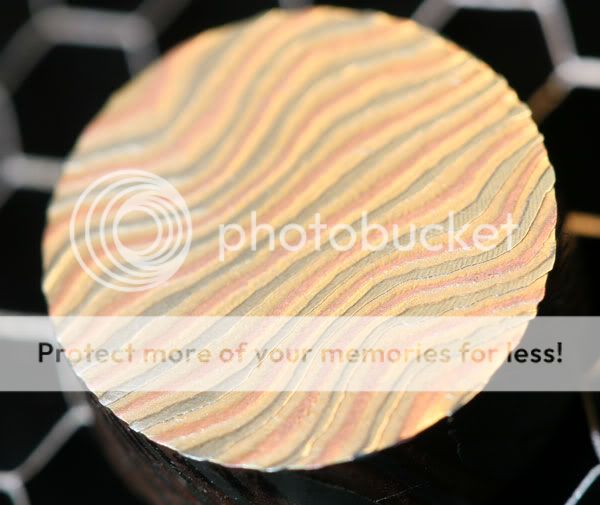
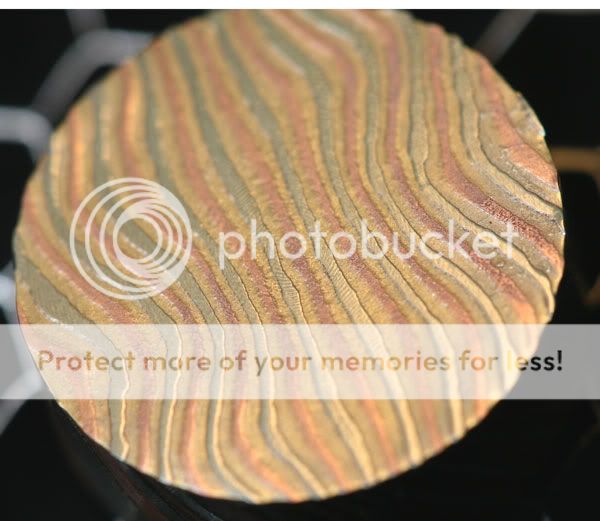
Trying another light from Mokume Gane, a little bigger than the Kuukuu Mokume Killer; this light will have a 10440 Li-Ion battery, mini FluPIC driver with three levels of brightness, a Seoul P4, McR-13 reflector, mineral glass lens, O-rings, and split ring attachment point. The Molume itself is a three-color twisted bar, made from copper, brass, and nickel silver.

Here are some pics along the way:

Mokume3-head-2.jpg


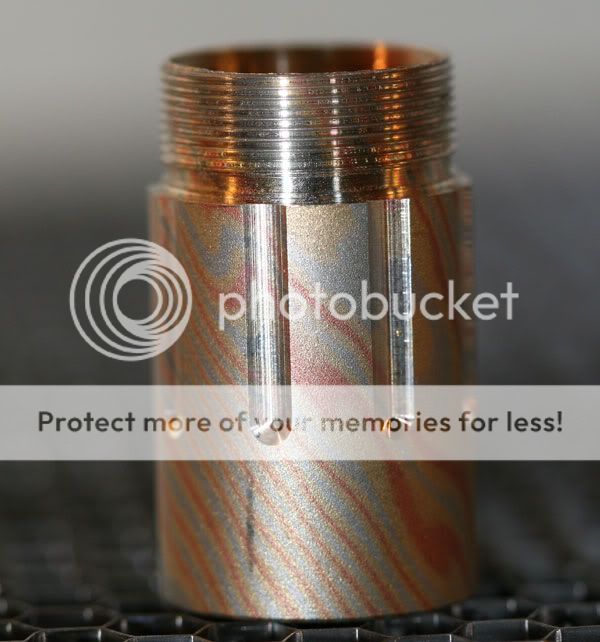
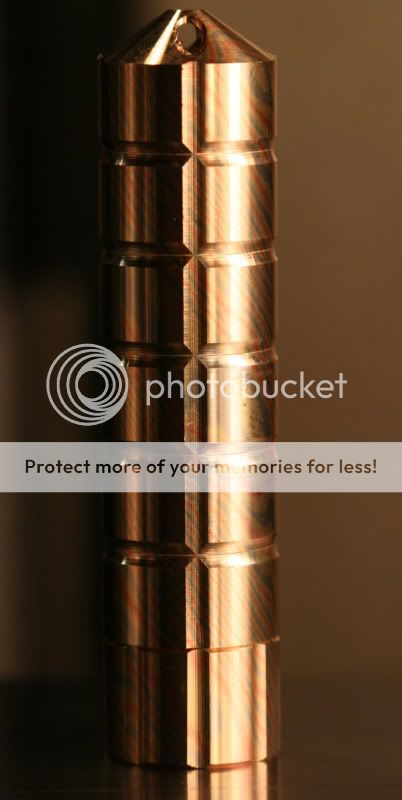
Head with external threads, O-ring groove and milled slots for grip when turning the head.

Mokume3-threads-1.jpg


Showing the internal threads to hold the Light Engine; there isn't a lot of metal between those two sets of threads! :devil:

Mokume3-mated-C_U.jpg


Testing the mating of the head with the battery tube. The threads were lapped with diamond paste to smooth out the normally rough threads that Mokume produces--due to the difference in hardness among the three metals.

M3-BT-slant-2.jpg


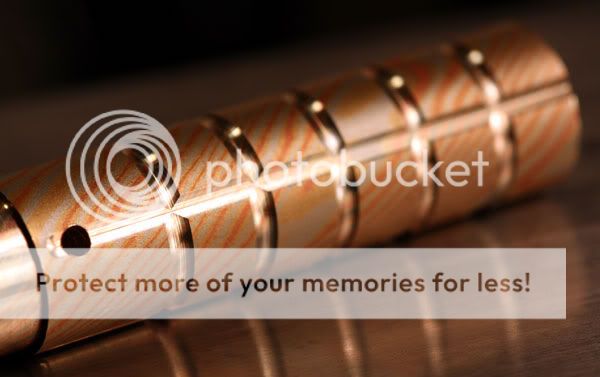
The battery tube has had its vertical and horizontal grooves milled into it. At the far left you can see the hole drilled for the split ring. The battery tube was then turned around and the finishing operation was milled to complete the bevel leading to the split ring.

M-3-SplitRing-2.jpg


Close-up of the split ring/bevel--note that the hole has not been deburred. ;)

M3-HD-1.jpg


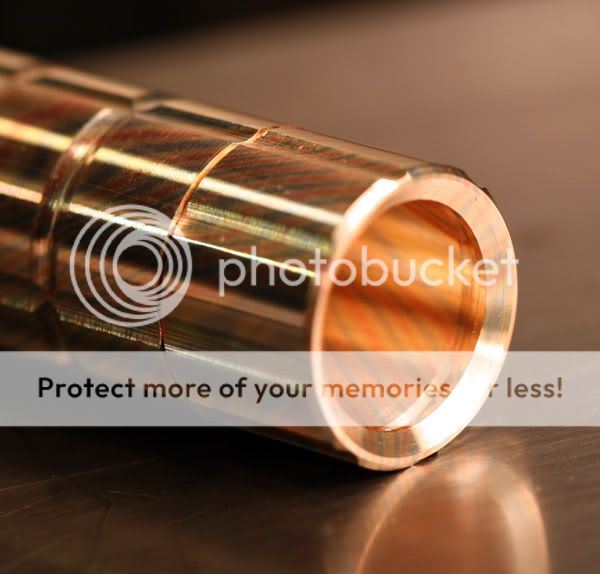
Next the head was completed by boring out the light exit hole, beveling the front of the head, and putting the 45-degree chamfer to the outside diameter.

M3-HDBT-V.jpg


This is the almost completed battery tube/head combo--just needs a little bevel where battery tube joins the head. Then it is on to the light engine machining and finally the finishing of the surface. While I don't plan to etch this light, I will be putting some sort of patina on it.
 

EricMack

Flashlight Enthusiast
Joined
Jan 13, 2004
Messages
1,128
That's totally awesome, Fred!! :bow::bow::bow:

You know my address.... :D:takeit:
 

PhotonFanatic

Flashlight Enthusiast
Joined
Dec 17, 2003
Messages
2,338
Location
western Massachusetts
The answer is, yes, Mokume Gane can be made from many metals, but the supplier only does one combo and that is copper, brass and nickel silver.

I would love to find other Mokume makers capable of making round stock, but they seem scarcer than hen's teeth.
 

gollum

Enlightened
Joined
Mar 17, 2008
Messages
994
Location
Brisbane
using this type of mokume I found the most pleasing finish was a med/heavy etch with no patina,I do like the natural finish best and the texture is what tells your hand that it is something special
I haven't seen round stock before though
did you get enough to make some for us all?:candle:
 

PhotonFanatic

Flashlight Enthusiast
Joined
Dec 17, 2003
Messages
2,338
Location
western Massachusetts
I think gollum is right--Mokume does look a lot more interesting, and feels better in the hand, when it is etched. My previous attempts to etch Mokume left me slightly disappointed, as I really like something to be sparkling on my lights. :devil:

So I thought I'd try etching with sulphuric acid to see how that worked. Didn't do a darned thing to it! That surprised me to no end. Perhaps if I had heated the solution.

So on to the second choice--Ferric Chloride--which is what I used on the Kuukuu Mokume Killer. Only this time, I changed the parameters--I used a very dilute solution and left it in for quite a while. Then I neutralized the etchant and proceeded to lightly sand the piece. Since the nickel silver is the most resistant to the etchant, it is the high relief now and when sanded, it does shine nicely. :D

But I still wasn't happy with the surface left by the etchant on the brass and copper--kind of pitted and rough--so I buffed it up a bit, which helped smooth and polish every metal.

I have a vibratory tumbler that may do the final finishing just fine on this light.

Some pics:

Etched-1.jpg


Etched-2.jpg


This piece is about 1/2" in diameter, just to give you a sense of scale. Now you can still clearly see the three metals and their distinctive colors, brass, copper and nickel silver. The lighting I used here doesn't really convey the shininess of the nickel silver, it looks better than the photos show.
 

jch79

**Do Not Feed The Vegan**,
Joined
May 2, 2006
Messages
3,661
Location
On the asphalt.
Wow, it looks like a topographic map. :cool:

I love the detail of Mokume - it looks better the closer up you get to it. The two colors in the Kuukuu are awesome - I can't imagine what these three look like in person.

And regarding allergies to certain metals in Mokume Gane, as long as they don't mix in mango's, I'm all good. :nana:

:thumbsup: john
 

gollum

Enlightened
Joined
Mar 17, 2008
Messages
994
Location
Brisbane
Hi Fred,
mate you did a great job it looks fantastic.
glad to see you did the right thing :twothumbs:twothumbs


that is exactly what I would have suggested... a dilute soln. is best as it eats the most reactive metal deepest without attacking the most resistant metal as much, this gives a deeper etch with less chance of over etching ,which mostly results in deep pitting.
usually a small bubble forms in the process and accelerates the etching due to oxygen (oxidisation naughty/bad :devil:)
I always check for bubbles and give the work a tap to shake off the bubbles...
the correct method is to remove it clean and neutralise (soapy water) and give a light sand (1000 grit or higher) then de-grease with isopropyl(metho works too) and re-etch if needed.

I don't know about a vibratory tumbler but a sand & polish is all I have done with nice results....final finish with 2500 grit to give a hand rubbed look and stop fingerprints and light scratches.
It seems a bit wrong but I heat the work as hot as I can hold using firm passes on the polishing mop this does 2 things ...polishes into the deep valleys and the heat expands the layers just a tad to accentuate the texture...
hope I'm not waffling here but if you get my drift try it on a scrap:)faint:) piece... if you do lots of lighter passes with the mop it tends to load up the valleys and clog up and you dont end up polishing the deep areas...
it will also encourage that yuckky pitting effect you get when something is over polished...

sorry if I'm going on about it too much...
I'm sorta sharing my experiences and maybe tips etc...you know I don't want you to stuff up MY light :poke::grin2::grin2::poke::crackup::crackup::crackup:
 

dom

Enlightened
Joined
Dec 22, 2006
Messages
749
Location
Australia Geelong
That looks fantastic Fred.
The little light would look great etched as well -though would be a scary thing to first drop it in that acid.

Cheers
Dom
 
Top