Elektrolumens "Moat-Sink"

uluapoundr

Newly Enlightened
Joined
Apr 7, 2008
Messages
153
Location
Hilo, Hawaii
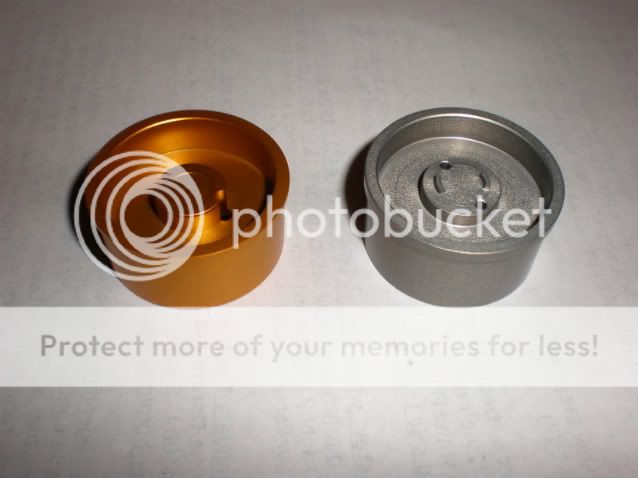
Got my order of Elektrolumens "Moat-Sink" heat sinks. These are hefty heatsinks for P7 D size Mag mods. Note the longer length and solid bottom for better heat transfer. It seems like a tight fit so either the body needs a little reaming, or the heatsink pressed in. It's clear anodized for conductivity isolation.

Note the height difference compared to H22A P4 heatsink.
P5210239.jpg


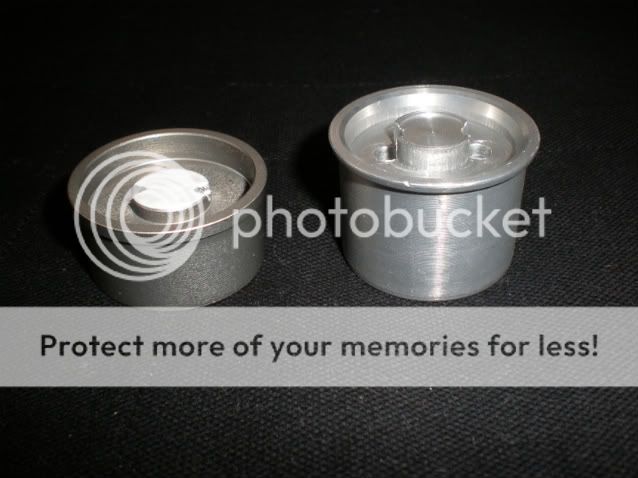
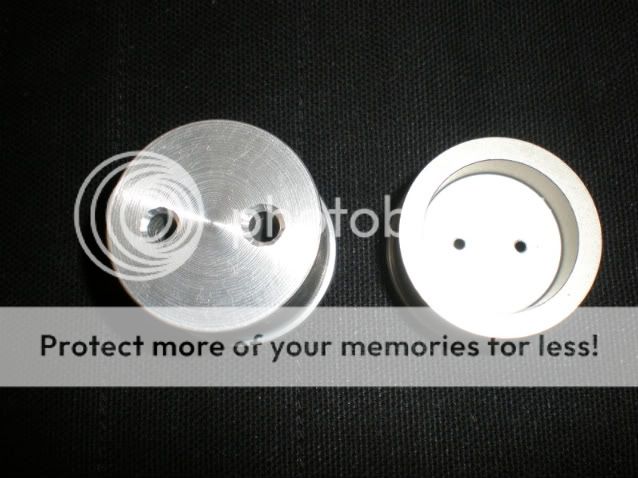
Solid bottom compared to H22A hollowed out bottom.
P5210242.jpg


These heatsink were a limited sale. If Wayne wasn't so busy building lights, perhaps he'd make more for sale. Thanks Wayne, the heatsinks look great!
 

uluapoundr

Newly Enlightened
Joined
Apr 7, 2008
Messages
153
Location
Hilo, Hawaii
That's a heatsink now, no doubts about that. I wonder how it compares to LITEmania's P7 heatsinks?

Here's the Litemania heatsink from Fenix next to H22A P4 heatsink. Same height, same hollowed out bottom. Litemania seems to slide right into the D cell body, whereas the H22A and Moat-sink are slightly larger, therefore some material may need to be removed from inside the tube.

PairHeatsinks.jpg
 

darkzero

Flashaholic* ,
Joined
Oct 7, 2003
Messages
4,459
Location
SoCal
It seems like a tight fit so either the body needs a little reaming, or the heatsink pressed in.

The one I worked on appeared to have the heatsink hammered in? :thinking: I could see the pounding marks on both sides & I couldn't remove it out of the tube.
 

ace0001a

Flashlight Enthusiast
Joined
Jun 29, 2006
Messages
1,153
Location
Sactown
I've never had to ream the inside of the Mag tube when using these kinds of heatsinks. I usually use a short cut piece of PVC pipe and a hammer to punch the heatsinks into the body. I prefer the tight fit because I've seen cases how a looser fit O-sink could slowly slide out. Like Elektrolumens does, I just used the method I just mentioned to install my Moatsink. The way to remove these really tight fitted heatsinks is to first desolder the wires from the emitter, loosen and remove the entire Mag switch assembly, take a really long screw driver (or something strong) and punch out the heatsink from inside.
 

uluapoundr

Newly Enlightened
Joined
Apr 7, 2008
Messages
153
Location
Hilo, Hawaii
I initially pounded in the H22A heatsink, but when my switch began giving me flickering problems, I had to remove the heatsink with a lot of prying, didn't try removing the switch first which would of made it much easier. After 3 tries of installing the heatsink, then prying it off, I was getting frustrated and just decided to ream the magbody and use thermal grease to fill the gap. I'll keep an eye out for momement, but I really doubt the heatsink will move as it's in there tight with the thermal grease.

Here's the H22A and Litemania heatsinks in 3D body.
SilverandGold.jpg
 
Last edited:

JamisonM

Enlightened
Joined
Apr 26, 2006
Messages
750
Location
South Carolina
Here's the Litemania heatsink from Fenix next to H22A P4 heatsink. Same height, same hollowed out bottom. Litemania seems to slide right into the D cell body, whereas the H22A and Moat-sink are slightly larger, therefore some material may need to be removed from inside the tube.
I was afraid of that. How well has LITEmainia's P7 heatsink served you?
 

uluapoundr

Newly Enlightened
Joined
Apr 7, 2008
Messages
153
Location
Hilo, Hawaii
I was afraid of that. How well has LITEmainia's P7 heatsink served you?

The Litemania heatsink fits smooth as butter into the body which is nice for installation and any future fixes or changes. I haven't run the lights too long, so not sure whether heat will cause the P7 to dim. Elektrolumens reports that with his moat-sink, there appears to be less dimming, most likely due to better heatsinking.

I'm excited to do my first mod with the moat-sink. I think I'll use it on a light I plan to use for extended periods due to better heatsinking. With H22A P7 heatsinks being released this weekend, should be interesting how those compare to the moat-sink. Nice to keep the $$ local. Elektro, keep the cool products coming!
 

M@elstrom

Flashlight Enthusiast
Joined
Oct 1, 2007
Messages
2,218
Location
Sunraysia, Australia
H22A stated in his DHS thread that the P7 versions wouldn't have the cavity the previous variants did... I'm not sure if they'll be the same height dimension or not though :thinking:
 

JamisonM

Enlightened
Joined
Apr 26, 2006
Messages
750
Location
South Carolina
The Litemania heatsink fits smooth as butter into the body which is nice for installation and any future fixes or changes. I haven't run the lights too long, so not sure whether heat will cause the P7 to dim. Elektrolumens reports that with his moat-sink, there appears to be less dimming, most likely due to better heatsinking.

I'm excited to do my first mod with the moat-sink. I think I'll use it on a light I plan to use for extended periods due to better heatsinking. With H22A P7 heatsinks being released this weekend, should be interesting how those compare to the moat-sink. Nice to keep the $$ local. Elektro, keep the cool products coming!
How well did the centering ring work on LITEmainia's P7 heatsink? I figure it should cool the P7's pretty decently; though I do like the moat-sink design better. I'm just thinking out loud, but maybe some arctic silver 5 between the thread of the head and battery tube would allow extended runtime?
 

uluapoundr

Newly Enlightened
Joined
Apr 7, 2008
Messages
153
Location
Hilo, Hawaii
How well did the centering ring work on LITEmainia's P7 heatsink? I figure it should cool the P7's pretty decently; though I do like the moat-sink design better. I'm just thinking out loud, but maybe some arctic silver 5 between the thread of the head and battery tube would allow extended runtime?

It seems like both heatsinks I tried work well. The head and body gets warm even without thermal grease on threads. Is Artic Silver 5 good for thermal conductivity on threads? I tried thermal grease, which got messy, then hardened and had to clean the threads. I haven't run the lights long enough to check for dimming.

As for the centering of the emitter, I don't think the ridges help out that much as I am applying Artic Alumina Adhesive to attach the emitter, see the white epoxy gooping off the side. I use the cut refector to center the emitter. Elektro says he mounts the heatsink, then centers the emitter using the reflector. That would be the ideal way to do it for alignment. I just slid the reflector over the emitter and moved it around till it looked centered.

Hint: Use your "good eye" for centering emitter .
 

JamisonM

Enlightened
Joined
Apr 26, 2006
Messages
750
Location
South Carolina
It seems like both heatsinks I tried work well. The head and body gets warm even without thermal grease on threads. Is Artic Silver 5 good for thermal conductivity on threads? I tried thermal grease, which got messy, then hardened and had to clean the threads. I haven't run the lights long enough to check for dimming.

As for the centering of the emitter, I don't think the ridges help out that much as I am applying Artic Alumina Adhesive to attach the emitter, see the white epoxy gooping off the side. I use the cut refector to center the emitter. Elektro says he mounts the heatsink, then centers the emitter using the reflector. That would be the ideal way to do it for alignment. I just slid the reflector over the emitter and moved it around till it looked centered.

Hint: Use your "good eye" for centering emitter .
Yeah, arctic silver 5 is good stuff. I figured it wouldn't hurt to have a decent thermal paste between the head and battery tube instead of having some kind of lubricant or just air. The makers of the stuff say it won't separate, run, migrate or bleed so that's just another reason to give it a try IMO. If it does harden or stiffen up; that's not a problem for me as I that'll make turning the head more difficult and accidental focus changes less likely to happen.
 

acourvil

Enlightened
Joined
Jun 4, 2007
Messages
389
Location
San Jose, CA
It does dry out and harden up over time, but not so much that you couldn't remove and clean it later if you wanted to.
 

uluapoundr

Newly Enlightened
Joined
Apr 7, 2008
Messages
153
Location
Hilo, Hawaii
I used thermal paste from DX on the threads and it dried and hardened so much that the head barely turned. When I finally got it off, I had to use a knife to dig out all the paste that was packed in the threads. I wonder if that thermal cream would work.

I'd like to get all my magheads finned and flutted if possible, but with shipping costs from Hawaii and machinning costs, I'm almost tempted to buy my own lathe.
 

James35

Newly Enlightened
Joined
Apr 29, 2008
Messages
100
I started to install my Moat Sink last night. I must say I'm disappointed in the fit. The diameter is so large that it makes this a permanent mod. If you have to remove the sink for switch repairs, emitter replacement, you are out of luck. Why bother anodizing these if they have to be forced in? I doubt it will still retain electrical isolation since forcing them in (this hard) will most likely scratch portions of anodizing off of the host body and the sink.

I need to be able to remove the heat sink, so I removed the anodizing off of the diameter. Still no help. I spent an hour sanding, still not even close. I'm going to try a power sander next as I don't have access to a lathe to turn these down.
 

Norm

Retired Administrator
Joined
Jun 13, 2006
Messages
9,512
Location
Australia
I started to install my Moat Sink last night. I must say I'm disappointed in the fit. The diameter is so large that it makes this a permanent mod. If you have to remove the sink for switch repairs, emitter replacement, you are out of luck. Why bother anodizing these if they have to be forced in? I doubt it will still retain electrical isolation since forcing them in (this hard) will most likely scratch portions of anodizing off of the host body and the sink.

I need to be able to remove the heat sink, so I removed the anodizing off of the diameter. Still no help. I spent an hour sanding, still not even close. I'm going to try a power sander next as I don't have access to a lathe to turn these down.
The important part of the anodising is under the emitter nothing else matters, Wayne states that this is a permanent mod, the switch can always be removed through the tail.
Norm
 

darkzero

Flashaholic* ,
Joined
Oct 7, 2003
Messages
4,459
Location
SoCal
I started to install my Moat Sink last night. I must say I'm disappointed in the fit. The diameter is so large that it makes this a permanent mod. If you have to remove the sink for switch repairs, emitter replacement, you are out of luck. Why bother anodizing these if they have to be forced in? I doubt it will still retain electrical isolation since forcing them in (this hard) will most likely scratch portions of anodizing off of the host body and the sink.

I need to be able to remove the heat sink, so I removed the anodizing off of the diameter. Still no help. I spent an hour sanding, still not even close. I'm going to try a power sander next as I don't have access to a lathe to turn these down.

I could relate. I was sent a EL P7 Mag to look at that stopped working. One of the leads was disconnected from the switch. Because the heatsink was pressed in & I wasn't sure how much force it would take to pound it out since it look like it had marks from pounding it in, luckily the switch comes out the rear.

I just attached new leads to the switch & made them longer than the entire Mag body, fed the wires through the heatsink's holes & pulled the switch back into place.

Had it been an old style Mag the repair wouldn't have been possible.
 

James35

Newly Enlightened
Joined
Apr 29, 2008
Messages
100
I should also note that I am happy with the sheer mass of the heatsink and also the price.

Here was the process I did. I removed the anodizing, this was not enough. I hand sanded, not enough. Power sanded, still not enough. I then put it in a vise and used a metal file, went all the way around it, and now we have success.
 
Top