TorchBoy
Flashlight Enthusiast
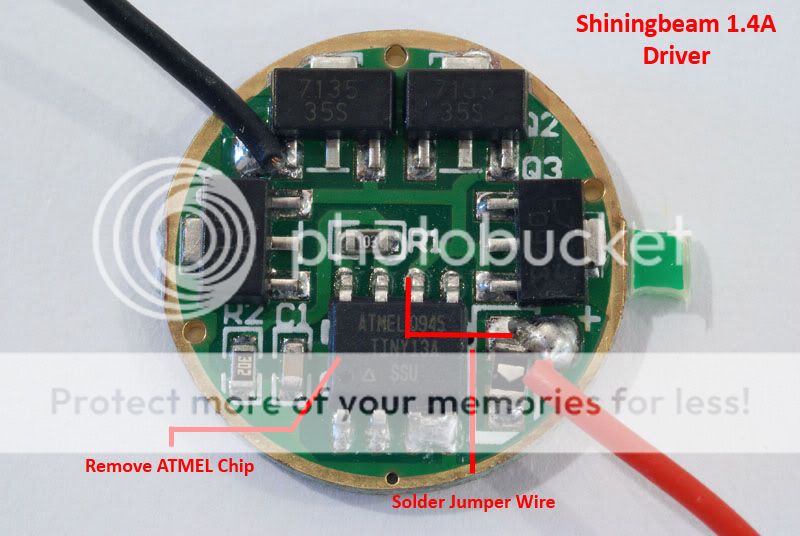
You'll find they're surface mount diodes, not resistors. All those little packages look the same, but in this case the arrowhead on them shows which way around the diode works.One type has 2 diodes, another type has only 1 diode and the last type has surface mount resistors. The boards with the surface mount resistors are the newest boards that I've purchased, so that's probably what they all come with now.
There are different models of AMC7135 chip, with outputs that vary from ~300 mA to ~380 mA. It may be that the bottom number has something to do with that. I don't know.
Thanks for the extra pics and explanations.
Last edited:
") As far as heat goes the thermal protection will likely cut in well under 6.6 V.
As far as heat goes the thermal protection will likely cut in well under 6.6 V.