
Just put this together tonight, my first "awesome" flashlight.
What went into it:
Fivemega 1.25D Dualbored mag body with charger port
SST-90 Glued into a britelumens Mag D heatsink.
Taskled H6Flex driver on the back of the heatsink
Carclo 10391 plain tight 26.5mm TIR optic
Britelumens custom MOP reflector bored to 23.5mm, with the holder for the above optic glued into the opening.
Glass lens from britelumens
2x Ultrafire 2500mAh 18650 unprotected Li-Ion batteries in a pack with a batteryspace protection PCB
Novak racing silicone wire
"Handmade electronics" Teflon wire
Deans micro connectors thoughout, some modified for right angle instead of the wires straight in.
Pics:
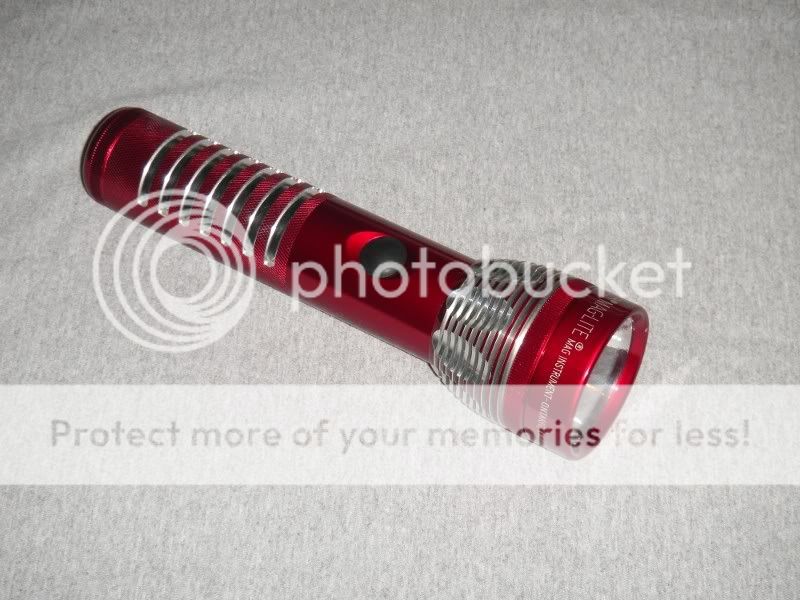
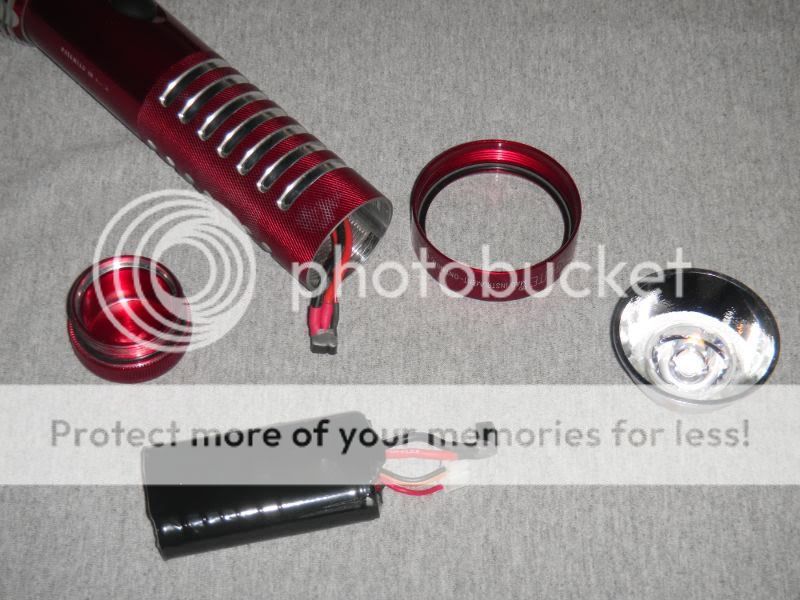
The whole thing, nice and small compared to my usual 3D, and light too
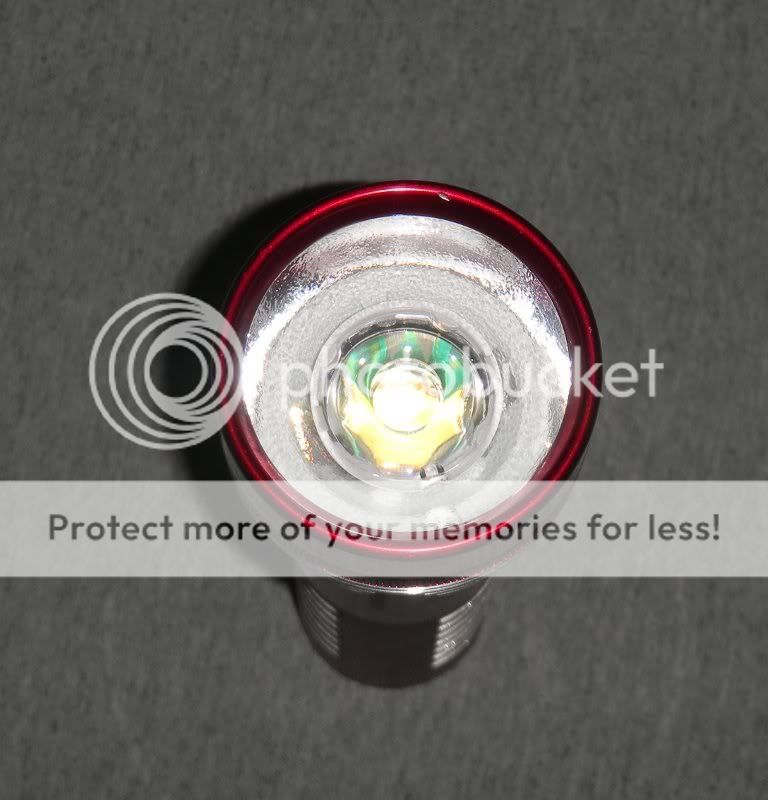
Business end, TIR optic with the reflector holding it in place.
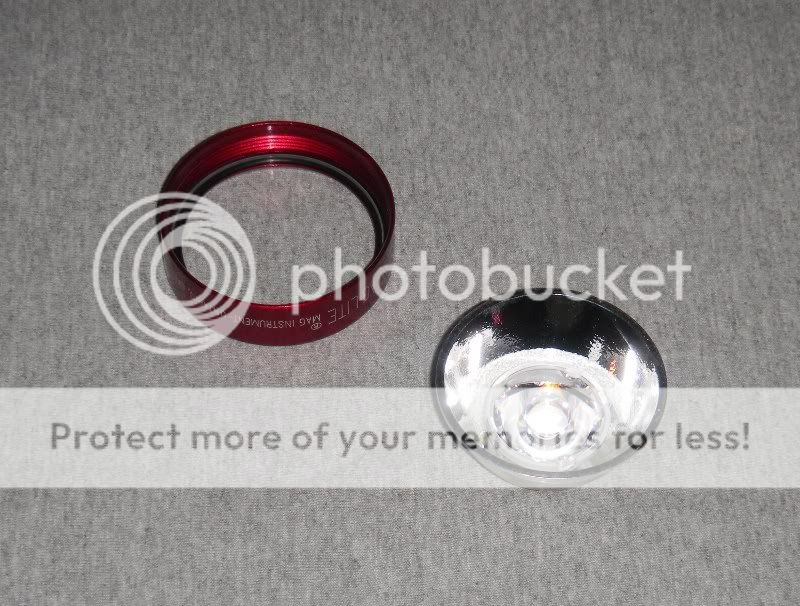
Reflector/TIR combo. The reflector doesnt do much optically, but it does hold the TIR optic holder. (Yes a holder for the holder) That way I can pull out optics just by taking the bezel off, as opposed to gluing down the holder to the heatsink. The focus is adjustable, but doing so is pretty pointless, just makes the beam ugly. At the moment its just down past a "perfect" focus all the way down against the heatsink, and it smooths out the grid on the surface of the SST-90 which is visible.
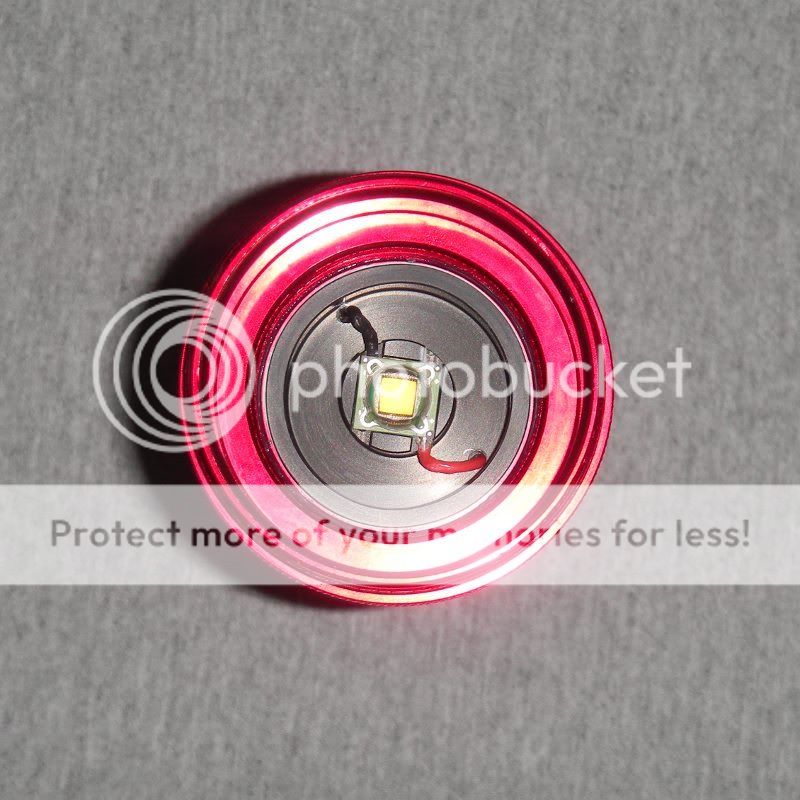
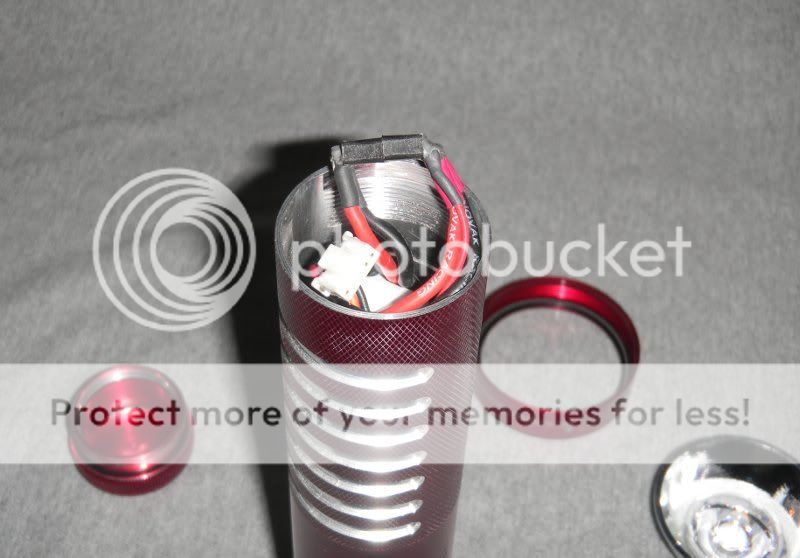
The emitter on the heatsink, Since the H6 flex has the pads for the wires are on the edge of the PCB, I drilled some holes though the heatsink in the spot needed. Another note, the holder for the Carclo optc fits perfectly on the britelumens heatsink with the LED mounted. If you wanted to, you could just epoxy it down on the heatsink and be done with it.
Batterypack, black connector is the deans micro, white is the revolectrix balance lead
The battery in the tail end, seated all the way. No spring needed, so the connector/wiring hides in the tail cap.
(crappy)Beamshot left hand, 3D Mag light with Mag LED drop in. Right, SST-90 mag on high, (6600mA)
I'd say the beamshot is pretty accurate, the hot spot of the mg is about the same as the hot spot of this. Very slight hot central spot in the beam not noticeable outside. The spill on the mag light is completely washed out in this shot. Also a bit of dim spill not visible in this shot too. Camera says F3.9 1/34 sec exposure

Whats left to do:
Gonna add some Green and/or Blue glow in the dark powder between the optic holder and the reflector.
Add some foam in the tailcap area to keep the battery solidly in place and keep stuff from shaking around.
Some duracoat, or molyresin to paint the whole thing possibly, still on the fence for that.
And a some mini reviews of the different components.
Fivemega 1.25D body:
Excelent work, nice fit and finish, the charging jack setup was well put together. Some burrs on the finning on the head, nothing that a single pass with an x-acto knife couldnt fix. If you wanted to do something that used the 2 18650's in parallel, the included battery holder setup would work great.
Tasklet H6Flex
Fantastic driver, bit big, just barely fitting inside the mag body, but I'm pretty sure it was a squeeze to get it to fit but that was George's goal. Lots and lots of options and features, low voltage cutoff, temperature foldback, high effiency, looks well built, great product
Britelumens heatsink
Excelent fit, slips right in with the set screw in the mag loosened, but with it tight, the flexing of the body grabs the heatsink solidly in place. The SST-90 drops right in place, snug fit but not so snug that its hard to put in place. A flat back would be nice for this, but the cupped back like there is now would be good for potting a smaller driver in place.
Carclo optic:
Nice beam, not very tight for being "plain tight", but its definitely great for a general use around the house and some outdoors stuff in close if its not too far. Wear gloves handling it to keep it from getting finger oils on it, no where to hold the optic at since the back is the surface the light refracts off of. Good alternative to reflectors if youre not looking for something tight and throwy.
Handmade electronics teflon wire
Very stiff, presumably from low strand count wire, strips fine with thermal strippers. I would buy something else when I need more.
Novak racing silicone wire
Flexible as all heck, high strand count, very temperature resistant, even with my thermal strippers orange hot, it takes a bit of twisting and pulling for it to get though the silicone, I would buy more
Deans micro connectors (3 pin version not the 2 pin!)
Very nice compact connectors. High contact pressure, between the connectors but not difficult to mate and unmate once the wire is soldered on. For my right angle ones, I bent the back of the pins 90 degrees, solderd on the wire, shrunk the heatshrink, and put some kapton tape on to keep stuff clean, and added some JB weld to the exposed pin and reinforce it some. Definitely buying more
Hope you all enjoy.
What went into it:
Fivemega 1.25D Dualbored mag body with charger port
SST-90 Glued into a britelumens Mag D heatsink.
Taskled H6Flex driver on the back of the heatsink
Carclo 10391 plain tight 26.5mm TIR optic
Britelumens custom MOP reflector bored to 23.5mm, with the holder for the above optic glued into the opening.
Glass lens from britelumens
2x Ultrafire 2500mAh 18650 unprotected Li-Ion batteries in a pack with a batteryspace protection PCB
Novak racing silicone wire
"Handmade electronics" Teflon wire
Deans micro connectors thoughout, some modified for right angle instead of the wires straight in.
Pics:
The whole thing, nice and small compared to my usual 3D, and light too
Business end, TIR optic with the reflector holding it in place.
Reflector/TIR combo. The reflector doesnt do much optically, but it does hold the TIR optic holder. (Yes a holder for the holder) That way I can pull out optics just by taking the bezel off, as opposed to gluing down the holder to the heatsink. The focus is adjustable, but doing so is pretty pointless, just makes the beam ugly. At the moment its just down past a "perfect" focus all the way down against the heatsink, and it smooths out the grid on the surface of the SST-90 which is visible.
The emitter on the heatsink, Since the H6 flex has the pads for the wires are on the edge of the PCB, I drilled some holes though the heatsink in the spot needed. Another note, the holder for the Carclo optc fits perfectly on the britelumens heatsink with the LED mounted. If you wanted to, you could just epoxy it down on the heatsink and be done with it.
Batterypack, black connector is the deans micro, white is the revolectrix balance lead
The battery in the tail end, seated all the way. No spring needed, so the connector/wiring hides in the tail cap.
(crappy)Beamshot left hand, 3D Mag light with Mag LED drop in. Right, SST-90 mag on high, (6600mA)
I'd say the beamshot is pretty accurate, the hot spot of the mg is about the same as the hot spot of this. Very slight hot central spot in the beam not noticeable outside. The spill on the mag light is completely washed out in this shot. Also a bit of dim spill not visible in this shot too. Camera says F3.9 1/34 sec exposure
Whats left to do:
Gonna add some Green and/or Blue glow in the dark powder between the optic holder and the reflector.
Add some foam in the tailcap area to keep the battery solidly in place and keep stuff from shaking around.
Some duracoat, or molyresin to paint the whole thing possibly, still on the fence for that.
And a some mini reviews of the different components.
Fivemega 1.25D body:
Excelent work, nice fit and finish, the charging jack setup was well put together. Some burrs on the finning on the head, nothing that a single pass with an x-acto knife couldnt fix. If you wanted to do something that used the 2 18650's in parallel, the included battery holder setup would work great.
Tasklet H6Flex
Fantastic driver, bit big, just barely fitting inside the mag body, but I'm pretty sure it was a squeeze to get it to fit but that was George's goal. Lots and lots of options and features, low voltage cutoff, temperature foldback, high effiency, looks well built, great product
Britelumens heatsink
Excelent fit, slips right in with the set screw in the mag loosened, but with it tight, the flexing of the body grabs the heatsink solidly in place. The SST-90 drops right in place, snug fit but not so snug that its hard to put in place. A flat back would be nice for this, but the cupped back like there is now would be good for potting a smaller driver in place.
Carclo optic:
Nice beam, not very tight for being "plain tight", but its definitely great for a general use around the house and some outdoors stuff in close if its not too far. Wear gloves handling it to keep it from getting finger oils on it, no where to hold the optic at since the back is the surface the light refracts off of. Good alternative to reflectors if youre not looking for something tight and throwy.
Handmade electronics teflon wire
Very stiff, presumably from low strand count wire, strips fine with thermal strippers. I would buy something else when I need more.
Novak racing silicone wire
Flexible as all heck, high strand count, very temperature resistant, even with my thermal strippers orange hot, it takes a bit of twisting and pulling for it to get though the silicone, I would buy more
Deans micro connectors (3 pin version not the 2 pin!)
Very nice compact connectors. High contact pressure, between the connectors but not difficult to mate and unmate once the wire is soldered on. For my right angle ones, I bent the back of the pins 90 degrees, solderd on the wire, shrunk the heatshrink, and put some kapton tape on to keep stuff clean, and added some JB weld to the exposed pin and reinforce it some. Definitely buying more
Hope you all enjoy.
Last edited:
")