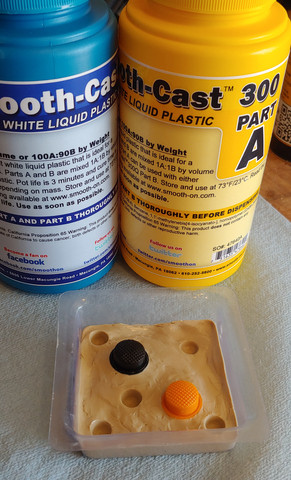
Okay, my first attempt at making a mold for silicone boots was educational, but not terribly productive. Thankfully, the 2-part resin stuff was only about $10, so not a big deal. I went to a custom mold supply shop not too far from me, and after $80 worth of product, I'm ready to go. Actually I'll need to spend about another $18 for some silicone colorant, but the resultant supplies would probably last for about a hundred tailcap boots. Or plenty for some other ideas I'd like to work with.
So on to part deux. Proper tools in hand, we'll begin. Working with pro materials kinda makes things fun again!
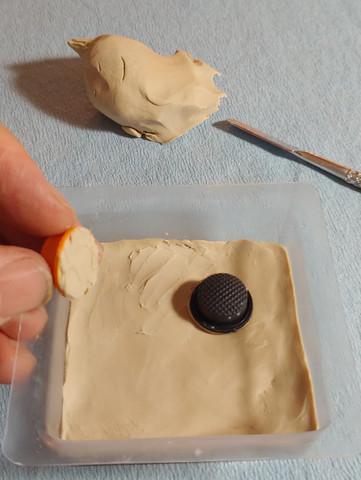
With my square plastic mold, I put a layer of clay down, including inside the tailcaps for support.
Note to self, next time get straight-sided containers...
After spraying on two layers of release agent, I'm ready to pour.
I tried to pay close attention to the transition of the boot flange to where the second pour would happen. I also used a marker cap to poke registration holes, thanks to a suggestion from the mold making people.
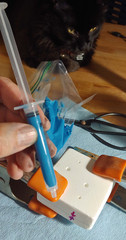
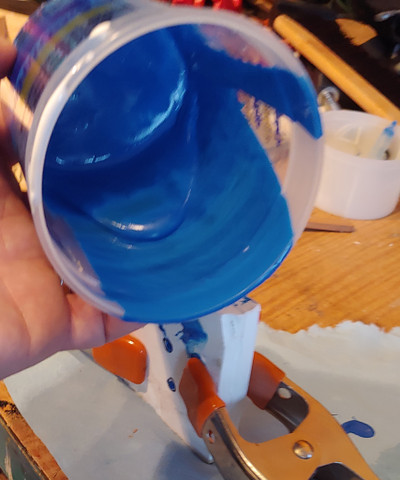
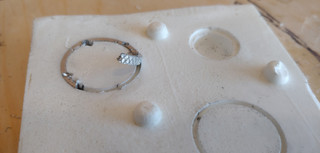
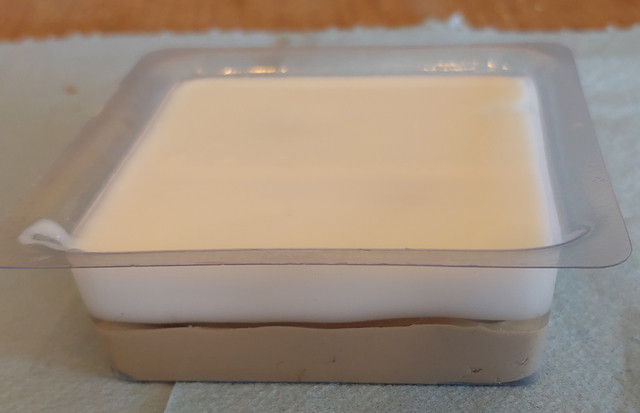
Okay, the pour is a bit hectic. After you pour the part B into part A, you have two minutes of 'pot time' before it starts to set up. That includes about 30 seconds of mixing. Once poured, I had maybe 15 seconds to move some bubbles away from the boots. Note that they suggested I pour in the lowest part of the mold, to allow the material to find its own level, and to greatly reduce bubble formation. It started to get stiff right about the two minute mark, and seconds after that it transformed from clear to white, very interesting to watch. Here you can see the barrier still kinda clear between the plastic and the clay.
After that, I had a nice hard plastic half-of-a-mold. I broke it out of the plastic container, and with a layer of clay to hold it in place, I set up for the second half of the mold. Here's where A straight sided container would have been helpful. I thought I'd sealed it nicely with clay, but once I poured a good deal leaked out due to the taper of the sides. I had to quickly make a second batch of resin and repour on top, but thankfully it solidified together as one unified section. I did make a video here of the first pour, to try to catch the transition from clear to white. It's rather shakey, as I was realizing that it would not cover the posts, and you can see just how much I spilled. I can post it if you're really interested, but it's certainly not my best camera work.
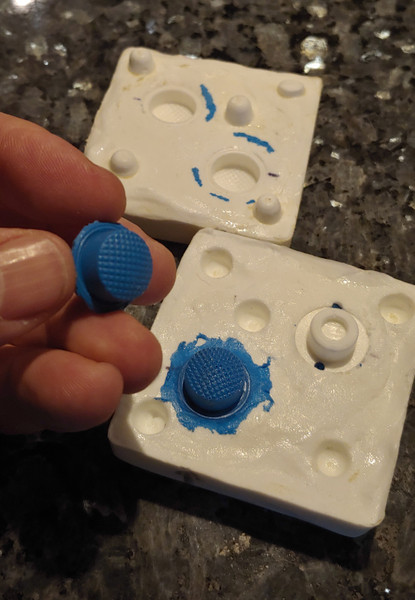
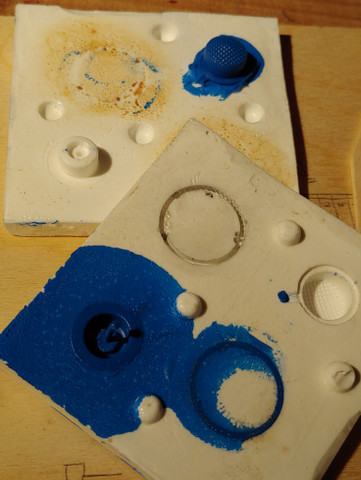
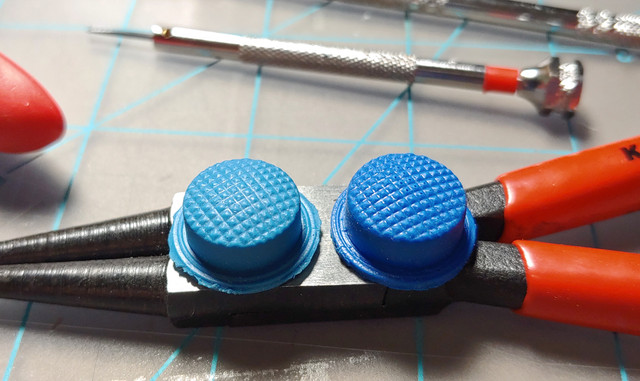
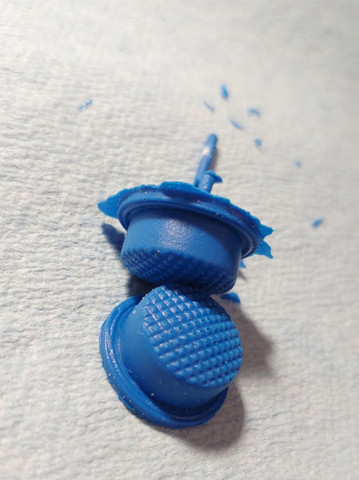
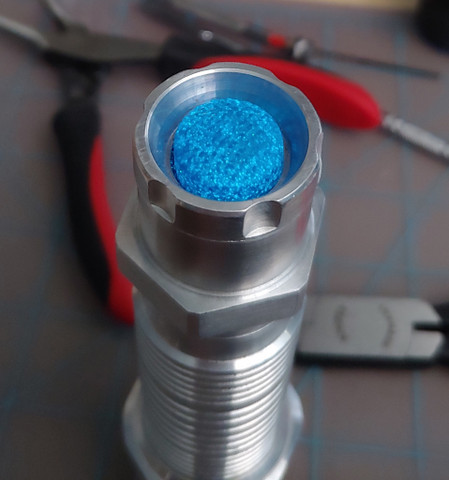
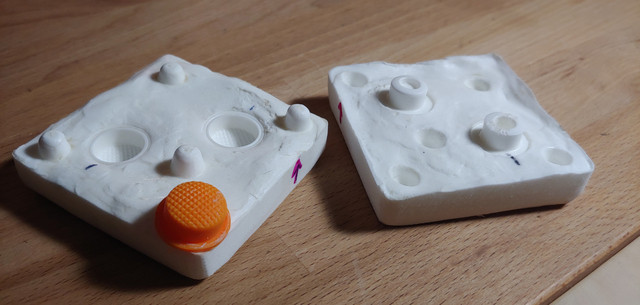
Final outcome, after a good deal of cleanup with razor knives and files? A pretty decent mold. mold. It did get a touch rough in one area, but it's on the inside of the boot, you'd probably never see it. From here, I need to drill the sprue channels, and wait for my silicone colorant to arrive. I'm making blue, because it's my favorite color, and I've even got some blue glow powder just for kicks. I should mention that the particular 2-part silicone I bought was a hardness of Shore 50, which felt like the best stiffness for such thin-walled things such as these. The only small problem is that the color is kinda a baby blue. I have a sample kit of colorant arriving, so I'll have more leeway to make a hue I like. Plus, it says it has a 45 minute pot time, so I have plenty of time to mix in glow powder, and then let it sit for the bubbles to disipate.
All of this work is still experimental. Ideally, I want to make my own design of boot via 3D print, and make a better mold. Next step is to mix up some silicone and do a test mold. This is where good quality release agent will come into play. That tiny bottle, maybe 2 oz, was $10 - but it does what it's supposed to.
So on to part deux. Proper tools in hand, we'll begin. Working with pro materials kinda makes things fun again!
With my square plastic mold, I put a layer of clay down, including inside the tailcaps for support.
Note to self, next time get straight-sided containers...
After spraying on two layers of release agent, I'm ready to pour.
I tried to pay close attention to the transition of the boot flange to where the second pour would happen. I also used a marker cap to poke registration holes, thanks to a suggestion from the mold making people.
Okay, the pour is a bit hectic. After you pour the part B into part A, you have two minutes of 'pot time' before it starts to set up. That includes about 30 seconds of mixing. Once poured, I had maybe 15 seconds to move some bubbles away from the boots. Note that they suggested I pour in the lowest part of the mold, to allow the material to find its own level, and to greatly reduce bubble formation. It started to get stiff right about the two minute mark, and seconds after that it transformed from clear to white, very interesting to watch. Here you can see the barrier still kinda clear between the plastic and the clay.
After that, I had a nice hard plastic half-of-a-mold. I broke it out of the plastic container, and with a layer of clay to hold it in place, I set up for the second half of the mold. Here's where A straight sided container would have been helpful. I thought I'd sealed it nicely with clay, but once I poured a good deal leaked out due to the taper of the sides. I had to quickly make a second batch of resin and repour on top, but thankfully it solidified together as one unified section. I did make a video here of the first pour, to try to catch the transition from clear to white. It's rather shakey, as I was realizing that it would not cover the posts, and you can see just how much I spilled. I can post it if you're really interested, but it's certainly not my best camera work.
Final outcome, after a good deal of cleanup with razor knives and files? A pretty decent mold. mold. It did get a touch rough in one area, but it's on the inside of the boot, you'd probably never see it. From here, I need to drill the sprue channels, and wait for my silicone colorant to arrive. I'm making blue, because it's my favorite color, and I've even got some blue glow powder just for kicks. I should mention that the particular 2-part silicone I bought was a hardness of Shore 50, which felt like the best stiffness for such thin-walled things such as these. The only small problem is that the color is kinda a baby blue. I have a sample kit of colorant arriving, so I'll have more leeway to make a hue I like. Plus, it says it has a 45 minute pot time, so I have plenty of time to mix in glow powder, and then let it sit for the bubbles to disipate.
All of this work is still experimental. Ideally, I want to make my own design of boot via 3D print, and make a better mold. Next step is to mix up some silicone and do a test mold. This is where good quality release agent will come into play. That tiny bottle, maybe 2 oz, was $10 - but it does what it's supposed to.