• You must be a Supporting Member to participate in the Candle Power Forums Marketplace.

    You can become a Supporting Member.

A Custom Built Light from A to Z

aljsk8

Enlightened
Joined
Sep 7, 2006
Messages
435
Location
Wigan, UK
Fred

this is outstanding - im right in thinking these are still the aluminum pieces
a lot of trouble to go to just for a prototype! - are you going to sell the aluminum light too?

check out that wall thickness! - now this is when you are allowed to use terms such as... "built like a tank"
just think in stainless steel this thing will outlast all of us!

just out of interest Fred can you weigh these aluminum bits for me?

do i also notice your signature mistake on the battery tube with the dimples?

very impressed

Alex
 

PhotonFanatic

Flashlight Enthusiast
Joined
Dec 17, 2003
Messages
2,338
Location
western Massachusetts
Fred

this is outstanding - im right in thinking these are still the aluminum pieces
a lot of trouble to go to just for a prototype! - are you going to sell the aluminum light too?

check out that wall thickness! - now this is when you are allowed to use terms such as... "built like a tank"
just think in stainless steel this thing will outlast all of us!

just out of interest Fred can you weigh these aluminum bits for me?

do i also notice your signature mistake on the battery tube with the dimples?

very impressed

Alex

Alex,

I've learned my lessons before, i.e., I learn from my mistakes, so I'd rather screw up on AL first, then perhaps I won't make the same mistakes on the SS. As it turns out, I did find a design boo boo--the threaded area at the top of the battery tube, that connects to the copper module needed to be made larger in diameter than the 15.25mm so that the walls of the converter module wouldn't be too thin. Now, I'm planning a 17mm diameter bore at the top of the battery tube for the converter threads.

I suppose if someone wants to buy the AL body and converter module when I am done, then I'd be glad to part with it. Recover some costs, at least.

The two AL pieces weigh 1.1 ounces, as measured on my postal scale--I don't have anything better than that.

Ah, you noticed that extra dimple? I wish I could say that I did it on purpose. :devil: Just another reason for the AL prototype, although to be honest, I already had F'ed up the taper, so I knew that the rest of the design didn't matter that much to me, so I was pushing for time.

Off to do the copper module.
 

jch79

**Do Not Feed The Vegan**,
Joined
May 2, 2006
Messages
3,661
Location
On the asphalt.
Fred -

I love these threads. Your photos are SO great - especially for someone like me, who doesn't know how to machine, but wants to know how it's done, and maybe someday will get into it! :thumbsup:

Thanks a lot,
john
 

aljsk8

Enlightened
Joined
Sep 7, 2006
Messages
435
Location
Wigan, UK
Fred

thanks for the info - as soon as you start ss ill send you another payment :twothumbs

i have a feeling you might be getting my custom again! - ill make a lot simpler light next time - i fancy a workhorse as well as a "show off light"

1 x subC cell simple tube full knurling - lets hope your still around in 6 months

:naughty:
 

PhotonFanatic

Flashlight Enthusiast
Joined
Dec 17, 2003
Messages
2,338
Location
western Massachusetts
Wanted to complete the converter module in copper today, but, alas, my copper bar was only 7/8" in diameter while I needed 1". Hey, no problem--just do it in AL instead. :D

The converter module houses both the driver and the LED and serves as a massive heatsink also. The overall length is 20mm, with 8mm devoted to the treads on each end to connect to the head and the battery tube, while the remaining 4mm are exposed between the two.

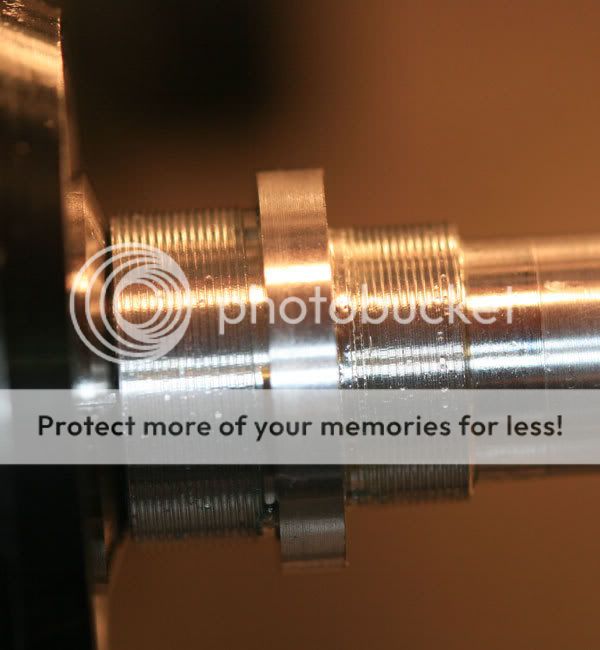
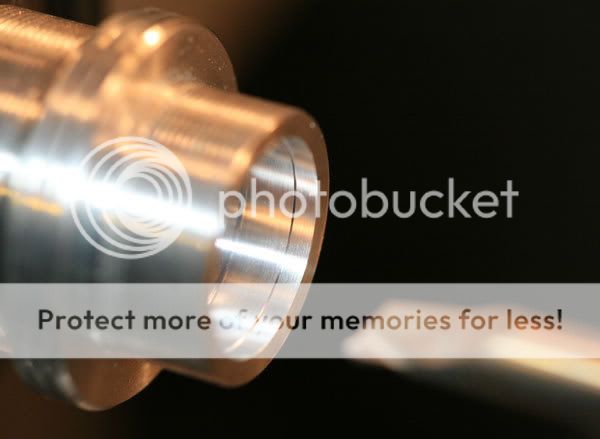
Here's how it looked after I had completed the threads on one end and was about to turn the area to be treaded on the other end:

CMAboutToTurnforBattThreads.jpg


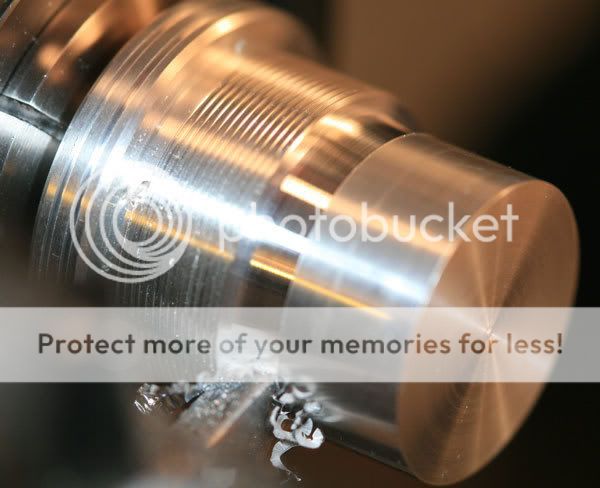
And after threading both ends:

CMThreadedBothEnds.jpg


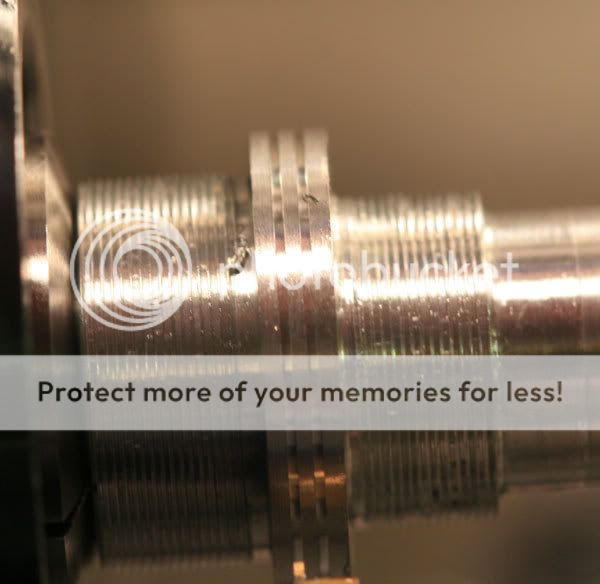
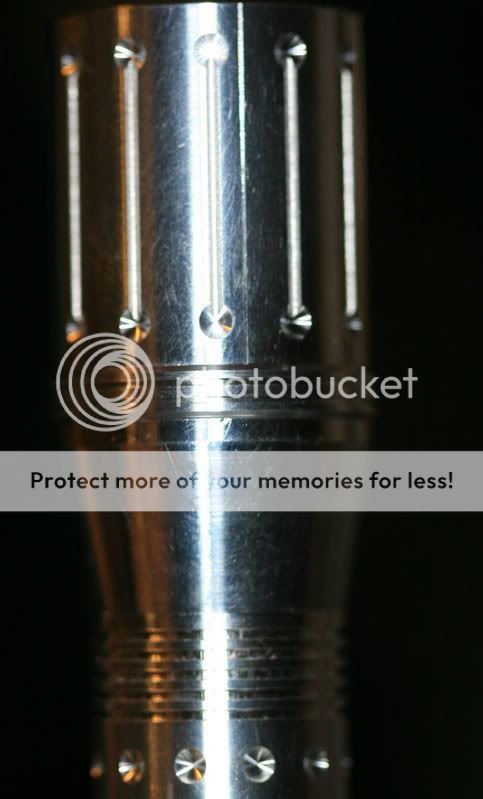
Next to be tackled were the grooves in the external 4mm section--these are quite narrow, only .5mm and 1mm deep:

CMGroovesCut.jpg


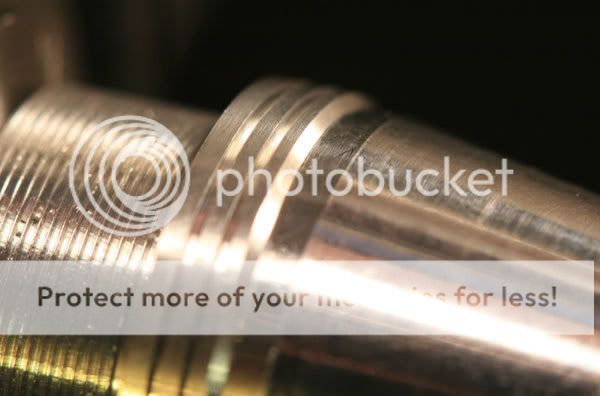
Once those were done, I needed to bevel the edges to match the head and the battery tube. Despite how carefully one might plan, there always seems to be some discrepancy between the size you wanted to turn and the size you actually turned. Normally, these would not be noticable to the eye at all, but with this bevel meeting a flat surface, it was important to get them pretty closely matched:

CMCloseUpBevelToTubeMatch.jpg


Once the bevels were in place and the threading done, then it was time to bore out the space for the driver. The depth of this bore is only 5mm, so I usually don't bother to drill first and then bore, I just use my boring tool to achieve the depth as well as the diameter that I want:

CMBoringOutForConverter.jpg


And this is the final depth, with a diameter of 13.80mm:

CMConvBoreToDepthDone.jpg


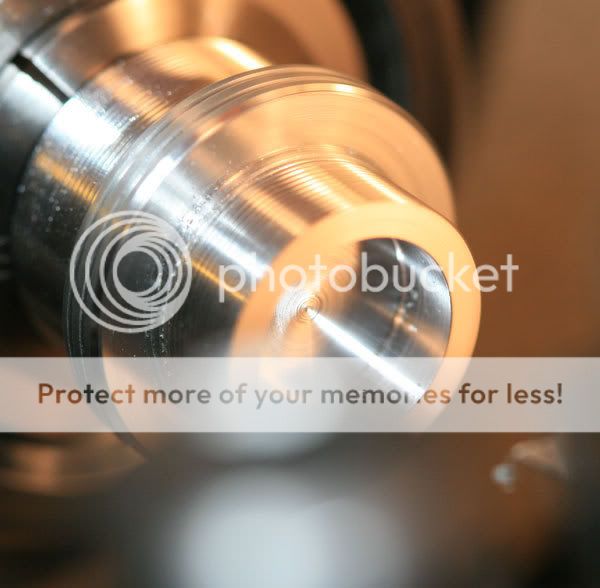
Of course, most standard drivers are now .55", or 14mm, in diameter, so the final bore is to place a lip close to the 14mm diameter and 1.6mm deep, which is the thickness of the standard PCB board that Wayne and Mike Jordan use. Here is the lip, which I make to 13.96mm and then prefer to sand the converter down to fit tightly:

CMLipForConverterDone.jpg


One of the last operations is parting off the second stub:

CMPartingOffOfStub.jpg


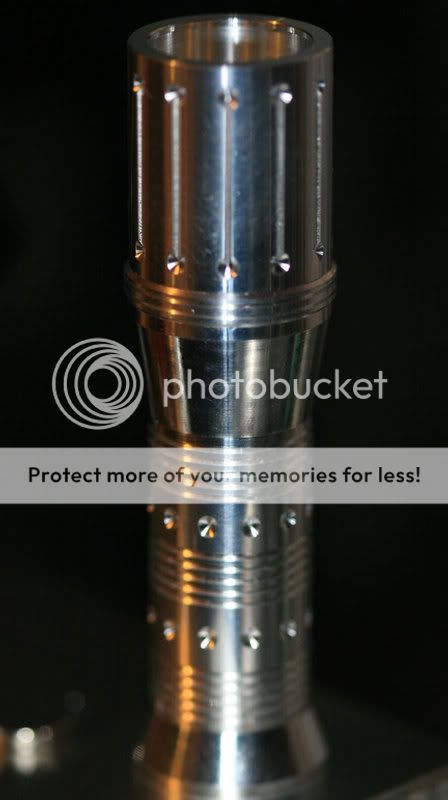
Then that end, where the LED sits, gets faced nice and smooth, and for today, at least, I'm done. Time to assemble everything and take the final pics:

AssembledWithConverter.jpg


And a close-up the converter module.

AssembledWithConverterUpClo.jpg


Man, the camera with flash, is harsh--shows all the flaws. :shakehead :crackup: Should look a bit better when sanded and polished.
 

aljsk8

Enlightened
Joined
Sep 7, 2006
Messages
435
Location
Wigan, UK
Fred

very good work :bow: - you dont waste any time! :twothumbs

i dont mind if you do the finished converter in aluminium
its up to you (i might want future spares)

im happy with the result but i do like the photo of the light before it had the converter in it (shorter and a bit less cluttered)
your free to do it the way we decided - after all i did say i was happy with it - your also free to kill me for what im about to suggest :xyxgun:

if this was indeed a test converter and you are going to do another anyway then this wont hurt too much!:rolleyes:

the 4mm bit with the grooves can go (if you want) - 2 ways i think this can be done (easy and hard)

1)make it 2mm and just do it flush - this would have no effect on any of the internal dims and makes your life easier
2)bore some extra internal grooves make the converter narrower in diameter so the lip sits inside the light

these are just ideas based on the way the light looks to me in the photos - and as i know ive been a royal PITA :banghead:
this is definitely your call - if you like the look of the converter and/or you were not making another - keep it this way

if its no extra hassle to do it one of the other ways ive suggested then do that - others please comment - which way do you guys like it?

just one point - i was expecting o-rings - should i have mensioned that? :thinking:

what size are those threads - they look very fine - it might just be the way it looks in the photos - redesign? :crackup:

a weight for the 3 peices now if you would :D

based on the weight of the 2 peices those will weigh 90grams when its stainless steel so its looking like it will fall in my target weight

wow - im suprised more ppl dont hate me!:grouphug:
 
Last edited:

PhotonFanatic

Flashlight Enthusiast
Joined
Dec 17, 2003
Messages
2,338
Location
western Massachusetts
Alex,

I don't know how nice AL would look against the SS pieces, plus it would oxidize over time. I still think the copper would look nice.

As for the grooves in the converter, it is your light and I can certainly eliminate them. They do help to disquise the seam when the light is off, i.e., slightly open.

The simplest solution, if you don't want the grooves is to make the converter flush with the head--I may just turn down those grooves and post a photo of that, so that you can decide. The width could be taken down to 2mm, instead of 4mm without any problem.

Hiding the converter inside the light would mean a major design change. Otherwise you have the head and battery tube just butting against each other. Would be better if they overlapped instead, if the converter were completely internal. The idea behind the external converter portion is to provide a heat path to the outside of the light, i.e., your hand, to help keep the LED cool, although I have no data to prove that it does that. :D

Yup, there will be O-rings, although I didn't point out where they were going on the converter. Final specs still to be determined on those, but they will be metric O-rings, only 1mm thick. And they do not show when the light is off, either.

Weight is 1.6 ounces now.

The threads are fine--.5mm pitch.
 

aljsk8

Enlightened
Joined
Sep 7, 2006
Messages
435
Location
Wigan, UK
Fred

copper is great but it just means more purchases for you
so your call - id prefer copper but if its alu then ill just polish it

if we do go with copper and we do go flush then it can be less than 2mm a nice subtle ring

i see what your saying about hiding the seam when its off but a lot of clickys even have a seam - its still there and you cant hide anything from a CPF-er!!

i just like the look on the one without the converter
i dont think there will be thermal issues eather way

for me its looking like doing it flush and copper if you can 1 - 2mm
the grooves look good but just not as good as without -

just one point how are we going to stop the wrong bit twisting?
opposite thread directions? - i dont want to use glue

thanks for listening! :whistle:


edit...

ive just done some sums and the alu converter weighs 14.2g in aluminium
it will weigh 47.2g in copper!!! - it might need a bit of extra machining anyway so trimming it down and removing the grooves might be a good idea

ss with alu converter = 105g add another 10g for the other bits 115g
ss with copper = 138g + 10 call it 150g

both good figures but it would be good to get the copper a bit lower!
 
Last edited:

PhotonFanatic

Flashlight Enthusiast
Joined
Dec 17, 2003
Messages
2,338
Location
western Massachusetts
Alex,

As for controlling which thread loosens when twisting the head, I try to control that mainly through the tightness of the threads/O-ring. In other words, the head's threads and O-ring fit are made tighter than the junction between the battery tube and the O-ring there. However, that depends to some extent of luck while doing the threading, i.e., it doesn't take but just a fraction of a mm to loose that tightness by making the thread or O-ring groove just too big. In that case, yes, I would use a thread locker to keep the head/converter assembly working as a unit. It isn't the end of the world, a mild thread locker can still be broken fairly easily if that's what one wants to do.

Actually, in real world use, I find that if you just crank down hard while tightening the head to the converter, that pretty much keeps things intact. When it come times to turn the light on, the threads/O-ring are already disengaged on the battery tube side, so it just takes light pressure to close the gap in order to turn the light on. No need to crank down hard then, so there is very little likelihood of binding then.

As for the weight of the copper converter, I think you've forgotten an e-mail where I suggested that I might drill out portions of the heatsink to reduce the weight a bit.

I will be ordering the copper and will make the converter flush with the head and battery tube, with only 1 to 1.5mm exposed.
 

Hodsta

Flashlight Enthusiast
Joined
Jun 14, 2007
Messages
1,352
There are no threads like a Fred Thread - this is another great development post and look forward to following to a very cool conclusion, no doubt.:clap:
 

aljsk8

Enlightened
Joined
Sep 7, 2006
Messages
435
Location
Wigan, UK
i doubt ill ever sell this light

"one of a kind" has a very nice ring to it :rock:

thanks for the replys fred - its all coming together

Alex
 
Last edited:

Cuso

Flashlight Enthusiast
Joined
May 18, 2006
Messages
1,733
Location
Florida
Well, since this is a custom built light, only one of a kind, you'll have to wait for Alex to put it up for sale. :devil:
Teasers :mecry:. Good luck with the rest of the build:thumbsup:. I love the pictures of the machining process. You dont get to c that very often..
 

luminata

Enlightened
Joined
Jun 6, 2006
Messages
335
More..More....More!!:party:

Are we odd for liking the details? I feel like we are all in the shop right there with Fred during the whole process. This design is pretty cool. If the finished product works out as planned ,thought should be given to a larger run in aluminum they would sell like hot cakes:whistle:
 
Top