Replacement of carbide lamps by LED lamps

uk_caver

Flashlight Enthusiast
Joined
Feb 9, 2007
Messages
1,408
Location
Central UK
I do see that the ideal close-up 'spot' beam is probably something like your 16° beam, since it will light up a reasonably wide area close to the caver, but I guess that does mean that it loses enough performance at long distances that you need an extra tight spot beam.

I find that even with a tight reflectored spot with a very sharp fall-off outside the beam, mixing a dim-to-medium spot with centre-biased flood seems to make the spot beam subjectively rather wider at short-to-medium distances (alternatively, the spot beam 'pulls out' the flood beam and makes it seem throwier even outside the spot).
I think it's down to objects outside the spot beam still being somewhat visible in the flood after the beam has passed over them - as long as they don't fall into relative blackness, they stay much better in the mind's attention.
This seems to work best with a lower power spot than flood beam, since there isn't as great a contrast at the edge of the spot. Too bright a tight spot can actually makes a light less usable close-up.
 
Last edited:

Tobias Bossert

Newly Enlightened
Joined
Oct 7, 2007
Messages
146
Location
Germany, Munich
Hi uk_caver,
there are two beamshots to compare bare XR-E with SSC-P4 and Carclo 10170/10363

x_XR-E.jpg


and

x_P4-10170.jpg


I have many holders and 5 reflectors 10170. 3 reflectors snap in easily having a very good flatness of the beam and being nearely circular. 1 needs little more force to snap in but still has an acceptable beam too. 1 needs strong force and shows a beam with some (weak) artefacts and a shape somewhat elliptical. This one is on the photo - worst case!

The beams are quite different. The emitter was 50cm apart from the wall with axis rectangular to the wall. The photo was taken from about 150cm with wide angle.

Regards Tobias
 
Last edited:

outer limits

Newly Enlightened
Joined
Aug 5, 2008
Messages
21
Hi Tobias,

Thanks for all the info, keep it up. I have been having a small play around but only to the extent of fitting leds into an existing mining light. I have been using a DX 1917 which I found easy to cave with and it did not seem to raise too many complaints from others in the party although I have been using elecrtic for a while so I am used to not looking directly at people. Liked the info on the modified drivers so might have to change.
 

degarb

Flashlight Enthusiast
Joined
Oct 27, 2007
Messages
2,036
Location
Akron, Ohio
Great thread. Worth reading a second time.

Daily, I do task work with headlamps. But found an essential missing puzzle piece is the wristlight. I've been building (left) wrist-lights since December. So far, best setup is an xr-c coleman 75 lumen two inch head hacksawed off, velcroed on to the power pack of 4 AA that is glued to elastic and velcro. I adjust to angle I need, as needed per task.

The benefits of a wristlight over a headlamp alone are several: 1. when walking the wrist light is pointing and illuminating your feet, so peripheral vision can see stumbling issues. 2. you can flick a thrower about faster than you can whip your head about, to find things and spot danger. 3. more flood and field of vision than just head lamp. 4. law of inverse square means brighter walls gut level and below. 5. extra battery source. 6. backup if head lamp breaks. 7. much better textural relief vision, as a silloette shows shape of walls (I can spot baseboard dust from 25 foot.) 8. more diversity of light temperature and angle means more subtle understanding of what you are looking at 9. another 75 to 100 lumens at 1 watt, minus the obvious losses.

I settled on the $20 xr-c coleman over the floodier 3 aa xr-e(hack saw off head for aa conversion) since throw is awesome with better than lux1 corona. I use rheostat, where the xrc throws great at 200 milliamps or as low as an efficient 80 milliamps , but rocks at 400 milliamps to astonishing effect.
 

uk_caver

Flashlight Enthusiast
Joined
Feb 9, 2007
Messages
1,408
Location
Central UK
The two wider-angle devices seem to have definite patches from the 4 dies in the LED, even though the narrower-angle one doesn't.
 

gillestugan

Enlightened
Joined
Nov 20, 2007
Messages
242
Location
Nora, Sweden
Great work Tobias!
Thank you so much for showing how to wire multiple PT4105 in parallel using one switch for regulating output to all of them.

My plan is to build a lamp for caving and general outdoor using two MC-Es. One very wide flood and one narrow.
I'm probably going to use 4 X PT4105 and the dies wired 2 in series with each pair individually driven.
This will give me a very wide input range of about 8-18V.

Regarding the housing:
I've used an aluminium box for a 3X XR-E setup which works very well. It handles the heat well, is waterproof (if o-ring or other seal is used) and is quite cheap. EUR 4.40. Just not as good looking as I wanted. I would prefer an oval housing. Anodised in gold, red or black. :p
Here is the box: http://www.conrad.de/goto.php?artikel=522369

Regards /Gille
 

Tobias Bossert

Newly Enlightened
Joined
Oct 7, 2007
Messages
146
Location
Germany, Munich
Long pause, but work was going on...
Now I completed my first test device: It's on a four days trip into a 95km-cave (Hierlatzhöhle) at the moment to get real life experiences with it.
My first test device is completely hand made - no usefull bases for professional manufacturing.
The purpose is to demonstrate the feasibility of improved lightning with respect to commercial high end headlamps. The crew also uses some Scurions at the same expedition and one Stenlight.
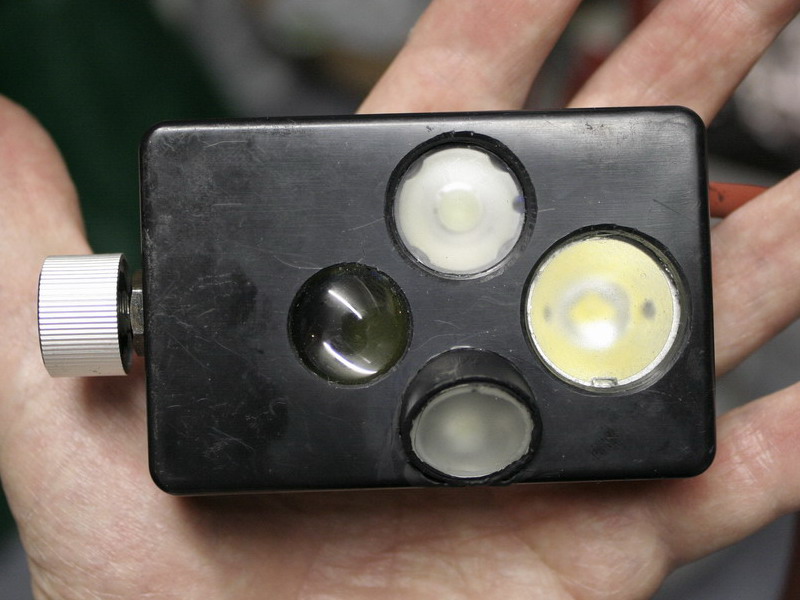
The test device is build in a plastic case (ABS), the original lid is changed by a 3mm alumine back plate. The outside dimensions are width 85mm (plus switch knob), hight 56mm and depth 22mm (plus outstanding lower lens tube). The weight is 155g without mechanical helmet fixation and without cable, battery case and connector. With 1m cable (as used now to carry the battery in the chest pocket) and connector the weight of the headset is 195g.

frontside.jpg


The switch has 6 positions:
  1. off
  2. pause light (upper source in picture: XR-E Q5 WC & Carclo 20mm frosted narrow)
  3. worklight low (= pause light + lower source in picture: XR-E Q5 WC & Carclo 20mm wide angle reflector & self edged glas lens; declined)
  4. work light high (= work light low but higher currents)
  5. shaftspot (left source in picture: XR-E Q5 WC & EdmundOptics lens AX77183)
  6. hallflooter (right source in picture: P7 CSXO & modified DX 3257 & Ledil Cree 26mm diffuser 20° bond with epoxy onto a glas lens)
With 6 AA NiMH (2500 mAh) the runtimes are: 2. more than 250h, 3. about 25h, 4. about 8h. Positions 5. and 6. are for short term use only (drawing about 4w / 12W).

With respect to my former posts, some modifications took place:
I didn't found a reasonable small OP reflector for P7 not throwing a donut, therefore I use now a moderate diffuser. This would be even strong enough to use a SMO reflector (DX 5955) . The diffuser is acrylic - not usefull without a separate hardened cover. When I put a plane glas lens in front of it, the light passes 4 surfaces giving reflections. Therefore I bont the diffuser with its plane side to the glas lens using a clear epoxy. This improves the transmittance noticeably. As a side benefit it stabilizes the glas lens: if it breakes up, there is a crack, but the acrylic part still holds.
I got a big collection of lenses and reflectors at home now. The outstandingly best glas lens is AX77183 from EdmundOptics (AnchorOptics), which allows a very compact thrower. The lens has a usfull diameter of 19mm. The internal depth of my case (19mm) is sufficient for XR-E on a star board to throw a sharp image of the die to a wall. I mounted the lens by about 1mm nearer to the LED (with respect to the inner side of the housing) to smooth out the details of the die image. The picture shows the beam 2m apart from the case; FWHM is about 4,3°.​

shaftthrower.jpg

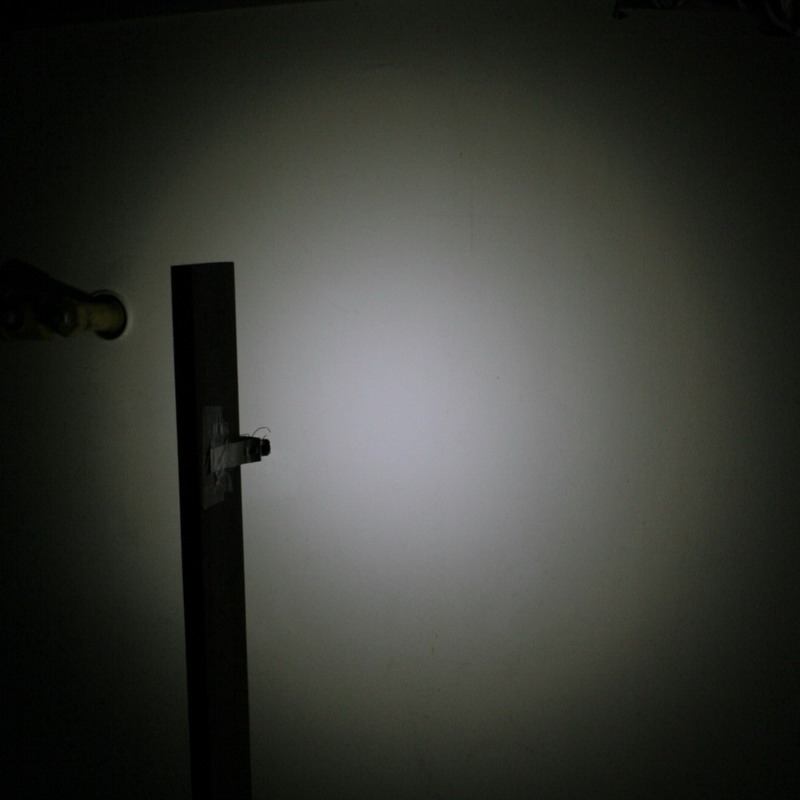
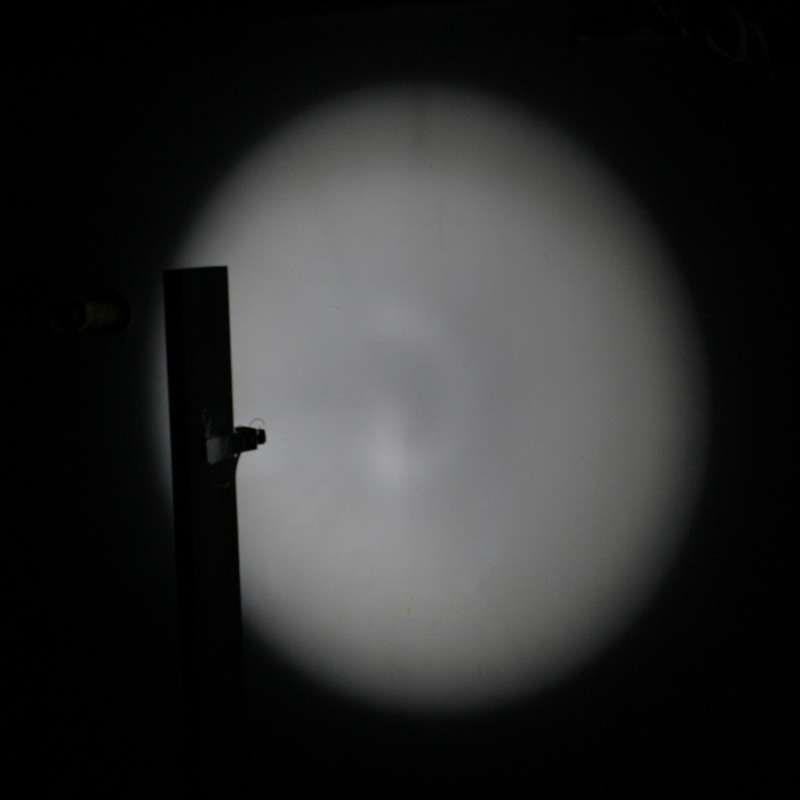
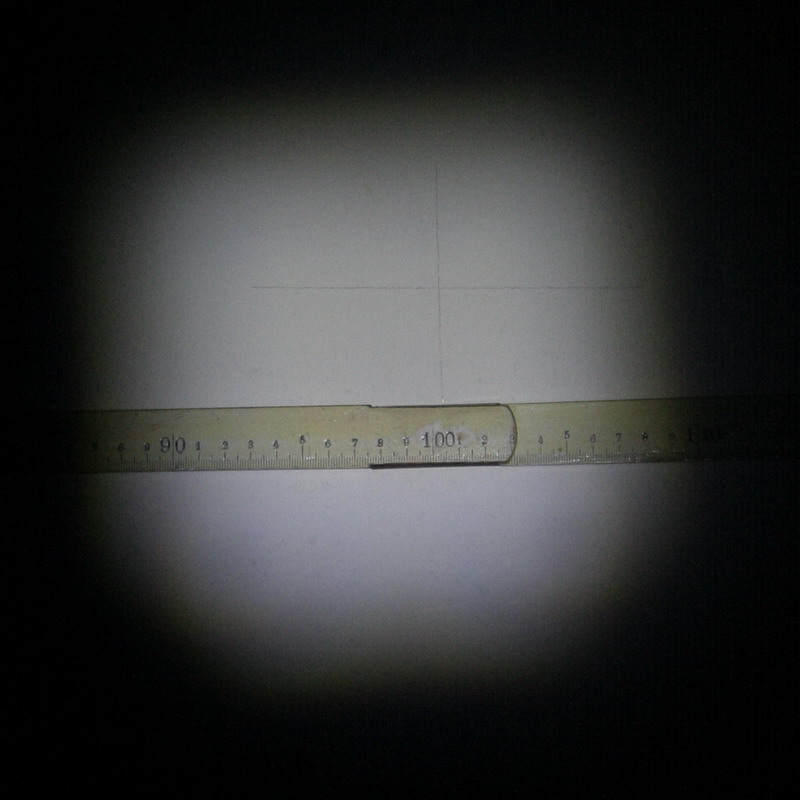
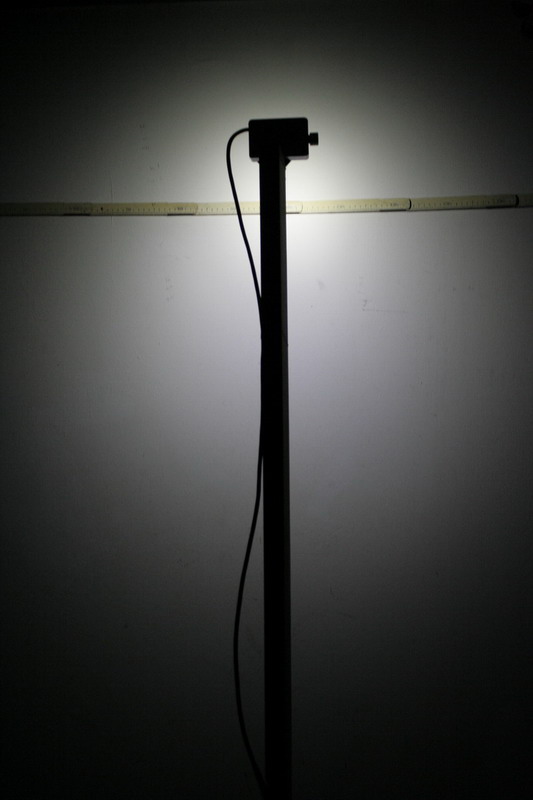
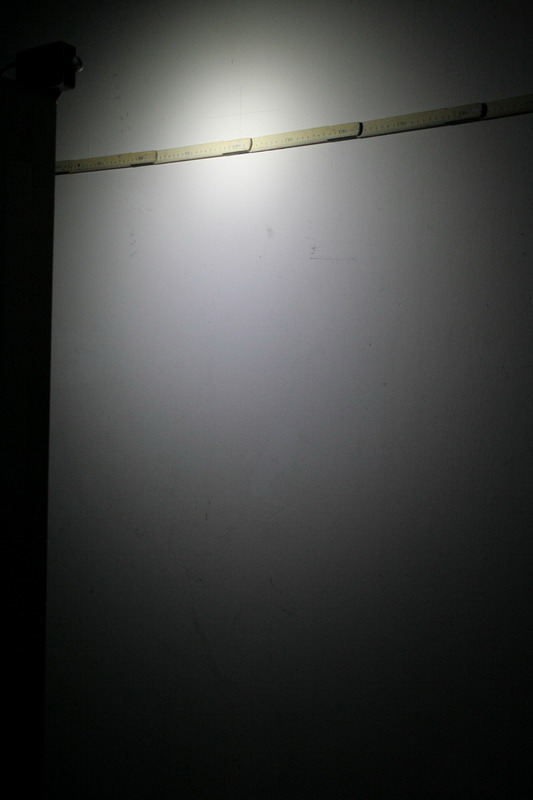
The worklight gives a combined pattern. The upper source is a 20mm Carclo TIR, the centre is horizontal. The lower source is a 20mm Carclo wide angle reflector, originally designed for lambartian LED only. Slightly modified to XR-E the FWHM is about 65° only. I covered it by a glas lens, which I edged by myself. There are two beamshots of the worklight. The distance of the headlamp from the wall was 50cm, the center of the upper part is slightly higher than the middle of the folding rule (at 100cm).​

worklight-1.jpg

worklight-2.jpg

The four days cave trip ends December 30. If there is no defect, the test device will be used on the next four days cave trip on January 3.​

I will post the findings!
And naturally discuss the experiences an try to improve the device.​
 

Guy's Dropper

Enlightened
Joined
Jul 30, 2008
Messages
386
Location
Southern California
Wow! What a project. It's probably too late to mention this, but CR123A Primary batteries would be much better suited to caving than alkalines. They have a much higher energy density, are more reliable and work in more extreme temperatures than alkaline batteries. I'd say the weight you could save would definitely be worth the effort. If you are having a hard time finding them, order them in bulk online for pretty cheap. For such a hobby that's so demanding on lights, I would not trust alkaline batteries,
 

gillestugan

Enlightened
Joined
Nov 20, 2007
Messages
242
Location
Nora, Sweden
Looks good. but a few more scratches i the plastic please would look good :) That is some serious testing grounds. Wish we had caves like that here in Sweden.

Guy's dropper: He wrote he used NiMHs not alkalines. And thy are more reliable and practical to use in such environments than Li-Ion. Using Li-ions you must use a hardcase to protect them from mecanical damage that comes from crawling, climging and sqeezing yourself through narrow passages. And a fire in your pocket is the last thing you want when you are in a position where you are unable to reach it.
 

Guy's Dropper

Enlightened
Joined
Jul 30, 2008
Messages
386
Location
Southern California
Ok, good. NiMH is a good economical battery type for that application. I should mention, however, that Li-ions are very easy to store safely. If I am carrying them on my person, I store them in either Tube Vaults or Airborne containers. They are the most waterproof and impactproof containers, as far as I can tell.
 

Tobias Bossert

Newly Enlightened
Joined
Oct 7, 2007
Messages
146
Location
Germany, Munich
Thank you so much for showing how to wire multiple PT4105 in parallel using one switch for regulating output to all of them.

No, Gille, please look to my circuit diagram carefully!
It is easy to parallel driver boards with C300 or C310, since LED+ is identical with Power+
As far as I understand, it is not possible to parallel those boards with PT4105 easily, because the LED is floating, LED+ and LED- both are not fixed.

My plan is to build a lamp for caving and general outdoor using two MC-Es. One very wide flood and one narrow.
I'm probably going to use 4 X PT4105 and the dies wired 2 in series with each pair individually driven.
This will give me a very wide input range of about 8-18V.

One benefit of MC-E above P7 is that each die can be driven separately. Your application with two MC-E does not need any paralleling of driver boards since you plan anyhow to build four paths each with two dies in series: each one can be driven with its own PT4105.
The efficiency of most boards decresases, when the difference between input voltage and output voltage increases. Therefore it makes no sense to drive two parallel pathes of two serial dies (Vf~7V) with two separate drivers at 18V. It would be more efficient to use only one driver for all of them in series.
Please remember, that switching just single dies off will propably decrease the "beauty" of your beams pattern. The advantage of boards with PT4105 is that they can be dimmed to quite low levels without loss of efficiency. Therefore it is better to dimm all four dies istead of switching then one after the other off. Also the output of all four dies each dimmed to 1/4 of current is higher than of only on die remaining on full current.

Regarding the housing:
I've used an aluminium box for a 3X XR-E setup which works very well. It handles the heat well, is waterproof (if o-ring or other seal is used) and is quite cheap. EUR 4.40. Just not as good looking as I wanted. I would prefer an oval housing. Anodised in gold, red or black. :p
Here is the box: http://www.conrad.de/goto.php?artikel=522369
Regards /Gille

Thanks for this link. This cases are very stable, my be I will take it for the next test device to improve mechanical stability. But first I'm waiting for the experiences with the first test device in real life situation of cave expedition...
Regards Tobias
 

gillestugan

Enlightened
Joined
Nov 20, 2007
Messages
242
Location
Nora, Sweden
Thanks for your input.
And yes, all dies in each led will always see roughly the same current to keep the beam uniform.

I planning on using 11.1V battery packs, which is closer to output voltage of two cells. (I already have 11.1V packs from another headlamp.)

Will use a 2 pole 5 ways rotary switch similar to yours, but I have decided to wire it off-on-on-on-on for both leds, using a mosfet to keep current in the switch low.
I will then use the other pole for selecting levels, using resitors for controlling the "off" and "on" for the leds in the different modes, where "off" will be a led driven at less than 1mA.
The resistors are wired with diodes in series as in your chart. Thanks, I would probably have gone looking for a bulky 5(6) pole switch if I hadn't seen your chart.


I've also been doing some testing with PTCs for temperature regulations. Replacing the resistor with value 1k8 in your chart with the thermistor.
I haven't decided yet if I want it or not. With it I wouldn't have to worry about cooling, but Im not sure I happy with the indefinite levels I would get. The air temperatures in a cave are stable, but I use headlamps outdoors as well, an it's a big difference between -20 and +25 degrees celcius. Maybe if I find a PTC whith a sharper knee...

I have run into one mayor problem. You know it too well - the optics.
The MC-Es are really not easy to work with. Most optics gives a beem with FWHM of 18-40 degrees. I want one less than 10 degrees and one more than 60 degrees. Haven't found any of them.
The only narrow ones are 35mm wide and then there is no point in using a MC-E as a 4*XR-E 35mm Ledil cute lens is smaller, more narrow and makes heat sinking easier.
Im interested of 20mm optics, maybe 25mm as I want to keep the housing pocket sized.

Have also been looking at the tiny XP-E leds. Khatod has a 25mm 4*XP-E lens 10 degrees FWHM. Looks good for spot, but I havent been able to buy and try it yet (or seen someone elses beamshots).
The XP-Es as well as the MC-Es are not uniform in colour when used without optics. They are very blue in the middle and very yellow-green further out. (i have only tested the WG tint.) Was hoping to be able to use them for flood without a lens, but the XR-Es are much better.
If you are interested you can find a lot of beam shots of various lenses and reflectors in this thread at MTBR.

So right now I'm trying to decide if I should build a MC-E light with one 15 and one 40 degree reflector with part available, or if I should wait and see if better optics will come for the XP-E.

I haven't got a program to draw circuit schemes, but maybe I will try to find one. Did yours actually have the PT4105E in the component library?

Regards
/Gille
 

Barbarin

Flashlight Enthusiast
Joined
Jul 30, 2001
Messages
1,305
Location
Pamplona- NA- Spain


While I'm working on a headlamp that would be good enough for caving and cave-diving, it won't be 100% optimal for caving from the point of view described by Tobias and others. As long as he has been kind enough to give me his opinions in my thread I wanted to give you my suggestions here for the project that is being discussed.

First of all I would like to link to a excellent post by Kiessling about the importance of flood lights and low levels.

Clearly, when it comes to really long term use of artificial and self attached lighting, on close distances, a spot, even a well diffused one, can be fatiguing and to some point, that "through hole view" could be even harmful (always on a very long term use).

Definitively a long term use caving headlamp designed for a comfortable use should have a pure flood light.
I've been playing for a while with "zoomable" optics. The problem with those is that at least the ones I have been testing are "pure spot" beams in which you just have the option to choose the angle of the spot, but it is not a beam with a combined spot and corona.

This picture explains it better.

But, what if we use one zoom and one flood with independent switches and common output control? (Based on two XRE )

We could have all the options described by Tobias:

1) Normal light for walking and climbing

FLOOD ON + ZOOM ON. Output and zoom adjusted to needs. (large room, small tube…) From 0,5 to 7 Watts.

2) Pause light

FLOOD ON ZOOM OFF. Output to minimum. Less than 0,1 Watts.

3) Spot to explore deep pits or high shafts

FLOOD OFF ZOOM ON. Output 100%, zoom adjusted to distance. 3,5 Watts.

4) As much light as possible for big halls

FLOOD ON ZOOM ON. Output to 100% Zoom adjusted to distance. 7 Watts.

Now the challenge is how to design this to not need and screwdriver in your hands to adjust easily and fast the beam and output to what is needed each moment. By the now we know that we need three controls.

1. Output selector.
2. LED selector with three positions ZOOM-FLOOD-ZOOMFLOOD.
3. ZOOM actuator.

What do you think on this?


Last edited:

Barbarin

Flashlight Enthusiast
Joined
Jul 30, 2001
Messages
1,305
Location
Pamplona- NA- Spain


...This picture explains it better.


Obviously I didn't linked any pictures. Here it is:

byncompsinttulo4fu21zm6.jpg


From left up to right down you can see: 1-4, different degrees of ZOOM. As you can see with this kind of zoom you always have a spot, with near no spill. On picture 5 a pure flood CREE XR-E with no optics at all. Pic 6 is a reflectored single die LED, in which you can see clearly the effect SPOT+Corona.

What I'm suggesting for a caving dedicated light, is the addition of any of the zooms + flood, working together but when on resting time or in "search" (just spot).

Javier
 
Last edited:

Tobias Bossert

Newly Enlightened
Joined
Oct 7, 2007
Messages
146
Location
Germany, Munich
Thank you, Barbarin,
your proposal seems to be a good compromise between number of required independent LEDs and mechanic/optical complexity. I think this is much more flexible approach for cavelight than your 1-LED proposal in your actal thread https://www.candlepowerforums.com/threads/217415
In some way this is an improved Scurion solution (also 2-LED). Scurion combines a bare emittor (P4, not XR-E) with another LED in a narrow beam TIR (Gaggione LL3).
You replaced the TIR by a pure optic lens which gives the posibility to vary the focus and which doesn't produce spill.
As far as I can see, your new 2-LED solution covers all these light combinations I required a 4-LED solution in my test device: Congratulations!

Unfortunately every benefit (only two optics, LEDs and drivers needed) requires some effort: Your 2-LED solution needs mutch more mechanics than my 4-LED solution.

1) You need to provide a mechanic adjustment of the focus.
When you switch from "work-light" (defocused beam) to "shaft-thrower" (focused), you will have to switch electrically and mechanically!

2) You need to provide separate declination adjustment of beam and flood
Fortunately no focus change is necessary between "work-light" and "huge-hall"; but in this case you need to readjust the declination of flood with respect to throw, otherwise you will illuminate the floor especially!

I'm no mechanic expert, but as far as I can imagin, the 4-LED solution will get smaller and more lightweight than any adjustable 2-LED approach. And even easier to use too...
But the adjustable 2-LED solution is more universal, because you can vary continuously. The fixed 4-LED solution is restricted to what it was preset.

Tobias
 

Barbarin

Flashlight Enthusiast
Joined
Jul 30, 2001
Messages
1,305
Location
Pamplona- NA- Spain
Hello Tobias,

Good points.

For a homemade light the mechanical complexity of this option proposed makes it less viable, but for a industrially developed and made product it could be the way to go if the design is clever and the use intuitive. Even one of the selectors could be removed if we use just a rotary switch with enough positions such as:

1. OFF
2. FLOOD 30 mA (Resting) 10 lm
3. FLOOD 300 mA (Moving on small pasages ) 90 lm
4. FLOOD+SPOT 300+300 mA (Regular use) 180 lm
5. FLOOD+ SPOT 700+700 mA (Large rooms) 320 lm
7. SPOT 1400 mA (Search mode) 300 lm

With just one Li-ION 18650 2200 mA runtimes would be like 70 hours, 7 hours, 6 hours, 1,5 hours, 1,5 hours.

Can this be done on a compact desing? To start with two LEDs housing should be smaller than a 4 led one, assuming same construction requirements regarding waterproofness (IP).. Uff, let me think about it during the next days...

Regarding your point 2, I think if you choose the right angle and your flood is wide enough you mneed not adjustment on divergence, as long as you always need light in the floor near you, large or small rooms.

The "Hellmeet light" is not so apropiated for caving as it has more a "raid under any condition" approach than a pure cavediving light.. but you won't get lost on a cave using it.

I'm going to try some pictures.
 
Last edited:

Tobias Bossert

Newly Enlightened
Joined
Oct 7, 2007
Messages
146
Location
Germany, Munich
For a homemade light the mechanical complexity of this option proposed makes it less viable, but for a industrially developed and made product it could be the way to go if the design is clever and the use intuitive.

You are completely right, homemade optimum and industrially produced optimum are different!

Even one of the selectors could be removed if we use just a rotary switch with enough positions such as:
1. OFF
2. FLOOD 30 mA (Resting) 10 lm
3. FLOOD 300 mA (Moving on small pasages ) 90 lm
4. FLOOD+SPOT 300+300 mA (Regular use) 180 lm
5. FLOOD+ SPOT 700+700 mA (Large rooms) 320 lm
7. SPOT 1400 mA (Search mode) 300 lm

It's only 6 positions, same as me too!
The 90lm is very demanding. XR-E R2 is >114lm@350mA and you will lose some % of light internally too. Flood is o.k. but with the optic lens it would be rather 70...80lm.
As far as I see, XR-E R2 at the present is availlable in color WG only, too greenish. WC or WD would be more nice, but these are Q5 only.

With just one Li-ION 18650 2200 mA runtimes would be like 70 hours, 7 hours, 6 hours, 1,5 hours, 1,5 hours.

70h, 7h, 3.5h, 1.5h, 1.5h

Can this be done on a compact desing? ... Uff, let me think about it during the next days...

I'm verry eager to see whether you can solve these demanding technical problems!

There is another problem I'm still looking for a better solution:
Surion has a bare P4 which glares very strongly. There will be no improvement with respect to glaring when using a XR-E.
I tried to avoid glaring by a combination of LED, wideangle reflector and diffuser lens. It does the job verry well but at the expense of at least 30% light loss.
The problem is, that all known diffusers work well as long as the light passes nearely orthogonally. With large incident angles the losses increase dramatically. For this task I would need domed glass front lens (18mm diameter, 4,5...5,5mm hight depending on glass thickness 1...2mm). If I would get those, I can edge or sand them at the concave side by myself. This would decrease the losses and improve the flood tremendously.

Tobias
 
Top