Thinking of using a manual reamer to bore a SF 6P body...more

marinemaster

Flashlight Enthusiast
Joined
Mar 1, 2003
Messages
1,238
Location
Atlanta, GA
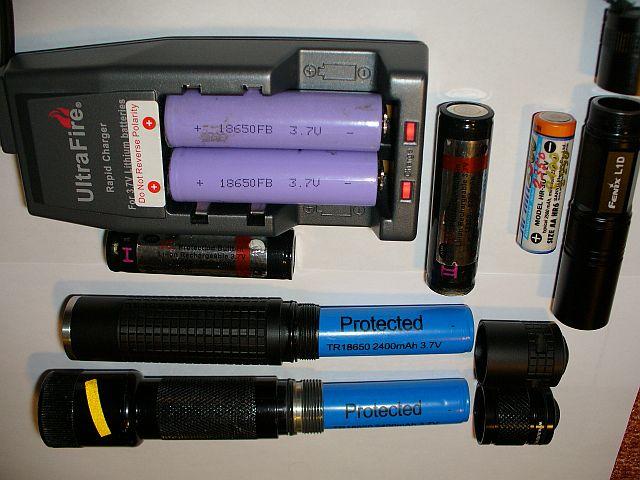
So I got myself two SF 6P and two SF 2C bodies for the sole reason to bore them to take 18650. Forget 17670 for a moment. Have not done it yet. I have been reading as much as I could here. Unfortunately a lathe is not an option. I have asked here but no go............I wished someone here would have helped.............

So my question is: has anybody been using a hand reamer to bore a SF 6P body? I seen them cost from $20 to $40 so is not so bad.

As i understand is best to bore out to 18.4mm I have measured and it looks like the smallest diameter of the 6P at the end of it is 19.6mm that is the diameter where the Oring goes. So if boring to 18.4mm that would leave a 1.2 mm thick. I am guessing is enough. The last portion of the 6P body is about 18.2mm so if I am correct only .2mm needs to be reamed.

Now going deeper inside the body the diameter is 17mm so it would need 1.4mm reamed.

About the reamer I believe the best size would be 23/32 to 25/32 inch which I think gives 18.25mm to about 19mm expansion range.

How difficult is it? Can it be done? I am guessing it will need lubrication while this is done.

All input appreciated.

Chris
 

LukeA

Flashlight Enthusiast
Joined
Jun 3, 2007
Messages
4,399
Location
near Pittsburgh
A 3/4 in (or 25/32, but those are much rarer and usually more expensive) drill bit and a drill press would do famously. You may be able to turn the drill press spindle by hand if you want.
 

will

Flashlight Enthusiast
Joined
Apr 14, 2004
Messages
2,597
The only comment I have concerns using a drill or reamer in the 3/4 inch range. I can't count the number of times I have spun the work in the vise, or spun the vise when the bit 'catches'. Reamers are generally used to get a better finish and size on a drilled hole, not for stock removal.

Also - the alignment in whatever is being used to hold the body has to be right on.
 
Last edited:

modamag

Flashlight Enthusiast
Joined
Aug 16, 2004
Messages
2,101
Location
Bay Area, CA
Chris, you're treading dangerous territory with reamer and hand drill that size. I think I loss more flesh & blood this way than any other metal cutting means.

Tell you what, if you can post a picture of your light and description of what you want done. I'll try to do it for you for $0$, however it might be a 1 month turnaround.

All I have is a small collet lathe so hopefully it's enough to hold your light.
Drop me an email and I'll give you my address.
 

marinemaster

Flashlight Enthusiast
Joined
Mar 1, 2003
Messages
1,238
Location
Atlanta, GA
Thank you Modamag I really appreciate it.

I think I have second thoughts about boring. I have already destroyed a very nice 6P body. I had put it in a visegrip that was bolted to a table. I have used a 3/4 inch drill bit which is a 19mm diameter. The drill bit was oiled but even so it got stuck in the body about 25 times or so. The body tried to twist many times I have to grip it even harder. As I was close to finish the threads broke. The threads broke clean from the body. It separated from the body. In the end I got the 18650 to fit but no threads so it was useless.

I think I need to be wiser about it and keep the 6P body in stock format the way SF desgined them to be used.

Thanks for all the advice. This is what makes this forum great.

Chris
 

tvodrd

*Flashaholic* ,
Joined
Dec 13, 2002
Messages
4,987
Location
Hawthorne, NV
If I had to improvise, I would use a straight flute chucking reamer and clamp it in a bench vise. I would then work the SF body over it. A glove might help, cuz I'd be at it for a while. It won't dig in like a drill bit.

Larry
 

gadget_lover

Flashaholic
Joined
Oct 7, 2003
Messages
7,148
Location
Near Silicon Valley (too near)
Sorry to hear that your 6P is ruined. It's always a very good idea to measure very, very carefully before doing a project like this. I think it's safe to say that all us who do machining have accidently cut the threads off a light at least once.

Daniel
 

tvodrd

*Flashaholic* ,
Joined
Dec 13, 2002
Messages
4,987
Location
Hawthorne, NV
Sorry to hear that your 6P is ruined. It's always a very good idea to measure very, very carefully before doing a project like this. I think it's safe to say that all us who do machining have accidently cut the threads off a light at least once.

Daniel

:crackup: ! God (Don) and myself have both done it! :crackup: Welcome to the club!

Larry
 

qadsan

Newly Enlightened
Joined
Aug 13, 2006
Messages
79
I know other people have done this mod by hand, but my opinion is that it should be done accurately with the right equipment (i.e. lathe) and by somebody who's very familiar with their equipment.

In case it helps, here are some measurements from one of my 6PD's that was bored out on a lathe.

Tube ID (after bored out) = 18.35mm (0.0722")

OD inside the O-ring groove on tail threads = 19.56mm (0.0770")
Wall thickness at this thinnest point = 1.21mm (0.0475")

OD from base of threads = 19.7mm (0.7756")
Wall thickness at this point = 1.35mm (0.053) left for all thickness.

OD of thinnest point of body = 23.6mm (0.9291)
Wall thickness at this point = 5.25mm (0.2067").

Length of 18.35mm bore from end of tail cap threads towards front of light = 77mm

This leaves ~4mm of the original bore left towards the front of the light so the negative contact spring (the large spring) has plenty of material to rest against.

The thinnest part of this light is inside the o-ring grooves on the tail threads. The wall thickness at this thin point is a bit more than 1/16 of an inch, which means there's not a lot of margin for error. Even though others have said they've done this mod successfully by hand, I just can't recommend it with this margin of error at this one point in the light.

Throughout the entire body (except for the tail cap threads), you have at least 5.25mm (0.2067") of wall thickness. Boring out the tube to 18.35mm at a length of ~77 so that you're leaving ~4mm of the original bore towards the front of the light would be hard to do by hand.

I'm sorry to hear things did not work out for you with this mod. I wish Surefire would have made the tube for this light compatible with the 18650 because this battery has a lot to offer for its size. The 6PD with an 18650 is a wonderful and versatile light. Lighthound sells a body from Leef for this application, but it's quite expensive. I already owned several Surefire 6PD's for use in my businesses. Since they were already bought and paid for, I chose to bore them out and I'm glad I did. However, when (or if) it comes time for me to add more 6PD's, I'll probably be looking very seriously at the Dereelight CL1H since it has the forward clicky, a HAIII finish that the 6P does not have, good build quality, compatible with the 18650, upgradable, good customer service via email or PM through CPF, etc.
 

scott.cr

Flashlight Enthusiast
Joined
Jan 10, 2006
Messages
1,470
Location
Los Angeles, Calif.
I know other people have done this mod by hand, but my opinion is that it should be done accurately with the right equipment (i.e. lathe) and by somebody who's very familiar with their equipment.

Hey Gary, those the lights I bored out for ya?

If so, you can testify that even with a lathe it can take some time to measure the tube for adequate thickness and concentricity, indicate it to the lathe axis and bore it to the correct depth. (Guys: qadsan stood around my garage for like three hours while I bored his lights.)
 

qadsan

Newly Enlightened
Joined
Aug 13, 2006
Messages
79
Hey Gary, those the lights I bored out for ya?

If so, you can testify that even with a lathe it can take some time to measure the tube for adequate thickness and concentricity, indicate it to the lathe axis and bore it to the correct depth. (Guys: qadsan stood around my garage for like three hours while I bored his lights.)

Hi Scott,

Yes, the latest group of 6P's I have were bored out by you. It definitely took some time for all the measurements, all the setup that was needed, the re-checks, cleaning, cleanup, etc. And each light was slightly different from the factory and required its own setup, so its not like you could simply chuck one light after another and push a button. I know you're *very* experienced in machine work, setup, etc, and I can say from watching you that this is not a task somebody should try to take on themselves without the right 'experience' and equipment.

The 6P's I had bored out by someone else a ways back were simply dropped off and picked up a few days later so I didn't get to see how long it took to bore them out. I can say with confidence that your work was precise & flawless (better than a couple other 6P's I had done from someone else). The lights you did for me look like they came from the factory this way :thumbsup:
 

adamlau

Flashlight Enthusiast
Joined
Dec 8, 2007
Messages
2,424
Location
Los Angeles
You guys are local, awesome! You guys available to help me bore out my 6PD? I was thinking of selling the body now that I have a LeefBody 1x18650, but perhaps I can keep it after all...
 

yellow

Flashlight Enthusiast
Joined
Oct 31, 2002
Messages
4,638
Location
Baden.at
there simply is not enough material left to do it by hand, or to use a drill, thats a lathe job imho

having this 6P and the T1 milled for the 18650s costed me 10 mins and € 5,-- (for coffee box) at a machine shop I found by accident in the next city - there is always one around
Setup is a joke, because we dont need the accurancy they are working with for usual

avcz41bceo9v3w67o.jpg


(if the guy does not do this from himself: have a single layer of paper wrapped around the body, to save it from possible scratches)
 

Ganp

Enlightened
Joined
Jul 8, 2006
Messages
468
Location
Bristol - England
marinemaster ... I'm very sorry to hear your 6P lost its threads:(

But that is hardly surprising .... come on guys .... a bore of 18.4 mm through an o-ring groove of 19.6 mm diameter leaves a wall thickness of only 0.6 mm, not 1.2 mm, and an 18.4mm bore through the main body diameter of 23.6 mm is a wall thickness of 2.6 mm. :poke:


Colin.
 
Top