Groooovy !!!

frisco

Enlightened
Joined
Dec 29, 2005
Messages
736
Location
San Francisco
I've been trying to give myself little projects to do so I can "hone" my lathe skills before I attempt to make a few critical parts for a Custom Motorcycle I'm building.

I've always loved the Grooved Mag heads. The first time I tried to groove one....... The head jumped out of the chuck!!!

So here is my solution. Started with a scrap chunk of Aluminum I bought on eBay.

I really tried to measure everything and get it just right....... It was hard to do..... But I'm very happy the clearances.


Here is the fixture in my lathe getting a center hole drilled before getting threaded for a 3/8 x 16 Bolt.


This photo shows my finished fixture after "grooving" my first Mag Head. I'm still not sure if I'm useing the right grooving tool.


This photo shows the fixture and the machine steps. The finish came out VERY nice with my Grizzly G0602 10"x22" Bench Lathe. I'm sure this seems so basic for all you "Machinists"....... I don't want to tell you how long it took me!!!.....


frisco
 
Nice job!:twothumbs Now you have to try grooved and fluted!!! You can send me the red head for QA...;)
 
I grab the head on the inside. You tighten the part to the chuck by opening the jaws. I then put a live center in the tailstock and press that against the head. This works and the head can't pop off.

Also - I always attempt to get the work or tool to fit inside the chuck. If you reduce the diameter of the part that is held by the jaws, and increase the length so that part uses the full length of the jaws, you will have a more secure tool.

I only use HSS tools on aluminum, the carbide I use for cutting steel and harder materials.

nice job on the fins.
 
Last edited:
Looks similar to my MR16 light:

P1010499.jpg


I'm also quite an amateur, I just got my Micro Mark 7x14 about a month ago.. before that was about 9 years ago in junior high school "applied tech" class.. I remembers how much satisfaction I somehow derived from cleanly machined metals.. It's very nice to have my own lathe now.

Parting for me goes very well for the first 100 thou into the piece. I get nice long ribbons and I can advance the parting tool at quite a nice rate.. then once I get in a little further the problems start.

The chips won't evacuate the deeper groove properly.. they just come off as small flakes instead of ribbons.. jamming up on the tip of the parting tool and eventually causing the lathe to bind or stall.. I end up having to work very slowly and crank the parting tool out of the work to clean off welded on aluminum chips quite often.

Does anybody else experience this?

The cuts in your mag head look to be right about the depth where I would start to have troubles...

I have a slight rake on my parting tool as I read that it worked much better.. and I found that it did seem to work better.. but I still can't evacuate the chips properly once I start getting deep into the work.
 
To get clean grooves, use some cutting oil, kerosene is fine for aluminum.
The parting tool should have side clearance and a front rake.
the tool should also be perfectly perpendicular to the work.
The tool should be centered in the tool holder vertically. I generally set mine slightly below center, this will leave a slight nib in the work.
If you look at the tool from the front. it should taper down from the top - this gives side clearance.
If you can grind your own tools. you might taper from from the front going towards the rear of the tool.

Parting tools require a lot of power, make sure the work is held tight, the various adjustments on the carriage are not too loose.
 
Last edited:
Thanks for some tips.

I've spent hours trying to tune any slop out of my lathe.. and I'm using a T type parting tool.. the top is slightly thicker than the rest..

I just need to figure out how to get the chips outs of there so they don't weld onto the tool and bind things up.

I forgot to mention, I'm parting around 380-420rpm, I've read before that it should be done on quite a slow speed.
 
Great info Will..... I did some research on "Parting Tools" My grooving goes much better with said improvements.

frisco


To get clean grooves, use some cutting oil, kerosene is fine for aluminum.
The parting tool should have side clearance and a front rake.
the tool should also be perfectly perpendicular to the work.
The tool should be centered in the tool holder vertically. I generally set mine slightly below center, this will leave a slight nib in the work.
If you look at the tool from the front. it should taper down from the top - this gives side clearance.
If you can grind your own tools. you might taper from from the front going towards the rear of the tool.

Parting tools require a lot of power, make sure the work is held tight, the various adjustments on the carriage are not too loose.
 
+ 1 - thanks much for the tips will :thumbsup:

I recently started creating my own cutting tools for "special" uses, and I must say that there is a lot of satisfaction that comes from creating tools from scratch. Sometimes, there is just no other option than to create your own tool, like this one created from a small HEX wrench (you can see the tapered edges as will points out - although mine still needs more work!):

IMG_4360.JPG


IMG_4361.JPG


IMG_4363.JPG


Here is the new cutter in use:
IMG_4359.JPG


And here is the end result of the tower/pedestal:
IMG_4368.JPG


Will
 
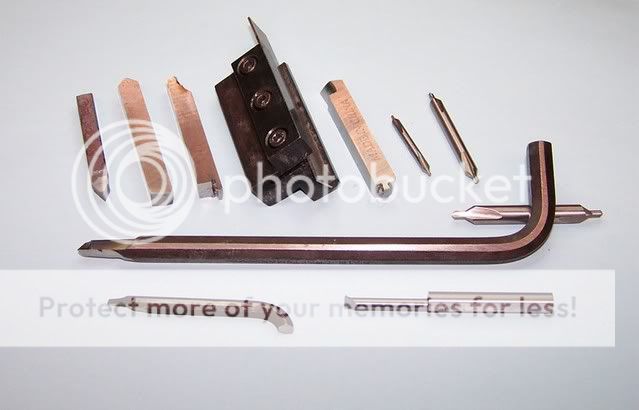
I have posted this picture before - this is my tool set. I like hex keys as well.

tools.jpg
 
Top