Using Copper Heatsink Need Options with Electronic Isolation

jar3ds

Flashlight Enthusiast
Joined
Sep 12, 2005
Messages
1,988
Location
USA
Hello Everybody...

I've been wanting to use copper for a flashlight project I am working on but since we can't easy anodize copper the way we can with aluminum providing a surface to mount the slug on...

would it just be possible to flip the cell's orientation backwards since the slug is connected to the anode?

Any other options?

Thanks!
 
If you can, use a star. If not you could mill a small hole into the copper and screw or glue an anodized aluminum slug into it, only the top would need to be anodized.
 
thanks for the input guys... i'm wanting to run a SSC P7 which doesn't come in stars and doesn't have a neutral slug...

I don't really want to put it on aluminum because my whole point with using copper is to be in direct contact with the heat source...

so my idea of reversing the typical way the batteries are orientated in a flashlight wouldn't work? Thanks again!
 
If you are direct driving the P7 with just a resistor for current limit then you can reverse the polarity.
You can buy star type circuit boards for the P7. Check LITEmania
You could use Arctic Aliminia as many do. It is electrically non-conductive.
 
Just use Artic alumina. I use it all the time for P7's to bare heat sinks. The trick is to mix up the epoxy and wait 3-4 minutes until it just starts to thicken. Then epoxy the emitter to the heat sink then check for continuiity to be sure the (+) is isolated.

Mac
 
Here are a couple of other methods you may wish to use.

You can apply arctic alumina in two stages. The first application is applied to the slug and is made as thin as possible. This is allowed to dry before then applying a second coat to mount the slug to the heatsink. Methods for applying the first coat include pressing onto a non-stick surface such as certain plastic films or spreading the epoxy with a fresh razor blade edge.

The second method is to use two hairs - that's right - pluck them from your arm or wherever you like. Apply thermal expoxy to the slug and use the hairs to establish a separation between the LED slug and the heatsink. Just set them parallel into the epoxy with one on either side. IIRC credit goes to Yellow for this method. Someone please correct me if I am wrong.
 
my fear with using artic alumina is that in order for it to be really effective you need a razor blade thin layer inbetween the LED and the sink... My fear is that this isn't enough to keep it electrically isolated...

I know some people goop the stuff which mades a bad thermal transmission path...
 
I use two methods to isolate Seoul slugs from heatsinks, both methods work well for me, but I tend to drive my emitters fairly conservatively, at less than 1 amp. I use either a small flake of mica the size of the slug (sold as fake snow at Xmas, electrical insulator, or from a rock collector's shop) with Arctic thermal paste on each side, or thermal transfer double stick tape. The thermal performance of the double stick tape isn't outstanding, but neither is the thermal performance of a thick layer of Arctic epoxy. There seems to be good heat transfer to the bodies of the lights with either method. The advantage of both of these methods is that it is easy to upgrade the emitter without destroying it or the LE circuit board.
 
my fear with using artic alumina is that in order for it to be really effective you need a razor blade thin layer inbetween the LED and the sink... My fear is that this isn't enough to keep it electrically isolated...

I know some people goop the stuff which mades a bad thermal transmission path...

Using the method I use the layer of epoxy between the emitter and heatsink is very thin as a press down hard after the emitter is aligned to the heatsink. I have never had a thermal problem with any of the lights I have built. Also as far as I'm concerned copper is just a waste on a light as you will see no noticeable gains in thermal performance.

Mac
 
Last edited:
I agree with Mac, I also use thermal epoxy to isolate the slug & I've never had an issue with thermal transfer. I don't use AATA though. With P7s I find that the slug is not very flat (although they are getting better, the DSVNIs from Fred aren't as bad). I sand them flat then apply a very thin layer of epoxy on the slug using a razor blade. After that sets I then apply another thin layer of thermal epoxy to attach it to the heatsink. You'll never see thermal epoxy gooping out the sides on my builds. In my opinion if you can see epoxy gooping out the sides of the emitter than you used way too much. Some think that the more epoxy you use the stronger the bond, I disagree.

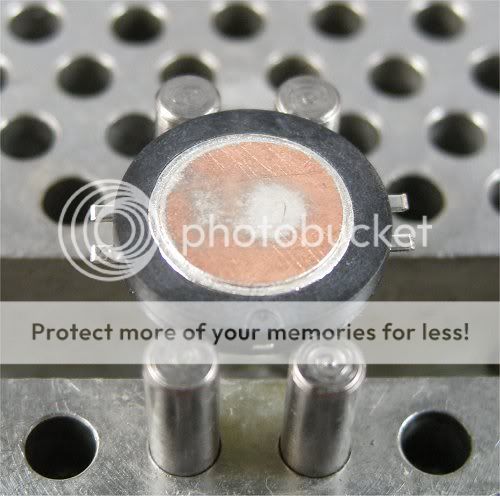
Here's a pic of a P7 after I sanded it flat & applied the layer of thermal epoxy for isolation. You can see the outside of the slug was higher than the center. The epoxy I use is white in color, the layer I put on is so thin it doesn't appear to be there & yes it is there.

Img_9724.jpg
 
DX has stars for P7s. If you have a reflow oven (a.k.a. toaster oven or hot plate... don't use it if you also cook food in it) you can reflow the P7 on. If not, you can put Arctic Alumina under the slug and solder the leads on and then attach the star to the heatsink.
 
Top