LiteFlux LF1 questions, feedback & suggestions

LED Cool

Enlightened
Joined
Jul 25, 2006
Messages
218
Location
Ipoh, Malaysia
a lot of CPF'er have (begin to) received their LF1. some have used it for a week and some just got it. this thread purpose is to collects all user's

first impressions of LF1,
opinions and comments on the design, features & operation of the LF1 and
suggestions for improvement in any aspects.

whether these are positive or negative are welcome.

also for those who are considering a LiteFlux LF1 but have questions about certain issues, you may find the answers in this thread. if not please post your questions here as well.

i hope this thread will serve to provide as much information as possible on LiteFlux LF1.

also state your serial number here as well.

thank you.
Khoo
 
Last edited:

yekim

Enlightened
Joined
Oct 6, 2005
Messages
260
Location
AK = ALASKA
Re: LiteFlux LF1 questions, impressions, comments & suggestions

I like it. Replaced my L2T for EDC, mostly because of the "fiddle factor" i.e. I can take it apart, put it together, run it on 1aa, etc.

I am going to get more.

IT has potential for alot of things, like a mini-turbohead and a replacement LED pill, like a 1w or something for really long runtimes, or like a flupic type addition or the like. Maybe a slightly larger head with cooling fins. The possibilities are endless.

I see this light as possibly a platform, kind of like with surefires, where things can be swapped and changed to meet the user's needs.
 

Joe Talmadge

Flashlight Enthusiast
Joined
Aug 30, 2000
Messages
2,200
Location
Silicon Valley, CA
Great light. I feel it compares favorably to the L1T for a number of reasons: lower low, constant-low/momentary-hi mode, whiter beam.

My biggest suggestion for improvement is the switch -- it's got a bit more throw than I'd like. It's a little uncomfortable for my thumb to dig it in deep enough.

Joe
 

fieldops

Flashlight Enthusiast
Joined
Jan 29, 2005
Messages
1,100
Location
Cape Cod MA
Very nice and quite versatile light. It is about evenly matched to the L2T.

comments:

Cons:

1. Switch is a bit "squishy"
2. Fenix finish is a bit better, but no big deal
3. Wall thickness is thinner than the Fenix
4. Focus capability is marginally effective


Pros:

1. Tint is great
2. Candle mode works fantastic
3. fitted tubes make super versatility
4. Runtime is excellent
5. Low mode is good and low
6. beam quality is very nice
7. tailcap mode change is nice

I tried to be as fair and balanced as I could. I think its a nice light and would serve anyone well. I would recommend it to anyone thinking about getting one.
 

mbirds

Newly Enlightened
Joined
Jun 16, 2006
Messages
117
Location
Virginia
I received mine 2 days ago. I had (until recently) an L2T which was given as a gift to a family member who admired it. I decided to try the LF1 as a replacement because of it's clicky and the versatility.

What I like better on the LF1:

Very compact on one cell, very bright on two.
More useful "low"
Texture easier to grip
Very nice clicky that can do momentary low and high
Removeable head and candle mode, led module screw right out with no tools.
Box makes it a great gift
Threads smoother, easier to operate as received from factory

What I like better on the L2T:

*slightly* nicer build quality
Nicer looking beam (less blurry hot spot)
Shorter
Better quality holster


It really is a tough choice, they are both excellent lights, but the included cell extension I think tips the scale toward the LF1 for me. I may try an IMS reflector to see if it brings the beam on par with the Fenix. Really only apparent in wall hunting.
 

jayke

Newly Enlightened
Joined
Jul 28, 2006
Messages
71
Location
Orlando, Florida
This is my favorite light to date.

What a light! Color Tint beats all my other lights. Nice white tint. Huge spill ring which is great. This light is like a feather and the ability to extend it is great. Great runtime with Lithium AA.

I can't figure out out to change the tail cap out to the red one that came with the light. I have messed with it for 30 minutes trying to get the internals out of the clickie. I don't want to ruin the light. What's the trick?

Thanks for the help!

Joe
 
Last edited:

mbirds

Newly Enlightened
Joined
Jun 16, 2006
Messages
117
Location
Virginia
LED Cool,

Have you tried the IMS reflector? is it the correct length as well? What, if any, difference did you notice in the beam?

Thanks!
 

LED Cool

Enlightened
Joined
Jul 25, 2006
Messages
218
Location
Ipoh, Malaysia
jayke,
to change the black button to a red one, the 2 part (upper & lower) retainer ring assembly needs to be removed using a sharp tweezer.

1. poke the sharp tweezer into the 2 holes in the 1st part (upper) of retainer ring and rotate the tweezer while still applying a slight downward pressure.

2. there are another 2 holes in the 2nd part (lower) of the retainer ring. once the tweezer is into the 2 holes in the lower part of retainer ring, you can then unscrew the whole assembly out.

3. from outside the tail cap, push out the black button slowly, while observing what comes out in what order. (clickie switch with circuit board, thin metal washer, then black silicone button)

4. change to red button and re-assemblle washer, clickie, and 2 part retainer ring. be careful of the orientation of the retainer ring. the lower part of the retainer ring is threaded, so please make sure it is the lower part that get screw back in.

hope this is clear to everyone.

mbirds,
the diameter and length of IMS 17mm reflector fits the LF1 bezel without any problems. though you must trim the 3 legs of the IMS in order to fit the reflector retainer ring.

IMS 17mm gives a slightly smaller & more defined hot spot, spill size & spill brightness is the same.

khoo
 

GJW

Flashlight Enthusiast
Joined
Jan 25, 2002
Messages
2,030
Location
Bay Area, CA
The McR-18 reflector is the perfect diameter but the length does not allow the head to screw down all the way thus leaving a small gap.
This would not be a big problem but it could be solved if the light engine screwed further into the body -- the tailcap spring would probably compensate for the extra length so I don't think you'd need a longer body.
The focal point was off with my McR-18 but that's probably a joker related issue.
I don't know if mine is a joker or a non-joker but I bet that if the proper version was used it would clean up the beam much better than even the IMS does.
 

LED Cool

Enlightened
Joined
Jul 25, 2006
Messages
218
Location
Ipoh, Malaysia
GJW, thank you for posting here. do tell us more about your experience with the LF1.

when using a McR-18, does the bezel thread pass the o ring? how small is the small gap?

What exactly is a "joker"? does it has something to do with the height of the phosphur coating?

thanks
 

NetKidz

Enlightened
Joined
Jun 21, 2006
Messages
569
Location
Taiwan
Here's a simple mod to use a protected 14500 Li-ion battery.

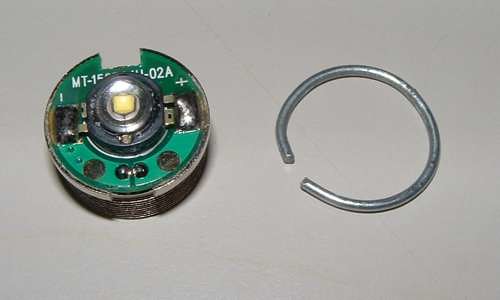
First, use a metal or copper wire to make a ring
223709568_7d4b52b3a8.jpg


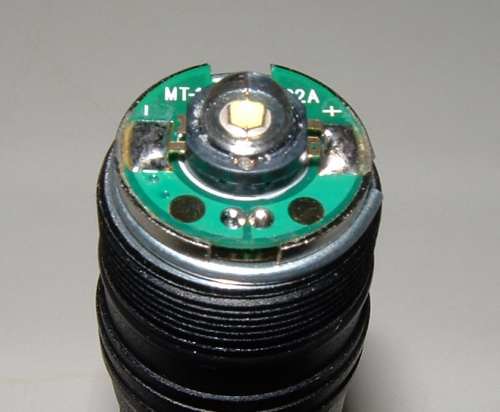
Put the ring in between and screw back the LED base.
223709569_ccd3851115.jpg


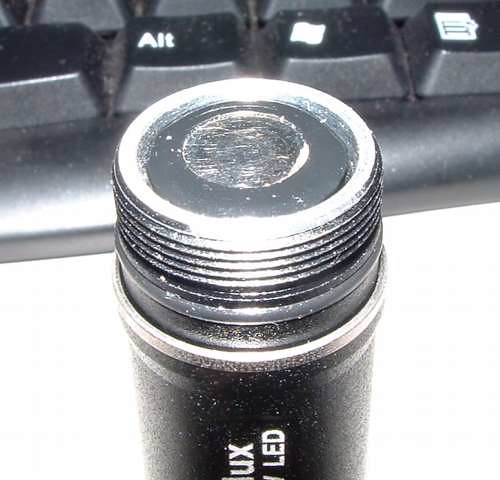
Make sure the battery bottom is near the same level as the tube and it's all done.
223709570_eb6b3d7df0.jpg


There's no need to take if off when using 1AA or 2AA betteries. It'll still work! :naughty:

PS. I'm using AW's protected 14500.
 

Krahl

Newly Enlightened
Joined
Nov 11, 2003
Messages
68
I like the LF1 alot. The reason I never bought a Fenix is the reverse clicky.

The LF1 replaced my TNC Keylux as my EDC because it takes Li-ions and alkalines.
I`m using mine with the IMS 17 mm reflector to get some throw and it fits perfect. I think a good accessory would be a metal reflector, it would upvalue the light alot.

Very nice would be a pocket clip, then the light also won`t roll of the table.
I would also like to see some coating on the inside of the light instead of bare aluminum.
The rough anodization is very nice, it looks good and it gives a little better grip.

This light has a lot of potential and I`m really looking forward to future versions.
5 stars from me.
 

Joe Talmadge

Flashlight Enthusiast
Joined
Aug 30, 2000
Messages
2,200
Location
Silicon Valley, CA
LED Cool said:
jayke,
to change the black button to a red one, the 2 part (upper & lower) retainer ring assembly needs to be removed using a sharp tweezer.

1. poke the sharp tweezer into the 2 holes in the 1st part (upper) of retainer ring and rotate the tweezer while still applying a slight downward pressure.

2. there are another 2 holes in the 2nd part (lower) of the retainer ring. once the tweezer is into the 2 holes in the lower part of retainer ring, you can then unscrew the whole assembly out.

3. from outside the tail cap, push out the black button slowly, while observing what comes out in what order. (clickie switch with circuit board, thin metal washer, then black silicone button)

4. change to red button and re-assemblle washer, clickie, and 2 part retainer ring. be careful of the orientation of the retainer ring. the lower part of the retainer ring is threaded, so please make sure it is the lower part that get screw back in.

I changed to the red button last night. No need to do steps 3 & 4, or even all of step 2. Once you start unscrewing the assembly, when the retainer rings are about halfway through the threads, the black tailbutton will be loose enough that you can pull it out from the back. I then put the red button in, again from the back. Then I just screwed the retainer rings and assembly back down tight again.

Joe
 

LED Cool

Enlightened
Joined
Jul 25, 2006
Messages
218
Location
Ipoh, Malaysia
netkidz, that is good thinking.:thumbsup: what is the diameter of the wire? 1mm, 1.5mm ?

krahl, try the lanyard or a small key ring and your LF1 will not easily roll off the table.

waion, glad you like your LF1, the clickie switch is my favourite as well. it operates like a surefire Z58 tail cap switch but with a shorter switch travel.
 
Top