jamie.91
Enlightened
Hey Cpf!
Finally Finished Phase one of my first Surefire Lego")
I decided i wanted a shortie/3P type light so i set about finding parts, i didnt want to go the oveready/fivemega route as thats what most do, i wanted something as close to 100% genuine surefire as possible.
I first sourced a surefire L60. For anyone who doesnt know, a p60 type drop in wont fit an L60 without machining

Heres a pic to show how close it is to fitting.

as this is "phase one" i wanted to use as many stock parts as possible, so although it could be machined i wanted to avoid surgery for now, it may come later though
so keeping within the stock parts parameters and as usual on a budget i found a Kx4 on the MP for the right money, the reason for this is it's a straight fit because of the spring/reflector arangement.

Im making another lego aswell at the moment which isnt finished yet but the standard tailcap on th 6P is being replaced so seen as i had a Z41 spare i decided to use it. Now seen as all my other surefires have mcclickys i decided i was going to use a ZeroRez for a change, that and it looks nice lol

By this point i had a light that i was happy with looks wise


I also tried it with a clicky out of curiosity, now im tort between the two :duh:
Now i had to get light from the handsome fella
I ran a 17500 at first with some magnets for spacers as it was slightly too short but the 4'ish volts wasnt quite enough to get full power (120 Lumens)

As you can see here two Cr123a's are way too long

Then i had an idea, why not run 2 Cr2's? that would give 6 volts and fit :YAY:

I should mention at this point that when trying new ideas you NEED a parts box to play with, heres mine

After fiddling with the spring on the KX4 and spacers another amazing idea came from nowhere, instead of cutting the spring to get the desired length, because remember we want to keep it stock for now, i decided that the light would be easier to operate if the head was the tiwisty rather than the tail seen as the anti roll bezel lands perfectly in your hand just between your thumb and finger! this would also make life easier in setting the battery length and stop rattle.
i added an o ring at the front as a damper.

as you can see its blue so ten times more amazing
as i tried it i realised the spring is a little long but in keeping with the stock parts thing for now i decided not to cut it down and save that for "phase two" if i decide to do so, but for now i added an o ring to fill the gap and keep the crud out.
This is the size of the gap

And with O ring

This is the end of "phase one" as it stands.


Concluding the first stage of the light my thoughts are mixed so i've decided to leave it as it is for a while and try it, if i think it could be better i will move onto phase two that will involve machining the body. i wanted to do it this way first to show its possible without machining as some people dont have access to lathes and such.
Over all i'm happy with the outcome, even though the gap between the body and the head is a little big its silky smooth and EASILY operable with one hand, this makes it easier to hold the light in and EDC way rather than a tactical grip. This was an unexpected game changer but i love it, i never planned it initially but i'm so glad that it turned out this way.
My ideas for the second stage i'm not sure on yet, and id love to hear your feedback and suggestions!
My first thought was to machine the body to use a p60 but im in love with the KX4 beam pattern :LOVE: its such a shame it has a nasty tint and ever so slightly under powered for me, id imagine 200 to 300 neutral lumens would be perfect for me.
I also considered machining the bottom of the tailcap ( the part before the threads ), the threads on the L60 are shorter than usual so i would benefit from more thread contact and a shorter overall length, even though i could shorten the spacer i'm not sure how it would look as there would be a silver band visible between the tailcap and body.
sorry for the long post and i hope its of interest to someone
Thanks
Jamie
Finally Finished Phase one of my first Surefire Lego
I decided i wanted a shortie/3P type light so i set about finding parts, i didnt want to go the oveready/fivemega route as thats what most do, i wanted something as close to 100% genuine surefire as possible.
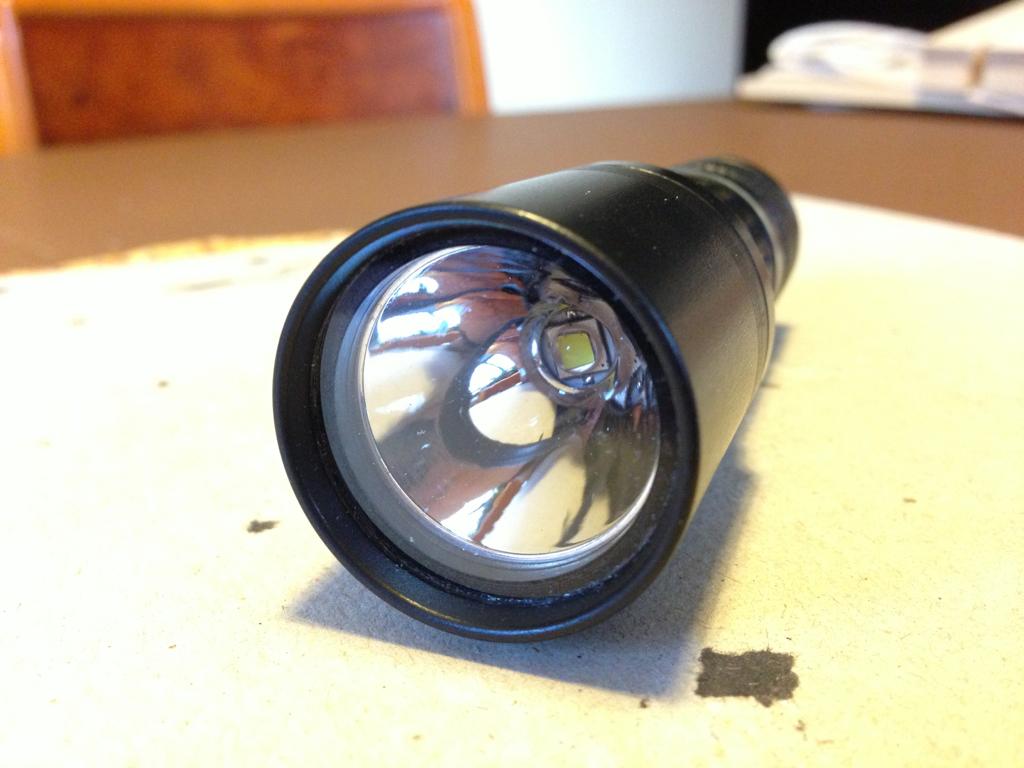
I first sourced a surefire L60. For anyone who doesnt know, a p60 type drop in wont fit an L60 without machining

Heres a pic to show how close it is to fitting.

as this is "phase one" i wanted to use as many stock parts as possible, so although it could be machined i wanted to avoid surgery for now, it may come later though
so keeping within the stock parts parameters and as usual on a budget i found a Kx4 on the MP for the right money, the reason for this is it's a straight fit because of the spring/reflector arangement.

Im making another lego aswell at the moment which isnt finished yet but the standard tailcap on th 6P is being replaced so seen as i had a Z41 spare i decided to use it. Now seen as all my other surefires have mcclickys i decided i was going to use a ZeroRez for a change, that and it looks nice lol

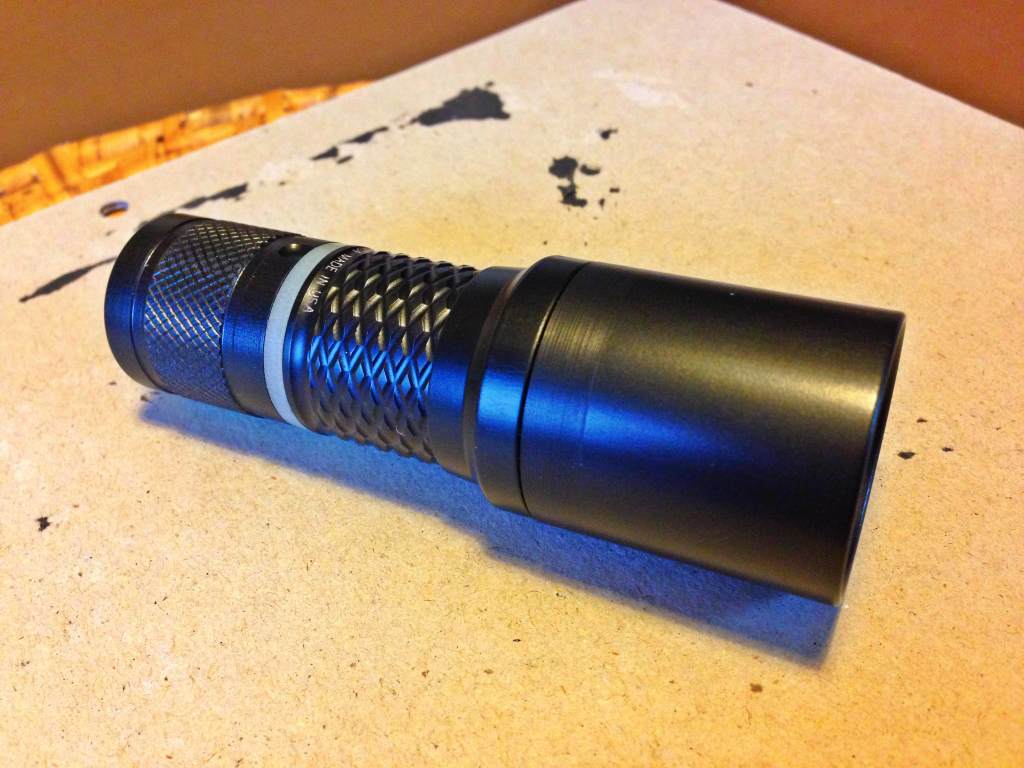
By this point i had a light that i was happy with looks wise


I also tried it with a clicky out of curiosity, now im tort between the two :duh:
Now i had to get light from the handsome fella
I ran a 17500 at first with some magnets for spacers as it was slightly too short but the 4'ish volts wasnt quite enough to get full power (120 Lumens)

As you can see here two Cr123a's are way too long

Then i had an idea, why not run 2 Cr2's? that would give 6 volts and fit :YAY:

I should mention at this point that when trying new ideas you NEED a parts box to play with, heres mine

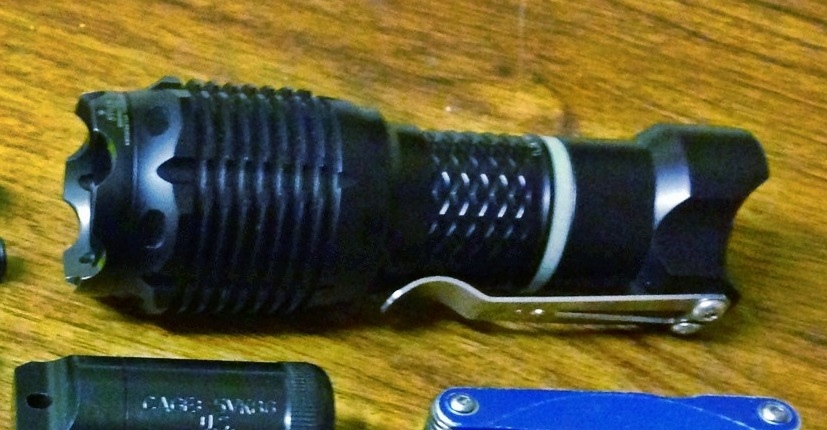
After fiddling with the spring on the KX4 and spacers another amazing idea came from nowhere, instead of cutting the spring to get the desired length, because remember we want to keep it stock for now, i decided that the light would be easier to operate if the head was the tiwisty rather than the tail seen as the anti roll bezel lands perfectly in your hand just between your thumb and finger! this would also make life easier in setting the battery length and stop rattle.
i added an o ring at the front as a damper.

as you can see its blue so ten times more amazing
as i tried it i realised the spring is a little long but in keeping with the stock parts thing for now i decided not to cut it down and save that for "phase two" if i decide to do so, but for now i added an o ring to fill the gap and keep the crud out.
This is the size of the gap

And with O ring

This is the end of "phase one" as it stands.


Concluding the first stage of the light my thoughts are mixed so i've decided to leave it as it is for a while and try it, if i think it could be better i will move onto phase two that will involve machining the body. i wanted to do it this way first to show its possible without machining as some people dont have access to lathes and such.
Over all i'm happy with the outcome, even though the gap between the body and the head is a little big its silky smooth and EASILY operable with one hand, this makes it easier to hold the light in and EDC way rather than a tactical grip. This was an unexpected game changer but i love it, i never planned it initially but i'm so glad that it turned out this way.
My ideas for the second stage i'm not sure on yet, and id love to hear your feedback and suggestions!
My first thought was to machine the body to use a p60 but im in love with the KX4 beam pattern :LOVE: its such a shame it has a nasty tint and ever so slightly under powered for me, id imagine 200 to 300 neutral lumens would be perfect for me.
I also considered machining the bottom of the tailcap ( the part before the threads ), the threads on the L60 are shorter than usual so i would benefit from more thread contact and a shorter overall length, even though i could shorten the spacer i'm not sure how it would look as there would be a silver band visible between the tailcap and body.
sorry for the long post and i hope its of interest to someone
Thanks
Jamie