over the years its been asked over and over again... How do you chop a Maglight ? and how do you make it water proof..? well here is how i do it and If done the right way It will make a water tight dive light head that can go down past 200 feet or more... So here we go ..
First you need a chop saw, or what ever you have in the shed.. i use a chop saw with a metal cutting disk
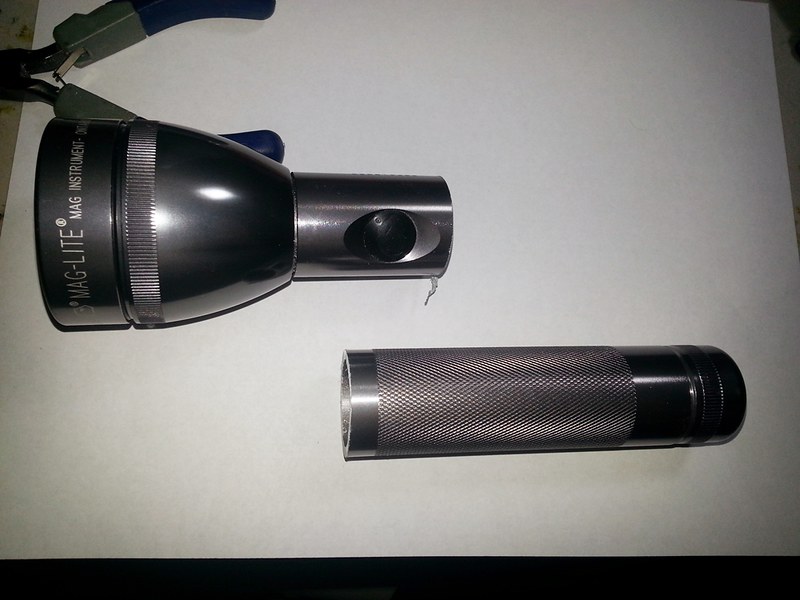
Then you need to decide what mag to chop a D size or a C size.? i use C mags because they have more room in the Head for optics
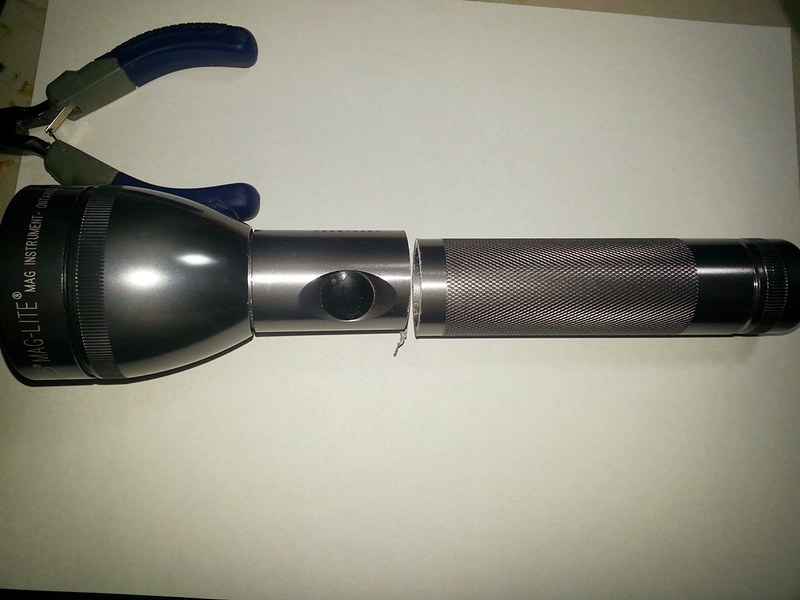
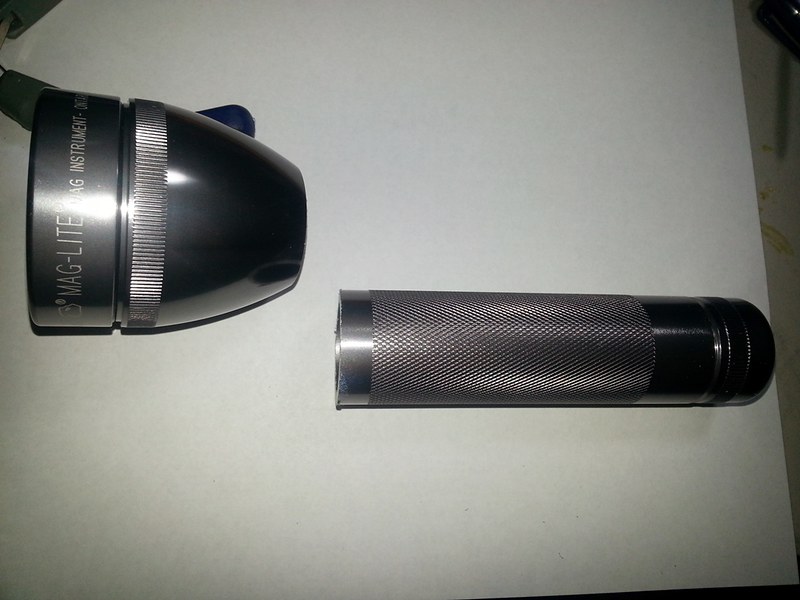
so grab you mag and chop it.. in this fist photo is where i chop mine
Nice , now we are ready for the next step
Now we are going to fit the Newly chopped handle into the mag head... but before we do that we are going to need to prep it
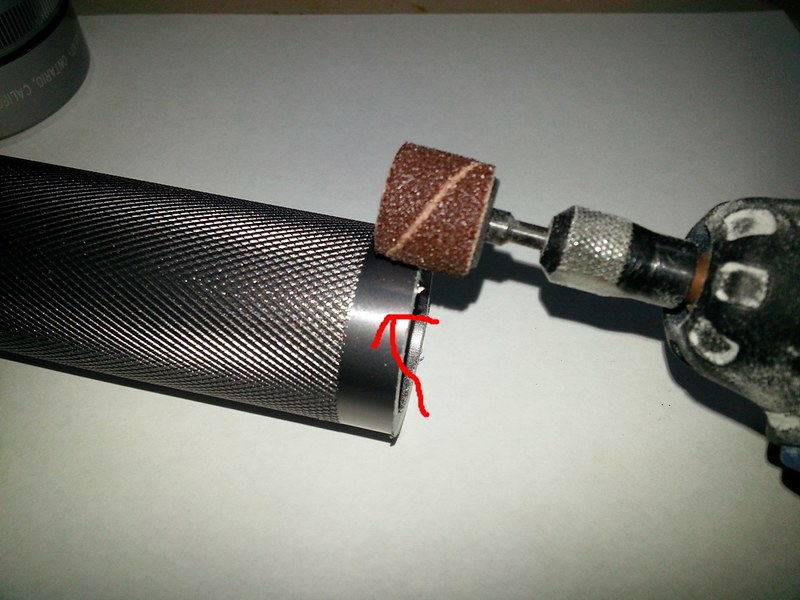
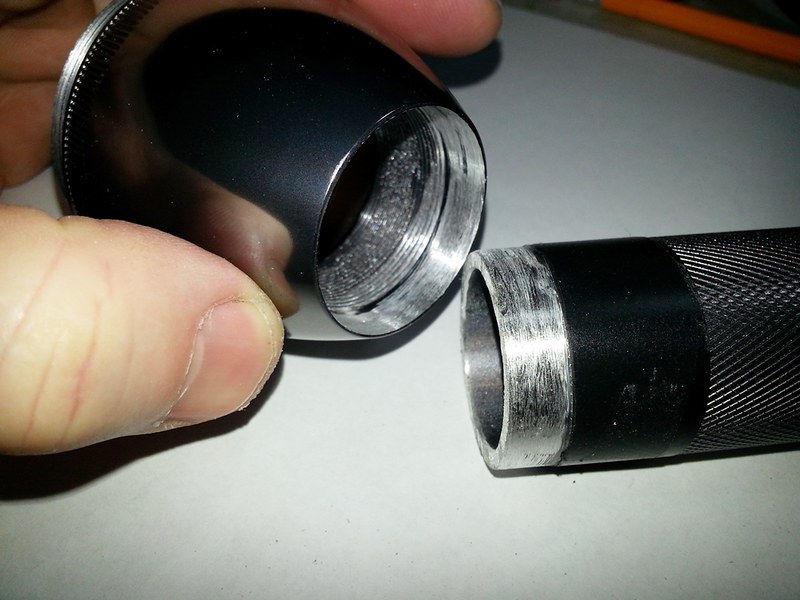
I find the best way to do this is with a dremel , i use the small sanding Barrell .. Take the dremel and sand off all the powder coating, if you mag is black sand off all the black powder coating, we want to see Raw aluminum
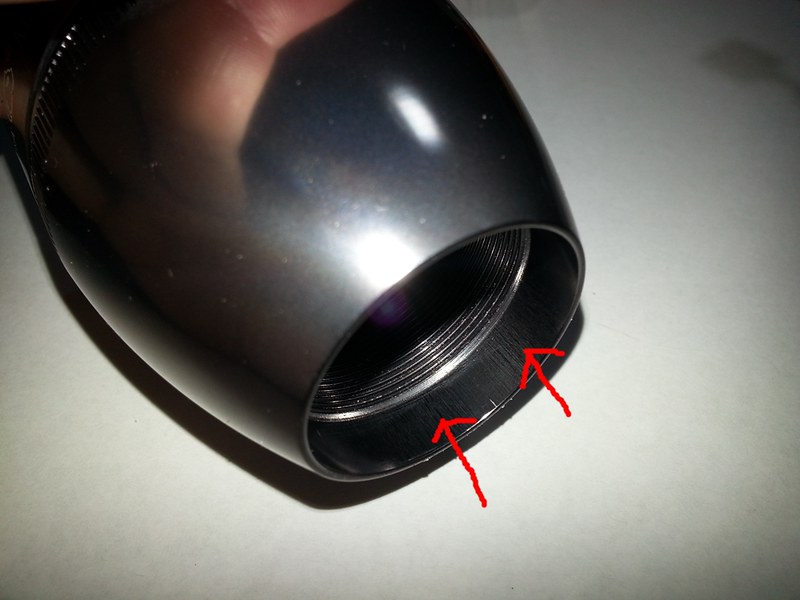
we are also going to do the same to the inside of the mag head...
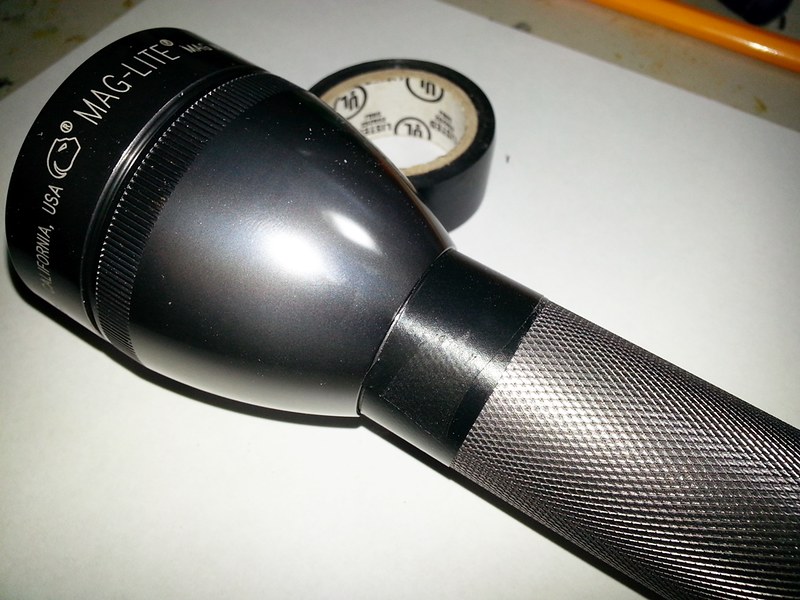
The next step is to fit the Handle into the maghead , and then get some Black electrical tape, this tape is going to be your guide on where to sand with your dremel... this will give you a nice taper line on where to sand ....
Now once your done sanding, it should Look like this ....
Now the next step is to get your JB weld and mix up a good amount to apply to the mag ...
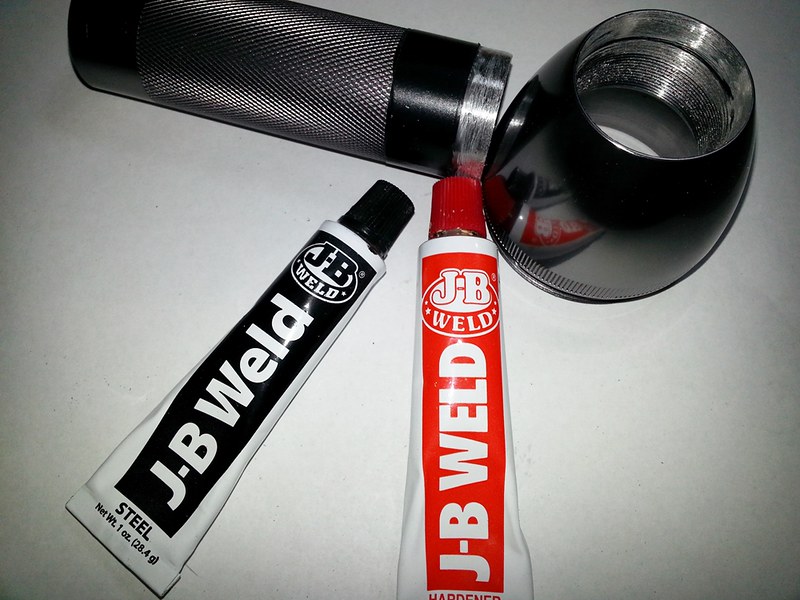
your going to apply a bead around the handle , and then a nice full bead of JB weld on the inside of the light head... Once youve coated both parts put them together... then take your finger and smooth the bead on the inside of the mag head where the 2 parts come together..
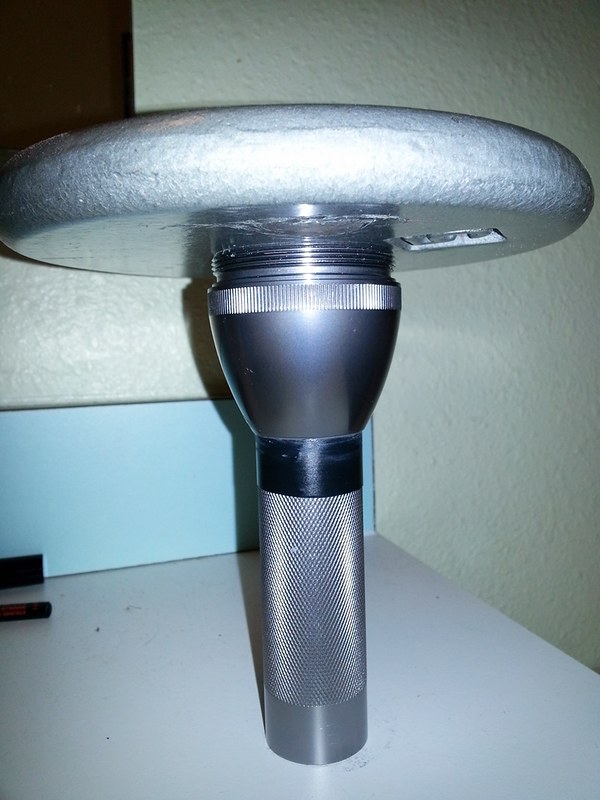
After that I put weight ontop of the maghead and let it sit and cure for 24 Hours...
After 24 hours ... you can now build your dive light... the other steps are to drill the end cap and instal a Cord Gland.. And install the front lens using an oring and silicone to seal it up.. i do not use a glass lens, why ? because i have found that glass has exploded on me do to pressure and heat at depths below 100 feet, I only use acrylic lenses and they have worked the best for me ... I use 100% aquarium grade silicone for the front lens, and the end cap...
Happy Modding H20doctor
First you need a chop saw, or what ever you have in the shed.. i use a chop saw with a metal cutting disk
Then you need to decide what mag to chop a D size or a C size.? i use C mags because they have more room in the Head for optics
so grab you mag and chop it.. in this fist photo is where i chop mine
Nice , now we are ready for the next step
Now we are going to fit the Newly chopped handle into the mag head... but before we do that we are going to need to prep it
I find the best way to do this is with a dremel , i use the small sanding Barrell .. Take the dremel and sand off all the powder coating, if you mag is black sand off all the black powder coating, we want to see Raw aluminum
we are also going to do the same to the inside of the mag head...
The next step is to fit the Handle into the maghead , and then get some Black electrical tape, this tape is going to be your guide on where to sand with your dremel... this will give you a nice taper line on where to sand ....
Now once your done sanding, it should Look like this ....
Now the next step is to get your JB weld and mix up a good amount to apply to the mag ...
your going to apply a bead around the handle , and then a nice full bead of JB weld on the inside of the light head... Once youve coated both parts put them together... then take your finger and smooth the bead on the inside of the mag head where the 2 parts come together..
After that I put weight ontop of the maghead and let it sit and cure for 24 Hours...
After 24 hours ... you can now build your dive light... the other steps are to drill the end cap and instal a Cord Gland.. And install the front lens using an oring and silicone to seal it up.. i do not use a glass lens, why ? because i have found that glass has exploded on me do to pressure and heat at depths below 100 feet, I only use acrylic lenses and they have worked the best for me ... I use 100% aquarium grade silicone for the front lens, and the end cap...
Happy Modding H20doctor
Last edited:
") What drop-in are you going to put in?
What drop-in are you going to put in?