
ahorton
Enlightened
- Joined
- Jul 22, 2008
- Messages
- 715
EDIT: This thread was initially a teaser that went on for several months. I slowly revealed information about it, but now I have collected it all in one place for easy reference. This is why it seems a bit disjointed.
The background:
The Spike V1
The Spike V2
The Worm Light
And after more than a year (+ over $2500) in development, there will also be the V3.
EDIT: Ha! it turned out to take another year and much more money than that!
It's not quite here yet, but I've sent the parts off to be machined / moulded. Many different parts from different suppliers. I'm hoping that it'll be ready in about 4-6 weeks. I'm pretty excited! I like headlamps and this new one is like nothing I've made before.
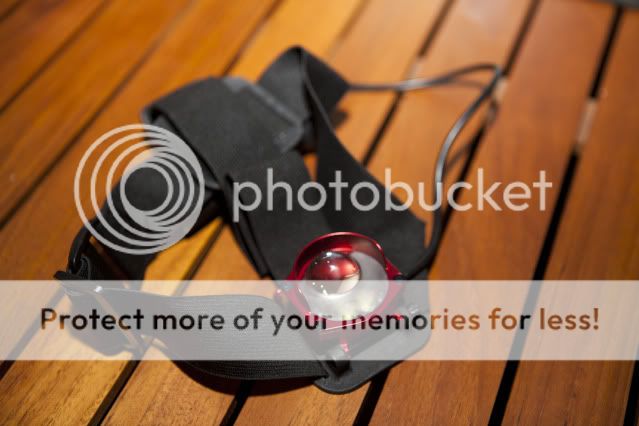
A few teasers for those who like headlamps as much as me:
1
7075 aluminium screws (+ many other weight savings)
Plastic moulded brackets
Most comfortable and stable of anything I've made or worn in the past.
Powered by 2x regular 18650s
Waterproof tested to 30m (in pressure tank)
2 The "Road Train" variation (temporary name)
There are 2 variations
- The original* dual beam 1A XR-E Aspheric / 1.4A Dual XP-G
- A new 2400 (theoretical, emitter) lumen single (multi-emitter) beam.**
*Almost. It's very similar to the original but with a few minor upgrades.
**No the heatsinking is not adequate. Not by far. At full power it does get pretty hot, but it has over-heating control. So far it has never triggered while I've been using it (so it is stable) but the output drops a bit. I think 1000 lumens is the practical maximum and point of diminishing returns.
3 Neutral Flood
The flood beam comes from two XP-Gs in Neutral R4. For some people, this will seem silly knowing that there are R5s and S2s available, but it's a much happier and warmer glow. It really makes a difference at 3am when you are cold, tired and depressed.
The spot has stayed cool.
4 Microcontroller Access
[Geek Warning]
The V3 has a microcontroller which can be reprogrammed by the owner. This means you can connect it to your computer and download a new UI if you don't like the one you selected when you bought it. ...
5 New Lens
It has a whole new lens which I designed specifically for the V3. Similar material (BK7) and quality to my aspherics, but a new mould was made along with whole batch of funny shaped lenses. The manufacturer thought I was crazy. They said they couldn't imagine how it would be useful for anything.
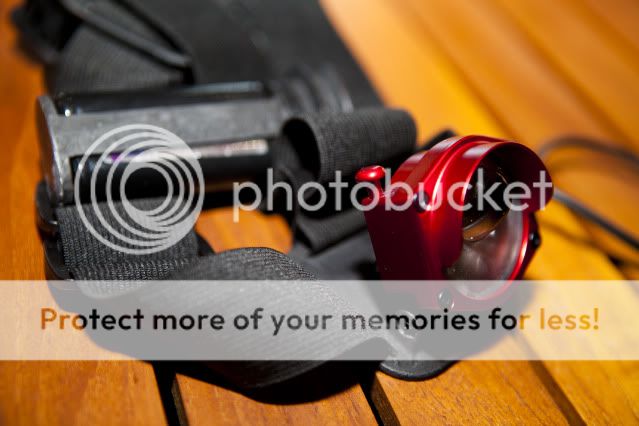
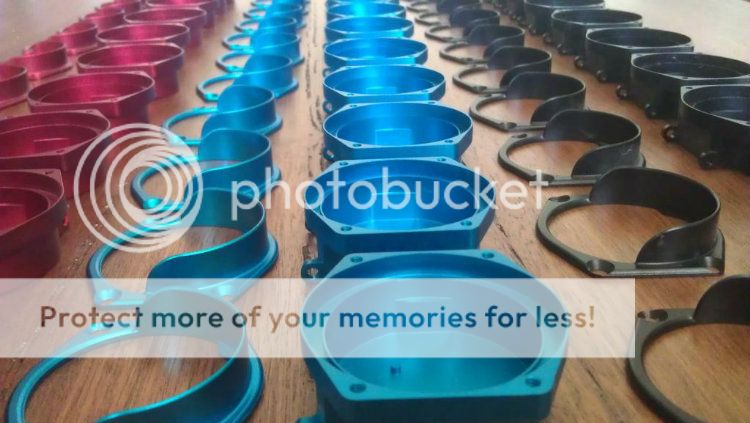
6 Colours
3 Colours available (Red, Blue, Black)
Some of the hardware will stay black as well as the plastic parts. So they'll either be all-black or red/black etc.
The switch button is being machined from 7075-T6 Al and is coming in each of the colours. So I'll be able to make a black V3 with just a red button (along with many other combinations). I don't know what I'll like yet so I just ordered a bunch of each to try out. When they arrive I'll start playing dress-ups.
7: Parallel Cells
The two 18650 cells are in parallel and individually accessible.
Implications:
- You can run the headlight with only one 18650 cell if you want.
- You can replace one cell at a time and never be without light.
The second assumes you don't mind mixing cells of different charge levels. For the 5 seconds it takes to swap a cell, I don't mind.
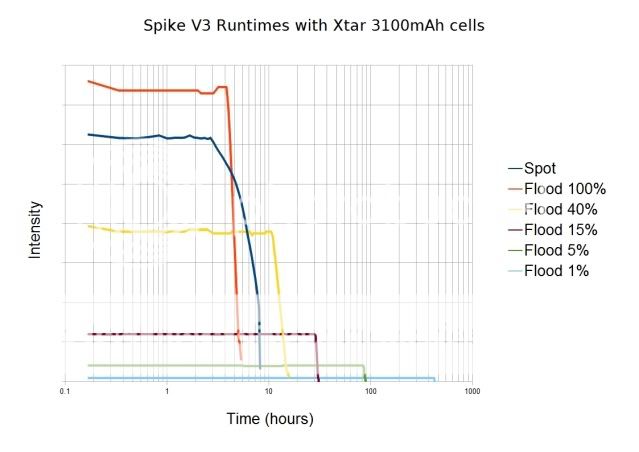
Runtimes with 2x protected XTAR (Panasonic) 3100mAh cells:
The current to the spot XR-E was 1050mA and the twin XP-Gs each received up to 700mA (1400mA total).
Logarithmic scale:
Without the lowest mode, it can now be viewed on a linear scale:
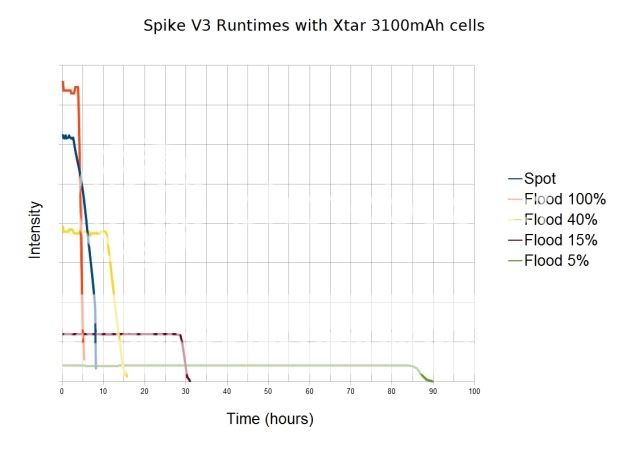
Bottom line:
I can get at least:
3 goods hours on the spot,
4 on the flood at 100%,
10 on the flood at 40%,
28 on the flood at 15%,
85 on the flood at 5%,
and probably more than 400 at 1%.
User Interfaces:
Here are some diagrams and a crude video to show how the 3 standard UIs work. Nothing pretty. I'd rather spend my time making the headlights, but I realised that people need this info first.


Broing YOUTUBE video to teach you how to use the competition interface:
http://youtu.be/RK63BGZ1hVA
NB: All UIs have a low-voltage protection. When the voltage approaches 3.0-3.1V, the highest modes are disabled. This allows the lower modes to continue for several more hours before the cell's protection circuits are triggered. So if you think your headlight is broken because the spot mode doesn't work, try recharging the cells. I have had several complaints that all turned out to be exhausted cells!
Here are a few extra pictures:
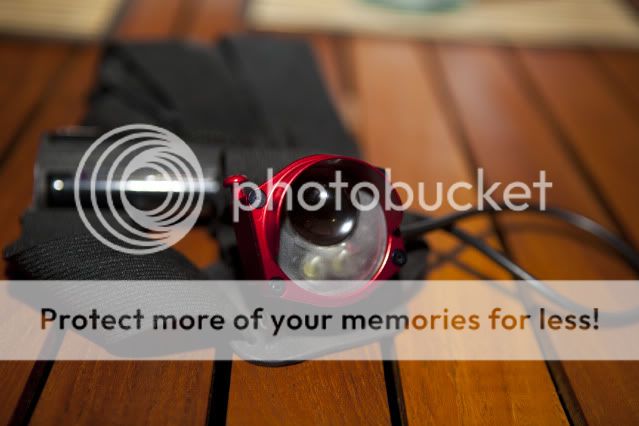
My new lens! Part aspheric for throw and frosted elsewhere for a smooth flood.
Remove the 4 x 7075 aluminium screws and the coverplate comes off.
Lift the lens out to service the 2.62mm o-ring or access the programming header.
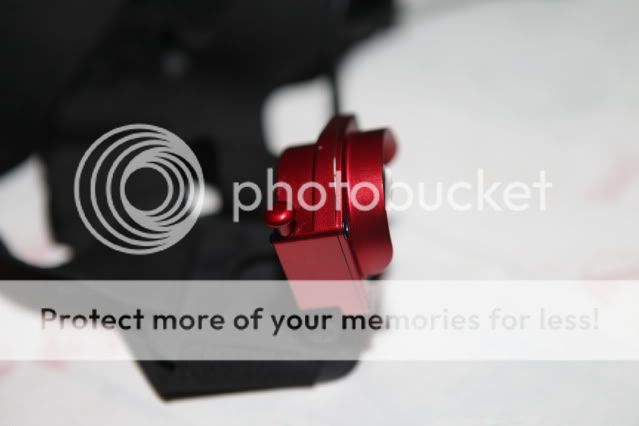
Big switch. Very strong (7075 aluminium). Nice solid press. Non-mechanical (very hard to break).
No moving parts penetrate the sealed body so there's no gaskets or rubber boots to fail.
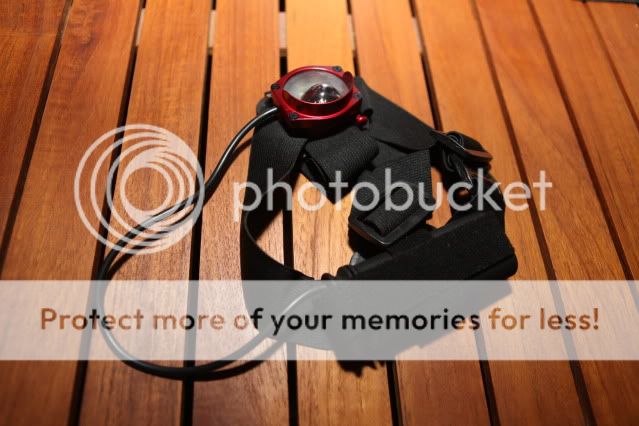
Also note the low profile and low weight which makes it very stable on the head.
Nice wide elastic for comfort and stability.
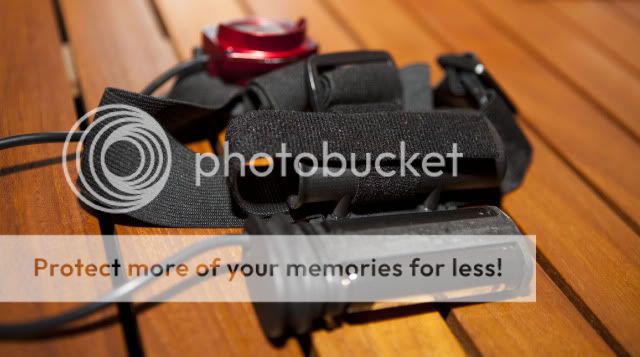
The battery pack at the back.
Focus on the 18650 holder. Uses one or two cells in parallel.
Big fat (3.53mm) o-ring makes an excellent waterproof seal every time.
All wires are embedded inside the plastic.

Focus on the battery case.
Very simple and reliable Velcro strap to keep the piston-like cell holder in place.
The velcro should be good for a few thousand actuations, but can easily be replaced.
No breakable clips or hinges. Nothing to fall off. No fiddly screws or latches.
Case mounts to bracket with 4 screws. Can mount to other things too.
Note the back of the bracket. Smoothly contoured to fit the head.
Edit: All these pictures are out of date now. Small changes keep being made. It now has a spiral cable, a better hinge, one less buckle ... etc. The same basic shape remains unchanged.
Only the aluminium parts are coloured. The plastic parts are all black.
Total mass for this little guy is 187g without 18650 cells (282g with the cells).
The background:
The Spike V1
The Spike V2
The Worm Light
And after more than a year (+ over $2500) in development, there will also be the V3.
EDIT: Ha! it turned out to take another year and much more money than that!
It's not quite here yet, but I've sent the parts off to be machined / moulded. Many different parts from different suppliers. I'm hoping that it'll be ready in about 4-6 weeks. I'm pretty excited! I like headlamps and this new one is like nothing I've made before.
A few teasers for those who like headlamps as much as me:
1
7075 aluminium screws (+ many other weight savings)
Plastic moulded brackets
Most comfortable and stable of anything I've made or worn in the past.
Powered by 2x regular 18650s
Waterproof tested to 30m (in pressure tank)
2 The "Road Train" variation (temporary name)
There are 2 variations
- The original* dual beam 1A XR-E Aspheric / 1.4A Dual XP-G
- A new 2400 (theoretical, emitter) lumen single (multi-emitter) beam.**
*Almost. It's very similar to the original but with a few minor upgrades.
**No the heatsinking is not adequate. Not by far. At full power it does get pretty hot, but it has over-heating control. So far it has never triggered while I've been using it (so it is stable) but the output drops a bit. I think 1000 lumens is the practical maximum and point of diminishing returns.
3 Neutral Flood
The flood beam comes from two XP-Gs in Neutral R4. For some people, this will seem silly knowing that there are R5s and S2s available, but it's a much happier and warmer glow. It really makes a difference at 3am when you are cold, tired and depressed.
The spot has stayed cool.
4 Microcontroller Access
[Geek Warning]
The V3 has a microcontroller which can be reprogrammed by the owner. This means you can connect it to your computer and download a new UI if you don't like the one you selected when you bought it. ...
5 New Lens
It has a whole new lens which I designed specifically for the V3. Similar material (BK7) and quality to my aspherics, but a new mould was made along with whole batch of funny shaped lenses. The manufacturer thought I was crazy. They said they couldn't imagine how it would be useful for anything.
6 Colours
3 Colours available (Red, Blue, Black)
Some of the hardware will stay black as well as the plastic parts. So they'll either be all-black or red/black etc.
The switch button is being machined from 7075-T6 Al and is coming in each of the colours. So I'll be able to make a black V3 with just a red button (along with many other combinations). I don't know what I'll like yet so I just ordered a bunch of each to try out. When they arrive I'll start playing dress-ups.
7: Parallel Cells
The two 18650 cells are in parallel and individually accessible.
Implications:
- You can run the headlight with only one 18650 cell if you want.
- You can replace one cell at a time and never be without light.
The second assumes you don't mind mixing cells of different charge levels. For the 5 seconds it takes to swap a cell, I don't mind.
Runtimes with 2x protected XTAR (Panasonic) 3100mAh cells:
The current to the spot XR-E was 1050mA and the twin XP-Gs each received up to 700mA (1400mA total).
Logarithmic scale:
Without the lowest mode, it can now be viewed on a linear scale:
Bottom line:
I can get at least:
3 goods hours on the spot,
4 on the flood at 100%,
10 on the flood at 40%,
28 on the flood at 15%,
85 on the flood at 5%,
and probably more than 400 at 1%.
User Interfaces:
Here are some diagrams and a crude video to show how the 3 standard UIs work. Nothing pretty. I'd rather spend my time making the headlights, but I realised that people need this info first.
Broing YOUTUBE video to teach you how to use the competition interface:
http://youtu.be/RK63BGZ1hVA
NB: All UIs have a low-voltage protection. When the voltage approaches 3.0-3.1V, the highest modes are disabled. This allows the lower modes to continue for several more hours before the cell's protection circuits are triggered. So if you think your headlight is broken because the spot mode doesn't work, try recharging the cells. I have had several complaints that all turned out to be exhausted cells!
Here are a few extra pictures:
My new lens! Part aspheric for throw and frosted elsewhere for a smooth flood.
Remove the 4 x 7075 aluminium screws and the coverplate comes off.
Lift the lens out to service the 2.62mm o-ring or access the programming header.
Big switch. Very strong (7075 aluminium). Nice solid press. Non-mechanical (very hard to break).
No moving parts penetrate the sealed body so there's no gaskets or rubber boots to fail.
Also note the low profile and low weight which makes it very stable on the head.
Nice wide elastic for comfort and stability.
The battery pack at the back.
Focus on the 18650 holder. Uses one or two cells in parallel.
Big fat (3.53mm) o-ring makes an excellent waterproof seal every time.
All wires are embedded inside the plastic.
Focus on the battery case.
Very simple and reliable Velcro strap to keep the piston-like cell holder in place.
The velcro should be good for a few thousand actuations, but can easily be replaced.
No breakable clips or hinges. Nothing to fall off. No fiddly screws or latches.
Case mounts to bracket with 4 screws. Can mount to other things too.
Note the back of the bracket. Smoothly contoured to fit the head.
Edit: All these pictures are out of date now. Small changes keep being made. It now has a spiral cable, a better hinge, one less buckle ... etc. The same basic shape remains unchanged.
Only the aluminium parts are coloured. The plastic parts are all black.
Total mass for this little guy is 187g without 18650 cells (282g with the cells).
Last edited:
")
