
bluecrow76
Enlightened
My first mod!
The second LED light I bought a couple years ago after Katrina was a Streamlight Twin-Task 3AA because of the long runtime on the LEDs. Then i found the Task-Light 3AA based on the 1W Luxeon. That was really cool at the time too! Time went by, technology got better and I matured in my flashlight knowledge, and needless to say my two Streamlight T-L's lost their attraction.
A couple months ago I read how to take them apart. When I dissected my Task-Light, I discovered the single pull-down resistor on the back of the switch. I realized how easy it would be to replace the Luxeon I on a star, and possibly add some sort of current regulator.
I placed an order for some parts from Kaidomain. In the order I included a Cree Q5 on a star ($9) and a 5 mode regulator board ($3). I used parts from Kai simply because this was my first mod and I didn't want to make a huge investment, although I was really excited about the possibility of resurrecting my old light.
All my parts arrived two days ago and I got to work. Pictures of the light are at the end.
To removed the LED from body of the light, you have to first remove the head (duh). You will then find a hexagonal looking piece on top of the star. This screws off. Carefully use some pliers to unscrew and remove it. The LED and switch module should come out pretty easily. If it provides any resistance dropping a AA down the tube will give it enough of a nudge to make it pop out.
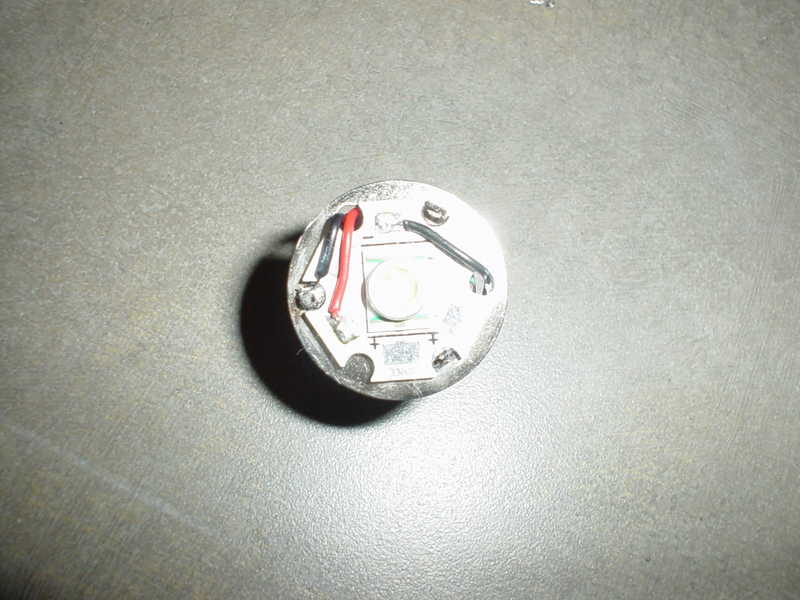
To remove the original LED, first you need to unsolder the wires. One of them goes from the - plate of the star to the ground plate. The point that it is soldered to the ground plate is what I connected to the - input of the regulator. After you've removed the wires, simply pry the old star off and put the new one on.
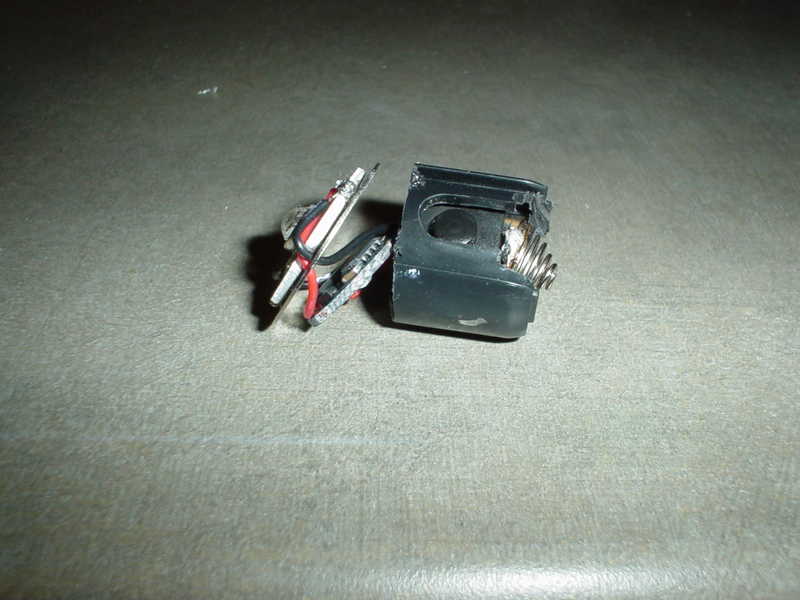
At first I had some grand ideas of mounting the drive board on the bottom of the plastic switch module and having the top of the battery contact the bottom of the drive board directly. I started cutting the bottom of the module and realized I didn't have the tools to do the "precision" work that would be required. So now I had a nicely mangled module. I had already cut off the bottom of the switch PCB and removed the + battery tab, so I connected a spring that I pulled from a spare MiniMAG tail.
You'll also notice on the switch PCB a wire connecting the right side to the left side. I discovered the hard way that you don't cut PCB with pliers, unless you want the cut to travel all the way across the PCB. The first time I attempted it the PCB split all the way up about a 1/4 of the way from the right hand side (looking at the back of the board). This had the effect of separating the left switch contact from the right switch contact, so I had to add a wire that reconnected
them. "The proper way" to cut PCB is to use my Dremel and a cutting wheel! That worked much better!
I decided to mount the driver between the switch module and the LED/ground plate. This required me to cut down the top of the switch module and the switch PCB so that there would be some room for it. I cut the switch PCB down to the top of the switch, and then cut the switch module down to match the PCB level.
So for battery contacts, the + connection comes from the spring, through the switch module and up to the bottom of the regulator via a wire soldered to the + plate on the regulator. The - connection comes from the LED/ground plate down to the regulator. The wires I used came with the regulators that I bought from Kai. Very convenient and pre-tinned!
I added some Ceramique non-electrically conductive thermal compound to the top of the driver board after all the soldering was done. If the regulator warms up the heat will be transferred to the ground plate and hopefully to the body of the light. I opted not to use thermal epoxy as I may want to update it some day.
I was going to replace the stock reflector with a Fraen. The Fraen provides a nice tight hot spot and some spill if you want a thrower. The beam of the stock reflector with the stock Luxeon I is not the greatest and I was expecting the same behavior after the mod was done. I was about to start cutting into the stock reflector to make room for the new one when I decided to at least give the old one a try. I was pleasantly surprised to find that it worked great! It's floodier than the Fraen but has a defined hot spot with nice wide spill. I'm intending this light for around the inside and outside of the house, or maybe a car light, so I opted for the floodier reflector. I've got LumaPower lights for throw!
To put the setup back in, you have to pull out on the switch button so the module can slip past. I used some hemostats clipped to the button to keep it pulled out while I inserted the setup. I had to do this same thing on all the other StreamLight Twin-Tasks I've taken apart.
What once was an unimpressive Luxeon I based ringy beamed light is now a regulated 5 mode Streamlight Task-Light Cree Q5 almost tactical light! The new configuration on low puts out more light with a cleaner beam than the original configuration's single mode, and I'm guessing that the batteries will last a good deal longer! The driver that I used takes an input voltage from 2.7V to 6.0V (as stated on Kai). Now to make get another driver that can handle multiple lithium ions.
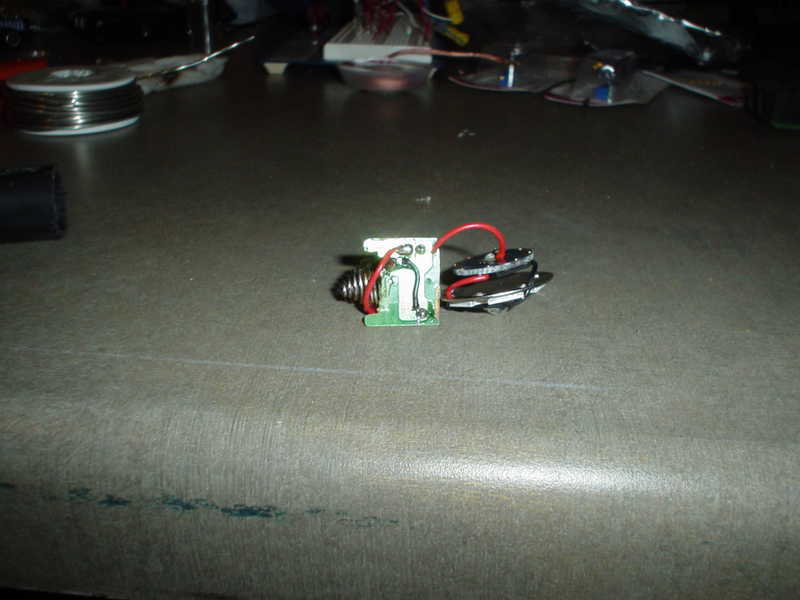
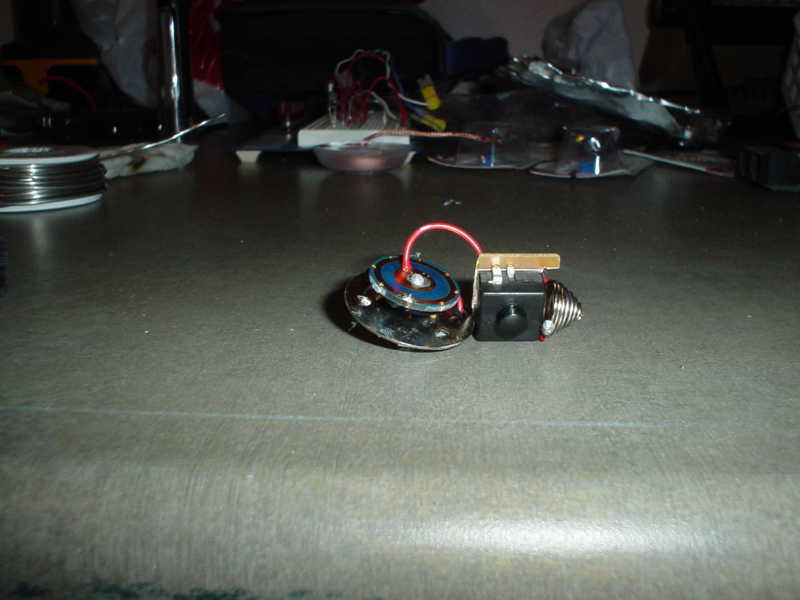
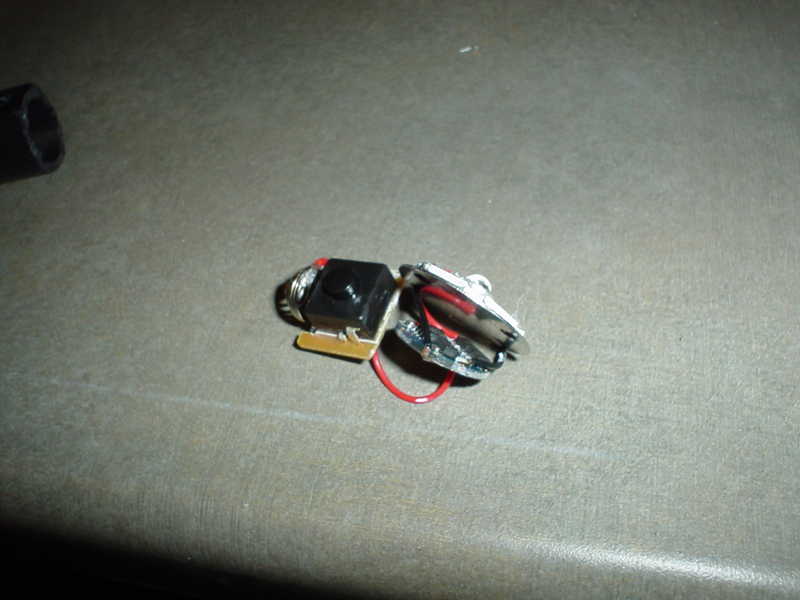
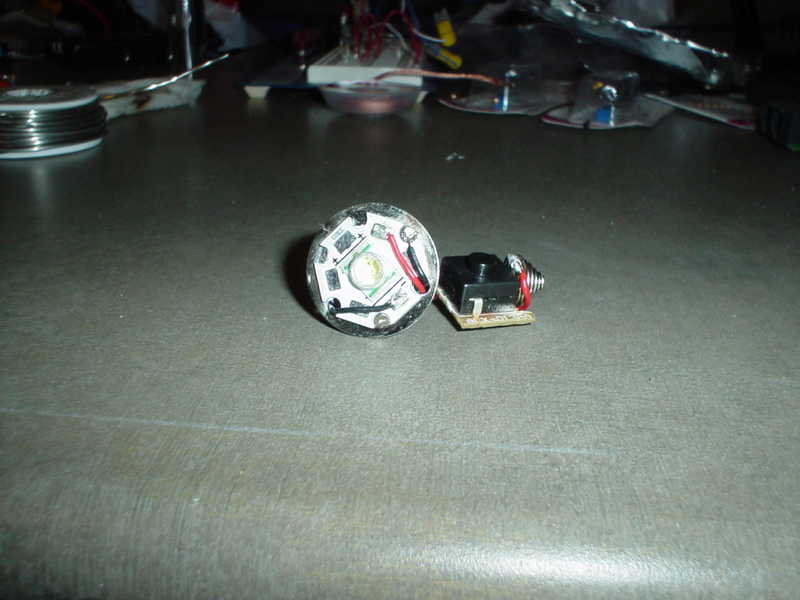
Views of the complete module:
Looking in after the switch and LED modules have been put back in.
Looking down the top of the light after the hex screw has been put back on:

The second LED light I bought a couple years ago after Katrina was a Streamlight Twin-Task 3AA because of the long runtime on the LEDs. Then i found the Task-Light 3AA based on the 1W Luxeon. That was really cool at the time too! Time went by, technology got better and I matured in my flashlight knowledge, and needless to say my two Streamlight T-L's lost their attraction.
A couple months ago I read how to take them apart. When I dissected my Task-Light, I discovered the single pull-down resistor on the back of the switch. I realized how easy it would be to replace the Luxeon I on a star, and possibly add some sort of current regulator.
I placed an order for some parts from Kaidomain. In the order I included a Cree Q5 on a star ($9) and a 5 mode regulator board ($3). I used parts from Kai simply because this was my first mod and I didn't want to make a huge investment, although I was really excited about the possibility of resurrecting my old light.
All my parts arrived two days ago and I got to work. Pictures of the light are at the end.
To removed the LED from body of the light, you have to first remove the head (duh). You will then find a hexagonal looking piece on top of the star. This screws off. Carefully use some pliers to unscrew and remove it. The LED and switch module should come out pretty easily. If it provides any resistance dropping a AA down the tube will give it enough of a nudge to make it pop out.
To remove the original LED, first you need to unsolder the wires. One of them goes from the - plate of the star to the ground plate. The point that it is soldered to the ground plate is what I connected to the - input of the regulator. After you've removed the wires, simply pry the old star off and put the new one on.
At first I had some grand ideas of mounting the drive board on the bottom of the plastic switch module and having the top of the battery contact the bottom of the drive board directly. I started cutting the bottom of the module and realized I didn't have the tools to do the "precision" work that would be required. So now I had a nicely mangled module. I had already cut off the bottom of the switch PCB and removed the + battery tab, so I connected a spring that I pulled from a spare MiniMAG tail.
You'll also notice on the switch PCB a wire connecting the right side to the left side. I discovered the hard way that you don't cut PCB with pliers, unless you want the cut to travel all the way across the PCB. The first time I attempted it the PCB split all the way up about a 1/4 of the way from the right hand side (looking at the back of the board). This had the effect of separating the left switch contact from the right switch contact, so I had to add a wire that reconnected
them. "The proper way" to cut PCB is to use my Dremel and a cutting wheel! That worked much better!
I decided to mount the driver between the switch module and the LED/ground plate. This required me to cut down the top of the switch module and the switch PCB so that there would be some room for it. I cut the switch PCB down to the top of the switch, and then cut the switch module down to match the PCB level.
So for battery contacts, the + connection comes from the spring, through the switch module and up to the bottom of the regulator via a wire soldered to the + plate on the regulator. The - connection comes from the LED/ground plate down to the regulator. The wires I used came with the regulators that I bought from Kai. Very convenient and pre-tinned!
I added some Ceramique non-electrically conductive thermal compound to the top of the driver board after all the soldering was done. If the regulator warms up the heat will be transferred to the ground plate and hopefully to the body of the light. I opted not to use thermal epoxy as I may want to update it some day.
I was going to replace the stock reflector with a Fraen. The Fraen provides a nice tight hot spot and some spill if you want a thrower. The beam of the stock reflector with the stock Luxeon I is not the greatest and I was expecting the same behavior after the mod was done. I was about to start cutting into the stock reflector to make room for the new one when I decided to at least give the old one a try. I was pleasantly surprised to find that it worked great! It's floodier than the Fraen but has a defined hot spot with nice wide spill. I'm intending this light for around the inside and outside of the house, or maybe a car light, so I opted for the floodier reflector. I've got LumaPower lights for throw!
To put the setup back in, you have to pull out on the switch button so the module can slip past. I used some hemostats clipped to the button to keep it pulled out while I inserted the setup. I had to do this same thing on all the other StreamLight Twin-Tasks I've taken apart.
What once was an unimpressive Luxeon I based ringy beamed light is now a regulated 5 mode Streamlight Task-Light Cree Q5 almost tactical light! The new configuration on low puts out more light with a cleaner beam than the original configuration's single mode, and I'm guessing that the batteries will last a good deal longer! The driver that I used takes an input voltage from 2.7V to 6.0V (as stated on Kai). Now to make get another driver that can handle multiple lithium ions.
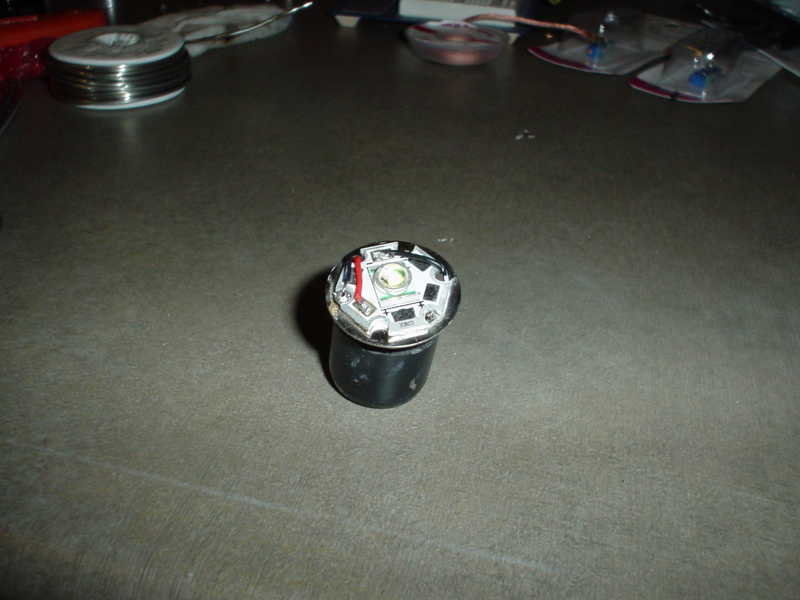
Views of the complete module:
Looking in after the switch and LED modules have been put back in.
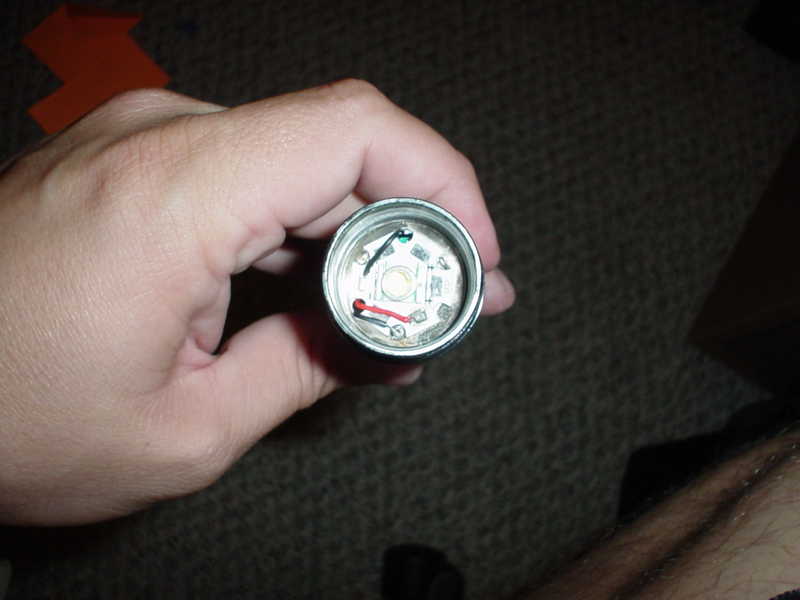
Looking down the top of the light after the hex screw has been put back on:
Last edited: