koala
Flashlight Enthusiast
Read how the project started here!
CLICK HERE TO JUMP DIRECTLY TO ORDER LIST & UPDATES.
Hello guys,
I am finally making these available. Please read and read carefully, before you take the plunge.
For this reason, I am posting the user instructions first then followed by the actual sales contents.
View this in Google, download as PDF format
Onion Ring User Instructions

Before performing the task, please ensure that you are wearing a grounded anti-static wrist strap to prevent damage from the electronic components.
The 5mm LED has no ESD protection. Here's a howto.
Inspect Onion Rings
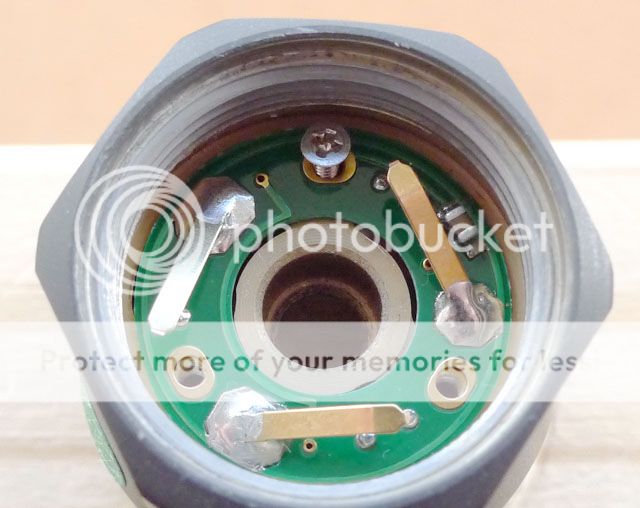
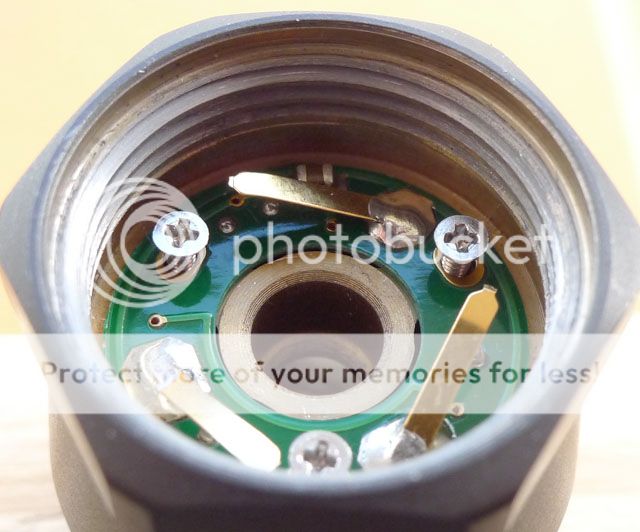
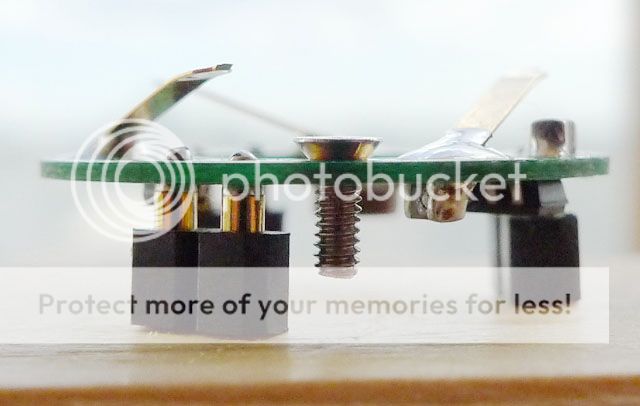
1 - Check the springs are in shape and the DIP connectors are straight. Refer to pictures below.
Preparing the LEDs.
1 - Trim the leads to 4mm. Usually, there will be a stopper in the way, remove the stoppers with a file. Thick leads will damage the socket.
Some leads are thicker than normal, if so, thin the leads. A Dremel with sanding disc will work well.

2 - Remove base/skirt with a file. The easiest way is to insert the LED into a drill chuck and file away

The LEDs should have a smooth body without the protruding base/skirt.

Preparing the SF A2 head
Dust is your main enemy, start by cleaning your work area. Once it's clean, clean your SF A2 especially the bezel head area. You don't want anything to fall inside the reflector area because it's hard to remove it afterwards. Remove the original Surefire A2 LED ring by disassembling the three screws with a small Philips screwdriver. Keep the screws in a safe location. Do not lose them!
You should recycle the Onion Ring packaging by reusing it for storing the Surefire A2 LED ring. :thumbsup: Keep the item safe, you will not need it for the rest of the installation.
Preparing the Onion Ring
1 - Adjusting the Brightness.
The surface mount trimpot has an arrow pointer, you may need a loupe if vision is not perfect. It will arrive in medium setting(12 o'clock) as a default. Each LEDs will be driven at 10-15mA.

2 - Minimum brightness setting is at 7 o'clock. Each LEDs will be driven at 3-5mA.

3 - Maximum brightness setting is at 3 o'clock. Each LEDs will be driven at 32-38mA.

Adjust brightness sparingly and only when needed. The trimpot is not a regular stereo adjstment knob, it will not last many cycles.
4. Installing the LEDs.
When the socket is at 12 o'clock, positive is on the left and negative on the right


Installing the Onion Ring
1 - Insert the Onion Ring in to the A2 head. Position a screw in to the correct slot as pictured (other slots may not work)

Important!
2 - Hold the screwdriver as upright as possible and turn slowly and lightly clockwise. Do not use any force, if you feel any resistance, remove the screw and try again.
It's easy to strip the thread in the A2 head as the metal is soft. So install the screw slowly and carefully. We only need 1 screw for now. Reinstall the Surefire MA02 bulb then the head. Check if the LED brightness is right.
If adjustment is required, remove everything and adjust the trimpot.
3 - When you are done with the adjustments, reinstall the second and third screw.

The screw holes might not align properly. Loosen the first screw by 2 to 3 turns. Then try installing the second and third screw. Finally tighten the screws one by one in small steps.
4 - Due to the design(more like lack of) of the pcb slots, the screw does not go all the way in. So stop turning once you feel resistance.

5 - The Onion Ring does not need all screws to function, you can leave the two screws out but keep them in a safe place. Do not lose them!
View this in Google, download as PDF format
CLICK HERE TO JUMP DIRECTLY TO ORDER LIST & UPDATES.
Hello guys,
I am finally making these available. Please read and read carefully, before you take the plunge.
For this reason, I am posting the user instructions first then followed by the actual sales contents.
View this in Google, download as PDF format
Onion Ring User Instructions

Before performing the task, please ensure that you are wearing a grounded anti-static wrist strap to prevent damage from the electronic components.
The 5mm LED has no ESD protection. Here's a howto.
Inspect Onion Rings
1 - Check the springs are in shape and the DIP connectors are straight. Refer to pictures below.
Preparing the LEDs.
1 - Trim the leads to 4mm. Usually, there will be a stopper in the way, remove the stoppers with a file. Thick leads will damage the socket.
Some leads are thicker than normal, if so, thin the leads. A Dremel with sanding disc will work well.
2 - Remove base/skirt with a file. The easiest way is to insert the LED into a drill chuck and file away
The LEDs should have a smooth body without the protruding base/skirt.
Preparing the SF A2 head
Dust is your main enemy, start by cleaning your work area. Once it's clean, clean your SF A2 especially the bezel head area. You don't want anything to fall inside the reflector area because it's hard to remove it afterwards. Remove the original Surefire A2 LED ring by disassembling the three screws with a small Philips screwdriver. Keep the screws in a safe location. Do not lose them!
You should recycle the Onion Ring packaging by reusing it for storing the Surefire A2 LED ring. :thumbsup: Keep the item safe, you will not need it for the rest of the installation.
Preparing the Onion Ring
1 - Adjusting the Brightness.
The surface mount trimpot has an arrow pointer, you may need a loupe if vision is not perfect. It will arrive in medium setting(12 o'clock) as a default. Each LEDs will be driven at 10-15mA.
2 - Minimum brightness setting is at 7 o'clock. Each LEDs will be driven at 3-5mA.
3 - Maximum brightness setting is at 3 o'clock. Each LEDs will be driven at 32-38mA.
Adjust brightness sparingly and only when needed. The trimpot is not a regular stereo adjstment knob, it will not last many cycles.
4. Installing the LEDs.
When the socket is at 12 o'clock, positive is on the left and negative on the right
Installing the Onion Ring
1 - Insert the Onion Ring in to the A2 head. Position a screw in to the correct slot as pictured (other slots may not work)

Important!
2 - Hold the screwdriver as upright as possible and turn slowly and lightly clockwise. Do not use any force, if you feel any resistance, remove the screw and try again.
It's easy to strip the thread in the A2 head as the metal is soft. So install the screw slowly and carefully. We only need 1 screw for now. Reinstall the Surefire MA02 bulb then the head. Check if the LED brightness is right.
If adjustment is required, remove everything and adjust the trimpot.
3 - When you are done with the adjustments, reinstall the second and third screw.

The screw holes might not align properly. Loosen the first screw by 2 to 3 turns. Then try installing the second and third screw. Finally tighten the screws one by one in small steps.
4 - Due to the design(more like lack of) of the pcb slots, the screw does not go all the way in. So stop turning once you feel resistance.

5 - The Onion Ring does not need all screws to function, you can leave the two screws out but keep them in a safe place. Do not lose them!
View this in Google, download as PDF format
Last edited:


 Unique Transaction ID #8B228565MT337462H
 Once you have the time to finish your sales posts, I'll send paypal. Tomorrow at the latest.... WOOO HOOO... they're here