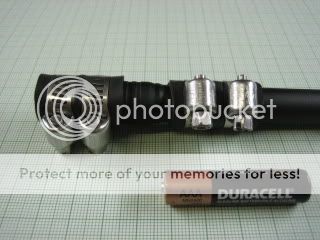
It doesn't have anything to do with those two metal tabs. Leave those alone.
I removed the tailcap and placed it in a vice as if you were going to clamp it by the clip with the base of the tailcap resting on top of one of one of the jaws of the vice. I don't actually clamp the vice down on the clip, but close it just enough to hold it there so you have a nice firm base so you can hammer(tap) on it. I suppose you could let the clip hang off the edge of a table and hold it while tapping, but the vice helps hold it in place.
I then use a small, flat screwdriver and push it against the side of the rubber tailcap sw cover until you get by the small ledge that holds the rubber cap on. (the sw is pressed up from the bottom against this lip/ledge, against another lip from the rubber cap to secure it)
I then carefully tap on the screwdriver to
try and drive the switch down, some. You might try a few different positions around the button to help ease movement.
What you need to be careful of is to try and not cut the rubber cap edge (to much) with the screwdriver tip so it will be reusable and hold good when replacing. A slightly dull screwdriver tip would work best. Or maybe something else that's similar you might have.
I only tap it enough till the sw has moved enough to release the pressure on the rubber lip, and I then remove the rubber so as to not damage it (any more).
I then continue to tap the sw down, rotating around it with the screwdriver to help extraction.
A word of caution here: The plastic is quite soft that the sw is made of. You/I really need a better suited tool for this but I've been getting bye with this particular one I have. DO NOT let whatever you are driving the the sw out with.. slip into the actual button slot where the actual button sticks out. You'll surely ruin it that way. Some force is needed on some of these so be careful.
Once removed, you might sand down the outside of the sw some so it's not so hard to drive back in once you're finished. Not to much though, but once
all back together, the battery pressure will help keep it in place should you go a bit too far.
Good luck! At least you now have
some ")
idea how to do it. :thumbsup:
Edit to add: Oh yeah, and don't forget to place the rubber sw cover back in before driving the sw back in. That's what holds the rubber on.
What I do here is place the sw upside down in a socket (a 3/8s maybe? I forget) so the there's no pressure on the button when I tap it in.


 so the heat must have tweaked the reflector or lens enough to create the very colorful new beam. Not a big deal, as I plan to use the LD01 head on the MS body anyway, but I would have preferred that the MS head be left good as new. SO... word to the wise about boiling!!! Next time I would use the small hose clamp method and perhaps applying a little head with a lighter.
 And along with it, some AW 10440 cells. I filed down the threads a little on the MS body so the LD01 head can sit right up against the flange on the MS body... topped off the 10440 and put it all together.... all I can say is W~O~W!
  The output is stunning for a single AAA light. Stunning for a AA light even! In my standardized ceiling-bounce test I recorded 4.8 EV from this thing.... just for comparison, some of my other ceiling bounce measures: