OxLite: Malkoff/FiveMega Integration (pics/runtime added)

ElectronGuru

Flashaholic
Joined
Aug 18, 2007
Messages
6,055
Location
Oregon
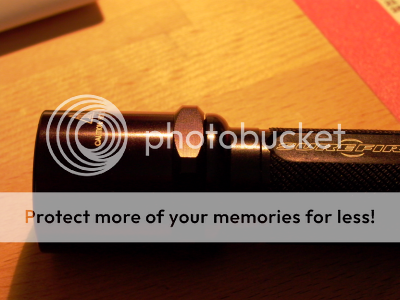
Had a bit of trouble getting my Malkoff dropin installed in a new FM body, here are the details. Please note, I make no claim about the design or construction of either piece, my comments are limited to my own experience:


Combine FMs new SureFire 2C body with Malkoff dropin and appropriate bezel and batteries
6ezpc1.jpg


But something is blocking the brass module from seating all the way in
rhub2t.jpg


This in turn, is keeping the head/bezel and body apart
35jwmbs.jpg


Looking inside, the collar at the throat, separating the battery from bulb compartments inside the body is smaller than the Malkoff would like. Comparing the Malkoff, its bottom end is larger than FM's or SFs modules.
2q3zwc5.jpg


So breaking out my "high-tech" lathe
29kucfs.jpg


And applying a few hundred careful rotations
242hibp.jpg


I have reduced the collar's diameter
f9ghn8.jpg


Lowering the module down all the way
65wz5w.jpg


and allowing the head to do the same.
10cq41v.jpg


Also adding a bit of tape to the cells prevents any rattle or movement...
28bb0j5.jpg


...leaving what I call my OxLite. Its not the smallest/fastest/lightest/prettyiest light in the drawer, but the 3300 mAh cells wrapped in HAIII (Z44 bezel) aren't going to stop without good reason
2r7a2xf.jpg


Here are some comparisons
o8v1ox.jpg


295tq81.jpg


and where she lives
2ytvcj7.jpg


Extra Info:
This step drill bit (originally purchased to enlarge aluminum reflectors)
281djll.jpg


is 7/8's at its largest, and barely fits inside the larger opening
2qcqxie.jpg


-EG
 
Last edited:
Re: OxLite: Malkoff/FiveMega Integration Fix (pics/runtime added)

Finally had enough time to do a complete runtime. 2 AW C's pushing a Malkoff M60F (single LED, full power, flood), yield:

Runtime: 5:11 Hours
 
Re: OxLite: Malkoff/FiveMega Integration Fix (pics/runtime added)

:)

Let me know if you get tired of that body and those cells! :twothumbs
Great, great runtimes.

An M60WL should have quite a long run in there!
 
Cool.

Just think, A Malkoff MC-E would run around two and a half hours...:naughty:
 
Sorry ElectronGuru, I hope this doesn't ruin an excellent thread. I have seen other threads about the Malkoff / Surefire gap before. I would like to point out something to anyone considering this type of modification. A P60 (or whatever) has a spring to make the ground contact. If you cut away the battery tube spring step so the bezel is flush with the battery tube when the drop-in is installed, there may not be enough tension to provide a good ground contact.

Actually I discovered this quite by accident. I bought a Surefire 6P and a Malkoff P7 direct drive drop-in. I drilled the battery tube out to take 18650's at work with an 18.5 mm drill. I was so preoccupied with not ruining the tailcap O-ring notch, I decided it was safer to drill from the bezel end of the battery tube. I didn't give a thought to the spring step on the bezel end of the tube.

That is until I got home and tried it out. The O-ring notch survived the ordeal. My new 18650's fit fine. When I turned it on nothing happened. I shook my new Surefire with just the Malkoff installed. I could hear it rattling ever so slightly. Of lesser importance is the fact that the original P60 no longer works. Not that I was thinking of going back.

I ended up using a piece of 18 gauge solid copper wire wrapped around the front of the Malkoff to make the ground contact. It gives the bezel just the right clearance with the battery tube. The coil sits on the beveled step in the front of the battery tube. That and a few layers of slightly crumpled aluminum foil for thermal contact. The gap I have between the bezel and the battery tube is very slight. It's less than a 0.5 mm. Sorry for the wrong white balance.
L1010440_Resample.png
 
Thank you for sharing your experience and sorry about your ordeal. If you wanted to start over, 6P bodies are frequently on ebay for pretty cheap (whole 6P's cost less than the bezel and tail/switch separately.

In this case, my photos are misleading. I am not (and am not recommending) the reaming out of the head end diameter. This is also not removing the collar/shelf that the outer spring on SF modules would rest against. What I did was was reduce the size of the shelf, enlarging the opening left by the shelf so it matches the shelf found in the 6P/9P.

Does that help?


BTW, if you have Photoshop there is a easy fix for the whitebalance/yellowing problem. 1) When you take the picture, include something white in the background (the more pure white the better). 2) After the image is loaded into PS, open up Levels. Under the buttons in the Levels window are 3 dropper icons - click the 'white' one. Then just click on a few white pixels in the image and everything is automatically/instantly corrected. Basically PS is asking itself, what do I have to adjust to make this one pixel perfectly white. Then it applies that same adjustment to every other pixel.

There isn't enough white on this image to get a good read, but hitting on single pixel on the bezel's lettering gives an idea of the effect:
qp1cut.jpg
 
Last edited:
No my 6P is working just fine thanks. I was originally planning to put a Z41 on a Solarforce L2. I like the idea that Surefire switches are not switches at all but a big block of metal. You could switch 100 amps with it if you needed to. I didn't think the reverse clickie in the Solarforce would stand up to the P7's current demands.

After some digging, I found a place to buy a Z41. B&H sells them for $42 plus shipping. I ended up buying the whole flashlight + 6 batteries from BatteryJunction for only $20 more. At the time shipping was free. Between the shipping and the batteries, I almost got the rest of the light for free. I only posted here because I felt someone else might get an unexpected result if they reamed out the battery tube until the drop-in was flush.

Thank you for sharing your experience and sorry about your ordeal. If you wanted to start over, 6P bodies are frequently on ebay for pretty cheap (whole 6P's cost less than the bezel and tail/switch separately.

I've only seen pictures of FiveMega tubes. They already take 18650's, yes? I would have liked to have gotten an HA3 light. I thought about getting a C2. I honestly think the 6P is a much nicer looking light. If they made hard anodized 6P's, I definitely would have bought one. The price difference wasn't really it.

I count my mistake as a piece of good luck. If not for my blunder and staring at the drop-in for 20 minutes wondering how to fix it. I probably never would have thought to wrap the brass in aluminum foil for better thermal transfer. So it wasn't a total loss. If I had it to do over I would have drilled from the other direction to keep the last millimeter of the spring step. I just didn't think of it.

BTW, what kind of LED is in the MagLite in your pictures? The body of it looks like a K2. But it looks different than pictures I've seen of them. Is that what a flip-chip looks like? I've never actually seen one before. It must give a nice tight beam being that small.

In this case, my photos are misleading. I am not (and am not recommending) the reaming out of the head end diameter. This is also not removing the collar/shelf that the outer spring on SF modules would rest against. What I did was was reduce the size of the shelf, enlarging the opening left by the shelf so it matches the shelf found in the 6P/9P.

I have an old copy of PhotoShop 5.0SE. That is an excellent tip BTW. I can't remember where I first ran across that eyedropper thing. But it is easily the best white balance tool I've ever used. Well, just not in this case. Most other paint programs I have use sliders you have to drag around to get the desired result. What a pain.

My camera's white balance doesn't work so well on automatic. I need a better camera. Been spending all my extra dough on flashlights. I turned the flash off so the halogen desk lamp would illuminate the bezel gap from the desk behind the light. Something to make it more visible. I simply forgot to change the camera's white balance to tungsten. I also forgot I had IrfanView set to png instead of jpg when I resampled the picture to forum size.

BTW, if you have Photoshop there is a easy fix for the whitebalance/yellowing problem. 1) When you take the picture, include something white in the background (the more pure white the better). 2) After the image is loaded into PS, open up Levels. Under the buttons in the Levels window are 3 dropper icons - click the 'white' one. Then just click on a few white pixels in the image and everything is automatically/instantly corrected. Basically PS is asking itself, what do I have to adjust to make this one pixel perfectly white. Then it applies that same adjustment to every other pixel.

There isn't enough white on this image to get a good read, but hitting on single pixel on the bezel's lettering gives an idea of the effect:
 
I've only seen pictures of FiveMega tubes. They already take 18650's, yes? I would have liked to have gotten an HA3 light. I thought about getting a C2. I honestly think the 6P is a much nicer looking light. If they made hard anodized 6P's, I definitely would have bought one. The price difference wasn't really it.

BTW, what kind of LED is in the MagLite in your pictures? The body of it looks like a K2. But it looks different than pictures I've seen of them. Is that what a flip-chip looks like? I've never actually seen one before. It must give a nice tight beam being that small.

FiveMega and Leef both make good HA3 bodies, most commonly in 2x18650. The FM above is a less standard body, designed specifically for AW C cells. Pictured above, these are closer to 26660, even larger than 18650's.

Based on what you've said, this looks just like what you're looking for:
http://www.cpfmarketplace.com/mp/showthread.php?t=192982
http://www.cpfmarketplace.com/mp/showthread.php?t=192109


The mag is running a TerraLux Red LED, powered by 3xCR123's. Pretty intense as red normally goes. Makes for fun night vision testing and can see right through window tinting.


I have an old copy of PhotoShop 5.0SE. That is an excellent tip BTW. I can't remember where I first ran across that eyedropper thing. But it is easily the best white balance tool I've ever used. Well, just not in this case. Most other paint programs I have use sliders you have to drag around to get the desired result. What a pain.

My camera's white balance doesn't work so well on automatic. I need a better camera. Been spending all my extra dough on flashlights. I turned the flash off so the halogen desk lamp would illuminate the bezel gap from the desk behind the light. Something to make it more visible. I simply forgot to change the camera's white balance to tungsten. I also forgot I had IrfanView set to png instead of jpg when I resampled the picture to forum size.

I'm a huge proponent of flash-free photography, the biggest challenge of which is dealing with all the color temp variations of artificial light. This is my favorite WB tool, but it does require a camera with "custom WB" capability:

http://www.cpfmarketplace.com/mp/showthread.php?t=193167
 
Last edited:
It's funny, I looked right at the picture of those taped up AW C cells and thought they were RCR123A's. At first glance I didn't even notice the battery tube was as big as the bezel. Your OxLite really isn't as big as I would have imagined.
FiveMega and Leef both make good HA3 bodies, most commonly in 2x18650. The FM above is a less standard body, designed specifically for AW C cells. Pictured above, these are closer to 26660, even larger than 18650's.

Wow those Moddoo lights look nice.:D I bought my 6P around Christmas time. I'm trying to think of a way to explain to my wife why I need another one of the same thing just because it's a different color. Hmm...


Can see through window tinting :thinking:
The mag is running a TerraLux Red LED, powered by 3xCR123's. Pretty intense as red normally goes. Makes for fun night vision testing and can see right through window tinting.
 
Can see through window tinting :thinking:

UV protection and privacy are the key goals of window tint film, so it is engineered to block near sunlight (white) wavelengths. Longer wavelengths (red and infrared) pass right through such film and reflect back out, allowing you to see past them. I have not tested it on real security film or one way mirrors.
 
Thanks, that's a very interesting piece of info I've never heard before. Nice chatting with you. :wave:

UV protection and privacy are the key goals of window tint film, so it is engineered to block near sunlight (white) wavelengths. Longer wavelengths (red and infrared) pass right through such film and reflect back out, allowing you to see past them. I have not tested it on real security film or one way mirrors.
 
Top