Taking beamshots

pulstar

Enlightened
Joined
Aug 24, 2008
Messages
464
Location
Slovenia
Hello...
Iconsider myself as a greenhorn in a flashlight world, but i'm a total newb in photography. I really want to make a few beamshots of some lights, but since i have only "normal" digital camera i had to borrow a serious piece of photo equipment from my cousin. But here it gets interesting. It has so many functions and manually adjustable settings, that i'm completely lost. I would really like to get some information of basic settings, needed to make a decent beamshot:
What is exposure, which settings should i use?
AF (autofocus) which settings are good enough?
ISO is important for what?
and so on...
Can someone please post a few "bulletins" how to prepare a camera to make atleast barrable picture in form like:
1.adjsut some....
2.try to select....

btw, i'll use Nikon D70s

Thanks in advance for your help
 
Last edited:
I'm in a similar situation, and I want to do pretty much exactly the same thing in a day or so. I know there are manual settings on my Canon point&shoot digital camera, so perhaps that would be simpler, except I don't know what settings to use. I'd love some advice on this as well. Thx,
 
Can someone please post a few "bulletins" how to prepare a camera to make atleast barrable picture in form like:
1.adjsut some....
2.try to select....

btw, i'll use Nikon D70s

I am not an expert at beam shoots, but if I want to compare a number of lights I do it this way:

First put camera on a tripod and adjust it to point at the area where you want to light up.
Use a powerful light and let the camera do auto focus (Half press shutter), then disable AF (A small switch on the front, just beside the lens).
Put camera on manual exposure (M on the wheel).
Start with ISO=200, aperture=Largest, time=10 sec
Then take a beam shoot of the most powerful lamp you are going to take beam shoot's off and preview. If the picture is to light, decrease time, if the picture is to dark, increase time (If you want to go above 30 sec, increase ISO to 400 or 800).
Depending on you mood, you might want to lock white balance (WB) at daylight.

When you have the settings for a fine beam shoot, do all the other with the same settings.

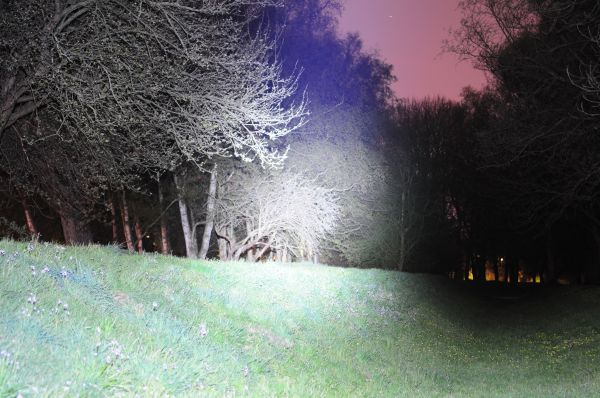
You can see two from a TA30 here, the first one was used to adjust exposure:
DSC_4159.jpg


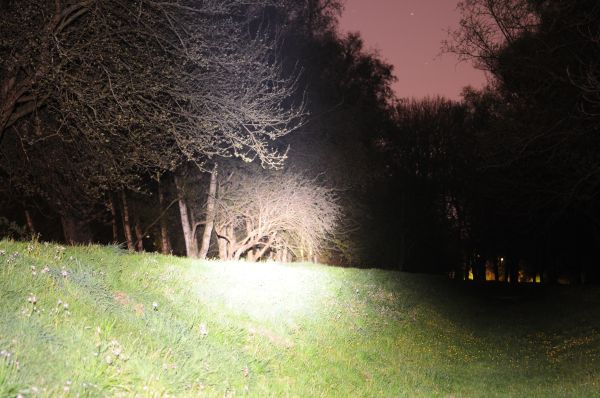
The next one is from a TK20, with same exposure:
DSC_4163.jpg
 
see one of the beamshots from one of my reviews.. it gives you some information regarding iso, aperture, and shutter speed.

I am considering doing lower ISOs, and smaller apertures, though.

smaller aperture: wider depth of field (sharpness, if you will) smaller aperture also give you less light for the sensor to recognize, (darker pictures)

shutter speeds: lower speed, more light
problem with shutter speeds would be with camera shake if you do not use a tripod.

ISO: higher iso, more light sensitivity, but less color detail.


HJK has most of the basics down pretty well.
 
I only know a bit on this subject.

ISO is, from my understanding, how sensative the camera is to light, the higher the setting, the more sensative and sometimes the more "noise" in the picture.

Aperture size is the size of the hole that lets light in. The smaller the size, the larger the number. A small aperture lets less light in but gives a longer depth of field, the opposite is true for larger aoerture size.

Shutter speed is how long the sensor/film is exposed to the light. The longer this is, the more light is let in, and the brighter the picture is. It is hard to take a chrisp/clear picture with a slow shutter speed freehand because of the wobble of our hands.

White balance, from what I seem to see, tells the camera what to define as white, and then use that as the reference point. I'm not really sure how to explain this, so here's a link.

Focus is what distance the clearest part of the picture will be.

Look at the beamshots of other people, some of them have the ISO setting, aperture size, shutter speed, white balance, and focus either in the picture file (some pictures contail that information), next to the picture, or somewhere in the post.
 
there are different aspects and it just depends on what you want to show. what it looks like to your eyes? or comparison with other lights? tint? beam/sidespill? etc.

when we're using a light in darkness, our eyes will adjust to the situation of light vs. ambient environment. to show what it might look like if you are just using that light, then try shooting in auto wiht any camera and hopefully it'll come out right. and if it doesn't then go into a manual mode or use exposure compensation to get what looks "right" to your eyes.

if you want to do a comparison between lights, then things get more complicated as you have to find some way to show the relative differences in brightness between the lights. you should lock exposure, lock ISO, and anything else that might influence the camera's metering of the situation. if you want to adjust for tint, then you also will have to lock white balance, to sunlight or something. then you use those same settings for all lights in the shootout.
 
Depends what you are comparing (to echo above). I had a surefire E1B and a TLS head for it. When I shone the light on the wall the Surefire head had a distinct hot spot, with several rings at various distances out from the center. Surprisingly to me - the TLS head had a larger hot spot and then a smoother transition (not rings) going out from the center.

I believe this helped sell the TLS head (I upgraded to a milky creemator head - put it on a FM 18650 E body) I was fortunate I had two bodies so I could compare them side by side in the same picture.
 
Top