Thanks, Bill!
As Bill mentioned, he has stickers from me, one for each person getting a USL. (Scroll down to bottom for donation button.)
Bill has been most kind to toss one in with each USL as they are shipped.
I got the idea for the stickers after
CroMAGnet made a comment just after I joined the USL club. CroMAGnet also
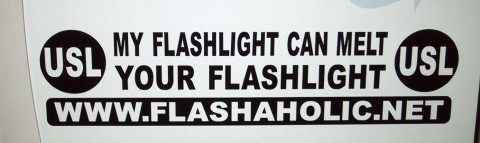
contributed greatly by buying the WWW.FLASHAHOLIC.NET domain that's listed on the stickers; soon it will be a great homage to the USL!
These are computer-cut all weather adhesive vinyl decals, not the average bumper sticker. I told the printer to give me his best, and I was surprised at the delightful quality of these.
Here's one on the side of a computer:
They require a little care to apply, for those who are not familiar with them:
1. Clean the surface or car bumper. I used alcohol to clean, and it has the added bonus of removing adhesive-killing moisture.
2. Keep a pair of tweezers, some tape, a small squeegee, and a rag handy. I used a plastic credit card as a squeegee; it's just the right size.
3. The vinyl letters are "sandwiched" between two layers of paper: a wax backing sheet and a semi-transparent transfer sheet, through which you can see the letters.
4. Align the sticker carefully, using the sticker itself as the guide - NOT the paper! Remember, the paper will be gone when we are done. Peel back the wax paper backing on the right hand side a little, and tape the right-hand edge of the transfer sheet onto the surface. Make sure your alignment is good.
5. Using the credit card or squeegee, slooooowly press the letters into place with your right hand while peeling away the wax paper backing with your left hand. Here's where the tweezers may be helpful: On occasion, the wax paper backing sticks slightly in smaller diameter cuts. Tweezers are the best for getting it off. (Actually, if your hand is very steady, you can completely remove the wax paper all at once and then squeegee the letters down.)
6. Once the letters are down, use the rag to firmly rub them onto the surface. This will remove any air bubbles and firmly set the adhesive.
7. Remove the transfer sheet, going from left to right, very sloooowly --- be sure to remove it by holding its edge against the surface as you pull, not at an angle.
8. Rub your letters down once more with care after inspecting them, and your USL club membership is there for everyone to see!
Of course, the color of your car or bumper shows through the letters. I'll post a picture of one on my dark bumper. I LOVE the fact that a black sticker on my dark bumper is stealthy, just like its namesake - The Ultimate Stealth Light!
On that note, most of the stickers going out from Bill are black. Some are red. I have more of each, and a few white ones.
Please don't bother Bill if you need a different color, or you've accidentally mangled yours. Just PM me and I'll take care of it. He's already got his hands full, and has been most kind in his support of this effort simply by taking the precious time to pack a sticker in with each USL.
Meanwhile, if you are happy with the sticker, please consider donating $3.00 for it by clicking on the button below. The stickers are already paid for by me, and most are already delivered to Bill. Like the USL, this was an effort in the product itself.
Of course, if you want want more, use the same button below and indicate the color(s) and quantity you desire. The choices are red or black, and I have a few white ones.
While I am certain more can be obtained in different colors and even "reversed" if you want to apply one to the inside of a window, I don't know what I'd be charged for another run. (I gave the printer an ORB Raw while buying him a beer to sweeten this deal!) Just PM me if you want something custom and I'll find out the cost.

Regards to the rest of the USL Club,
V. (aka lightlust)


 nice one!

