
eightbitpotion
Newly Enlightened
- Joined
- Jul 24, 2010
- Messages
- 31
So I've been getting my clicky back in EDC shape, and was trying to figure out a fix so I could tail-stand. While looking online for new parts, I decided to see what I could do with the stock part, and figured out a simple solution that is way better for tail-standing and instant tactical feedback than how they're sent out new. While I originally did this for tail-standing, I am more impressed with the FEEL of the switch with this, because it removes all travel/play from it. This only takes a minute to try, and is reversible to anyone that simply doesn't like it. Sorry for the terrible picture in advance....
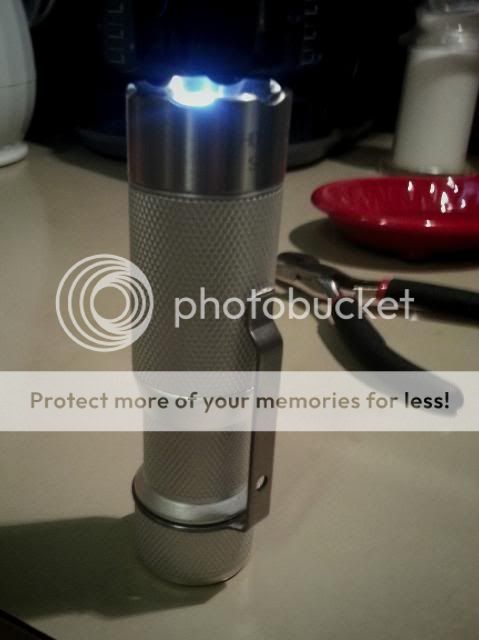
So you start off with the normal light....
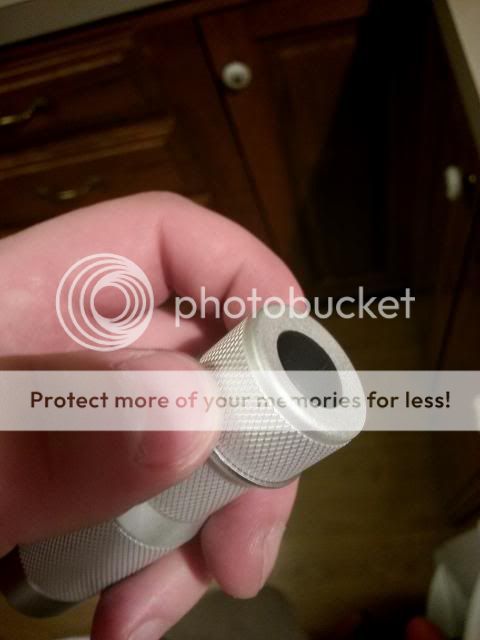
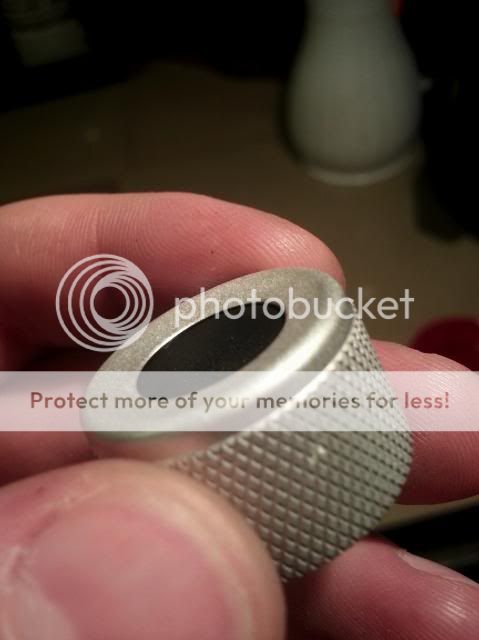
Then you unscrew the tail cap, and flip it over. Surely everyone has done up to this part before. I used small pliers, but you can also use pointed tweezers. Spread them apart, and unscrew the retaining ring.... also, if your clip spins around, this is the part that causes all of the problems (it isn't fully tightened if your clip spins around)...
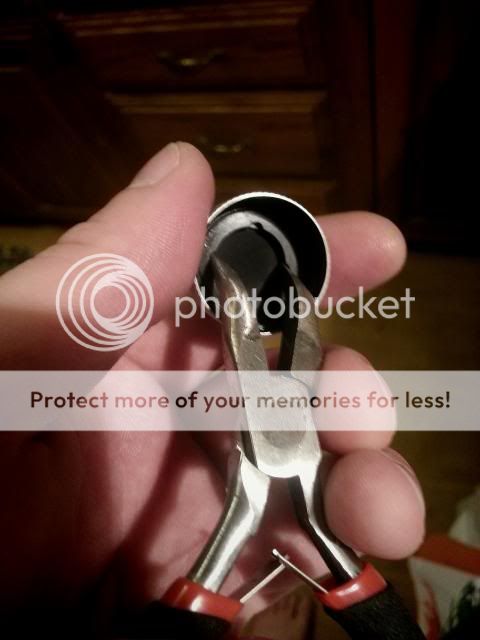
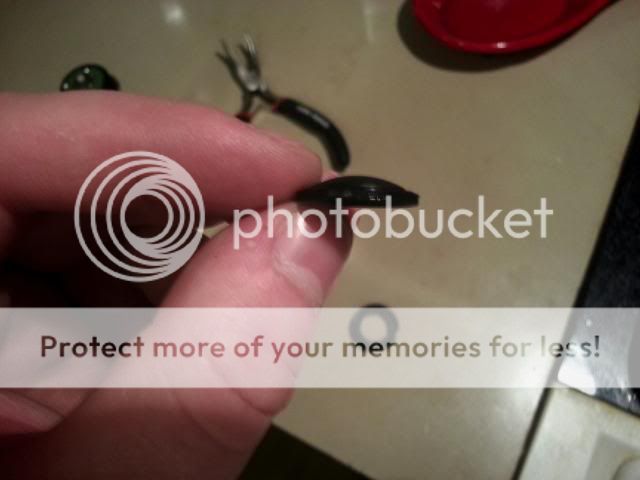
When the retaining ring is all the way out, just pull the rubber boot out with it. There's three pieces in all....

Ignore the other pieces, because we are focusing on the rubber boot only. Here's a side view of it; the convex is normally the external part...
Now before you look at the next picture, you need to finish the surface of the rubber however you want. By default, it's very smooth and slick. I didn't like this finish, and wanted something a lot more like the other side of it (soft and porous). I took some 320 grit wet/dry paper to it, but if you just want to remove the gloss, I would go with 400 grit. Be careful, because it works really fast. You'll also want to decide if you want to keep the "nipple" in the middle. I chose to keep this for mid-button reference, but you can easily remove this if it's to your preference. After this is all done, just put the boot back in upside down....
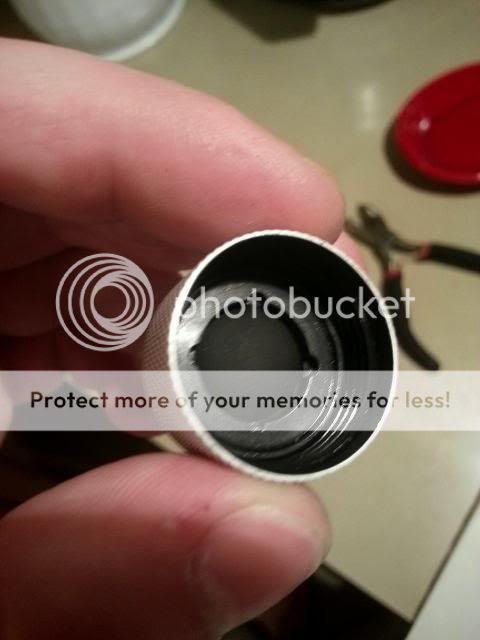
So the new inside should actually contain the old outside. I think that's easy enough to follow. Here's some remaining pictures that show the finished product.
(excuse the nick, I got into a knife fight and it was all I had )
)

So you start off with the normal light....
Then you unscrew the tail cap, and flip it over. Surely everyone has done up to this part before. I used small pliers, but you can also use pointed tweezers. Spread them apart, and unscrew the retaining ring.... also, if your clip spins around, this is the part that causes all of the problems (it isn't fully tightened if your clip spins around)...
When the retaining ring is all the way out, just pull the rubber boot out with it. There's three pieces in all....
Ignore the other pieces, because we are focusing on the rubber boot only. Here's a side view of it; the convex is normally the external part...
Now before you look at the next picture, you need to finish the surface of the rubber however you want. By default, it's very smooth and slick. I didn't like this finish, and wanted something a lot more like the other side of it (soft and porous). I took some 320 grit wet/dry paper to it, but if you just want to remove the gloss, I would go with 400 grit. Be careful, because it works really fast. You'll also want to decide if you want to keep the "nipple" in the middle. I chose to keep this for mid-button reference, but you can easily remove this if it's to your preference. After this is all done, just put the boot back in upside down....
So the new inside should actually contain the old outside. I think that's easy enough to follow. Here's some remaining pictures that show the finished product.
(excuse the nick, I got into a knife fight and it was all I had
)
Last edited: