ShineOnYouCrazyDiamond
Flashlight Enthusiast
Opening the HDS Rotary Tailcap
How to open the HDS Rotary tailcap:
Note: This is posted purely as a reference. I do not encourage anyone to disassemble their HDS Rotary light. Nor do I take any responsibility if you brick your HDS Rotary.
I apologize this post is so long but I didn't realize how many pictures I had taken while doing the work. This second time around opening the HDS Rotary tailcap and re-lubing it only took about 15 minutes total.
I hope you find this reference useful.
1) This is the hole you will be pulling the retaining wire out of. Notice the grease being squished out of the tailcap - we will address how to avoid this later on.
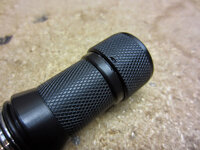
2) You'll need a pair of fine tweezers. I am using the same ones I distributed with the second run of the V10R Ti e-switches.
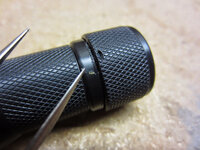
3) You need to use one point on the tweezers to rotate the wire around the light about 2mm at a time until you see the exposed metal end of the wire.
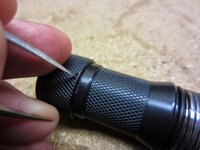
4) Here is the exposed metal end of the wire I am going to pull out.
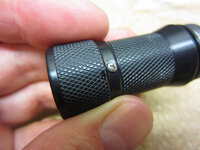
5) It takes a little patience and persistence. Go slow and gentle and eventually you can wiggle the wire so that it is starting to poke out of the hole.
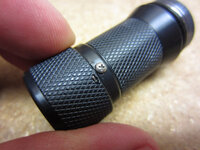
6) Grab the end with the tweezers and slide it out sideways.
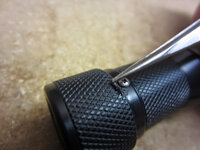
7) The wire it pretty long so keep pulling.
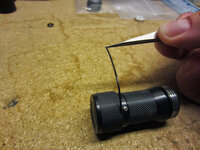
8) Once the wire is out the top comes right off.
IMPORTANT: DO NOT clean the grease off the retaining wire. It needs to be on there so the wire slides back in with no resistance.
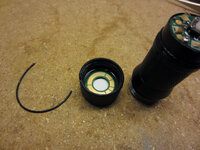
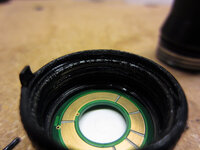
9) We are going to want to clean off all of this grease on the tailcap.
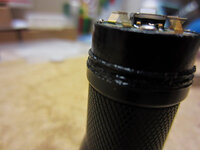
10) And all of this grease on the body of the light.
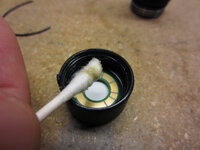
11) Use a q-tip and wipe it around the inside of the tailcap. Take your time as you don't want to push grease down onto the contact board. I used both ends of about 5 q-tips to get it clean.
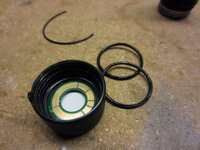
12) Once clean remove the two o-rings. Continue to clean the remaining grease off the inside. I find that a q-tip soaked in alcohol is good removing any remaining grease inside the tailcap. Use a soft cloth or paper towel soaked in alcohol to remove the grease from the o-rings.
13) See how I am cleaning the grease off from the side. You want to be very careful to not go down from the top or else you will likely bend the VERY fragile contact fingers.
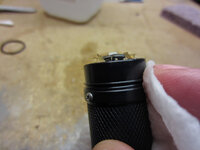
14) Notice how I brushed against a few of them. They bend easily. I was able to bend the back gently with the tip of the tweezers.
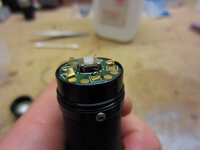
15) There are four indented rings on the inside of the tailcap. The first one below is where the retaining wire goes.
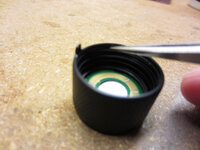
16) The second ring is for an o-ring.
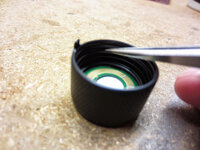
17) The third ring is for an o-ring.
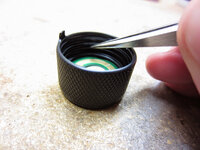
18) The fourth and bottom ring remains empty.
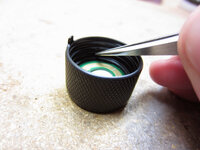
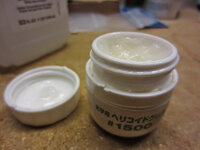
19) Ready to re-grease. My grease of preference for any rotating parts is called helical grease. It is the type of grease used on camera zoom lenses. It has a bit of a stickiness to it which help it hold position and provides a bit of resistance to turning motion. I have found the 1500 weight to give just enough resistance. The container below was about $30 but should provide more than a lifetime supply of grease for anyone.
20) Using a fine implement put some grease into the grooves in rings two and three in the tailcap. Try to get this grease into the rings only as the o-ring will sit against this greases to help rotation and sealing from the elements.
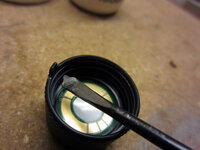
21) Re-install the two o-rings into grooves two and three. I found the tip of the tweezers helped to simply nudge the o-rings into place.
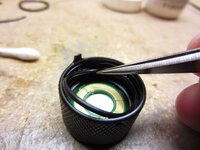
22) Once re-installed you'll see most of the grease I just put in is hidden behind the o-rings.
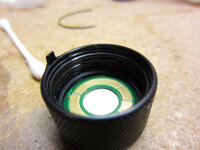
23) Apply just a small coating of grease to the top of the o-rings. This is where is pays to be careful with your application. Too much grease here or grease smudged into the top ring will cause the grease marks squishing out in picture 1.
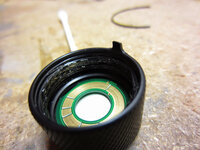
24) Align the tailcap with the top of the battery tube and just push it straight down.
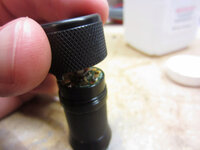
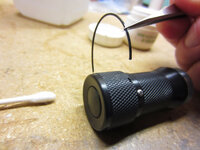
25) I recommend aligning the hole with the screw so you have a little back and forth movement available in the head to assist in case the wire sticks a bit at some point while putting it back in. Hold the wire as shown with the tweezers. The exposed wire section will be the last past that goes back in.
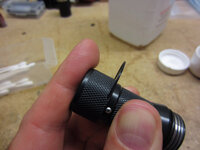
26) Hold the light as below and put a little pressure onto the tailcap to push it down in place. The tiny copper finger put some pressure on the tailcap so the ring for the wire doesn't line up unless the tailcap is pushed in. Insert the wire into the hole.
27) Push the wire in a little bit at a time until just a tiny bit remains exposed.
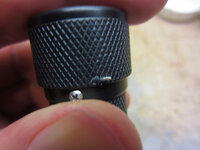
28) With the tip of the tweezers push the remaining bit of the wire into the hole. Rotate the tailcap back and forth a bit to make sure the wire is fully seated and will doesn't poke back out when twisting.
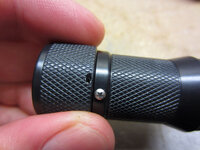
And that is it. Actually pretty simple once you know how the tailcap is assembled.
How to open the HDS Rotary tailcap:
Note: This is posted purely as a reference. I do not encourage anyone to disassemble their HDS Rotary light. Nor do I take any responsibility if you brick your HDS Rotary.
I apologize this post is so long but I didn't realize how many pictures I had taken while doing the work. This second time around opening the HDS Rotary tailcap and re-lubing it only took about 15 minutes total.
I hope you find this reference useful.
1) This is the hole you will be pulling the retaining wire out of. Notice the grease being squished out of the tailcap - we will address how to avoid this later on.

2) You'll need a pair of fine tweezers. I am using the same ones I distributed with the second run of the V10R Ti e-switches.

3) You need to use one point on the tweezers to rotate the wire around the light about 2mm at a time until you see the exposed metal end of the wire.

4) Here is the exposed metal end of the wire I am going to pull out.

5) It takes a little patience and persistence. Go slow and gentle and eventually you can wiggle the wire so that it is starting to poke out of the hole.

6) Grab the end with the tweezers and slide it out sideways.

7) The wire it pretty long so keep pulling.

8) Once the wire is out the top comes right off.
IMPORTANT: DO NOT clean the grease off the retaining wire. It needs to be on there so the wire slides back in with no resistance.

9) We are going to want to clean off all of this grease on the tailcap.

10) And all of this grease on the body of the light.

11) Use a q-tip and wipe it around the inside of the tailcap. Take your time as you don't want to push grease down onto the contact board. I used both ends of about 5 q-tips to get it clean.

12) Once clean remove the two o-rings. Continue to clean the remaining grease off the inside. I find that a q-tip soaked in alcohol is good removing any remaining grease inside the tailcap. Use a soft cloth or paper towel soaked in alcohol to remove the grease from the o-rings.

13) See how I am cleaning the grease off from the side. You want to be very careful to not go down from the top or else you will likely bend the VERY fragile contact fingers.

14) Notice how I brushed against a few of them. They bend easily. I was able to bend the back gently with the tip of the tweezers.

15) There are four indented rings on the inside of the tailcap. The first one below is where the retaining wire goes.

16) The second ring is for an o-ring.

17) The third ring is for an o-ring.

18) The fourth and bottom ring remains empty.

19) Ready to re-grease. My grease of preference for any rotating parts is called helical grease. It is the type of grease used on camera zoom lenses. It has a bit of a stickiness to it which help it hold position and provides a bit of resistance to turning motion. I have found the 1500 weight to give just enough resistance. The container below was about $30 but should provide more than a lifetime supply of grease for anyone.

20) Using a fine implement put some grease into the grooves in rings two and three in the tailcap. Try to get this grease into the rings only as the o-ring will sit against this greases to help rotation and sealing from the elements.

21) Re-install the two o-rings into grooves two and three. I found the tip of the tweezers helped to simply nudge the o-rings into place.

22) Once re-installed you'll see most of the grease I just put in is hidden behind the o-rings.

23) Apply just a small coating of grease to the top of the o-rings. This is where is pays to be careful with your application. Too much grease here or grease smudged into the top ring will cause the grease marks squishing out in picture 1.

24) Align the tailcap with the top of the battery tube and just push it straight down.

25) I recommend aligning the hole with the screw so you have a little back and forth movement available in the head to assist in case the wire sticks a bit at some point while putting it back in. Hold the wire as shown with the tweezers. The exposed wire section will be the last past that goes back in.

26) Hold the light as below and put a little pressure onto the tailcap to push it down in place. The tiny copper finger put some pressure on the tailcap so the ring for the wire doesn't line up unless the tailcap is pushed in. Insert the wire into the hole.

27) Push the wire in a little bit at a time until just a tiny bit remains exposed.

28) With the tip of the tweezers push the remaining bit of the wire into the hole. Rotate the tailcap back and forth a bit to make sure the wire is fully seated and will doesn't poke back out when twisting.

And that is it. Actually pretty simple once you know how the tailcap is assembled.

