Techjunkie
Enlightened
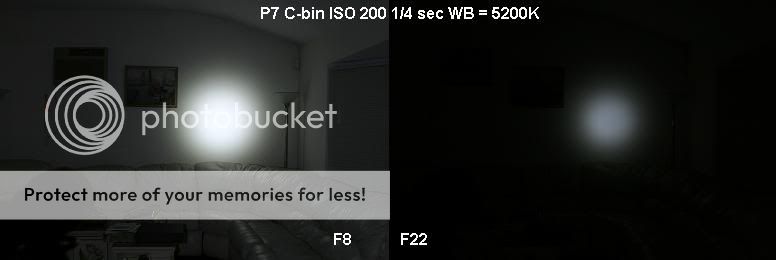
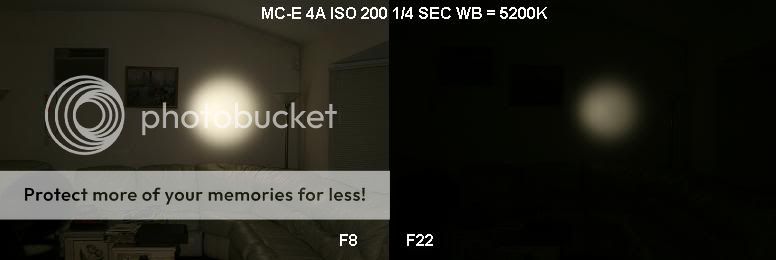
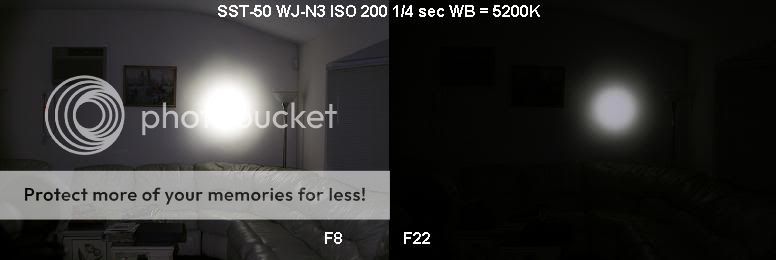
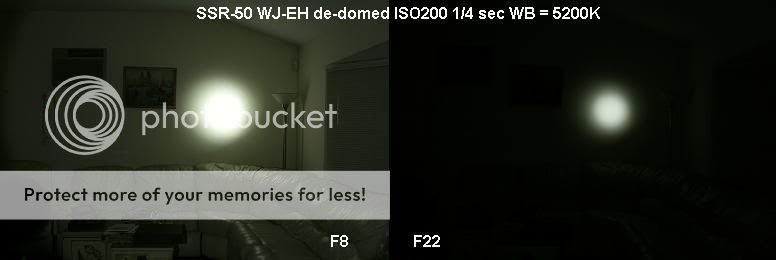
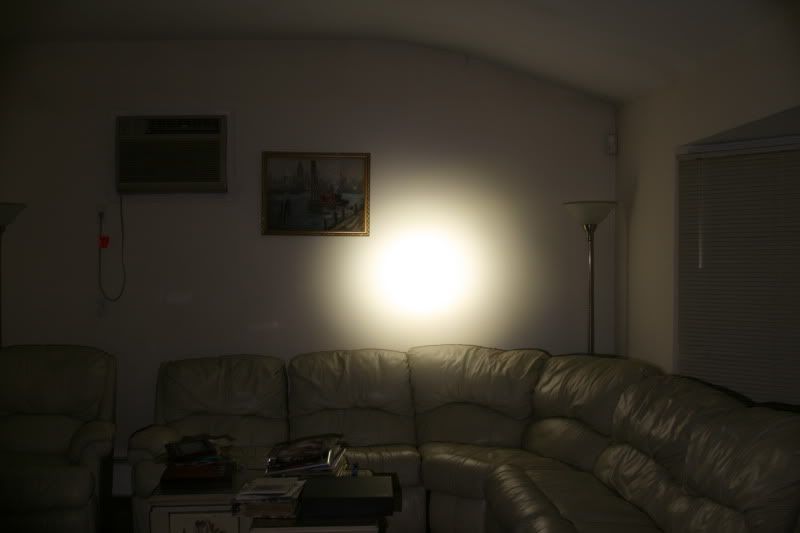
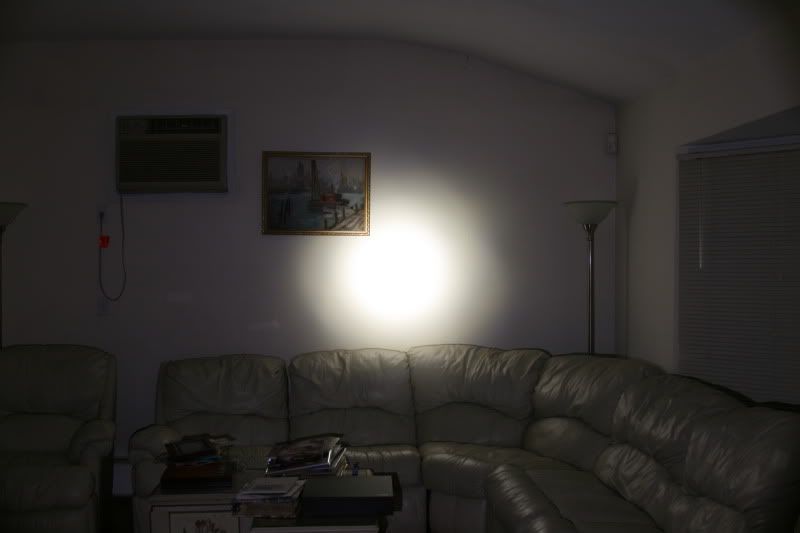
(White wall comparison beamshots in post #7)
I had a new-in-box old style Silver Mag 2C that I was saving to make a special light with. This is the beginning of that build log.
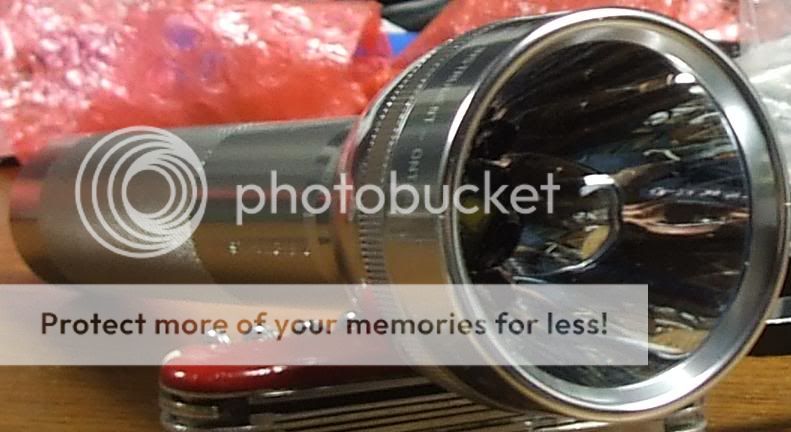
Very pleased with the SST-50 thrower that I made a short while ago, I decided to base this project on that one with a few improvements. I really like the 2C form factor better than 3C, the silver colored Mag better than black ('cause scratches aren't as obvious on Silver and it's a rare color for a 2C these days), neutral white LEDs better than cool white, and I'd like to try to keep the dome this time (even if losing it did help improve throw). Other than those differences, it will essentially be the same torch, unless current plans change.
I'll be using two DX 20330 2.8A 8.4V buck drivers in parallel again, and I'll be using two AW IMR26500 batteries that already fit perfectly in the old style Mag 2C with no honing required. That unfortunately is exactly where the old style C making things easer ends.
The deep Mag Rebel reflector, which fit's fine in a modern Mag C with it's lower shelf and lack of head-stop, would not fit in the old C head without removing a significant amount of metal from the head. The head-stop had to go completely and the edge of the shelf that remained had to be beveled to allow the reflector to sit all the way down so the bezel could be tightened completely. You can see in the pics that I removed a small layer of plastic from the outside of the reflector cup before I found a grinding bit long enough to let me bevel the edge of the shelf. The bottom of the 40mm deep reflector sits way down in the head, so the heatsink will have to be recessed into the neck.

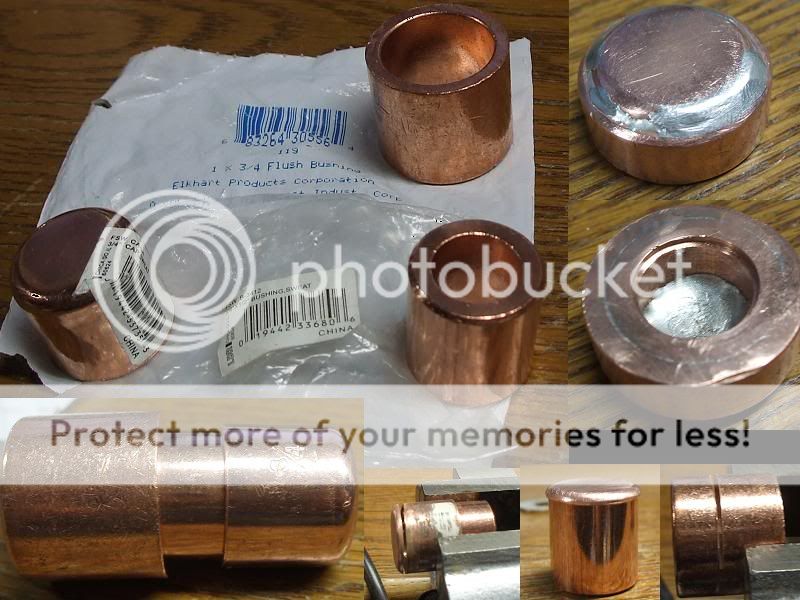
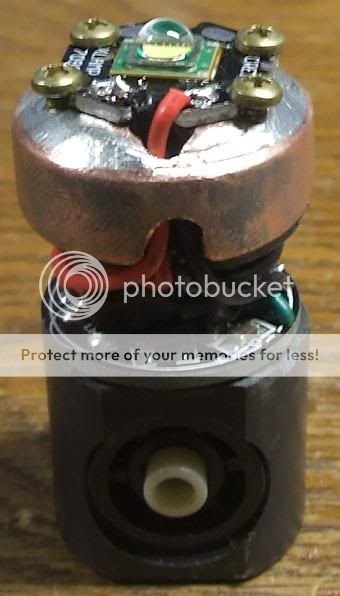
The brass pill from the DX reflector that I used last time was too fat to fit in the neck of the modern Mag C, so I had to hone the inside of the neck of that last torch to make it fit. The Old C has a much wider internal diameter and this time the brass pill is much too small. I considered shimming it with a sleeve made from duct-work Aluminum sheet metal, but I wasn't in love with the idea. I wanted to try making a heatsink from 1" copper tubing, but my go-to hardware giant only sells 10 foot sections which cost a fortune. Last week I came upon some copper bushings in Sears Hardware and hatched a new plan. The pic below shows how I cut the top from a 3/4" end cap, attached it to the top of a 3/4" bushing and nested it inside a 1" bushing. I cut down the 1" bushing first, then used a propane torch to silver-solder it all the parts together into a single piece. Finally, I cut it down the 3/4" bushing flush. I must have gone through about a dozen cut-off discs.
Being difficult again, the old 2C's much larger neck still wasn't large enough to accommodate my home-made without-a-lathe heatsink. I took out the brake hone again and honed the inside of the neck until my Cu heatsink fit.
The top of the neck above the threads was razor thin after honing so I filed that small portion off completely. And, yes... that is the hammer I'll use to "tap" the heatsink into place after the drivers and switch are installed. The heasink fits very snughly.
That brings me to the other complication of the Old C, vs New C... The Old C switch can only be removed from the top of the torch. It cannot exit through the battery tube. My heatsink is so snug in the top of the neck that pushing it out from beneath will crush the drivers with the switch. I'll tap some threaded holes to mount a star with. Hopefully, I'll be able to use the same screws to pry the HS out the top if necessary. Copper is very soft though. #3-48 threads might strip if I try to pry the HS out with them. Here's hoping it never comes to that.
I haven't drilled any holes for screws or wires yet, 'cause the metal work alone has already taken several days. I want the emitter centering to be perfect, so I'll tap the holes at the outside edges of the star. The focus point of the reflector i just below where the cam is cut off so no pedestal is needed.
I have a 4500K GH-400 SST-50, WJ-N3 tint emitter that I'll probably use in this torch, after I solder it to a 20mm XRE star still on its way from DX. I might need to mount that emitter on a smaller board if it turns out that the UniqueFire HS-802 that I also have on the way will not fit a 20mm star. If that happens, I'll solder the premium tint emitter I had reserved for this torch onto a smaller round star for the HS-802 and order an SSR to use in this project. I'd really like to finish this project before modding the HS-802, but I'd also like to delay buying another Phatlight emitter for a while and don't really care for hot-plate soldering emitters to stars. I'm trying to avoid doing it any more than necessary, so if that means using the bare emitter for the HS-802 and waiting to buy an SSR-50 on star to complete this projec, then that's what I'll do.
I had a new-in-box old style Silver Mag 2C that I was saving to make a special light with. This is the beginning of that build log.
Very pleased with the SST-50 thrower that I made a short while ago, I decided to base this project on that one with a few improvements. I really like the 2C form factor better than 3C, the silver colored Mag better than black ('cause scratches aren't as obvious on Silver and it's a rare color for a 2C these days), neutral white LEDs better than cool white, and I'd like to try to keep the dome this time (even if losing it did help improve throw). Other than those differences, it will essentially be the same torch, unless current plans change.
I'll be using two DX 20330 2.8A 8.4V buck drivers in parallel again, and I'll be using two AW IMR26500 batteries that already fit perfectly in the old style Mag 2C with no honing required. That unfortunately is exactly where the old style C making things easer ends.
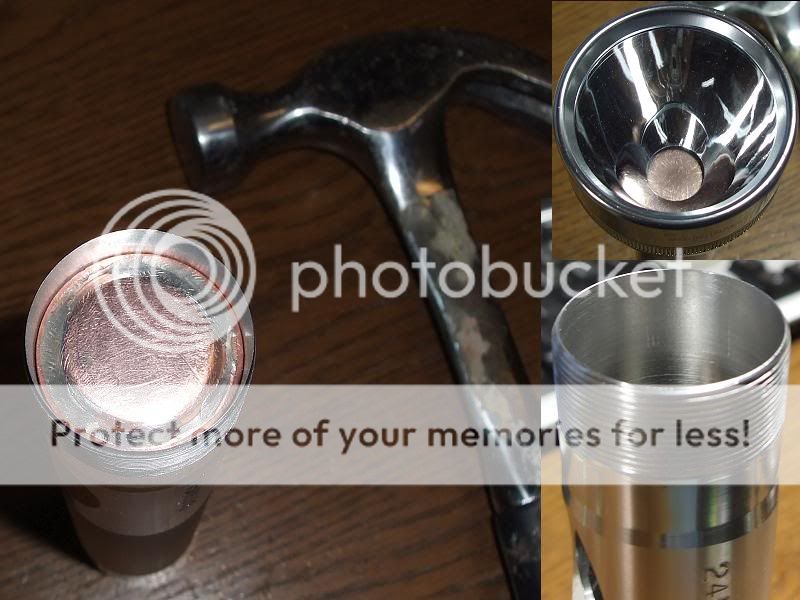
The deep Mag Rebel reflector, which fit's fine in a modern Mag C with it's lower shelf and lack of head-stop, would not fit in the old C head without removing a significant amount of metal from the head. The head-stop had to go completely and the edge of the shelf that remained had to be beveled to allow the reflector to sit all the way down so the bezel could be tightened completely. You can see in the pics that I removed a small layer of plastic from the outside of the reflector cup before I found a grinding bit long enough to let me bevel the edge of the shelf. The bottom of the 40mm deep reflector sits way down in the head, so the heatsink will have to be recessed into the neck.
The brass pill from the DX reflector that I used last time was too fat to fit in the neck of the modern Mag C, so I had to hone the inside of the neck of that last torch to make it fit. The Old C has a much wider internal diameter and this time the brass pill is much too small. I considered shimming it with a sleeve made from duct-work Aluminum sheet metal, but I wasn't in love with the idea. I wanted to try making a heatsink from 1" copper tubing, but my go-to hardware giant only sells 10 foot sections which cost a fortune. Last week I came upon some copper bushings in Sears Hardware and hatched a new plan. The pic below shows how I cut the top from a 3/4" end cap, attached it to the top of a 3/4" bushing and nested it inside a 1" bushing. I cut down the 1" bushing first, then used a propane torch to silver-solder it all the parts together into a single piece. Finally, I cut it down the 3/4" bushing flush. I must have gone through about a dozen cut-off discs.
Being difficult again, the old 2C's much larger neck still wasn't large enough to accommodate my home-made without-a-lathe heatsink. I took out the brake hone again and honed the inside of the neck until my Cu heatsink fit.
The top of the neck above the threads was razor thin after honing so I filed that small portion off completely. And, yes... that is the hammer I'll use to "tap" the heatsink into place after the drivers and switch are installed. The heasink fits very snughly.
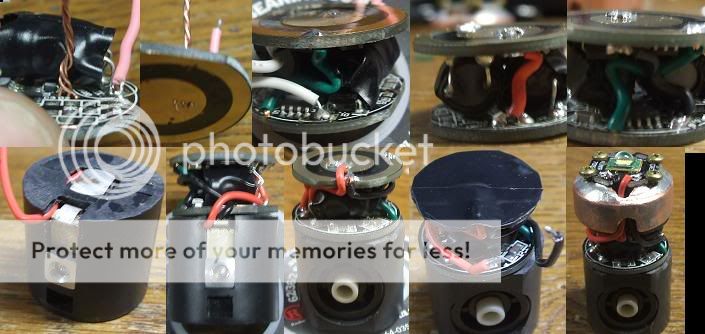
That brings me to the other complication of the Old C, vs New C... The Old C switch can only be removed from the top of the torch. It cannot exit through the battery tube. My heatsink is so snug in the top of the neck that pushing it out from beneath will crush the drivers with the switch. I'll tap some threaded holes to mount a star with. Hopefully, I'll be able to use the same screws to pry the HS out the top if necessary. Copper is very soft though. #3-48 threads might strip if I try to pry the HS out with them. Here's hoping it never comes to that.
I haven't drilled any holes for screws or wires yet, 'cause the metal work alone has already taken several days. I want the emitter centering to be perfect, so I'll tap the holes at the outside edges of the star. The focus point of the reflector i just below where the cam is cut off so no pedestal is needed.
I have a 4500K GH-400 SST-50, WJ-N3 tint emitter that I'll probably use in this torch, after I solder it to a 20mm XRE star still on its way from DX. I might need to mount that emitter on a smaller board if it turns out that the UniqueFire HS-802 that I also have on the way will not fit a 20mm star. If that happens, I'll solder the premium tint emitter I had reserved for this torch onto a smaller round star for the HS-802 and order an SSR to use in this project. I'd really like to finish this project before modding the HS-802, but I'd also like to delay buying another Phatlight emitter for a while and don't really care for hot-plate soldering emitters to stars. I'm trying to avoid doing it any more than necessary, so if that means using the bare emitter for the HS-802 and waiting to buy an SSR-50 on star to complete this projec, then that's what I'll do.
Last edited:


 sku 20330 has changed status again, this time from "temporarily sold out" back to being available once again for purchse. I've never seen that happen before. Now I have two of those on the way too. I'm not cancelling the order for the two 20329s, just in case something else changes. I'm just going to keep throwing money at this until it works the way I want it to. (Don't tell my wife I said that.)