So, you got yourself a Fivemega Bi-Pin adapter, a Boro lens, and aluminum reflector, you're ready to rig yourself up a slick hotwire when you realize, the lack of cam means you cannot focus it ?
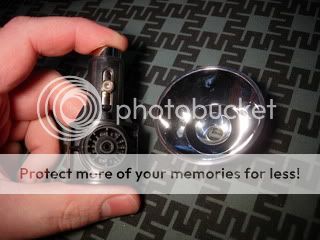
Well here is a quick illustrated guide showing you and easy straight forward way to focus a non cammed reflector when using the stock switch assembly and a bi-pin adapter.
First off, the necessary tools.
The most important tool in the any mag modders arsenal is his trusty 2mm allen wench used to release the switch assembly.
For handling the bulb we save the piece of "spare bulb foam" that came with your mag and is found in the tailcap.
After the bulb is installed we will use a tweezer to adjust it.
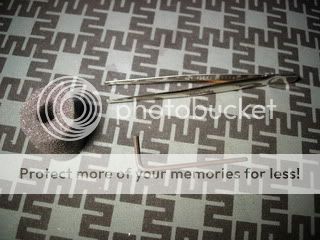
The importance of the foam is simply to keep your fingers off the bulb when installing it. Any naturally occurring bodily oils you get on the bulb off your finger tips will effect its thermal dynamics resulting in a shorter lifespan. If you touch the bulb it's not the end of the world, but it should be avoided. You can use alcohol to clean it if need be.
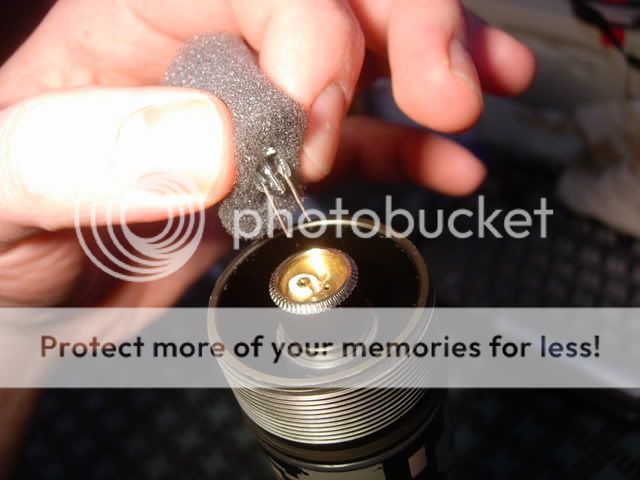
The first step is to remove the switch assembly, once out, we remove the cam nut.
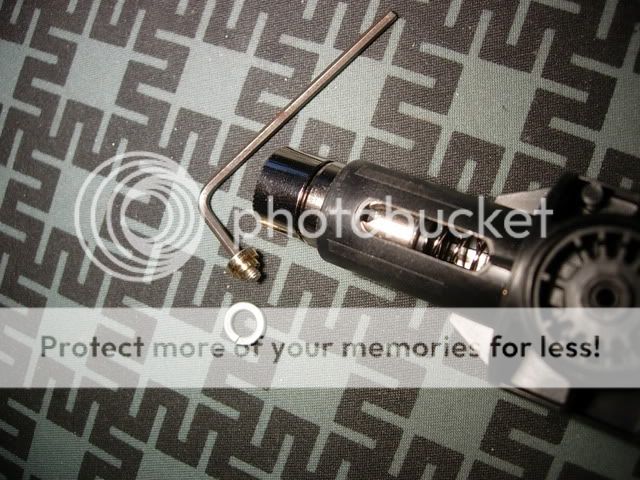
As you can see, I have a washer. I'm using an M5 (5mm ID) Lock washer.
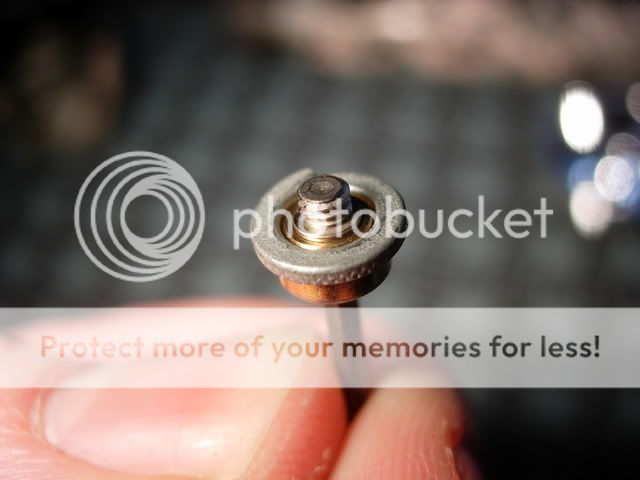
We take the washer and install in onto the cam nut like so, effectively allowing us to lock the slug in a selected position.
At first, we don't want to tighten it all the way. We want it to remain loose enough so that it can be moved freely for fine adjustments, to be tightened later once we've established our focal point.
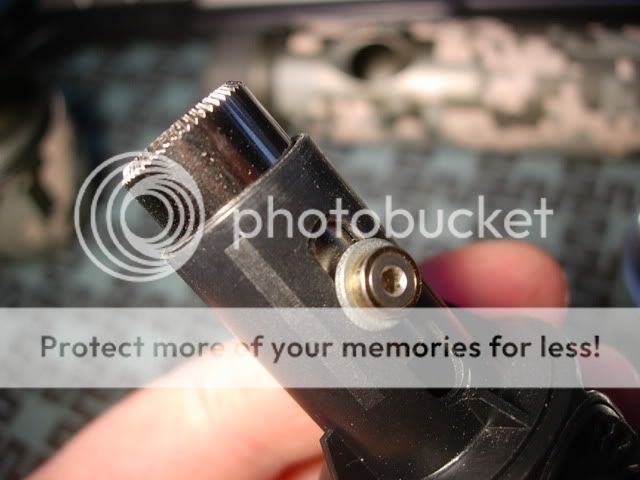
The next step is to reassemble the Mag. Installing the bulb and batteries so that it is ready to use. We tighten the head all the way, and drop the reflector into place, but we do not install the lens and bezel.
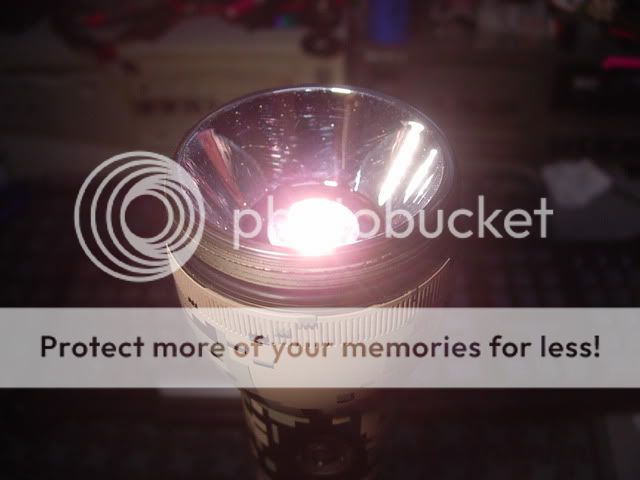
At this point, what we are going to do is test for focus, shooting the beam at the ceiling for quick reference.
Now, if you only ever want to use this Mag as a thrower, feel free to focus it achieving an optimum hotspot. Otherwise, if you want to maintain the dual function of the Maglite, allowing you to rotate between flood and spot mode, the focus effect we are first trying to establish is a flood beam.

Once we have our flood focus set, you will later be able to rotate the head outwards into spot mode.
At this time, the slug is still loose allowing us to tweek it.
If the bulb is too high we carefully push the slug downwards.
I have chosen to use the allen key.
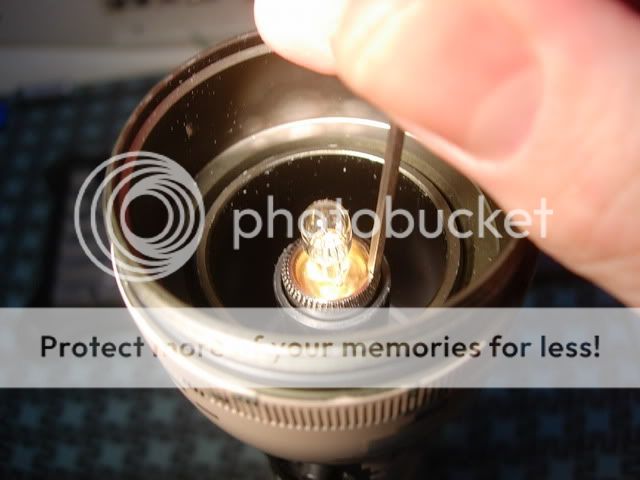
If you've pushed it down too far, no sweat, just turn the allen key around, using the angel end as a hook to pull it back up.
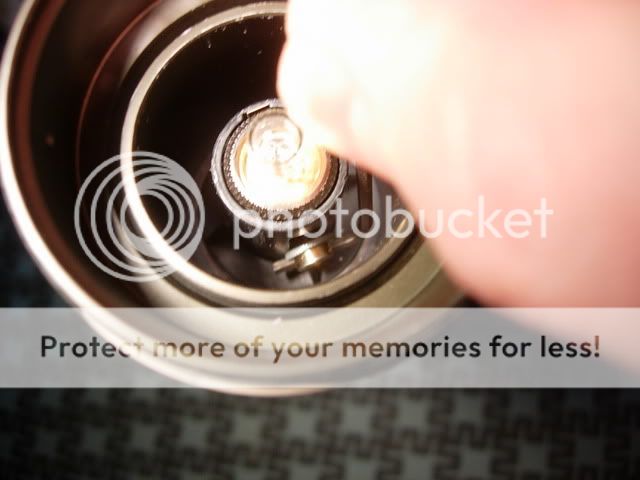
Once we've established our preferred focus, we can loosen the switch assy', slide it down, and tighten the cam nut securing the slug, though the switch hole like so.
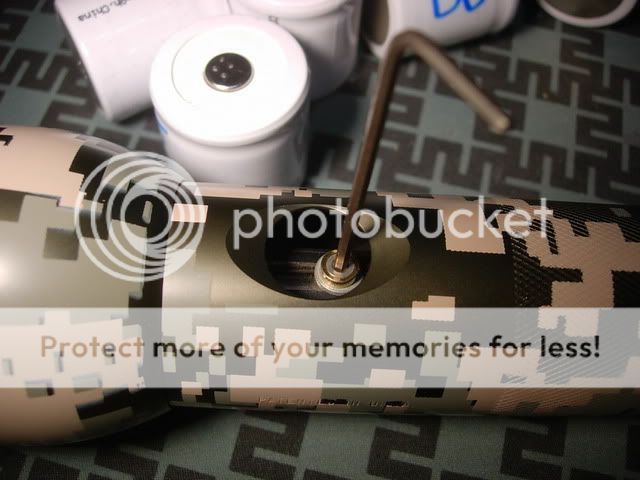
So now we are pre-focused, we can now rotate the head out into spot mode, but chances are, we are not quite done yet.
You may notice that the hotspot is a tad warped.
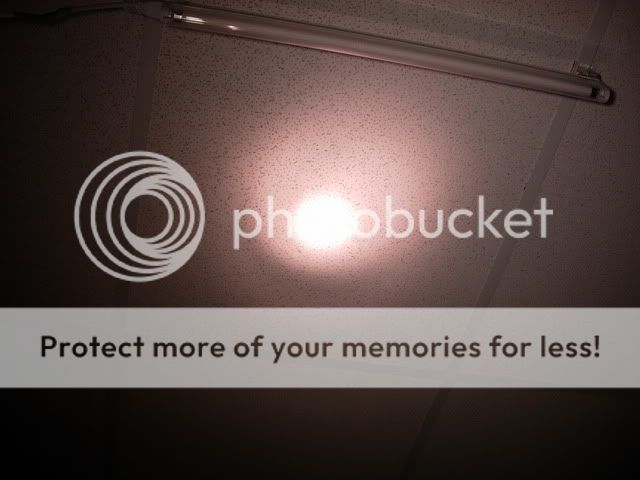
One flaw common to ANY bi-pin socket we use in our Mag hotwires, is that the bulb will not just slip in and sit perfectly straight.
Focusing our Mags requires tuning in all 3 dimensions. We must now fine tune the bulb position to align it as perfectly centre as possible in the middle of the reflector.
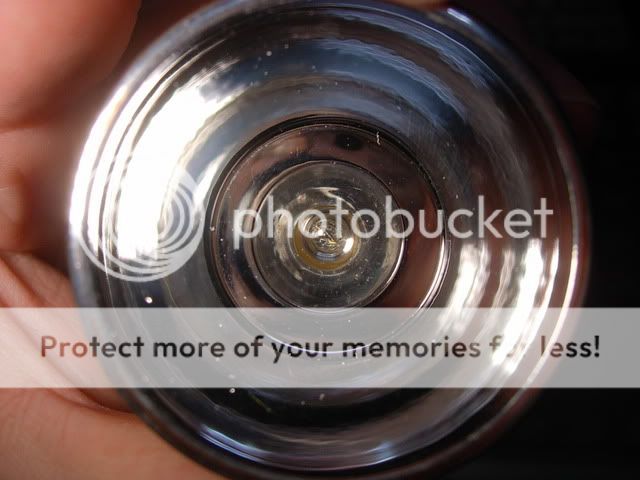
This is where the tweezer comes into play.
DO NOT ATTEMPT THIS WITH PLIERS !
Or for obvious reasons a plastic tool.
Halogen bulbs are fragile and are internally under pressure.
Too much force applied to the bulb may cause it to crack, and if that happen it will literally EXPLODE, sending shards of glass shrapnel flying everywhere.
For liability reasons, I will recommend you use eye protection during this procedure.
With tweezers, it will be very difficult to put enough pressure on the bulb to cause it to break. I would advise you still use caution.
Basically, at this point, we use the tweezers to gently adjust the bulbs pitch and yaw to centre it in the middle of the reflector and tighten up our hotspot.
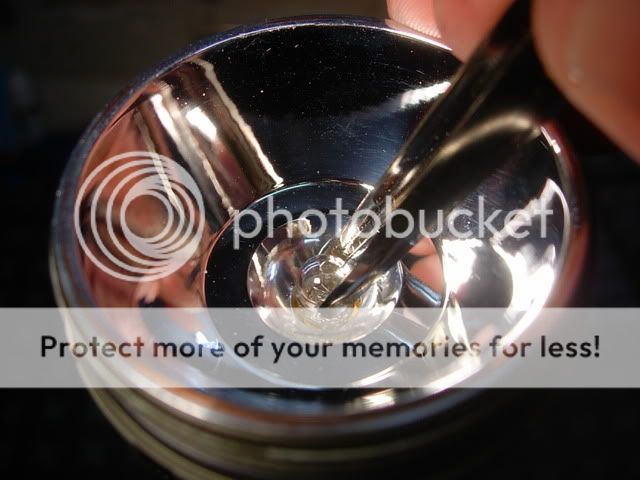
Once again, use caution in doing this. To much force applied to the pins at the base of the bulb can cause a hairline crack that will allow all the internal gasses to leak out. Once this happens, your bulb is as good as .
.
In the end it should not be too difficult to centre the bulb, getting that perfect long throwing hotspot we desire.
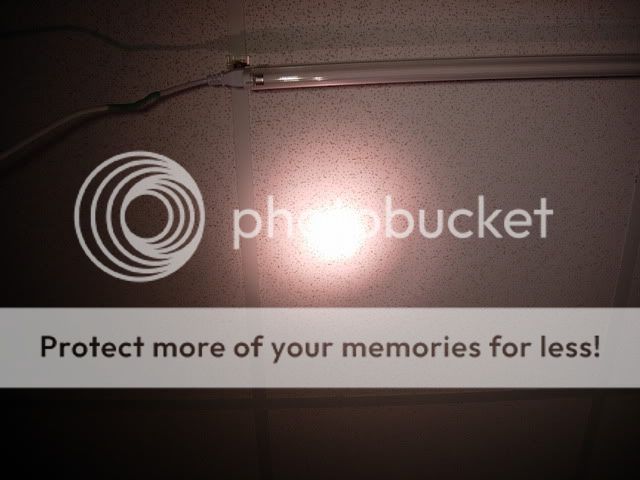
Once done, we screw the lens and bezel into place, and we are done.
Focused and ready to go, Enjoy you Hotwired Mag !
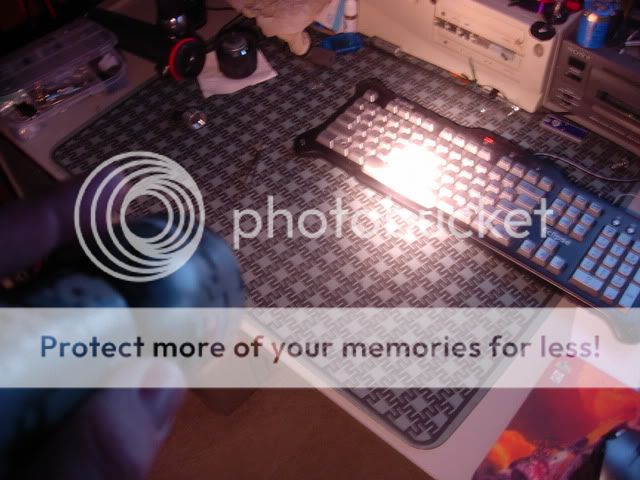
Bonus Levels :
Removing the Mag switch is done easily. With the tailcap and batteries removed. We gently pry out rubber switch dome. This can usually be done with just your finger nails. Once removed, the 2mm allen wrench is inserted into the hole in the middle of the switch, and turned counter clockwise to loosen the switch assy'. Once loose it will slide downward out through the bottom of the Mag.
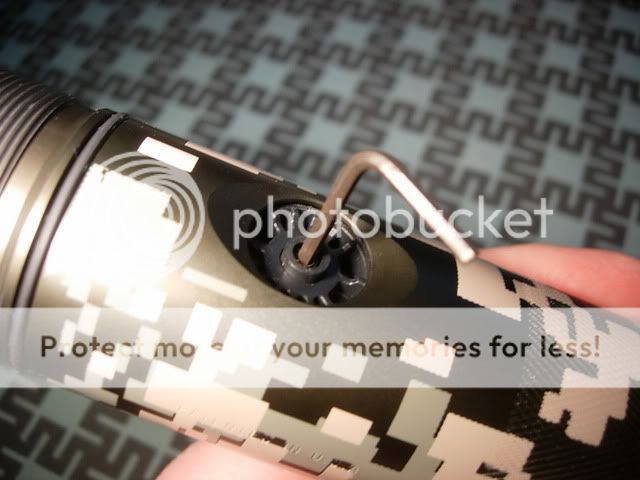
Securing the bulb in a Fivemega Adapter. You may notice the the bulb slides into the adapter too easily. And consequently can slide out just as easily. And in fact, unless you properly secure the bulb it can just fall out at any time. This is rather inconvenient.
The best way I have found to secure the bulb into place, while still allowing you to fine tweek it without the risk of it coming loose again is to VERY subtly bend the pins as seen here.
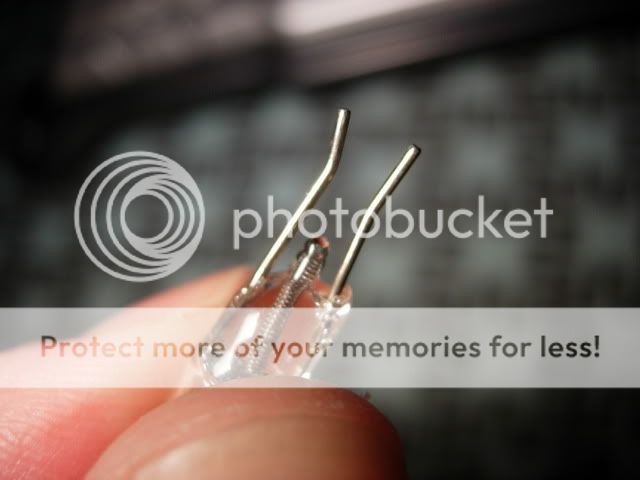
THIS IS AN EXAGGERATED BEND ! used to illustrate the effect we are going for. The actual bend you will do, will be so subtle you can barely tell the pins are bent at all, but in turn, the bulb will mount tightly and securely into the bi-pin adapter.
IT'S OVER !

Well here is a quick illustrated guide showing you and easy straight forward way to focus a non cammed reflector when using the stock switch assembly and a bi-pin adapter.
First off, the necessary tools.
The most important tool in the any mag modders arsenal is his trusty 2mm allen wench used to release the switch assembly.
For handling the bulb we save the piece of "spare bulb foam" that came with your mag and is found in the tailcap.
After the bulb is installed we will use a tweezer to adjust it.

The importance of the foam is simply to keep your fingers off the bulb when installing it. Any naturally occurring bodily oils you get on the bulb off your finger tips will effect its thermal dynamics resulting in a shorter lifespan. If you touch the bulb it's not the end of the world, but it should be avoided. You can use alcohol to clean it if need be.

The first step is to remove the switch assembly, once out, we remove the cam nut.

As you can see, I have a washer. I'm using an M5 (5mm ID) Lock washer.

We take the washer and install in onto the cam nut like so, effectively allowing us to lock the slug in a selected position.
At first, we don't want to tighten it all the way. We want it to remain loose enough so that it can be moved freely for fine adjustments, to be tightened later once we've established our focal point.

The next step is to reassemble the Mag. Installing the bulb and batteries so that it is ready to use. We tighten the head all the way, and drop the reflector into place, but we do not install the lens and bezel.

At this point, what we are going to do is test for focus, shooting the beam at the ceiling for quick reference.
Now, if you only ever want to use this Mag as a thrower, feel free to focus it achieving an optimum hotspot. Otherwise, if you want to maintain the dual function of the Maglite, allowing you to rotate between flood and spot mode, the focus effect we are first trying to establish is a flood beam.

Once we have our flood focus set, you will later be able to rotate the head outwards into spot mode.
At this time, the slug is still loose allowing us to tweek it.
If the bulb is too high we carefully push the slug downwards.
I have chosen to use the allen key.

If you've pushed it down too far, no sweat, just turn the allen key around, using the angel end as a hook to pull it back up.

Once we've established our preferred focus, we can loosen the switch assy', slide it down, and tighten the cam nut securing the slug, though the switch hole like so.

So now we are pre-focused, we can now rotate the head out into spot mode, but chances are, we are not quite done yet.
You may notice that the hotspot is a tad warped.

One flaw common to ANY bi-pin socket we use in our Mag hotwires, is that the bulb will not just slip in and sit perfectly straight.
Focusing our Mags requires tuning in all 3 dimensions. We must now fine tune the bulb position to align it as perfectly centre as possible in the middle of the reflector.

This is where the tweezer comes into play.
DO NOT ATTEMPT THIS WITH PLIERS !
Or for obvious reasons a plastic tool.
Halogen bulbs are fragile and are internally under pressure.
Too much force applied to the bulb may cause it to crack, and if that happen it will literally EXPLODE, sending shards of glass shrapnel flying everywhere.
For liability reasons, I will recommend you use eye protection during this procedure.
With tweezers, it will be very difficult to put enough pressure on the bulb to cause it to break. I would advise you still use caution.
Basically, at this point, we use the tweezers to gently adjust the bulbs pitch and yaw to centre it in the middle of the reflector and tighten up our hotspot.

Once again, use caution in doing this. To much force applied to the pins at the base of the bulb can cause a hairline crack that will allow all the internal gasses to leak out. Once this happens, your bulb is as good as
 .
.In the end it should not be too difficult to centre the bulb, getting that perfect long throwing hotspot we desire.

Once done, we screw the lens and bezel into place, and we are done.
Focused and ready to go, Enjoy you Hotwired Mag !

Bonus Levels :
Removing the Mag switch is done easily. With the tailcap and batteries removed. We gently pry out rubber switch dome. This can usually be done with just your finger nails. Once removed, the 2mm allen wrench is inserted into the hole in the middle of the switch, and turned counter clockwise to loosen the switch assy'. Once loose it will slide downward out through the bottom of the Mag.

Securing the bulb in a Fivemega Adapter. You may notice the the bulb slides into the adapter too easily. And consequently can slide out just as easily. And in fact, unless you properly secure the bulb it can just fall out at any time. This is rather inconvenient.
The best way I have found to secure the bulb into place, while still allowing you to fine tweek it without the risk of it coming loose again is to VERY subtly bend the pins as seen here.

THIS IS AN EXAGGERATED BEND ! used to illustrate the effect we are going for. The actual bend you will do, will be so subtle you can barely tell the pins are bent at all, but in turn, the bulb will mount tightly and securely into the bi-pin adapter.
IT'S OVER !

