Thanks for taking the time to respond. I wish you had seen my earlier threads sooner as it could have proven very helpful, but better late than never. The Armytek lights were pointed out to me as good options in some of those earlier conversations, but I ended up not going that way because I wanted more output. I may end up picking one up in the future, but I'm nervous about the tint's not matching creating blending challenges. Time will tell. I have a lot to learn about the tool I bought.
I hear you about the snoot challenges. I have a large mouse pad in my bag which I played with a bit and you may be right that the length needed to be effective is too long to be practical. I'm going out tonight for another shoot which will be a better test. No moonlight and a close mountain peak. It will be interesting to see what (if anything) I can light up at all.
You're welcome. Tints not matching might be an issue, but one can work wonders with slight localized colour corrections in Lightroom or Photoshop, if you have one area lit with a different light that looks slightly off. Depends on how much time and effort you have to work on each shot, and how important absolute accuracy is?
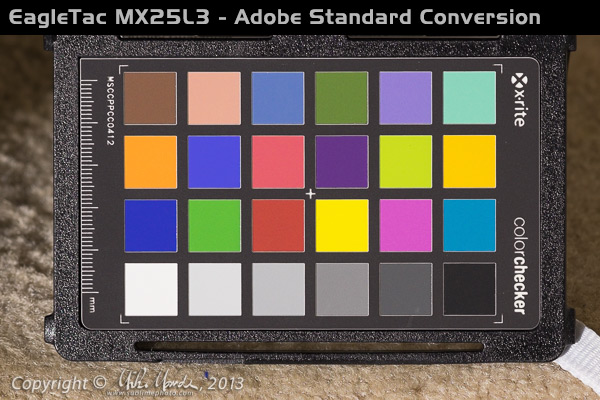
This might interest you. I have some examples of an Xrite ColorChecker Passport lit by various lights and comparing to a daylight calibration too. This will show you the degree of colour accuracy improvement you might see with a custom calibration. These were originally raw files shot with my Fujifilm X-E2. You will see that there are no basic changes to the neutral patches before and after calibration, but that there are changes to some of the colour patches...
Target lit with an EagleTac MX25L3 (MT-G2) - Adobe Standard Conversion...
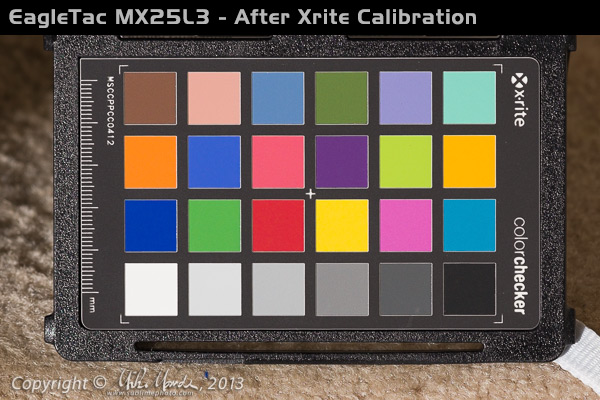
Target lit with an EagleTac MX25L3 (MT-G2) - Same image as before but after Xrite calibration...
Here is an animated GIF showing the two. Of course GIFs are not continuous tone and suffer from dithering artifacts, and if you are running a wide-gamut monitor the GIF will look over-saturated compared to the JPEGs (like it does on mine) and will
definitely exaggerate the differences, but it should give you an idea of the hue changes pre/post calibration, especially if you squint to blur out the dithering...
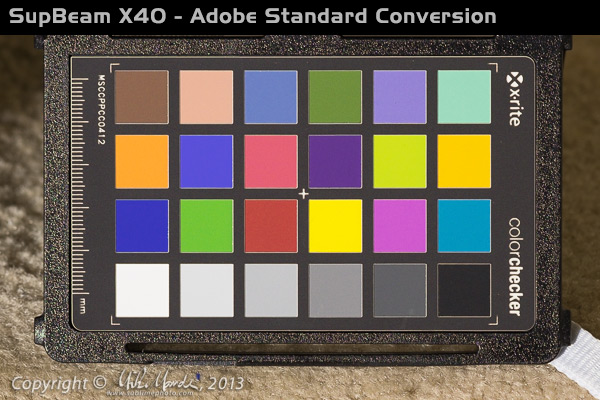
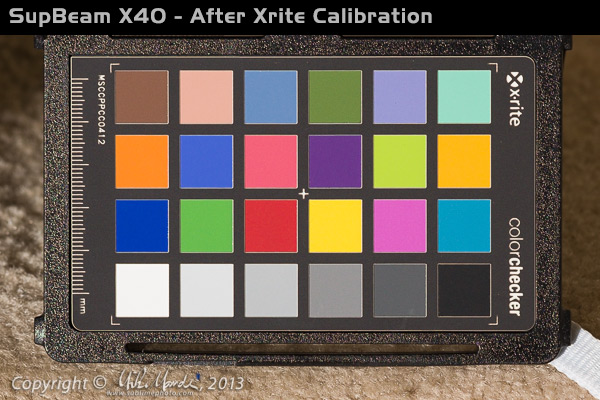
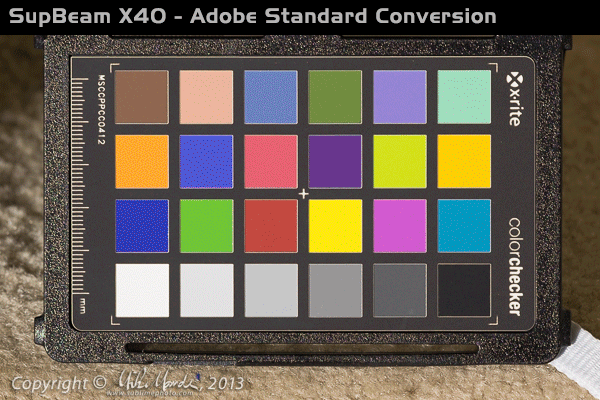
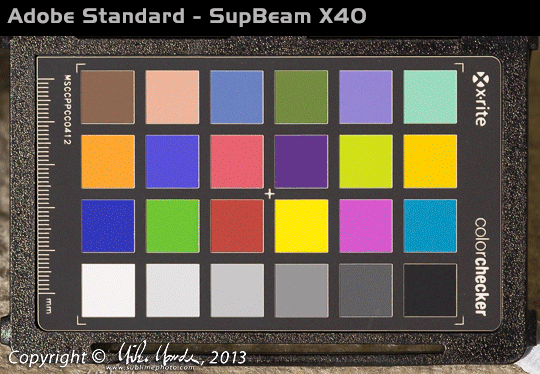
Here is another example, same thing with my SupBeam X40...
Notice here that there are slightly more changes perhaps than with the MX25L3, owing to the somewhat lower CRI and cooler tint of the XM-L2 LEDs used in the X40...
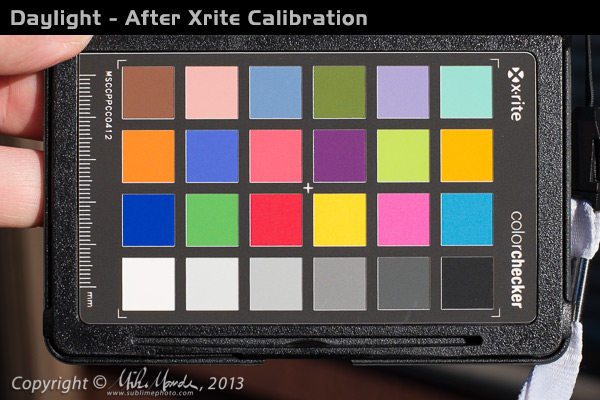
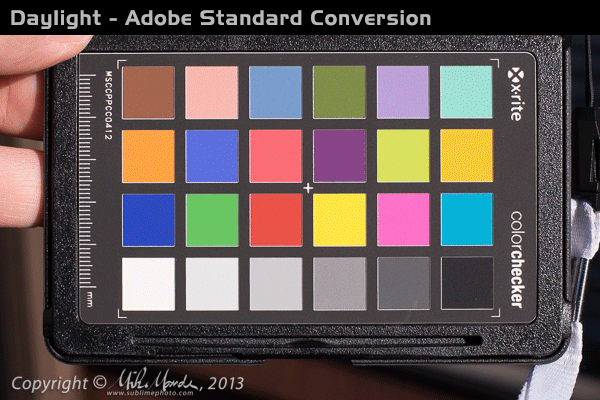
Finally, even daylight images can see improvement with an Xrite calibration, so not all of the variations seen above are due to the lights themselves! This was shot in December high-noon sun...
Mostly, you'll see a density/saturation boost in some colours after a daylight calibration (also camera dependant), like the dark blue and dark red patches for example, but not as much of a hue shift as you get with the flashlights...
Lastly, here are the Adobe Standard renderings for all three in an animation...
One last point to note with the above animation, is that relatively speaking, the two flashlights are closer to each other than either is to daylight, so as long as there are no huge colour temperature differences, for example using a warm-white 3500K LED light together with a very cool, say 6500K one, you might find that they can mesh quite well in a photograph, presuming critical colour accuracy is not a requirement and you just want an aesthetically pleasing result. However, if you were to be doing a clothing shoot for a client for example, where accuracy might be critical for bright colours, then you'd likely not want to mix light sources, regardless if we're talking LED or anything else for that matter...
Anyway, I hope this helps illustrate the colour rendering advantages of a custom calibration? And no, I don't work for Xrite!
")