Presenting you the very personal *Fenix E1 CE*

ViReN

Flashlight Enthusiast
Joined
Apr 3, 2004
Messages
3,078
Location
CPFReviews.com
EngrPaul, EsthetiX thanks for putting nice tips :) it's really appreciated.

EsthetiX: could you suggest a online for dremel retailer with world wide shipping?
 

EngrPaul

Flashlight Enthusiast
Joined
Sep 28, 2006
Messages
3,678
Location
PA
When you are sanding down the back of the reflector, sometimes you need it to stay very flat. The dremel will work OK but it's much better to patiently use a large flat file for this task.

I find most dremel bits get caked up with aluminum too quickly, heat up and chatter. The dremel bits seems designed for wood and steel. Hogging out lots of material is not it's forte.
 

EsthetiX

Enlightened
Joined
Nov 15, 2006
Messages
453
Location
Hawaii
ViReN said:
EngrPaul, EsthetiX thanks for putting nice tips :) it's really appreciated.

EsthetiX: could you suggest a online for dremel retailer with world wide shipping?

I honestly have no idea. I don't even own a dremel haha. After reading that it took you 2 hours I started wondering exactly how you were doing it and then the suggestion of using a dremel came immediately into my head. I've use one befrore it's a great device. I think it would be perfect for this type of stuff.
 

EsthetiX

Enlightened
Joined
Nov 15, 2006
Messages
453
Location
Hawaii
EngrPaul said:
I find most dremel bits get caked up with aluminum too quickly, heat up and chatter. The dremel bits seems designed for wood and steel. Hogging out lots of material is not it's forte.

Actually, that's a good point. I didnt think about metal caking on... Hmmm There's gotta be some kind of tip out there that is suited for this stuff... :)
 
Last edited:

kevinm

Enlightened
Joined
Jun 2, 2006
Messages
891
Location
Denverish
EngrPaul said:
When you are sanding down the back of the reflector, sometimes you need it to stay very flat. The dremel will work OK but it's much better to patiently use a large flat file for this task.

I find most dremel bits get caked up with aluminum too quickly, heat up and chatter. The dremel bits seems designed for wood and steel. Hogging out lots of material is not it's forte.

Okay, you *might* destroy some fingers doing this, but...use a belt sander. Put on a leather glove or find something that this will thread into or use some pliar, though this would be my last choice. Clamp the sander in something (vise or workbench), turn it on, and go to work. Be sure to have a glass of water to drop it into; it'll get hot fast.

You can use a Dremel or such, but don't use the stone bits. They do clog. Use one of the sanding drums and keep rotating the reflector. You'll be done in no time. I might do this later this week.

Incidentally, this would make the Luxeon mod ones even better, too.

Kevin
 

Thujone

Flashlight Enthusiast
Joined
Oct 18, 2006
Messages
1,688
Location
Nebraska
Are you a prisoner?

btw, great looking mod!

ViReN said:
I have been looking on ebay, but problem is shipping ristrictions to place where I am currently living.
 

ViReN

Flashlight Enthusiast
Joined
Apr 3, 2004
Messages
3,078
Location
CPFReviews.com
Thujone said:
Are you a prisoner?

btw, great looking mod!
:huh:lol.... :laughing: no.... :)

I actually live in Middle East, Some Items cannot be shipped in here which includes some kind of tools. at least to the PO Box addresses.

you may be surprised, our PO guy does not allow any flashlights to be shipped out. (I checked local rules, but no mention of this fact) but me being an expat is not supposed to argue .... otherwise i think, incoming lights would not reach me :grin2:

ViReN
 

BentHeadTX

Flashlight Enthusiast
Joined
Sep 29, 2002
Messages
3,892
Location
A very strange dark place
ViReN said:
:huh:lol.... :laughing: no.... :)

I actually live in Middle East, Some Items cannot be shipped in here which includes some kind of tools. at least to the PO Box addresses.

you may be surprised, our PO guy does not allow any flashlights to be shipped out. (I checked local rules, but no mention of this fact) but me being an expat is not supposed to argue .... otherwise i think, incoming lights would not reach me :grin2:

ViReN

Great mod ViReN!
I understand your shipping problems, those APO guys get kinda testy also. Turkey is not much better. I have this P2 XRE laying around minding it's own business and your E1 CE mod has the evil monkey whispering in my ear. You almost had me but my wife would probably like it on her keychain (I have a FF3) Thanks... now to keep eyeballing your mod and thinking what a great flood light it would be for my wife.
 

Frank_Zuccarini

Newly Enlightened
Joined
May 16, 2006
Messages
153
*Fenix E1 CE*

I performed this mod today, and it is wonderful!

As described by ViReN, the beam is larger and brighter, with a hot spot blending beautifully into the flood. No hint of a dark ring. No heat after 10 minutes continuous running. Used in the "candle mode", it illuminates my bathroom sufficiently for reading. I think that the throw is diminished, but there is much more light than OEM. I am very happy with the improvement.

Again, thank-you for sharing this very neat modification.

Frank
 

ViReN

Flashlight Enthusiast
Joined
Apr 3, 2004
Messages
3,078
Location
CPFReviews.com
Great Frank :) Nice to hear.

E1 CE is now my default multipurpose light at home. the wide throwish flood beam helps to illuminate much more and evenly ... with light output more than L0P and runtime around 3 hours (on alkaline) and full regulation... is just so cool :) and of course less heat generated...
 

LoneRebel

Enlightened
Joined
Oct 28, 2002
Messages
224
Looks cool. I have an E1 and a LOP-SE, and have some Crees coming coming as well.
I think I'll have to do this mod.

I'm curious as to this part of your post
3) Cut Circular PCB shaped Plastic disk (from Drinking water bottle cap)
Could you elaborate on what this plastic disk is used for? I'd understand if you needed to make a custom heatsink, but an insulator....hmmm?

Also from that diagram I think the dremels cutting wheel would be perfect for the job. It would seem very inefficient to just grind the whole thing all the way down. Then a slight touch up with a grinder bit should finish things off.

Sorry to hear that you have such a problem getting tools in the middle east.
 

LightScene

Enlightened
Joined
Sep 12, 2003
Messages
939
Thanks for sharing your great success with this mod. Hopefully, the Fenix engineers are working on changing all of their models to use Crees. By this time next year there should be lots of very bright and fairly cheap flashlights around.
 

Pellidon

Flashlight Enthusiast
Joined
Sep 19, 2002
Messages
1,380
Location
39.42N 86.42 W
In regards to the filing by hand. I found that a piece of rough sandpaper on a flat surface works pretty well without finger cramps, damage to fingers, and parts don't go flying across the room unless you throw them on purpose.

Still can take some time but it is a little more user friendly.

I did manage to score on a coarse large file at work that does a quick easy job with minimum damage to small parts or fingertips. It did not have a standard double cut profile so it did not grab or gouge things. If I can find it I can upload a picture.
 

Ty_Bower

Flashlight Enthusiast
Joined
Feb 18, 2004
Messages
1,193
Location
Newark, DE
ViReN said:
Did you notice Uniform Hotspot.....
No offense intended, but the hotspot actually looks a bit non-uniform to me. There's clearly a + shaped pattern in the central hotspot. It shows up pretty well in your EV=0, EV=-1 and EV=-2 shots.

It almost reminds me of an inverted form of the pattern you get from a "properly" focused LuxV at extremely close range.

Just being picky... Nice mod, though.
 

Henrik

Newly Enlightened
Joined
Dec 29, 2006
Messages
22
Rubbing a piece of chalk on the file before filing aluminum will make it easier to clean the shavings out of the file grooves. A fine-wire wire brush works well for the cleaning.

Henrik
 

ViReN

Flashlight Enthusiast
Joined
Apr 3, 2004
Messages
3,078
Location
CPFReviews.com
I'm curious as to this part of your post
3) Cut Circular PCB shaped Plastic disk (from Drinking water bottle cap)
Could you elaborate on what this plastic disk is used for? I'd understand if you needed to make a custom heatsink, but an insulator....hmmm?

The Cree with Corners cut will not fit properly in to the cavity created by the PCB + Nichia LED... now to replace that void, I need something like a disk (i preferred inert material such as plastic) so that the Cree LED could sit nicely on the disk.

I will try to take pictures of the internals hopefully today.

No offense intended, but the hotspot actually looks a bit non-uniform to me. There's clearly a + shaped pattern in the central hotspot. It shows up pretty well in your EV=0, EV=-1 and EV=-2 shots.

It almost reminds me of an inverted form of the pattern you get from a "properly" focused LuxV at extremely close range.

No Offense taken :), yes, i just looked at the with more concentration at the EV -2, there is a + sign .... it might be reduced @ cost of flood, if I file/grind the reflector a little bit, the LED die will come in perfect focus (will be more throw).

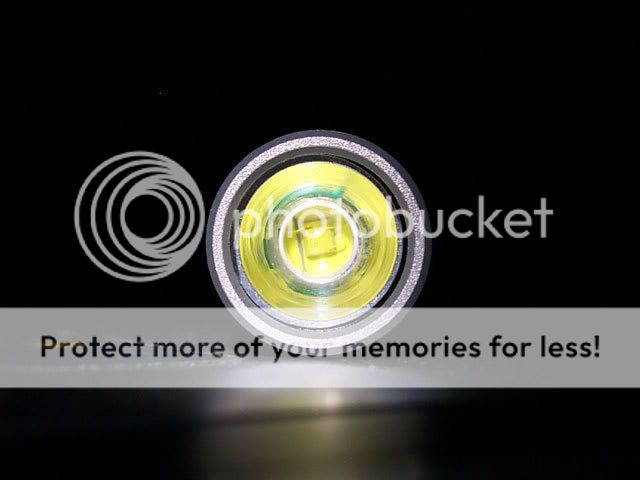
if you see this image, you can see the 'dark green' that's because LED is still back, that 'dark green' can be removed (making LED focused) with additional grinding.
DCP_6277_CreeE1.jpg
 

ViReN

Flashlight Enthusiast
Joined
Apr 3, 2004
Messages
3,078
Location
CPFReviews.com
I think, with the advent of U Bin Seoul P4 LED, the modifications are now still a lot more easier, I am gonna get some U Bin SP4 from sandwich shoppie and try em on Fenix L0P making it as "Fenix L0P S" :) instead of "Fenix L0P CE" and there wont be anything much to remove of reflector (hopefully) .. have a look at the NewBie's SP4 Analysis thread :)
 
Top