Transparent Mag switch covers?

orcinus

Flashlight Enthusiast
Joined
Jun 15, 2008
Messages
1,002
Location
Croatia
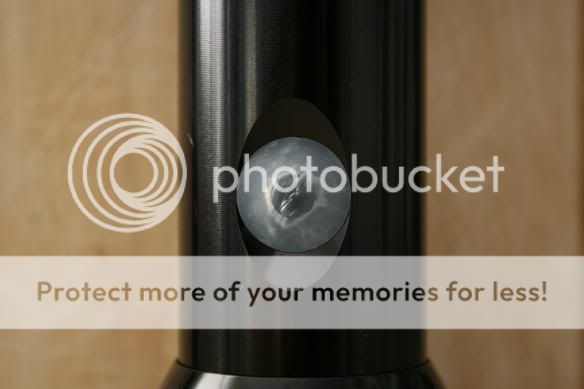
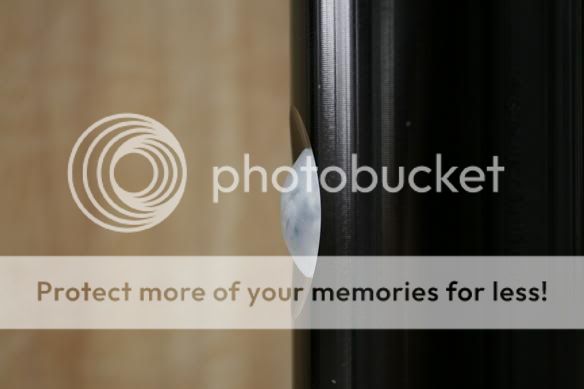
Does anyone know if there are any semi-transparent (as in: not completely clear, but cloudy) replacement switch covers for C/D Mags out there?

(In case you're wondering why i'm asking, it's because i'd like to try to put a 3mm LED near the switch, under the cover.)

Thanks in advance!
 
Last edited:
I've thought about molding some I just haven't felt like spending the money for the initial supplies yet.

I had a couple ideas that needed a semi-transparent cover also. Seems funny that they anodize the lights in 400 colors but have never used anything but black switch covers.
 
Yeah, i've always thought that was weird too.

Anyways, if you decide to mold some and include a transparent one, please give me a yell. I've thought of trying to make a semi-transparent one from silicone myself, but i'm not sure if making a mold for just one switch cover would be very sensible... :shrug:
 
Thats the same path I get led down. I figure if I'm going to make 1 mold it'll be hard to mix a small enough amount of silicone to not waste 50% of what I mixed. I'm guessing you'd have to do 5-10 at a time to make it less wasteful. Then I think about making 5-10 molds and I give up. :thinking:
 
I would be interested in one of the semi transparent rubber caps if you make any.

AlexGT
 
I just stuck a DX GITD Rubber Button in there with a O-Ring around it to hold it tight. I can see the red 5mm that is connected to my Maxflex when the Battery Voltage hits Medium level very clearly. I did invert the button and cut the little nipple off flush.

P1020107.jpg


P1020108.jpg


I got bored and decided to make some silicone caps.
I have been using the wax molding idea for a while,
and it works great! :twothumbs

I will let you guys/gals know how they turn out :thinking:
And if Der Wichtel wants to sell his own, he has
first rights to the sales because he brought his
meat and potatoes to the table first :poke: :grin2:
Then mee next! I don't like to step on toes :kiss:

Just go on. :thumbsup:
 
How does this wax molding idea work? Any tutorials?

AlexGT

First, Go get yourself some beeswax, and a small
empty, new paintcan from your local hardware store.
Also, grab some wax paper cups and some silicone
sealant. Try to find the quick-dry stuffs. Any color
can be used. Heck, you could even mix in some
glow powder if your feeling frisky!

The beast way to make a cheap 1-sided mold is to
heat up your wax in a double boiler setup.
Take a small non-teflon saucepan and fill it
with some water, put the stovetop
on high to get a boil going.

While it is getting ready to boil, put a nice chunk
of wax in the paint can and lower it slowly into the
pot of boiling water. You can set the can on an angle
or the edge of the saucepan to prevent it from jumping
around with the boiling water if you'd like.
Now lower the temp of the stovetop to simmer, and wait
for the wax to melt. The slower the better.

Okay, go grab your wax cups.
Cut it down to about an inch of the bottom.
Lay down some newspaper on your counter and put
your cup on top. After the wax melt, pour it into the
cup to about halfway and let it sit to solidify a bit.
You can keep the wax on the double broiler the whole
time for this project. Just make sure that you've put it
to simmer. After your wax has slightly solidified, get
your maglight button ready for action. Give it a good
washing in some soapy water. Now take your still melted
can of wax and pour a very thin layer on top of the
slightly solidified cup-o-wax. Then push the mag button
top-side down just enough for the wax to come to the
outer top edge. Now you play the sit-still and wait game
of letting the wax solidify just enough to hold the button
in place. Allrighty, go stick your creation on the top rack
of your fridge for about 20 minutes. Done yet? Now go
get your creation! Make sure the wax has hardened
enough to where it is the same consistency of a candle.
You can now pop out the mag rubber button by working
around the edges until you seperate it from wax enough
to peel it out. It should have come out nicely, if the wax
was solid enough. If not, just pour some more wax over
the top and start over :)

Now for the silicone! Put a nice dollup of it in the center
of the "mold" and swish it around with your finger to
coat the sides and bottom about 1/8in or 3mm thick.
Let your creation dry for about 24 hours :)
Resist the temptation of Touching it before then!
I know you want to but NO! hehe
After that time, peel it out and go shove it in your mag!
You can try different thicknesses of silicone for a
stiffer/mushier feel. And of course you can pour multiple
molds at the same time too! Have fun with it!
Aooh, and did you remember to turn off the stove silly?
Now take one of the pait-can covers and slap it on top.
If you don't have any, Saran wrap and a rubber band
will do nicely. And don't try to do this with a hot can!
Now you have wax left over for more projects.

I hope that was somewhat informative for you :nana:

Super:poof:
 
Last edited:
I was putting them in like POST #8 then I found a better way to hold them in the light body and did that with the P7 builds below.

I use a sanding drum on the dremel or small router and cut back some of the plastic of the original switch so the O-ring will fit in there better but...

In lieu of the O-ring I use a 1/2 inch transparent blue tint vinyl hose. I cut a section off of it and I can cut it at an angle to be thinner at the LED to compensate for the bump of the LED. It also helps to luse a touch of super glue. It also catches the light and adds to the effect. I use the same GID covers from KD. With the D2DIM, and its replacement, D2FLEX the switch is turned into a momentary only. No need for a long stroke here so I shorten the stroke by putting a stop inside it. In the D size I then must trim down the post inside the cover as it is too long. Invert the cover and with a sharp blade or sharp small scissor, snip!

You also need to consider if you put the LED in from the rear or from the front of the switch. I build charging jacks on most of my modes. Plenty room to put the LED in from the rear with that mod but I need to be careful running the negative contact near all the positive braid in that contraption. The front works better in D mods, C mods the front can be too "busy" with driver boards and such. With an incan hotwire the pedestal or KIU or bi pin to PR socket can be a problem and you must put the LED in from the rear.

Also I use 5mm LEDs. You need to know the Vf and power consumption of them and use an appropriate resistor to get a low draw glow. The thread with the N30 goes into some of that below.

The LED pro program is excellent to calculate those resistors. Here is the link: LED PRO


post2fj0.jpg


3c57614aq7.jpg


Here is the evolution to my builds:

IMPROVE THE N30 HID add a 225 Lumen R2 LED area light and GLOWING LED locators
FS-RECHARGEABLE 2D P7, Modes, Electronic GID & more features
FS-RECHARGEABLE 1.5 D P7, Modes, Electronic GID & more
FS-RECHARGEABLE 2C P7, Modes, Electronic GID & more features
 
Last edited:
Good Ideas!

I was putting them in like POST #8 then I found a better way to hold them in the light body and did that with the P7 builds below.

I use a sanding drum on the dremel or small router and cut back some of the plastic of the original switch so the O-ring will fit in there better but...

In lieu of the O-ring I use a 1/2 inch transparent blue tint vinyl hose. I cut a section off of it and I can cut it at an angle to be thinner at the LED to compensate for the bump of the LED. It also helps to luse a touch of super glue. It also catches the light and adds to the effect. I use the same GID covers from KD. With the D2DIM, and its replacement, D2FLEX the switch is turned into a momentary only. No need for a long stroke here so I shorten the stroke by putting a stop inside it. In the D size I then must trim down the post inside the cover as it is too long. Invert the cover and with a sharp blade or sharp small scissor, snip!

You also need to consider if you put the LED in from the rear or from the front of the switch. I build charging jacks on most of my modes. Plenty room to put the LED in from the rear with that mod but I need to be careful running the negative contact near all the positive braid in that contraption. The front works better in D mods, C mods the front can be too "busy" with driver boards and such. With an incan hotwire the pedestal or KIU or bi pin to PR socket can be a problem and you must put the LED in from the rear.

Also I use 5mm LEDs. You need to know the Vf and power consumption of them and use an appropriate resistor to get a low draw glow. The thread with the N30 goes into some of that below.

The LED pro program is excellent to calculate those resistors. Here is the link: LED PRO


post2fj0.jpg


3c57614aq7.jpg


Here is the evolution to my builds:

IMPROVE THE N30 HID add a 225 Lumen R2 LED area light and GLOWING LED locators
FS-RECHARGEABLE 2D P7, Modes, Electronic GID & more features
FS-RECHARGEABLE 1.5 D P7, Modes, Electronic GID & more
FS-RECHARGEABLE 2C P7, Modes, Electronic GID & more features
 
I just popped some quickie prototypes out for
a lookiesee.. here is the first batch, tweeking needed.
MagButtonFrontShot.jpg

MagButtonSideShot.jpg


I am doing another batch with a different process.
When i perfect the process, i will post the results
and final tutorial on how to make them. And if you
don't want to make em' yourself, I will sell the buttons
in a plain silicone form, or mixed with glowpowder for
a nice glowie effect that reacts with U.V. leds!
 
Sweet! Looks like a good first try. I'll be interested in buying a two or three, depending on the price you pick...
 
I think I'll rather pay you for one sabrewolf, yours look awesome. I might just end up stuck to a wall or something. he he he

Hey while your at it can you put some chequering texture into the button like the SF buttons have, specially the clickie button texture on the E2e is very nice.

AlexGT
 
Top