Homemade MJLED

UnknownVT

Flashlight Enthusiast
Joined
Dec 27, 2002
Messages
3,671
In thread - MJLED strobing?...
[ QUOTE ]
wwglen said:a "Homemade" MJLED. This is a high power 100mA 5mm LED I got from a group buy, ground down using a dremal tool. Looks rough but the three I have are about the same (brightness and beam shape) as the third gen MJLEDs I got.

[/ QUOTE ]
I did the shameless thing and begged wwglen for one of his homemade MJLEDs.

The wwglen home made MJLED arrived in the mail today, many thanks to wwglen for your generosity.

So I cut the legs to about 7/16" from the plastic dome base (just like I did with my previous MJLEDs) and replaced the MJLED in turn with each of my 2 gen2 MJLED MiniMag 2AAs for my comparisons.

Please see this thread -

MJLED drop-in for MiniMag 2AA

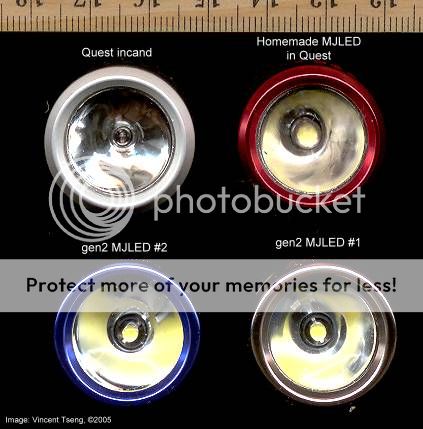
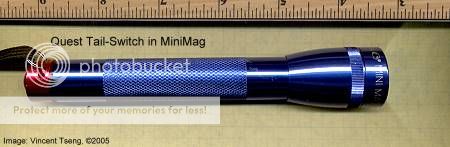
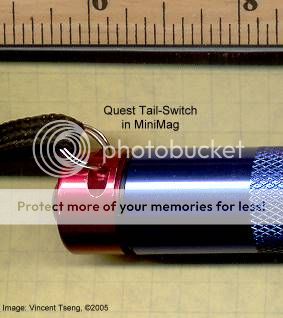
wwglen's Homemade MJLED installed -
hMadeMJLED.jpg


Compared to gen2 MJLED (#2) bought from Sandwich Shoppe -
hmMJLED_2.jpg
hmMJLED_2_2U.jpg


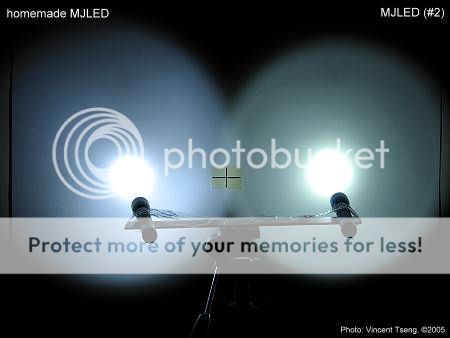
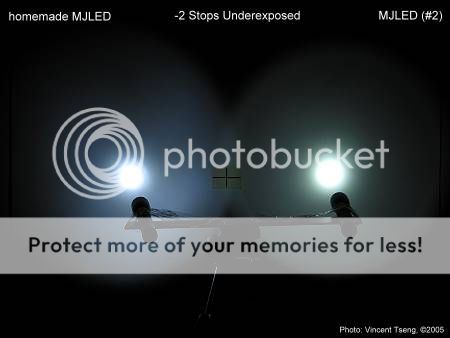
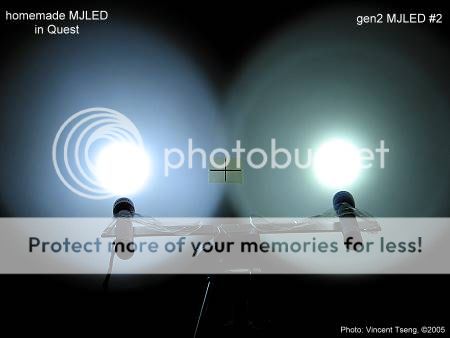
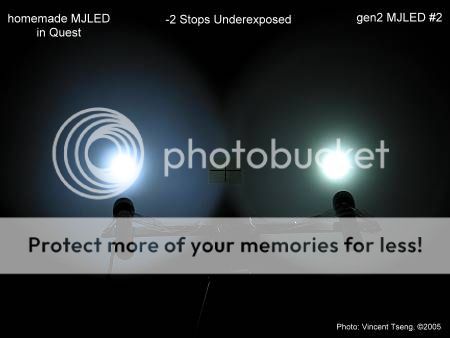
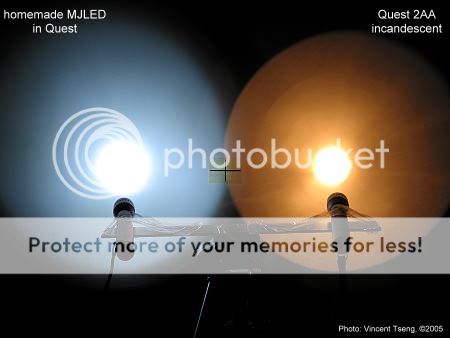
The homemade MJLED seemed a shade brighter (but see later**) with a cooler bluer tint compared to my gen2 MJLED #2

Compared to gen2 MJLED (#1) bought from Lambda -
hmMJLED_1.jpg
hmMJLED_1_2U.jpg

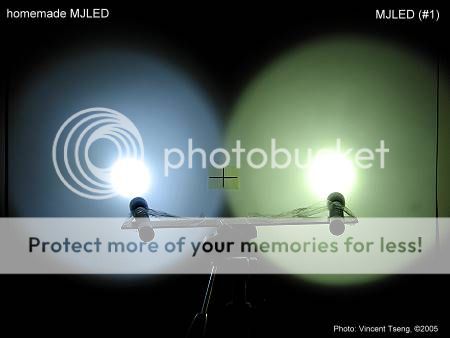
now the gen2 MJLED #1 seems a shade brighter - **well it is probably because the AA batteries in the MiniMag body of the MJLED #1 are possibly a bit fresher than those installed for the MJLED #2.

My gen2 MJLED #1 as noted previously has a yellow-green tint in comparison to the gen2 MJLED #2 and this is emphasized even more with the slightly cooler bluer tint of the wwglen homemade MJLED.

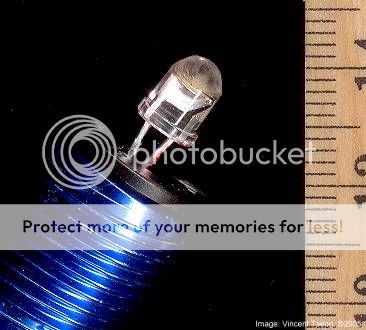
Looking at the homemade MJLED closely (see close-up above) indeed the cut-off looks less polished/finished than a "real" MJLED - but the results show that it is every bit as effective - perhaps there is a bit more asymmetry when the beam is defocussed to flood (with doughnut-hole) but I hardly ever use this so it is moot for me - and possibly with more patient centering of the homemade MJLED I may be able to get the symmetry/centering better -
but it really works fine the way it is - with minimal effort in installation...

Many thanks to wwglen for your generosity, and for this excellent LED that seems pretty comparable to my "real" gen2 MJLEDs -
and you know how enthusisatic I was about the MJLEDs.......
 

nemul

Flashlight Enthusiast
Joined
Mar 22, 2005
Messages
1,592
Location
Georgia
I have a secret to get a high polish on my "homemade MJLEDs" /ubbthreads/images/graemlins/wink.gif
 

wwglen

Enlightened
Joined
May 24, 2003
Messages
534
Location
NC
I just took a "cupped" shaped grinding wheel on a dremmal tool and swirled it around to grind it down to the approximate shape I wanted.

Then I touchedit up a LITTLE with a wet felt polishing pad and the dremmal metal polishing compound. This took the worst of the scratches and edges off.

Tried it out compaired to a real polished MJLED and said "GOOD ENOUGH" and this is how I do mine now.

wwglen
 

WildRice

Flashlight Enthusiast
Joined
Nov 30, 2003
Messages
1,135
Location
SW Michigan
to finish mine up I use 1200 wet sandpaper to get it close, then I use some 'blue magic' buffing car polish. I put a drip in my palm and run the LED around for a few mins. Then to top it off I use a bit of 'turtle wax'. when it is done, it looks like it was molded that way.
Jeff
 

UnknownVT

Flashlight Enthusiast
Joined
Dec 27, 2002
Messages
3,671
[ QUOTE ]
wwglen said: Tried it out compaired to a real polished MJLED and said "GOOD ENOUGH" and this is how I do mine now.

[/ QUOTE ]
Indeed I agree - for all practical purposes wwglen's homemade MJLED is "good enough" - very comparable to "real" MJLEDs - even if they look less well finished.

Here are some more comparisons.

I drilled out a reflector in an aluminum Quest 2AA from ****'s Sporting Goods (@ $7.49 for 3 -
see this thread - Re: ****'s Sporting Goods 3-Pack of Lights - Cheap )

hmMJLEDsize.jpg


Heads -
hmMJLEDhds.jpg


Compared to gen2 MJLED # 1 in MiniMag -
hmMJLEDq_1.jpg
hmMJLEDq_1_2U.jpg

as commented before my gen2 MJLED #1 from Lambda has a yellow-green tint (which I perversely quite like /ubbthreads/images/graemlins/crazy.gif /ubbthreads/images/graemlins/ooo.gif) - the homemade MJLED has fresh alkaline AAs so shows a shade brighter than the gen2 MJLED #1

Compared to gen2 MJLED #2 in MiniMag -
hmMJLEDq_2.jpg
hmMJLEDq_2_2U.jpg

again the gen2 MJLED #2 has less fresh alkaline AAs than the homemade MJLED.

In real-life the difference in brightness is hardly noticable and makes virtually no difference to me practically - but in the beamshots one can see it.

This goes to show that the directly driven MJLEDs are somewhat sensitive to battery levels - even though the runtimes may be very long in the region of 30+hours - but with slowly/gradually diminishing brightness......

Compared to a Quest 2AA incandescent as is -
hmMJLED_Quest.jpg
hmMJLED_Quest2U.jpg

again the Quest "as is", is on less fresh batteries than the homemade MJLED. It looks less bright in the beamshots - but the central hot-spot is more intense so it throws further - but nevertheless they are pretty comparable - except that the MJLED will have a substantially longer runtime.

These aluminum Quest 2AA flashlights seem to be pretty good quality - perhaps not as good as the MiniMag - but at least in a similar ballpark. Their beams seem to be somewhat better although there might be a bit more play in the heads....

The Quest have a reverse clickie tail-switch - and they do NOT turn on off via twisting the head (this is only for focus).

The Quest tail-switch will (conditionally) fit the MiniMag -
QuestTail.jpg
QuestTailDtl.jpg

On this trial the tail-switch did not screw completely in without force and I was reluctant to do this in case it messes up the threads - but it will fit and does work.
I did try another tail-switch earlier when I first bought these, and that seemed to screw all the way in OK....

- so maybe there is some mismatch in the threads, but enough tolerance to force fit them?
 

nemul

Flashlight Enthusiast
Joined
Mar 22, 2005
Messages
1,592
Location
Georgia
it's a 2 side finger nail Buffer..
sand it as smooth as you can then buff it to a smooth shinny finish with a nail buffer. i got mine at wally world for like $2 bucks...
 

greenLED

Flashaholic
Joined
Mar 26, 2004
Messages
13,263
Location
La Tiquicia
Would the same process as sanding down an NX-05 optic work for these? Namely, incresingly finer grain sand paper, finish off with 1500 or so and or a final buff with toothpaste or similar polishing cream? I've polished 1 or 2 optics like that and the surface is perfectly smooth afterwards.

It takes a long time to get perfetc /ubbthreads/images/graemlins/wink.gif though.
 

Wilsonite

Newly Enlightened
Joined
Feb 21, 2005
Messages
75
Location
Des Moines, Iowa
yes, yes! Toothpaste is the most commonly used "polishing compound" in my house! Denim is great for a finishing stage.
I have never used it on leds but use the above for repairing scratches in cds...

And, if you can get your hands on it, I highly recommend "Glass Wax". Be warned that it is petroleum based, I have never tried it on acrylic, or other plastics...(I have used it on cds with no problems) Works great on UCLs and TVs! If you go to the store to look for it, it's in a metal can, about 4x6x2 inches. Pink, white and gold paint job. There's only one store in my area that I have seen it. (grocery store) So you may not find it at walmart, or target...
 

UnknownVT

Flashlight Enthusiast
Joined
Dec 27, 2002
Messages
3,671
Cool! /ubbthreads/images/graemlins/cool.gif

Thanks for the responses - especially regarding the hints on how to get a more polished finish.

So is a Dremel the tool of choice to cut these LEDs down?

How hard would it be to use a file to grind the LED dome down initially - then working with progressively finer grades of sand/abrasive paper on a mouse-pad or some support, and finish with polishing?

How about putting down some simple step by step instructions on how to cut down any LED using just easily available, or even minimal home handtools?

Thanks /ubbthreads/images/graemlins/thumbsup.gif
 

WildRice

Flashlight Enthusiast
Joined
Nov 30, 2003
Messages
1,135
Location
SW Michigan
I have found the dollar store nail files work best. The ones I got were really stiff and about 1" x 6". I use the rough side to sand it flat, pretty close to the top of the bond wire (by looking from the side). then I use the finer side of the file to round it out. A nice rounded top close to the bond wire gives the best output. But be careful not to file the bondwire (have done twice) instant garbage.
Jeff
 

UnknownVT

Flashlight Enthusiast
Joined
Dec 27, 2002
Messages
3,671
[ QUOTE ]
WildRice said:
I have found the dollar store nail files work best. The ones I got were really stiff and about 1" x 6". I use the rough side to sand it flat, pretty close to the top of the bond wire (by looking from the side). then I use the finer side of the file to round it out. A nice rounded top close to the bond wire gives the best output. But be careful not to file the bondwire (have done twice) instant garbage.
Jeff

[/ QUOTE ]
Great stuff WildRice/Jeff! /ubbthreads/images/graemlins/bowdown.gif
Many thanks for that hint - sounds nice and simple /ubbthreads/images/graemlins/thumbsup.gif

...so, now that you're experienced at doing this -
how long do you think it takes to cut down and finish a typical 5mm LED?

and about how long just to cut down close to the bond wire, without finishing/polishing?

Thanks,
 

WildRice

Flashlight Enthusiast
Joined
Nov 30, 2003
Messages
1,135
Location
SW Michigan
I dunno, total time, mabyee 10-15mins. Mabyee 5 or so for the rough 'cut'. The hardest part is when you are getting close to finishing the rough cut, is keeping the top level. The flatter (more square?) you can make it, the easier it is to get the 'dome' part even, ie no oblong.
Jeff
 

UnknownVT

Flashlight Enthusiast
Joined
Dec 27, 2002
Messages
3,671
[ QUOTE ]
WildRice said:
I dunno, total time, mabyee 10-15mins. Mabyee 5 or so for the rough 'cut'. The hardest part is when you are getting close to finishing the rough cut, is keeping the top level.

[/ QUOTE ]
Love it!

It seems pretty easy to cut-down any LED.

OK... so how much did you guys pay for the high power 100mA 5mm LEDs used to make these homemade MJLEDs?

Thanks,
 

wwglen

Enlightened
Joined
May 24, 2003
Messages
534
Location
NC
It takes about 2-3 min with the cup shaped grinding wheel on the dremmal tool.

Just keep the LED moving around in the cup and rotate both the LED and dremmal.

I paid $1.25 each for 20 in a group buy headed by "Tritium".


wwglen
 
Top