yclo
Flashaholic*
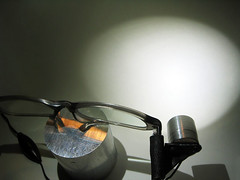
Headlamps, useful for hands free operation but has annoying strap that goes over your head. There are lights that attach to your ear but since I wear glasses, that seemed like the perfect place to secure it to.

(Click on photos for larger size)


(Click on photos for larger size)
I have chosen to use a Cree XR-E which by itself gives a very nice flood without any kind of reflector or optics. It is driven at 400ma with dat2zip's wizard board, which allows for an input voltage between 3V~12V (or could be 16V? I forget the upper limit for the Vin of the old Wiz boards) giving a great deal of flexibility in battery configurations. A generic power supply plug is used on the end for easy changing between different power sources.


(Click on photos for larger size)
The back of the headlight has two holes drilled and tapped for M3 screws, and a piece of kydex that has been shaped to fit on the side of my glasses is secured to it via button head screws.


(Click on photos for larger size)
As some of you may have noticed, the wiring looks very similar to a typical handsfree kit for a mobile phone. Because I could not fit an on/off switch into the headlight itself, I figured it would be better to have the switch closer towards the headlight for easy access. I opened the handsfree casing, removed the microphone, fitted a slide switch inside and cut an opening on the casing so that the slide switch can be used. While I was at it, the original button was wired for momentary on.
(Canon 400D/rebel DSLR users, the handsfree kit for older Nokia mobile phones use the same 2.5mm plug as the wired shutter for the 400D/rebel. In the past when I had the Canon 300D, I did pretty much the same thing to a handsfree adding both a slide switch and a second momentary switch. When plugged into the 300D, one momentary switch toggled focus, the second momentary switch toggled the shutter, and the slide switch was used for bulb exposures.)


(Click on photos for larger size)
The entire head assembly was machined from scratch, and also includes a mineral glass lens and 2 o-ring seals for keeping moisture out.


(Click on photos for larger size)
A decorative reflector like the one used in my first light is used to keep pressure between the glass window/o-ring/bezel lip. Once the hole in the side where the wire goes in has been sealed with silicone, the headlight portion should be completely water proof.


(Click on photos for larger size)
That's it!
-YC

(Click on photos for larger size)


(Click on photos for larger size)
I have chosen to use a Cree XR-E which by itself gives a very nice flood without any kind of reflector or optics. It is driven at 400ma with dat2zip's wizard board, which allows for an input voltage between 3V~12V (or could be 16V? I forget the upper limit for the Vin of the old Wiz boards) giving a great deal of flexibility in battery configurations. A generic power supply plug is used on the end for easy changing between different power sources.


(Click on photos for larger size)
The back of the headlight has two holes drilled and tapped for M3 screws, and a piece of kydex that has been shaped to fit on the side of my glasses is secured to it via button head screws.


(Click on photos for larger size)
As some of you may have noticed, the wiring looks very similar to a typical handsfree kit for a mobile phone. Because I could not fit an on/off switch into the headlight itself, I figured it would be better to have the switch closer towards the headlight for easy access. I opened the handsfree casing, removed the microphone, fitted a slide switch inside and cut an opening on the casing so that the slide switch can be used. While I was at it, the original button was wired for momentary on.
(Canon 400D/rebel DSLR users, the handsfree kit for older Nokia mobile phones use the same 2.5mm plug as the wired shutter for the 400D/rebel. In the past when I had the Canon 300D, I did pretty much the same thing to a handsfree adding both a slide switch and a second momentary switch. When plugged into the 300D, one momentary switch toggled focus, the second momentary switch toggled the shutter, and the slide switch was used for bulb exposures.)


(Click on photos for larger size)
The entire head assembly was machined from scratch, and also includes a mineral glass lens and 2 o-ring seals for keeping moisture out.


(Click on photos for larger size)
A decorative reflector like the one used in my first light is used to keep pressure between the glass window/o-ring/bezel lip. Once the hole in the side where the wire goes in has been sealed with silicone, the headlight portion should be completely water proof.


(Click on photos for larger size)
That's it!
-YC
Last edited:


 ... Very nice! ... :twothumbs