Hey CPF members,
All New Updates please see:
http://ktronik.com/LED.html
CNC head will be US$***, you get: SS screws, face plate, lens, rear cover with bflex/maxflex holder & mom on switch. Heavy duty HB clamp.
Slug - One side will be machined to accept either (not both!) a Cree XR-E or SSC P4, emitter - this is the main decision the customer must make. The other side of the slug will be flat - ready for a star of any type.
Side entry - Customer chooses custom hole for Deans 'micro plug' or a 4mm round hole... or no hole.
Extras:
IMS20's for US$5ea + US$2.50ea modding fee. If you want reflectors modded, customer needs to state what emitter will be used.
Deans micro plug US$2 (for set of M&F)
CREE XR-E HEAD: diesel_dad
CREE XR-E HEAD: rfix
Tricky bits:
Now I have built up the cree & seoul heads, I will start to flesh out some of the more tricky bits...
The only hard bits are installing the reflectors & heatsinks...
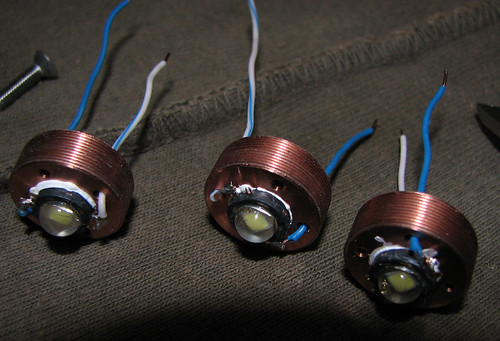
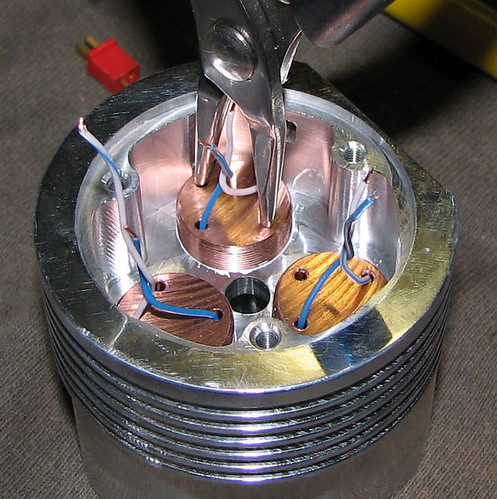
Prep the copper sinks with thermal paste (after you have secured the emitters). Take your time starting the thread on the copper sink, into the light housing...I just twisted the wires, clockwise to spin the sink in...its a fine thread, (for max surface area) so don't force or cross thread the copper sink!
I used AA to secure the emitters to the sinks...only use a little & make sure the emitter is seated correctly. I AAed, then wired, as wiring first, tends to be harder to seat the emitter on the copper sink...I had no problem wiring the crees after they were on the copper sink...use 'stars' if you can't solder well...
One important thing if using thermal grease on the emitters ( they might not seat properly when screwing them up) is to check from the back and make sure the depth of all the sinks is within 0.1mm to each other. That's if all the reflectors are the same length of course.
Make sure the 'tabs' are filed off the reflectors outsides (top)...this means the reflectors will sit in the front cover correctly.
For seoul, fit reflectors first & bolt on front cover... hold light unit, face down & screw the sinks, downwards towards the reflectors...just nip up, do not put too much pressure on the emitter! Then flip up the light to check the centering, facing up, unscrew the sink just a little & tap the reflector to center if needed...their is a very small bit of room to move if needed, mine lined up fine..
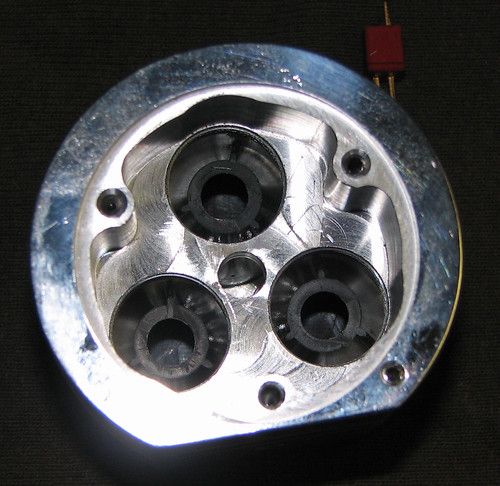
For cree, fit the sinks halfway, light facing up, place the reflectors on top of the sinks... bolt on the front cover...screw the copper sinks up, towards the front cover...tap if needed, to insure reflectors sit into the front cover correctly, again just nip up the screw sinks...
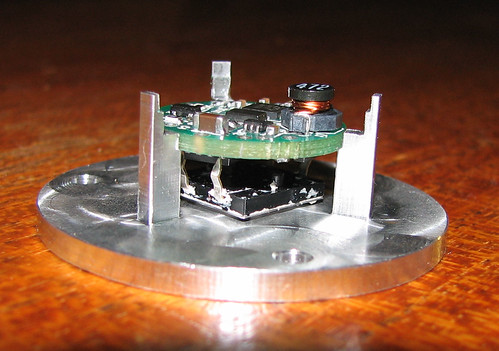
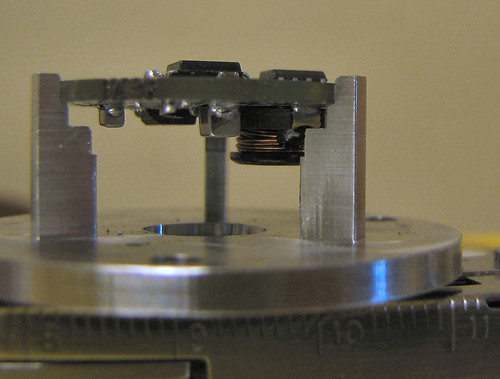
For the driver, it will 'click into place' just make sure it is orientated so nothing is shorting or the inductor is touching anything... re-check all work before powering up


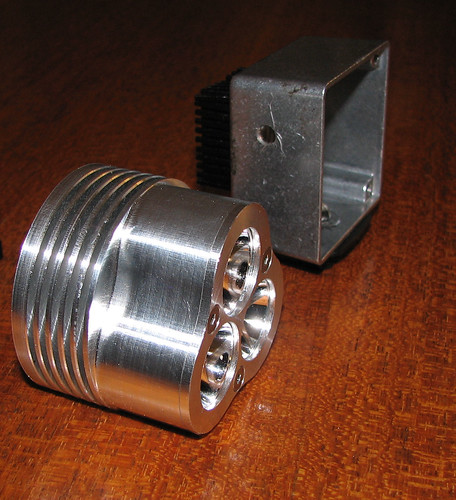
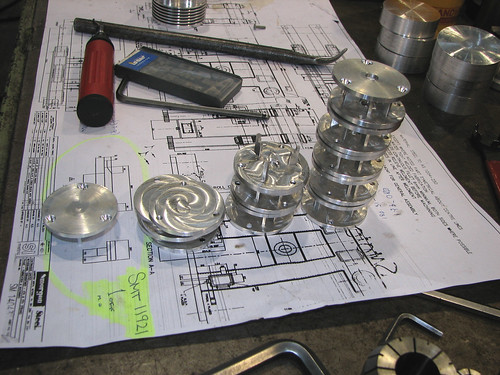
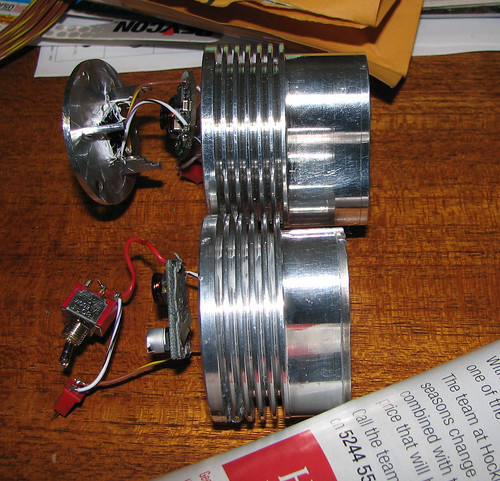
Sink-O-rama


Maxflex
Bflex
IMS holder
Modded IMS20 -with cutouts for solder clearance.
Modded IMS/non modded IMS
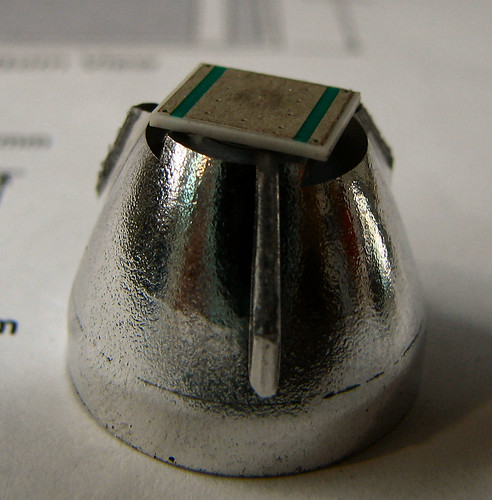
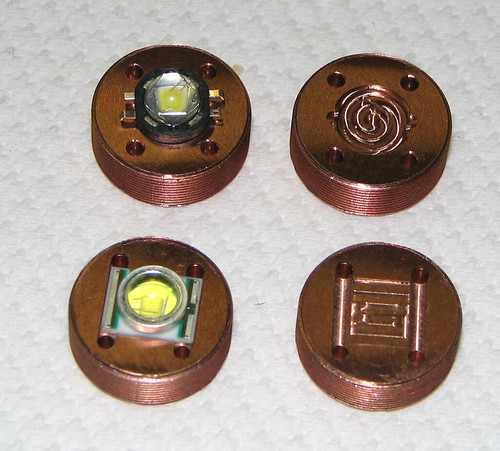
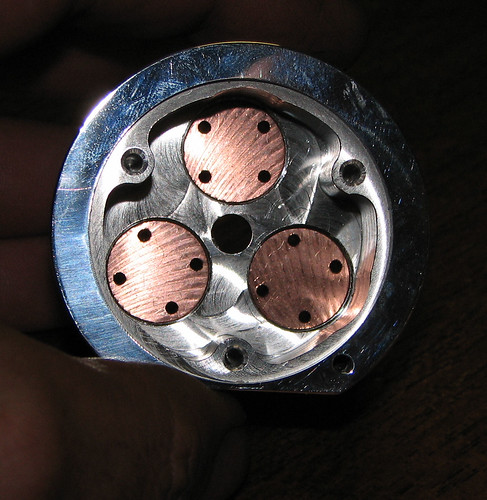
The copper slug will have a 0.3mm deep footprint for the emitter to contact, & 2 cutouts where the underneath solder pads would normally go, thus making the slug electricly netrual
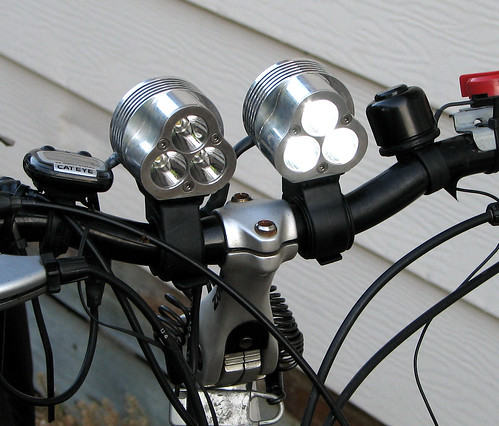
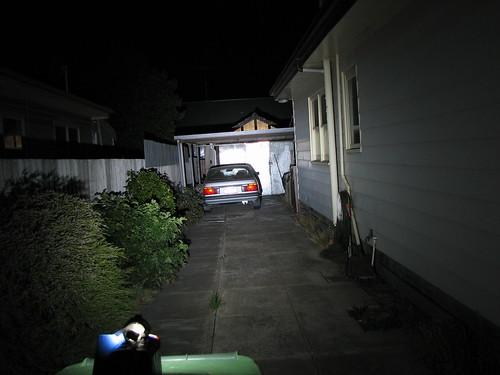
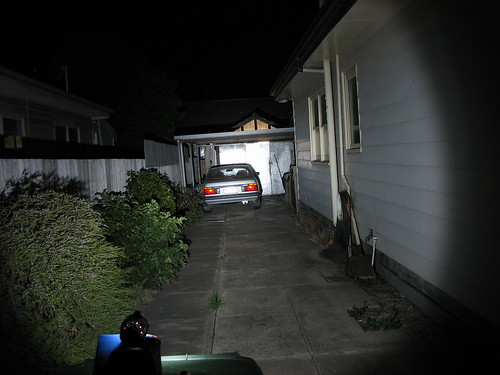
Here they are mounted on my mates E-bike...
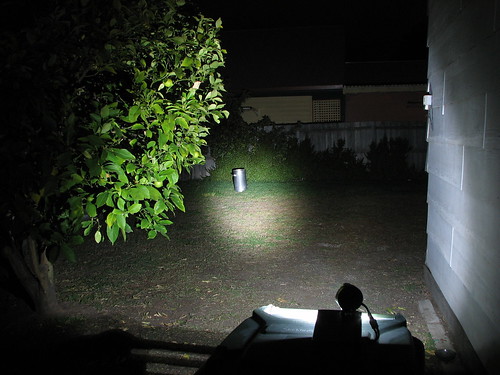
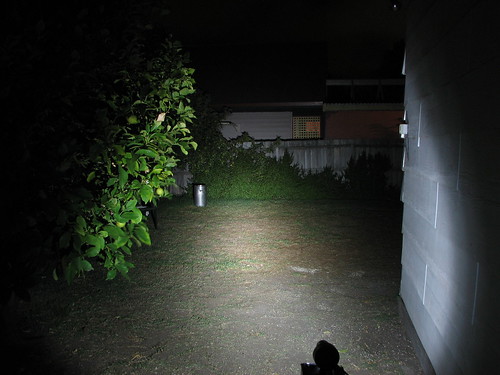
Here's the beamshots - both taken at 3.2sec F4 WOW
U bin LUX @ 1A

P4 bin CREE @ 1A
SEOUL @ 1A
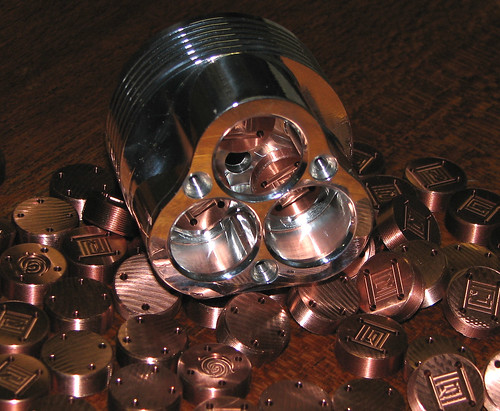
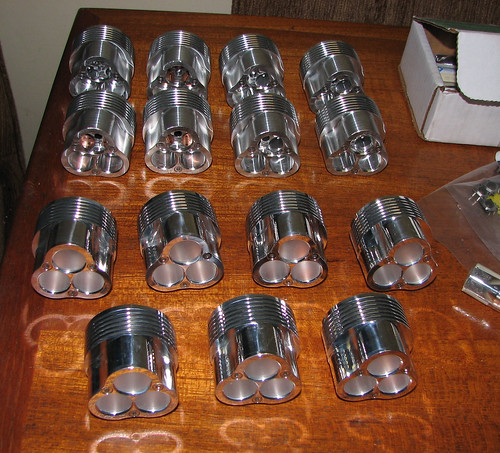
15 rear covers
Beefed the legs up a bit...
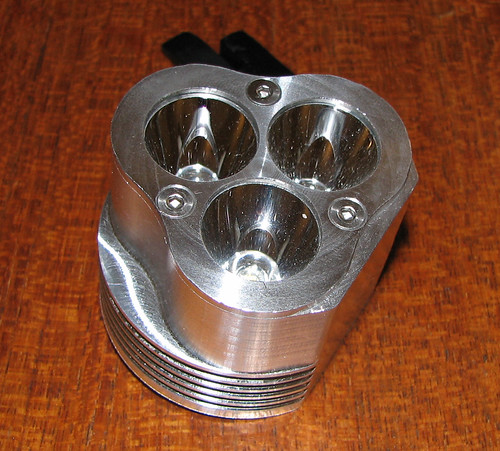
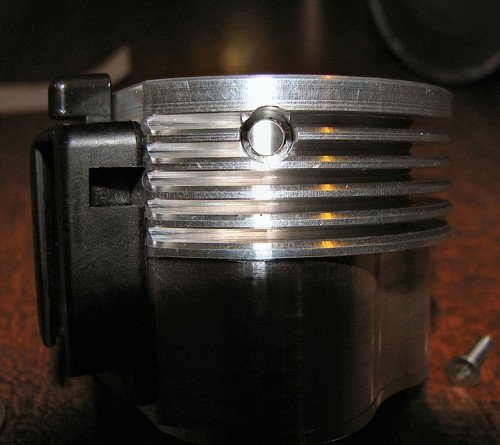
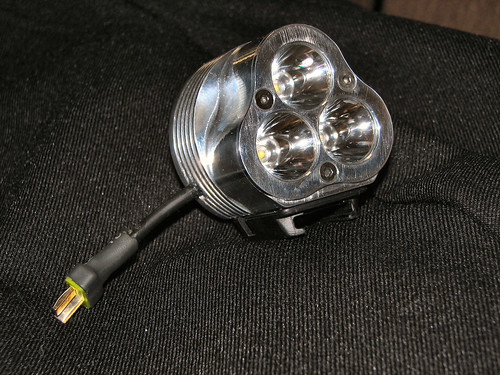
Cree XR-E CNC head
Seoulsink: slug is isolated by about 0.05mm (a hair) and emitter rests on the outer part in a 0.3mm deep recess for centrality.
Cree isolation: is the same -the 2 side bits are 0.05mm deeper
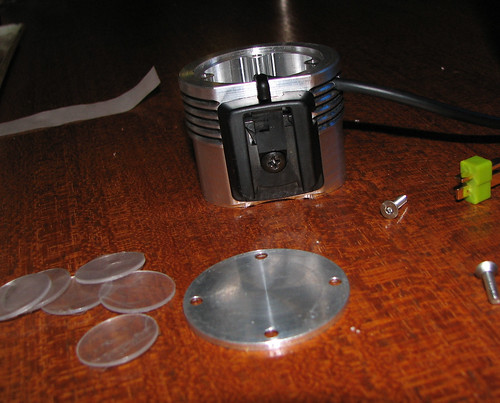
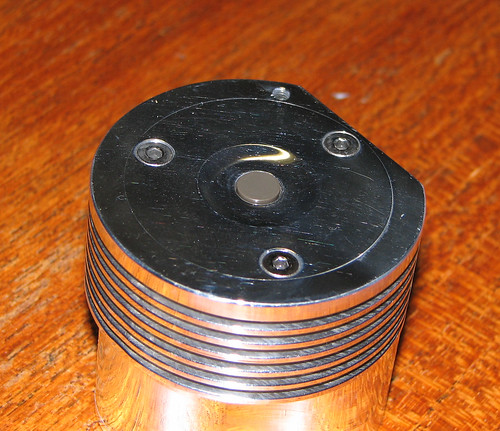
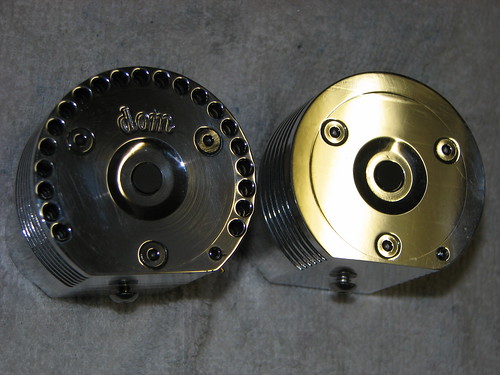
Rear switch cover
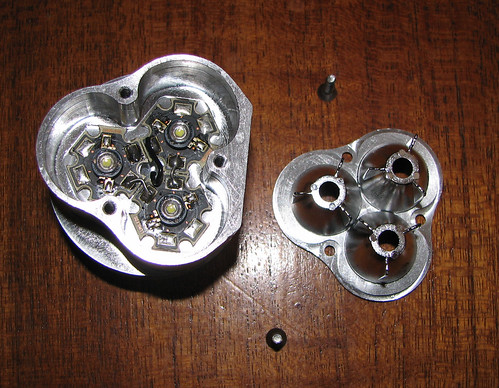
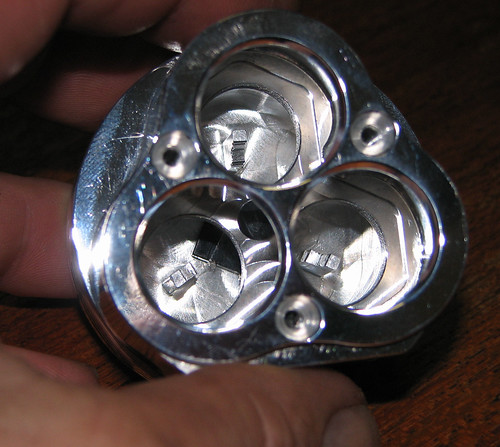
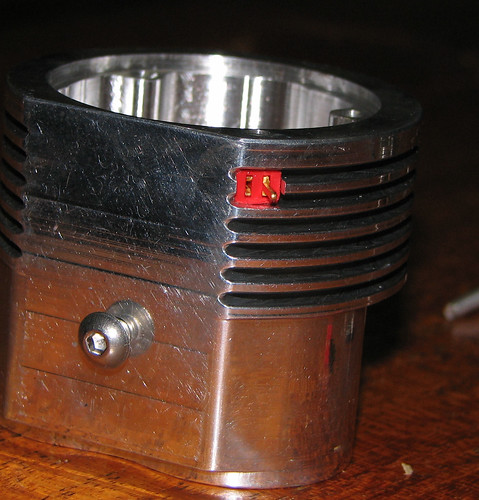
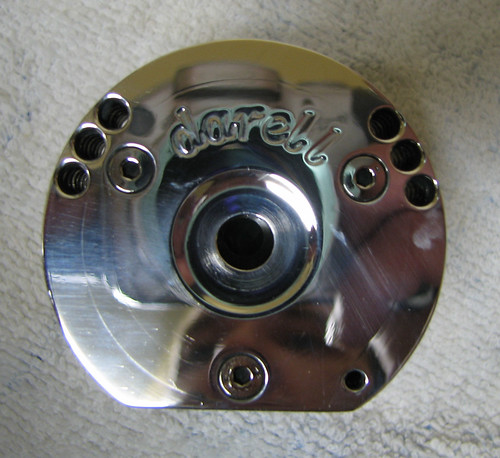
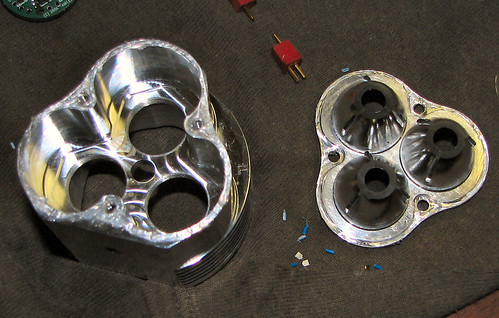
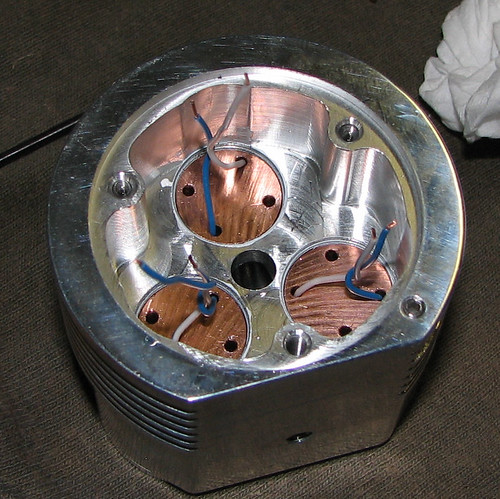
No copper sinks
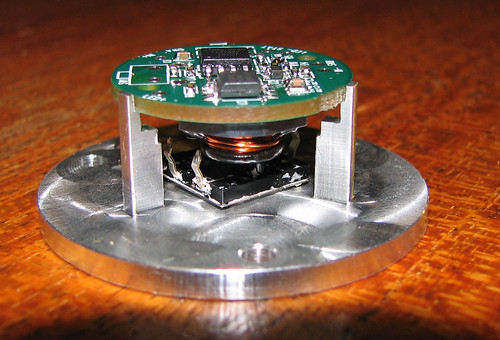
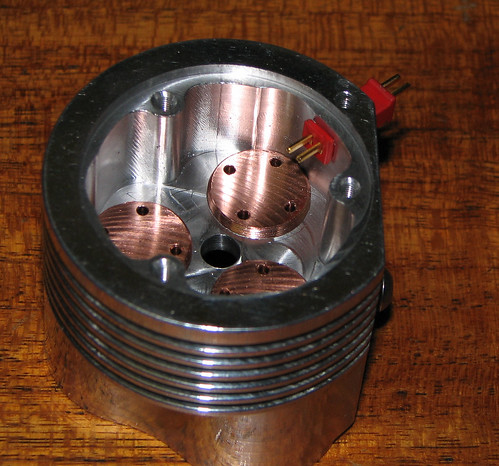
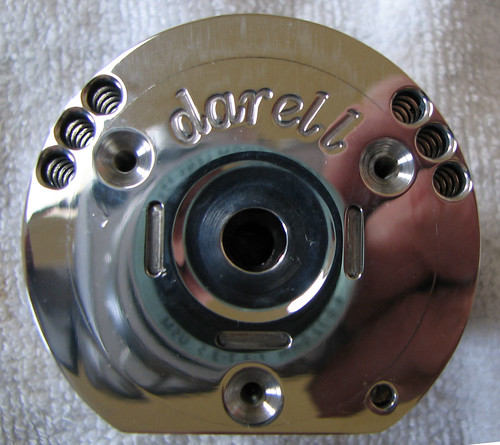
View rear with copper sinks
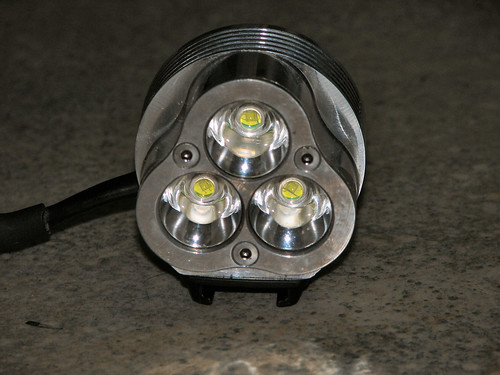
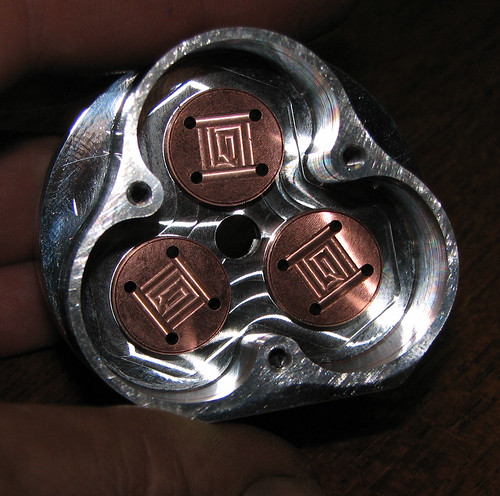
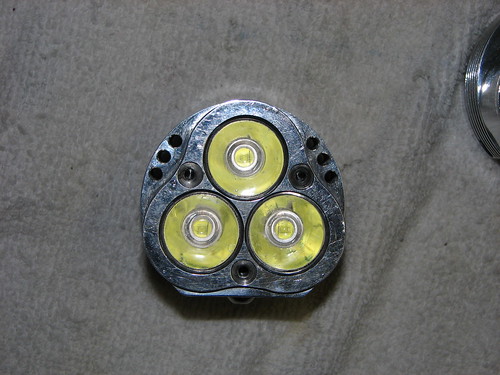
View front with cree copper sinks
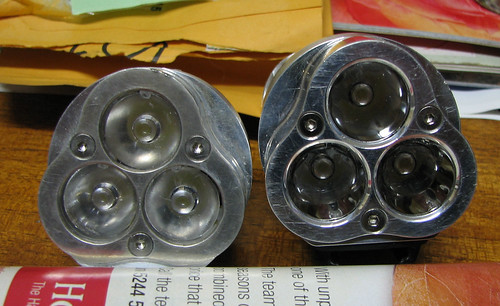
Left, Kahtod 20mm optics
Seoul with Kahtod 20mm optics at 20meters 1amp
Seoul modded IMS20 reflectors at 20meters 1amp
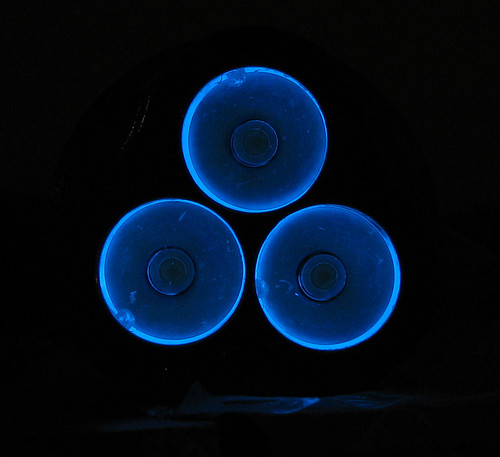
Ultra Blue glow powder behind Kahtod 20mm optics for Seoul LEDs
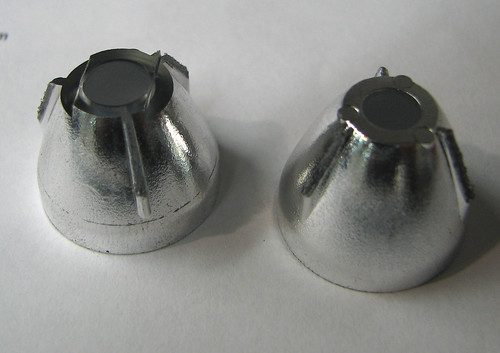
Cut down head for the Kahtod 20mm optics
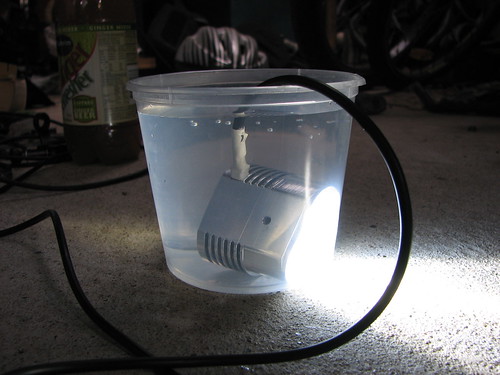
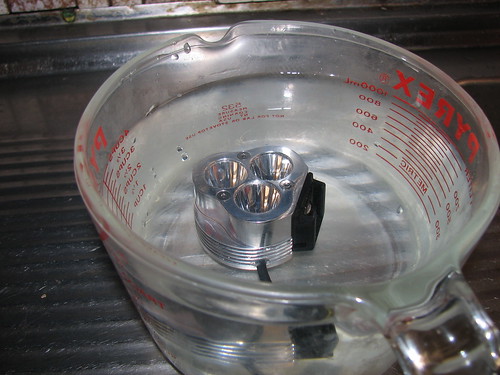
Water test
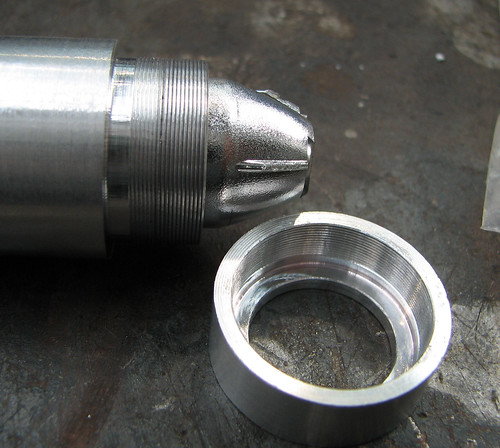
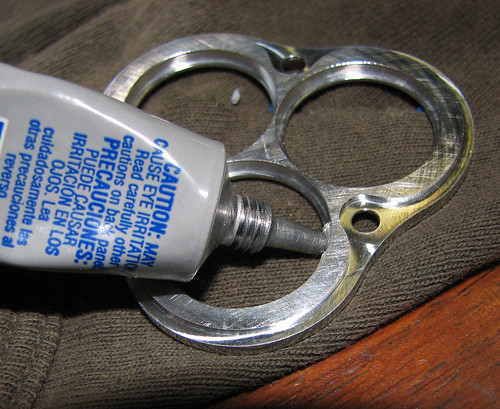
LENS BUILD UP
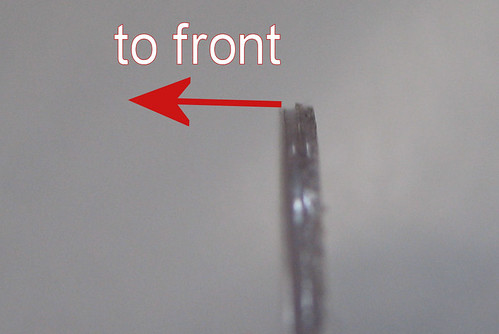
If you put the lense up to the light it looks as if there is a slight taper on the edge.
The smaller part of the taper goes toward the front of the housing -it will go in easier this way -with more resistance if you try and push it out.
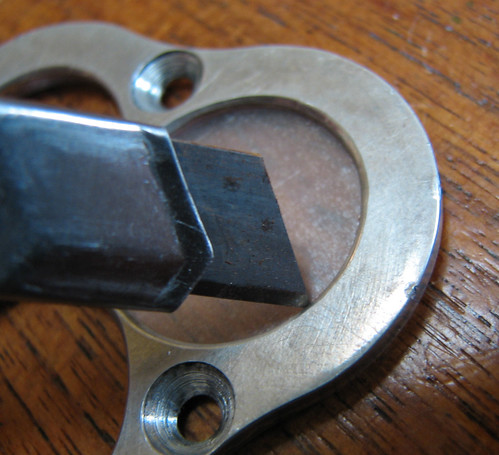
Cut the protective coating following the edge with a sharp blade
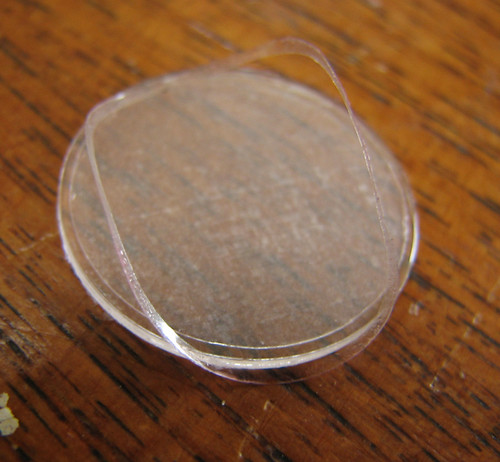
The cut ring will fall off
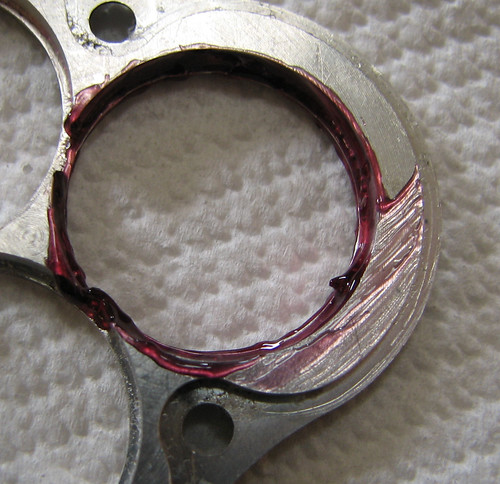

Wipe off excess sealant inside and out.
Leave on protective covering till you are ready to assemble.
Pick off covering with a sharp point from the edge out.
Practice makes perfect. I can send more lenses if needed.haha
Build up (seoul)

All New Updates please see:
http://ktronik.com/LED.html
CNC head will be US$***, you get: SS screws, face plate, lens, rear cover with bflex/maxflex holder & mom on switch. Heavy duty HB clamp.
Slug - One side will be machined to accept either (not both!) a Cree XR-E or SSC P4, emitter - this is the main decision the customer must make. The other side of the slug will be flat - ready for a star of any type.
Side entry - Customer chooses custom hole for Deans 'micro plug' or a 4mm round hole... or no hole.
Extras:
IMS20's for US$5ea + US$2.50ea modding fee. If you want reflectors modded, customer needs to state what emitter will be used.
Deans micro plug US$2 (for set of M&F)
CREE XR-E HEAD: diesel_dad
CREE XR-E HEAD: rfix
Tricky bits:
Now I have built up the cree & seoul heads, I will start to flesh out some of the more tricky bits...
The only hard bits are installing the reflectors & heatsinks...
Prep the copper sinks with thermal paste (after you have secured the emitters). Take your time starting the thread on the copper sink, into the light housing...I just twisted the wires, clockwise to spin the sink in...its a fine thread, (for max surface area) so don't force or cross thread the copper sink!
I used AA to secure the emitters to the sinks...only use a little & make sure the emitter is seated correctly. I AAed, then wired, as wiring first, tends to be harder to seat the emitter on the copper sink...I had no problem wiring the crees after they were on the copper sink...use 'stars' if you can't solder well...
One important thing if using thermal grease on the emitters ( they might not seat properly when screwing them up) is to check from the back and make sure the depth of all the sinks is within 0.1mm to each other. That's if all the reflectors are the same length of course.
Make sure the 'tabs' are filed off the reflectors outsides (top)...this means the reflectors will sit in the front cover correctly.
For seoul, fit reflectors first & bolt on front cover... hold light unit, face down & screw the sinks, downwards towards the reflectors...just nip up, do not put too much pressure on the emitter! Then flip up the light to check the centering, facing up, unscrew the sink just a little & tap the reflector to center if needed...their is a very small bit of room to move if needed, mine lined up fine..
For cree, fit the sinks halfway, light facing up, place the reflectors on top of the sinks... bolt on the front cover...screw the copper sinks up, towards the front cover...tap if needed, to insure reflectors sit into the front cover correctly, again just nip up the screw sinks...
For the driver, it will 'click into place' just make sure it is orientated so nothing is shorting or the inductor is touching anything... re-check all work before powering up
Sink-O-rama
Maxflex
Bflex
IMS holder
Modded IMS20 -with cutouts for solder clearance.
Modded IMS/non modded IMS
The copper slug will have a 0.3mm deep footprint for the emitter to contact, & 2 cutouts where the underneath solder pads would normally go, thus making the slug electricly netrual
Here they are mounted on my mates E-bike...
Here's the beamshots - both taken at 3.2sec F4 WOW
U bin LUX @ 1A
P4 bin CREE @ 1A
SEOUL @ 1A
15 rear covers
Beefed the legs up a bit...
Cree XR-E CNC head
Seoulsink: slug is isolated by about 0.05mm (a hair) and emitter rests on the outer part in a 0.3mm deep recess for centrality.
Cree isolation: is the same -the 2 side bits are 0.05mm deeper
Rear switch cover
No copper sinks
View rear with copper sinks
View front with cree copper sinks
Left, Kahtod 20mm optics
Seoul with Kahtod 20mm optics at 20meters 1amp
Seoul modded IMS20 reflectors at 20meters 1amp
Ultra Blue glow powder behind Kahtod 20mm optics for Seoul LEDs
Cut down head for the Kahtod 20mm optics
Water test
LENS BUILD UP
If you put the lense up to the light it looks as if there is a slight taper on the edge.
The smaller part of the taper goes toward the front of the housing -it will go in easier this way -with more resistance if you try and push it out.
Cut the protective coating following the edge with a sharp blade
The cut ring will fall off
Wipe off excess sealant inside and out.
Leave on protective covering till you are ready to assemble.
Pick off covering with a sharp point from the edge out.
Practice makes perfect. I can send more lenses if needed.haha
Build up (seoul)
Last edited: