
Sabrewolf
Flashlight Enthusiast
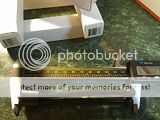
Chimera Mini Pre-Pay Sale (Added Bead-Blasted Finish Option)
I added another finish to the lineup.. Stonewash") That makes 3 seperate finishes
That makes 3 seperate finishes
that will work with any of the options below.. More pictures on page 8
The Stonewash is VERY difficult to make it look like the test-finish body you
see in the pictures below. It typically comes out look a duller-grey with a tighter
galvanized look. ALL 3 of these finished come as a Base Finish with the basic
price of the light (425$), Ie, They do not cost Extra. Just tell me what you
want on the light. You can even mix-match the finishes with the top and
bottom side of the light. So, Stonewash on the bottom, And beadblasted
on the top cover.


Satin on left, Bead-Blasted in the middle, And Stonewash on the right
Pick what you want, And let me know!
Previous thread in the Homemade and Modified Section.
https://www.candlepowerforums.com/threads/212213
A Short Review can be found in post #73
https://www.candlepowerforums.com/posts/2906979&postcount=73
Please Read this Entire post Before you buy the light.
I want to make sure you know All of the options and
specifications before pulling the trigger.
And if you have Any questions, Please Ask
Well, After many months of prototyping and planning... Here we go...
The pre-pay will be for the Full amount of the light,
Plus any options that would like.
Gen3 Production Model
The "Patterning" Will be an Extra Option.
See below in the options section.
(This light was not yet built up at picture time)


These Pictures are from my machinist
That is V10 Green Glowpowder Behind the lens.
His camera did not "Capture" the Green properly.


Specs:
: 2.7" X 2.2" X 0.4" Thick Or 68.8mm X 56mm X 10mm
: MC-E Led in Coolwhite (~400 Lumens) Or,
MC-E Led in Warmwhite (~350 Lumens)
See the Picture below for the color difference.
: Lithium Polymer 800mA Battery rated for 10c or 8Ah discharge
: MaxFlex3 Driver configured for 1200mA Max Drive Current,
Driving the led with 600Ma per die on high.
Setup for UiP mode (Portable/Flashlight mode)
: 5 Level Output With High Being One Click Away
: Seperate Leds for battery voltage and charging status located
under the power button.
:Glow powder will be behind the lens and charged by the led
(color choices are ocean blue, red, orange, green, white, and
pure blue) Glowpowder info at www.Glowinc.com And pics of the glow:


: Built-In USB Charging Circuit with a charge rate of 300mA (revised)
: Built-In MicroSD Reader/Writer with a max card capacity of 32Gig
When you plug the light into your computer to charge, The MicroSD
adapter will popup a drive letter for you to use as a flashdrive.
If you do not install your own card, Then nothing will happen.
I will offer cards in 1,2,4,8,and 16gig sizes if you dont want to
source out your own. The adapter will also support Windows Vista
"Readyboost" feature if you use a class 4 card or above.
To install the card, you unscrew the top cover, Lift the battery,
And slide your card in. Replace your screws, and Viola!
: 2 Sets of screws included. Black Steel and Stainless Steel
You can mix and match any combo you like
(Use a .05 Allen key or Torx T5 driver)
: Runtimes and Lumen Output:
(Runtimes and Lumens are Approximate numbers)
Level 1 10 hours at 40 lumens
Level 2 6 hours at 75 lumens
Level 3 4 hours at 150 lumens
Level 4 50 minutes at 250 lumens
Level 5 15 minutes at 350 lumens
If you leave Level 5 on continuous, The light
will drop to level 3 after 1 1/2 mins or so due
to the heat buildup. This is a function of the
MaxFlex3 driver to protect itself, and the batt.
(I will finish the figures when i have more time)
And the light does get fairly toasty on level 5
right behind the led. But the heat will start to
move to the front edges, and top of the light
in a short time. Level 4 and below are usable
in a continuous fashon.
This is an MC-E color comparison pic between
several different lights.

These prices are for the first batch of 30 lights.
That means its an "Introductory Price" < No More!
Prices will not change over the initial batch of 30....
$375 for Aluminum in 6061 (Anodized Black HAIII) The aluminum
version is Not available yet. So all models will be Titanium for now.
I just wanted to show you the price when it becomes available.
I don't have a timeframe on it yet due to the focus on the Titanium.
The design will also be a bit different too. So i will startup another
Thread when that happens.
$425 for Titanium in Grade 2 (99% pure Ti W/Satin Finish)
A home charger, Lanyard, And a Different set of screws (stainless).
A Mini-Usb cable will also be provided for connecting to your PC/Mac
Continental U.S. Shipping included. International is Extra.
Payment Options:
Check, Money Order, Or Paypal.
PM me for my address for the checks.
Paypal: robertkmagill AT hotmail.com
Please Add 4% for paypal fees if you
don't have a "Funded" account.
That means you have to have a Bank
account linked to your paypal account.
The Funds draw directly from it,
And Not your Credit Card.
Options: (I will have the rest of the prices shortly)
: MicroSD cards in 2gig 8$,4gig 11$,8gig 21$,16gig 50$ sizes.
: Money/Belt Clip. Titanium Construction. Final Price! Price $35
The clip Must be taken off to use the 1/4-20 Camera Mount if you opted it.
That is a Handmade Prototype clip you see below. The Final version will be a
bit thinner (.035in) and longer (closer to opposite end) Screw options wil be,
Blackened or Body color. The screws will be countersunk to allow tailstanding
If you wanted the clip installed Bezel-Down. (can go both ways, Just specify)
Also, You can opt for a Countersunk mount into the body, or not. So if you want
to take off the clip, There won't be a sharp edge there.. Just 2 screwholes that
can be filled with set-screws for water-resistance.
Added an Option!
For those who want the option to reverse the clip to the opposite end:
You can opt for non-slotting (no flushmount) of the body for the clip.
I will drill/tap 4 holes in the body (both ends) and supply you setscrews to
fill the holes that aren't used. That will help keep the water resistance
properties of the light. The light will Not tailstand if you install the clip
in the bezel-down configuration due to the use of button-top screws for
fastening the clip. Countersunk screws won't work with this option.


: 1/4-20 Mounting for Camera Tripod (Custom threaded from backside) 15$
The Threads are "Square Style" similar to Jetbeam lights. That means they
won't accumulate as much lint and grit from your pocket as a regular style
45 degree thread. The Screw depth CANNOT Exceed 1/4in (damage will result)
I finally found a good source for the mini tripods... They are 5$ each


Here is a different style that wraps around stuff.


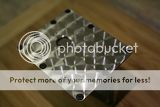
: Tritium Markers Installed Using the templates below. Each individual Slot is 15$
If you wanted "Just" the Trit Slot/s for your own install then it will be 10$
Tritiums can be found here:
http://www.cpfmarketplace.com/mp/showthread.php?t=183824
: Custom Satin Finish with Polished Edges (Seen here on the Gen2) 25$


Or Opt for the X-Men Theme On the Front or Back,
Or Both sides if you prefer. (Same 25$ price as above)

If you want custom artwork done, Please contact "Pontiaker" for prices.
He does metal carving similar to how a dentist carves out cavities.
Here is a thread of his work on a 007:
https://www.candlepowerforums.com/posts/2836916
For an Engine-Turned Finish (pearlie swirlies as i call them)
15$ per top OR bottom, And 10$ to do all 4 sides.

For the Machinist own custom plaid-like finish, it will be 50$ extra
Each light has its own Unique finish, So no 2 will be alike.
New Option!! Ipod Shuffle 150$

Please click on the link for more info.
https://www.candlepowerforums.com/threads/259385
Tritium Locations. Please ask B@rt for 1.55mm X 5mm Sized Trits.
The 1.55mm trits are actually the same thickness as the top cover.
So the milled slots will go all the way through the cover to accomodate
them. The Norland 63 will seal them up nicely, So there are no worries
Just pick the letters of the slots you want me to mill. And i will install the
trits in them with Norland 63 Optical adhesive. Please contact B@rt for the
colors you want, And purchase them from him. Have him send them to me
directly for installation. That way, If there is a color thats not available,
He will let you know. This eliminates the Middleman (me) in case of any
communication problems. Pick your letter, and color combo for install.
Ie, A-Orange or C-Green... You could even have Every slot filled
Keep in mind that this is the Gen2 light. The Gen3 Production Model has
the middle screws in the top cover moved slightly to the front of the light.
Look at the "Machinists" pictures to see what i mean.


Beamshots:


Previous Versions:
My Handmade Aluminum Prototype


Gen1 Titanium Machined Prototype


Gen2 Titanium Machined Prototype


Family Photos:

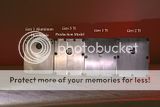


I added another finish to the lineup.. Stonewash
That makes 3 seperate finishesthat will work with any of the options below.. More pictures on page 8
The Stonewash is VERY difficult to make it look like the test-finish body you
see in the pictures below. It typically comes out look a duller-grey with a tighter
galvanized look. ALL 3 of these finished come as a Base Finish with the basic
price of the light (425$), Ie, They do not cost Extra. Just tell me what you
want on the light. You can even mix-match the finishes with the top and
bottom side of the light. So, Stonewash on the bottom, And beadblasted
on the top cover.


Satin on left, Bead-Blasted in the middle, And Stonewash on the right
Pick what you want, And let me know!
Previous thread in the Homemade and Modified Section.
https://www.candlepowerforums.com/threads/212213
A Short Review can be found in post #73
https://www.candlepowerforums.com/posts/2906979&postcount=73
Please Read this Entire post Before you buy the light.
I want to make sure you know All of the options and
specifications before pulling the trigger.
And if you have Any questions, Please Ask
Well, After many months of prototyping and planning... Here we go...
The pre-pay will be for the Full amount of the light,
Plus any options that would like.
Gen3 Production Model
The "Patterning" Will be an Extra Option.
See below in the options section.
(This light was not yet built up at picture time)


These Pictures are from my machinist
That is V10 Green Glowpowder Behind the lens.
His camera did not "Capture" the Green properly.


Specs:
: 2.7" X 2.2" X 0.4" Thick Or 68.8mm X 56mm X 10mm
: MC-E Led in Coolwhite (~400 Lumens) Or,
MC-E Led in Warmwhite (~350 Lumens)
See the Picture below for the color difference.
: Lithium Polymer 800mA Battery rated for 10c or 8Ah discharge
: MaxFlex3 Driver configured for 1200mA Max Drive Current,
Driving the led with 600Ma per die on high.
Setup for UiP mode (Portable/Flashlight mode)
: 5 Level Output With High Being One Click Away
: Seperate Leds for battery voltage and charging status located
under the power button.
:Glow powder will be behind the lens and charged by the led
(color choices are ocean blue, red, orange, green, white, and
pure blue) Glowpowder info at www.Glowinc.com And pics of the glow:


: Built-In USB Charging Circuit with a charge rate of 300mA (revised)
: Built-In MicroSD Reader/Writer with a max card capacity of 32Gig
When you plug the light into your computer to charge, The MicroSD
adapter will popup a drive letter for you to use as a flashdrive.
If you do not install your own card, Then nothing will happen.
I will offer cards in 1,2,4,8,and 16gig sizes if you dont want to
source out your own. The adapter will also support Windows Vista
"Readyboost" feature if you use a class 4 card or above.
To install the card, you unscrew the top cover, Lift the battery,
And slide your card in. Replace your screws, and Viola!
: 2 Sets of screws included. Black Steel and Stainless Steel
You can mix and match any combo you like
(Use a .05 Allen key or Torx T5 driver)
: Runtimes and Lumen Output:
(Runtimes and Lumens are Approximate numbers)
Level 1 10 hours at 40 lumens
Level 2 6 hours at 75 lumens
Level 3 4 hours at 150 lumens
Level 4 50 minutes at 250 lumens
Level 5 15 minutes at 350 lumens
If you leave Level 5 on continuous, The light
will drop to level 3 after 1 1/2 mins or so due
to the heat buildup. This is a function of the
MaxFlex3 driver to protect itself, and the batt.
(I will finish the figures when i have more time)
And the light does get fairly toasty on level 5
right behind the led. But the heat will start to
move to the front edges, and top of the light
in a short time. Level 4 and below are usable
in a continuous fashon.
This is an MC-E color comparison pic between
several different lights.

These prices are for the first batch of 30 lights.
That means its an "Introductory Price" < No More!
Prices will not change over the initial batch of 30....
$375 for Aluminum in 6061 (Anodized Black HAIII) The aluminum
version is Not available yet. So all models will be Titanium for now.
I just wanted to show you the price when it becomes available.
I don't have a timeframe on it yet due to the focus on the Titanium.
The design will also be a bit different too. So i will startup another
Thread when that happens.
$425 for Titanium in Grade 2 (99% pure Ti W/Satin Finish)
A home charger, Lanyard, And a Different set of screws (stainless).
A Mini-Usb cable will also be provided for connecting to your PC/Mac
Continental U.S. Shipping included. International is Extra.
Payment Options:
Check, Money Order, Or Paypal.
PM me for my address for the checks.
Paypal: robertkmagill AT hotmail.com
Please Add 4% for paypal fees if you
don't have a "Funded" account.
That means you have to have a Bank
account linked to your paypal account.
The Funds draw directly from it,
And Not your Credit Card.
Options: (I will have the rest of the prices shortly)
: MicroSD cards in 2gig 8$,4gig 11$,8gig 21$,16gig 50$ sizes.
: Money/Belt Clip. Titanium Construction. Final Price! Price $35
The clip Must be taken off to use the 1/4-20 Camera Mount if you opted it.
That is a Handmade Prototype clip you see below. The Final version will be a
bit thinner (.035in) and longer (closer to opposite end) Screw options wil be,
Blackened or Body color. The screws will be countersunk to allow tailstanding
If you wanted the clip installed Bezel-Down. (can go both ways, Just specify)
Also, You can opt for a Countersunk mount into the body, or not. So if you want
to take off the clip, There won't be a sharp edge there.. Just 2 screwholes that
can be filled with set-screws for water-resistance.
Added an Option!
For those who want the option to reverse the clip to the opposite end:
You can opt for non-slotting (no flushmount) of the body for the clip.
I will drill/tap 4 holes in the body (both ends) and supply you setscrews to
fill the holes that aren't used. That will help keep the water resistance
properties of the light. The light will Not tailstand if you install the clip
in the bezel-down configuration due to the use of button-top screws for
fastening the clip. Countersunk screws won't work with this option.


: 1/4-20 Mounting for Camera Tripod (Custom threaded from backside) 15$
The Threads are "Square Style" similar to Jetbeam lights. That means they
won't accumulate as much lint and grit from your pocket as a regular style
45 degree thread. The Screw depth CANNOT Exceed 1/4in (damage will result)
I finally found a good source for the mini tripods... They are 5$ each


Here is a different style that wraps around stuff.


: Tritium Markers Installed Using the templates below. Each individual Slot is 15$
If you wanted "Just" the Trit Slot/s for your own install then it will be 10$
Tritiums can be found here:
http://www.cpfmarketplace.com/mp/showthread.php?t=183824
: Custom Satin Finish with Polished Edges (Seen here on the Gen2) 25$


Or Opt for the X-Men Theme On the Front or Back,
Or Both sides if you prefer. (Same 25$ price as above)

If you want custom artwork done, Please contact "Pontiaker" for prices.
He does metal carving similar to how a dentist carves out cavities.
Here is a thread of his work on a 007:
https://www.candlepowerforums.com/posts/2836916
For an Engine-Turned Finish (pearlie swirlies as i call them)
15$ per top OR bottom, And 10$ to do all 4 sides.


For the Machinist own custom plaid-like finish, it will be 50$ extra
Each light has its own Unique finish, So no 2 will be alike.
New Option!! Ipod Shuffle 150$

Please click on the link for more info.
https://www.candlepowerforums.com/threads/259385
Tritium Locations. Please ask B@rt for 1.55mm X 5mm Sized Trits.
The 1.55mm trits are actually the same thickness as the top cover.
So the milled slots will go all the way through the cover to accomodate
them. The Norland 63 will seal them up nicely, So there are no worries
Just pick the letters of the slots you want me to mill. And i will install the
trits in them with Norland 63 Optical adhesive. Please contact B@rt for the
colors you want, And purchase them from him. Have him send them to me
directly for installation. That way, If there is a color thats not available,
He will let you know. This eliminates the Middleman (me) in case of any
communication problems. Pick your letter, and color combo for install.
Ie, A-Orange or C-Green... You could even have Every slot filled
Keep in mind that this is the Gen2 light. The Gen3 Production Model has
the middle screws in the top cover moved slightly to the front of the light.
Look at the "Machinists" pictures to see what i mean.


Beamshots:


Previous Versions:
My Handmade Aluminum Prototype


Gen1 Titanium Machined Prototype


Gen2 Titanium Machined Prototype


Family Photos:


Last edited:

 I just pop em out


 I am currently paying for a wedding and could only dream of owning one of these, but Damn they are a thing of beauty! What a great design Sabrewolf:twothumbs This is truly the EDC!