
Written sometime in June/July 2011…
You might have already read something of this 150 Watt Short Arc military searchlight. If so, you know that the bulb was damaged and the light stopped working. I offered to buy the light knowing its' condition because I love military lighting products. Before I made an offer, I had to ask myself – "Self, do you think you'll be able to find a new lamp for this 30+ year-old light?" I answered "maybe" and that's good enough for me! I figured that even if I was unsuccessful, I'd have fun trying and I'd still have this unique light in my possession.
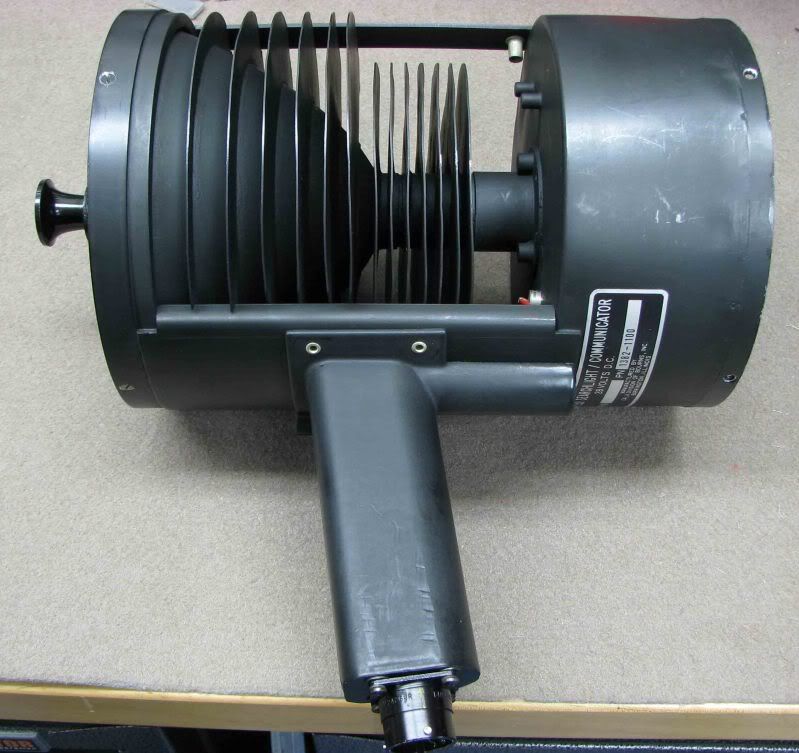
As a side note, this device is called a Searchlight/Communicator. I don't remember this being mentioned or it might have been lost when CPF had its' hiccup early this year. Obviously, one purpose was for use as a handheld long-range visible and infrared searchlight. Purpose number two, and probably the primary purpose was to be used as a personal communicator when used in conjunction with another identical light operated by someone else. Absent from this light is the cylindrical shaped light wave receiver/amplifier that mounted to the top of the light, microphone and earpiece. When connected, the device did two things: 1. It converted a persons' audible speech into electrical impulses which in-turn, were used to modulate/pulse the light produced by the short arc bulb. 2. The receiver on the light down field received the pulsed light wave and converted it back to audible speech. Two people could voice-communicate with each other at up to approximately 7 miles pretty much as if they were using walkie-talkies. This could be done in both visible and infrared modes.
My quest to get the light going started by tearing it down to see what was going to need repair and/or replacement. Once I knew what needed to be done, I contacted a department director at the CAI, a division of Bourns Inc. company (the original manufacturer) to inquire if a long-time employee might know something of this light and its' bulb. The director informed me that Goodrich had bought this part of the business from them and forwarded my email to two people there. That avenue ultimately yielded an answer that there was no one there familiar with the light and no info on the bulb. I then web searched short arc bulb mfg's and came up with a couple of companies that I sent inquiries to about trying to match the bulb. They were helpful in doing research but again, the ultimate yield was nothing. Understandably, large companies have no interest in selling a bulb or two. I then sent the bulb to Dons Bulbs.com who hoards tons of obsolete light bulbs and performs detailed bulb searches if he doesn't have any. After I had sent the package off, I found Wolfram lighting, a small specialty company that makes short arc lamps. I emailed them and received a reply that they don't make this type of bulb but that another company they forwarded my email to, might be able to help. I followed up with an email of my own to the new company (Advanced Radiation Corporation - ARC) and received a reply that they, more than likely, could make this bulb. My heart raced!
I quickly emailed Dons Bulbs and asked him to terminate his search and to mail the bulb to this company. After they received the bulb, they had some technical questions which I tried to answer the best I could. We were talking about bulb dimensions and arc location and it became apparent to me that in order to do this right, I needed to take the light up to them so they could see physically see the bulb and how all the parts worked together to position the bulb in proper focal point of the reflector. Part of the problem was that the Anode base was damaged to the point where it was not possible to know its' original critical dimensions.
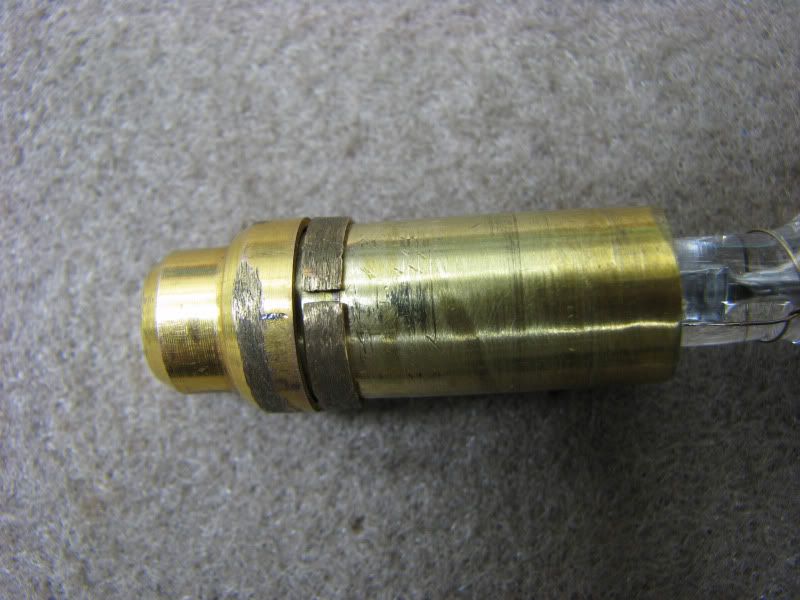
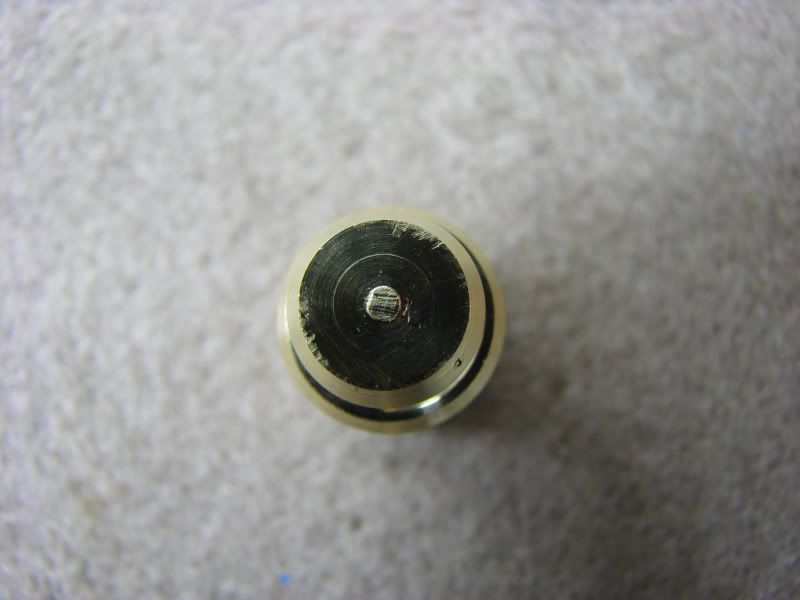
A tiny bit of Anode electrode connector ribbon sticking out of the quartz. I saw that the Anode base endcap had been ground down and separated from the ribbon
There was a similar problem with the Cathode base adapter but there was barely enough original material to obtain the needed dimensions.
Luckily, ARC is located within a reasonable driving distance from me.
I arrived at 8:15 and was immediately greeted by John, one of the owners. He ushered me into the offices where I got to talk with Ray, his dad, the founder of the business, now retired (but shows up every day, M-F and works for free). This man probably knows everything there is to know about gas discharge lamps. (This company makes the OEM lamps for Spectrolab's NightSun and Starburst short arcs and the original stick Maxabeam bulb among hundreds of other bulbs. I got to hold a NightSun bulb! I had sent many macro photos and measurements to them the day before, and believe it or not, they had new bases already made when I got there in preparation for making a new lamp. No order had been placed, no money given, yet they were already working on it! I had expected this to take 2 – 3 weeks to accomplish, but WOW, they were already on it.
As you can see in the pic above, the Anode end of the original quartz bulb still had about .030" of the electrode sticking out so Ray, the founder said why don't we go out back in the shop and test the bulb. If it works, just silver solder on the new base, re-pot it and call it a day – NO CHARGE. Well, a couple hours later, I was re-assembling the light with the original working bulb as tested in their test rig! This was WAY more than I had ever expected! I had brought my tools and portable 28 Volt power supply just in-case and that proved to be a good move.
Unfortunately, the light did not fire up. Lots of arc strikes as it should be doing but it did not light off. Well, after having taken up 4 hours of the two owners time and receiving machining services from three of their employees for free, I did not feel it was right to take up any more of their time. I thanked them profusely and headed for home. After all, I knew the bulb worked after their repairs because it tested out fine.
I got home and started to trouble shoot the problem. In darkness I could see arcing taking place but it was not between the Anode and Cathode tips. It was somewhere further back in the light. I kept trying to ignite it so I could tell where the short was. Surprise! Just before I was ready to stop for the evening, the light started up four different times after about 30 tries.
I eventually decided that the arcing was occurring from the Anode base to the wall of a large, thick ceramic bushing the bulb Anode base sits in. When I looked very closely at the bulb base, I could see what I thought were arc traces on it. How could the spark jump through the ceramic bushings' 3/16" wall to ground? I kept Ray and John updated with my troubleshooting and they offered many suggestions and technical info. (I now know the purpose for the tiny wire that wraps around the arc chamber. It's called the Trigger Wire and in some uses, is electrically connected to the cathode base, then wraps around the arc chamber but obviously does not connect to the Anode. During ignition, High Voltage is present in the wire which Ionizes the Xenon gas in the arc chamber so it can then be ignited when the spark jumps the gap inside the bulb).
The next morning, unprompted from me, I got a call from Ray and John. Ray told me that the ceramic bushing is most likely Aluminum Oxide and if it's dirty enough, it could be conducting. The bushing did have quite a bit of metal tracings in it from bulb movement made during the focusing operation. I had tried to clean it the night before but it is one tough piece of material and I could not do much. He said the only two ways to clean it are in a bath Hydrofluoric acid, which is unobtainable by most people or to heat it in an industrial oven to about 1100C. He then offered to clean it for me if I would mail it to him. Again, NO COST! That being done, the light still failed to start but I could still see the arcing taking place. It turns out that the arcing was actually coming from a very loose fitting front/Cathode bulb adapter. (The ground brass adapter in the pic above) I saw this when I took the light apart. There is a small spring between the adapter and the bulb base. Because of the loose adapter fit, the arc was finding its' way thru the small gauge spring which could not handle the power and was beginning to melt in half. There were arc track marks on the bulb base. Oh well, I thought at the time, I'll have to wait for the new bulb which will have threaded studs on both ends for a positive fit. At the time, I had no thoughts of buying a lathe so I figured I'd have to go to a local machine shop to get some adapters made.
ARC suggested that when they make the new bulb, that I have them shorten the arc gap a little to make starting easier and to provide more surface brightness from the bulb with just a bit more power consumption. It will have better throw, too with the smaller light source. A few weeks after my last communication with them, I had decided to buy the lathe so I told them to hold off making anything until my lathe arrived and I set it up. This was early August.
Fast forward to this week… My new PM1236 lathe arrived about 5 weeks ago. It took me a few weeks to get it set up and adjusted. Last week, I horsed around just turning shafts, doing my first threading and some practice boring. Last week, I figured that since I'm still waiting for the new bulb, why not try to make a special adapter for the working bulb I have now. It will be good practice and if it works, I'll have two working bulb/adapater setups for this old light. I spent a total of about 10 hours making the adapter in the pics below. It doesn't look like much for 10 hours of work and it would probably take a machinist less than an hour to make, but I'm just learning. There were so many calculations that I needed to nail down in my mind. Bore diameter of the adapter for a very, very light "press fit" over half the length of the old bulb base. OD for the end of the adapter that goes into the split retainer clip/ground contact, OD for the shell since it sits in another larger bore, taper angles, how to make the tapers, remaining wall thickness of the shell – will it be strong enough to support boring down to about a .028" wall thickness, (this because I needed to use my parting tool to cut down the shaft behind the adapter to a very small diameter so I could get in there and create the taper. I should have done the boring first!). What order should I do the different cutting operations in?. All this and trying to insure that the arc gap ends up in the same place as it did with the old adapter.
I'm so pleased that I got all the machining done without destroying the part or any tooling. I had visions of the adapter breaking away from the original shaft material due to forces beyond which it could handle or boring thru the shell because the walls were getting thin. I assembled the light and it works like it should! Ignition is very rapid now with the solid ground contact.
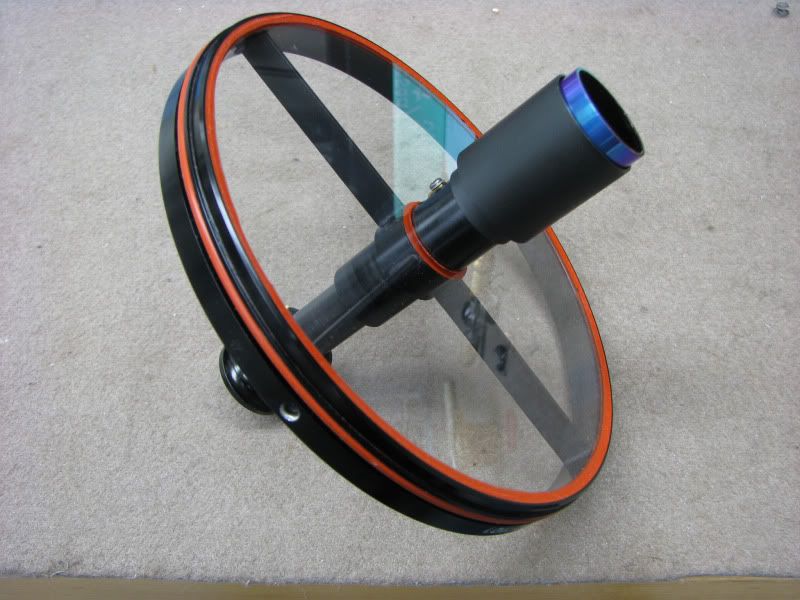
Here's the Communicator
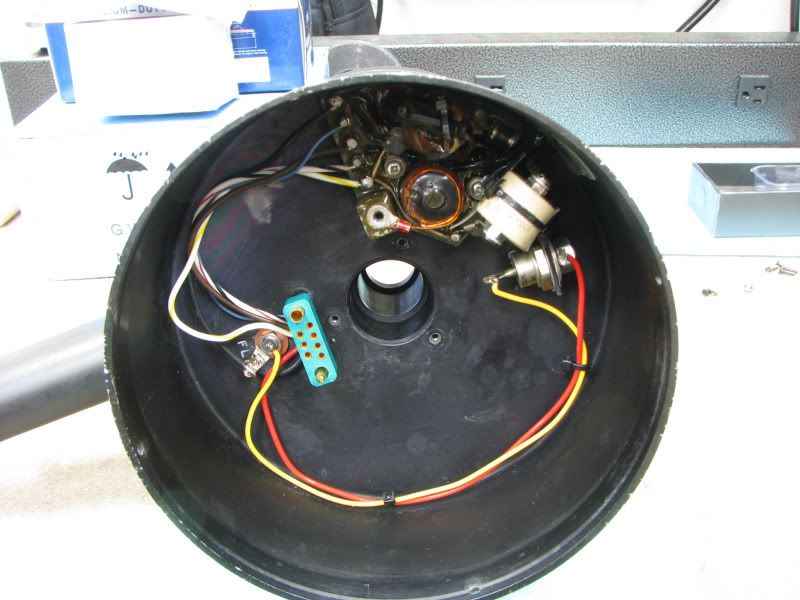
Here's how the original bulb mounting parts lay out in the light
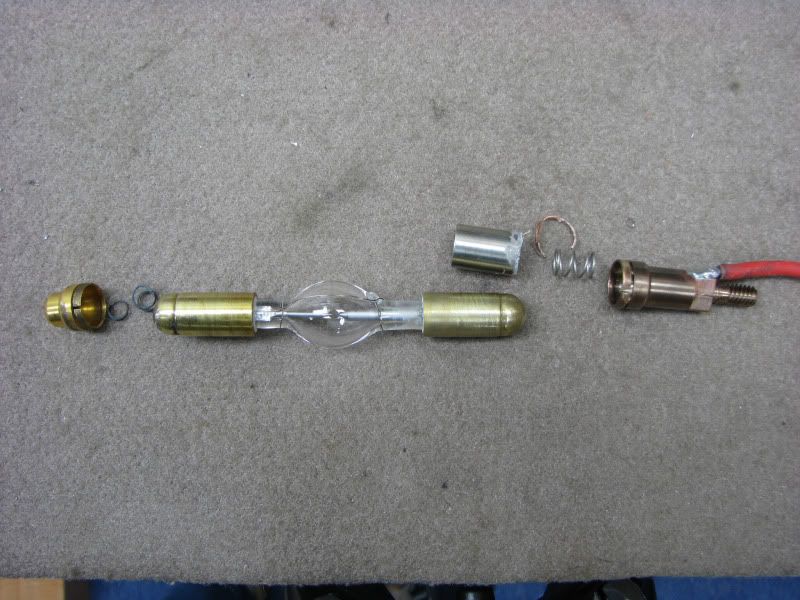
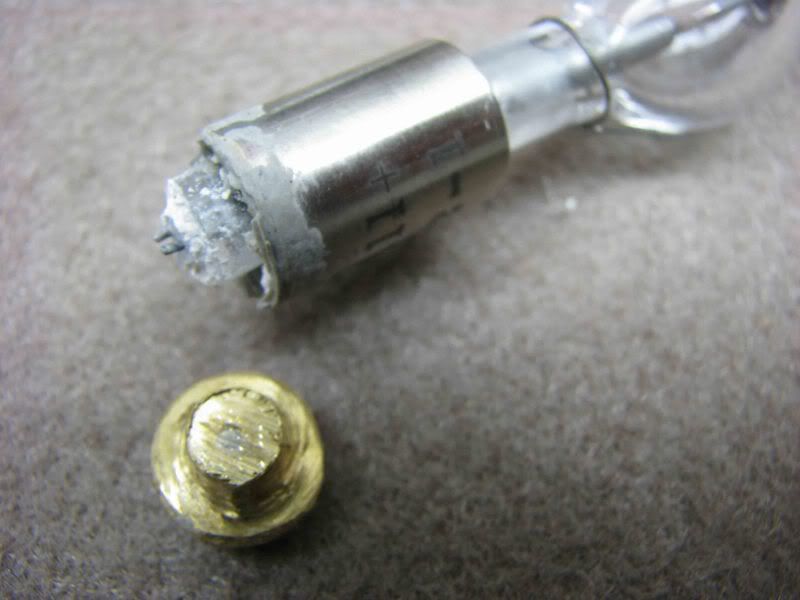
Original Cathode adapter loose on bulb base. Original adapters "clipped" onto the rounded base ends and did not fit over the cylindrical part of the base.
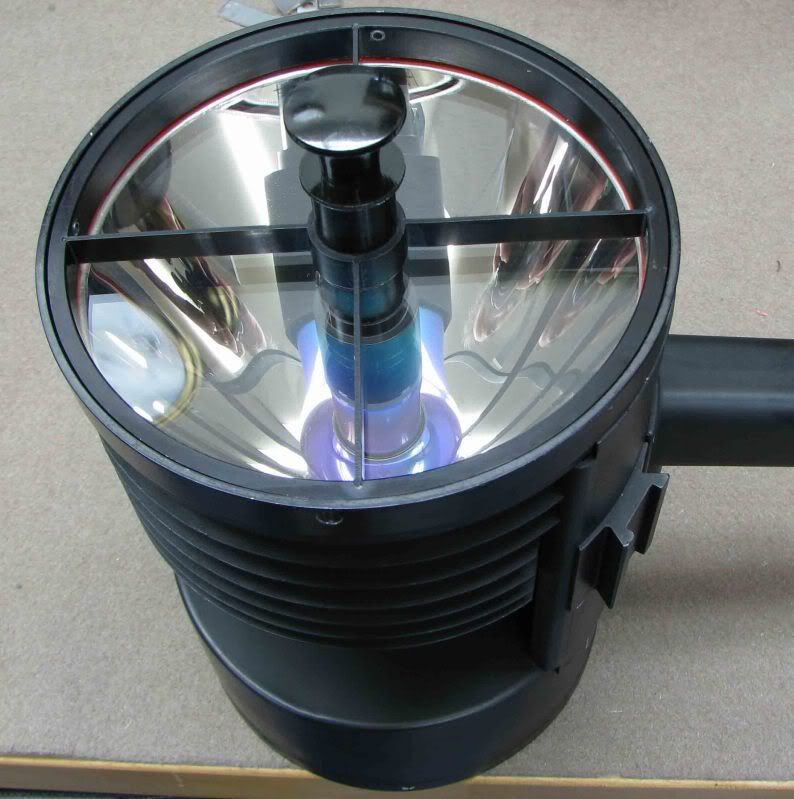
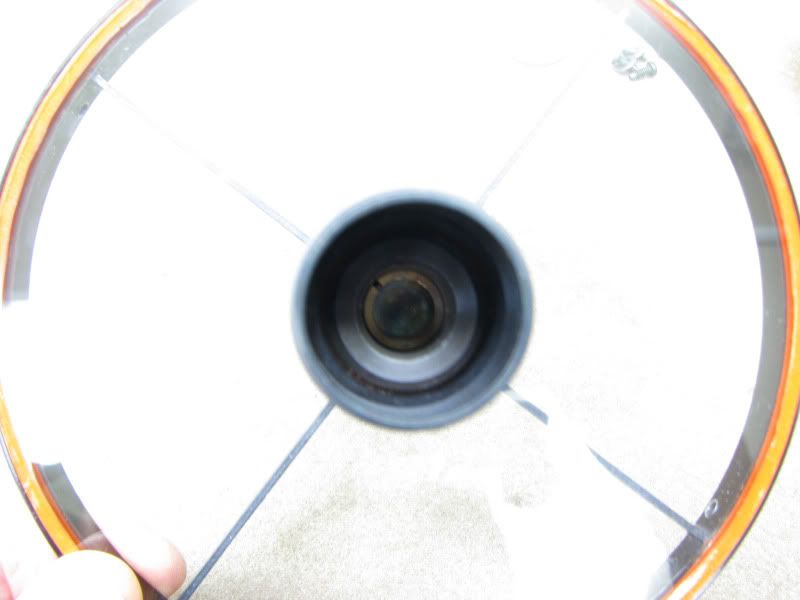
Front light window ***'y where the Cathode base adapter is located
The adapter bore and split ring seat
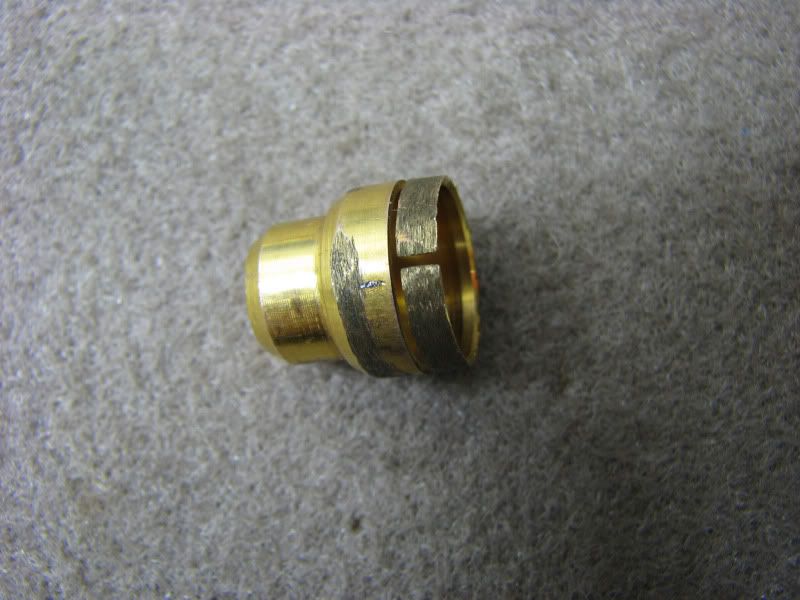
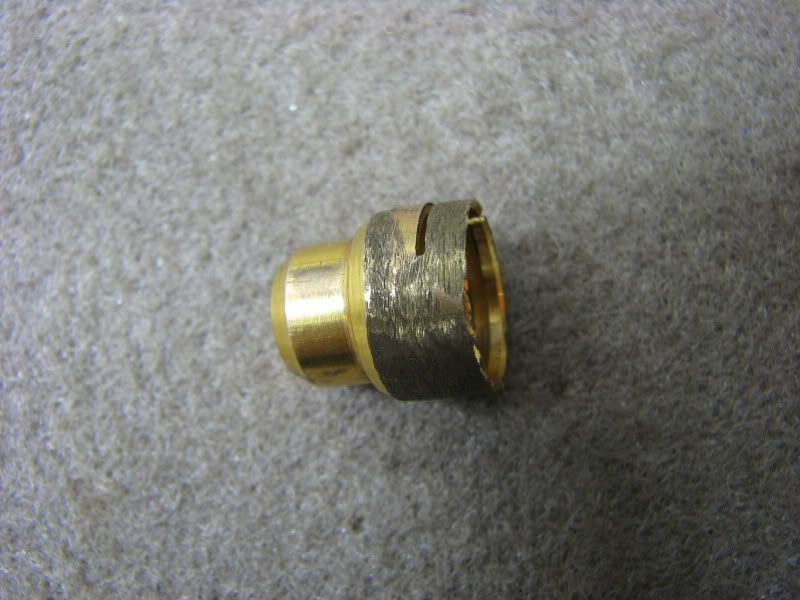
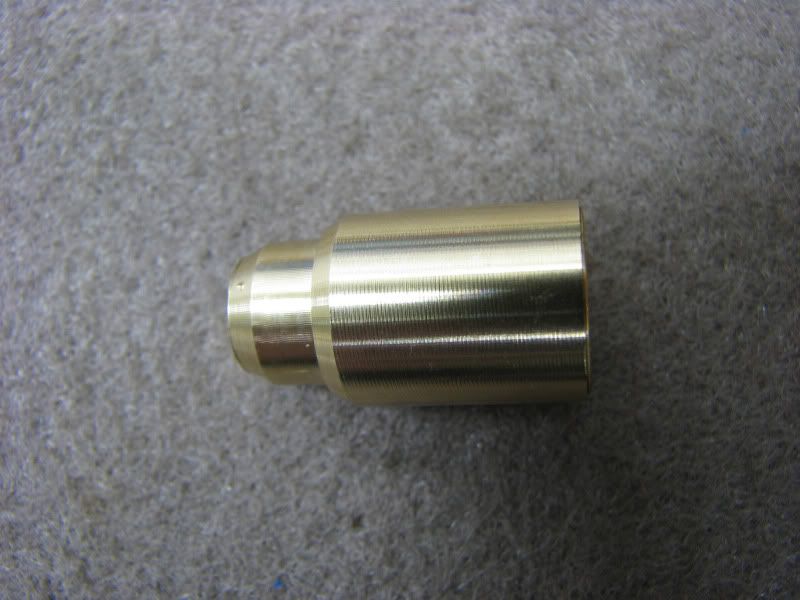
New adapter exterior. My Very First part made on my new lathe!
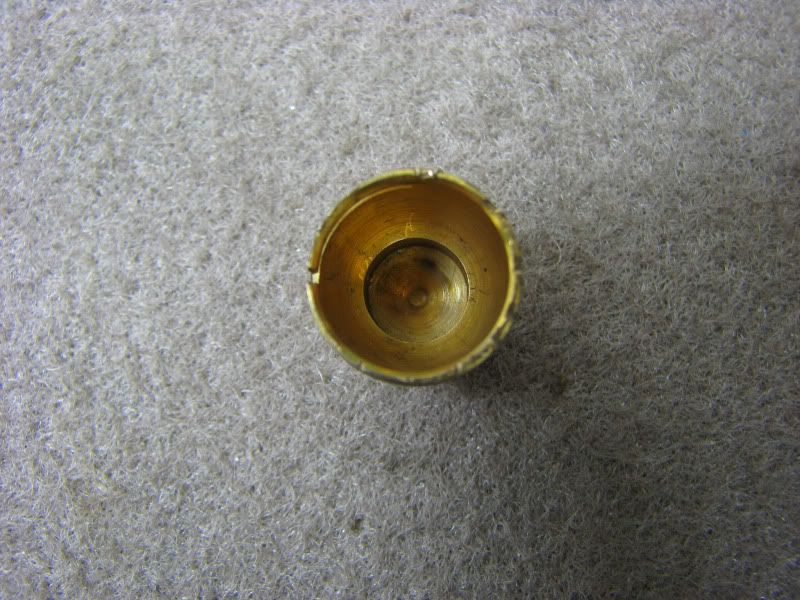
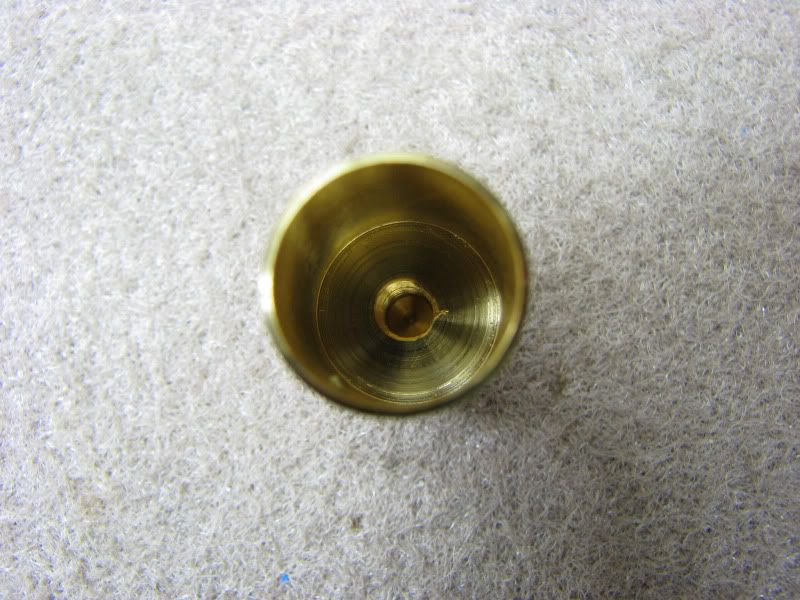
New adapter interior. The small hole is threaded to 8-32 so I can use a screw to pull the adapter out of the split ring
Question: When parting off, is there a technique to not ending up with a nub needing to be removed?
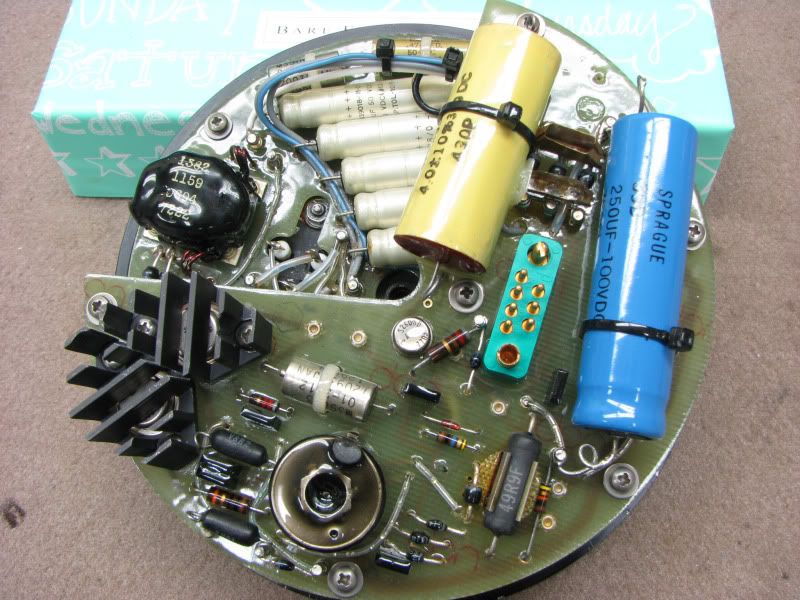
Just for info: The ballast mounted on the inside of back cover. Two, double layered IC boards.
The Ignitor – located on the back side of the light body, next to the ballast.
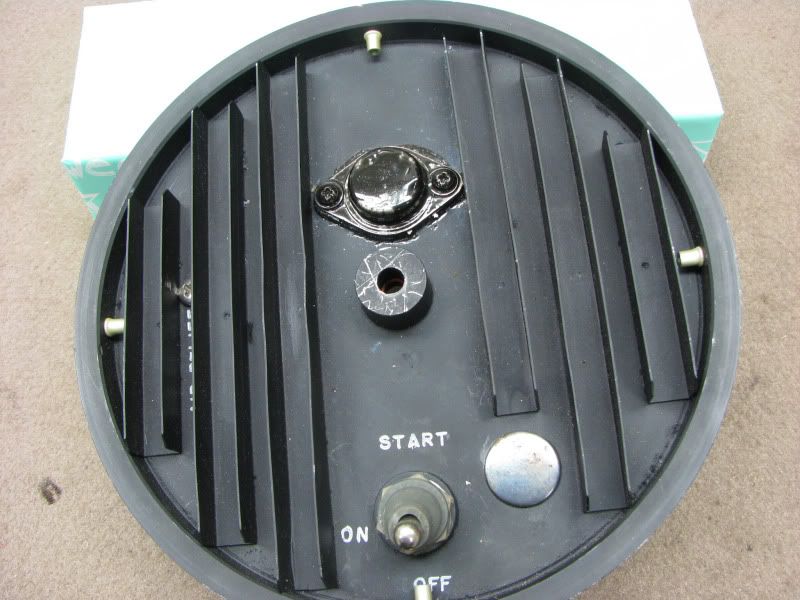
The control panel on the back of the light. Forgot to show the focusing knob where the focusing shaft comes thru the center hole. The "blank" is where the audio receiver/transmitter used to connect.
Beamshots:
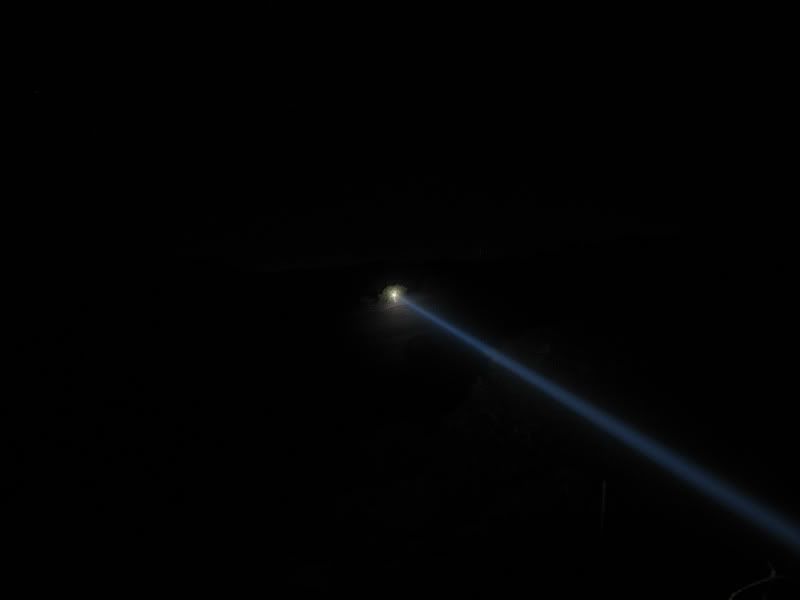
CAI Communicator 350 Yrds
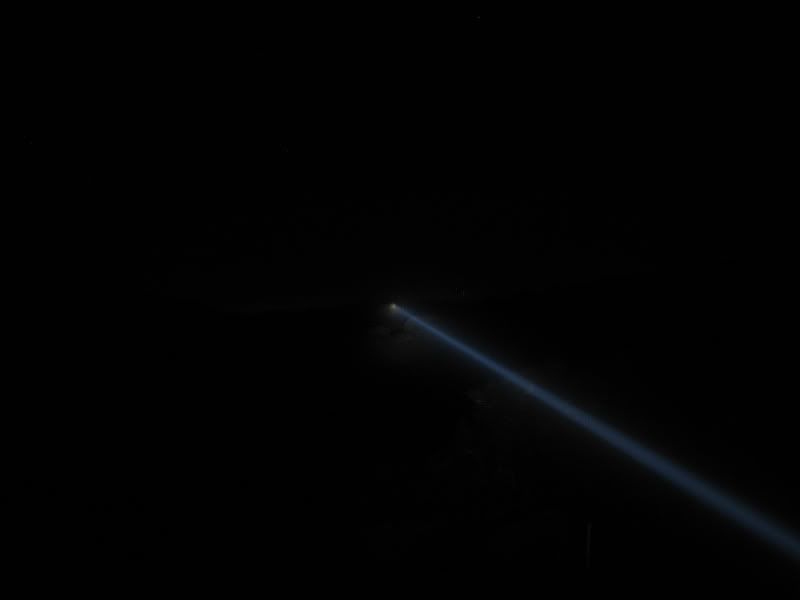
Maxabeam Gen3 350 Yrds
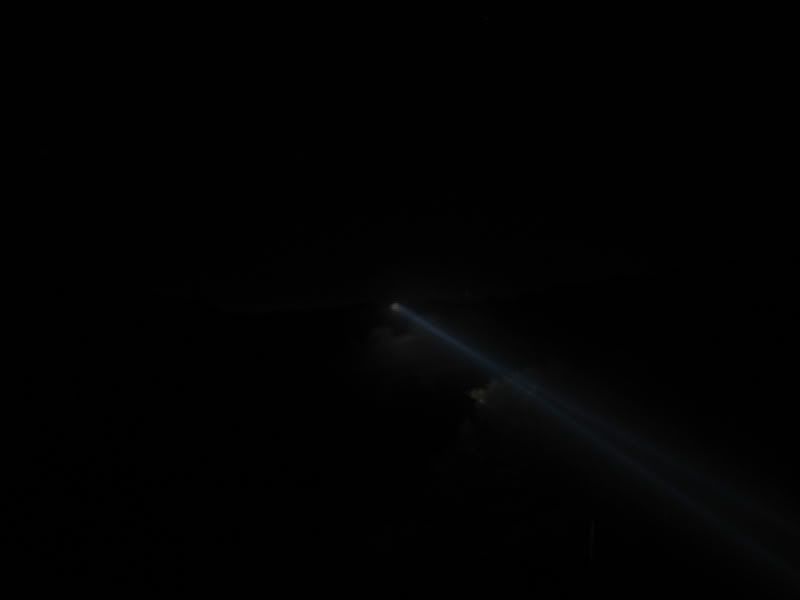
CAI Communicator 900 Yrds
Maxabeam Gen3 900 Yrds
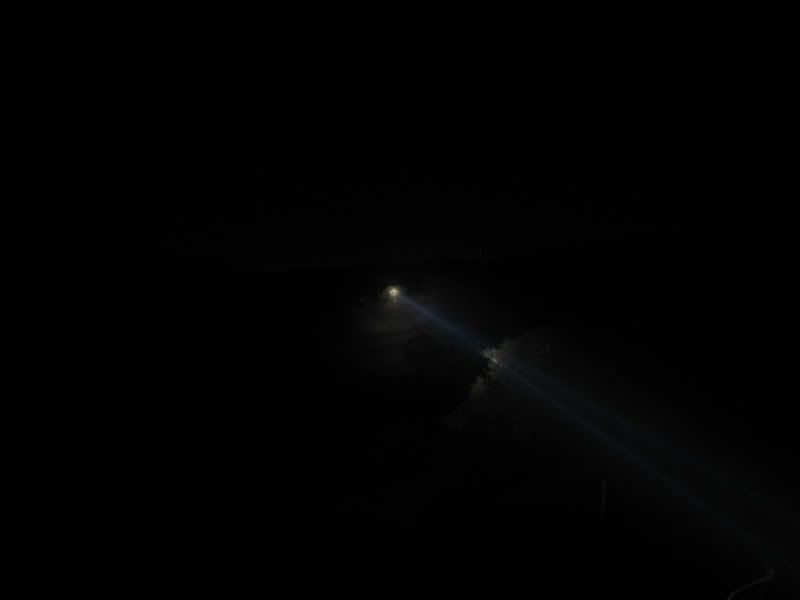
CAI Left Maxabeam Gen3 right, 350 Yrds
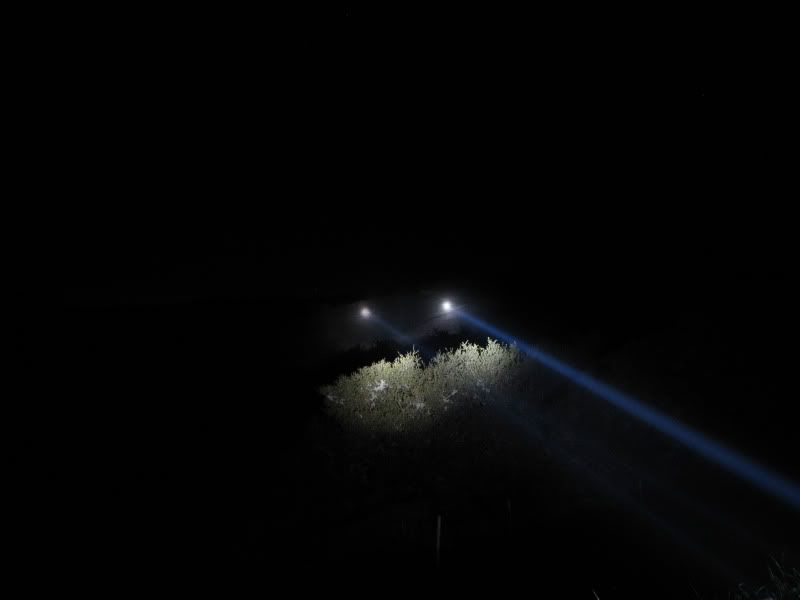
This is a 150 Watt (Input Rated) light. About 123 Watts goes to the bulb. I'm a little disappointed that the 85 Watt Gen3 Maxabeam focuses narrower and throws further. Well, it's only 1970's technology. It's still quite a machine for its time and I love having it.
You might have already read something of this 150 Watt Short Arc military searchlight. If so, you know that the bulb was damaged and the light stopped working. I offered to buy the light knowing its' condition because I love military lighting products. Before I made an offer, I had to ask myself – "Self, do you think you'll be able to find a new lamp for this 30+ year-old light?" I answered "maybe" and that's good enough for me! I figured that even if I was unsuccessful, I'd have fun trying and I'd still have this unique light in my possession.
As a side note, this device is called a Searchlight/Communicator. I don't remember this being mentioned or it might have been lost when CPF had its' hiccup early this year. Obviously, one purpose was for use as a handheld long-range visible and infrared searchlight. Purpose number two, and probably the primary purpose was to be used as a personal communicator when used in conjunction with another identical light operated by someone else. Absent from this light is the cylindrical shaped light wave receiver/amplifier that mounted to the top of the light, microphone and earpiece. When connected, the device did two things: 1. It converted a persons' audible speech into electrical impulses which in-turn, were used to modulate/pulse the light produced by the short arc bulb. 2. The receiver on the light down field received the pulsed light wave and converted it back to audible speech. Two people could voice-communicate with each other at up to approximately 7 miles pretty much as if they were using walkie-talkies. This could be done in both visible and infrared modes.
My quest to get the light going started by tearing it down to see what was going to need repair and/or replacement. Once I knew what needed to be done, I contacted a department director at the CAI, a division of Bourns Inc. company (the original manufacturer) to inquire if a long-time employee might know something of this light and its' bulb. The director informed me that Goodrich had bought this part of the business from them and forwarded my email to two people there. That avenue ultimately yielded an answer that there was no one there familiar with the light and no info on the bulb. I then web searched short arc bulb mfg's and came up with a couple of companies that I sent inquiries to about trying to match the bulb. They were helpful in doing research but again, the ultimate yield was nothing. Understandably, large companies have no interest in selling a bulb or two. I then sent the bulb to Dons Bulbs.com who hoards tons of obsolete light bulbs and performs detailed bulb searches if he doesn't have any. After I had sent the package off, I found Wolfram lighting, a small specialty company that makes short arc lamps. I emailed them and received a reply that they don't make this type of bulb but that another company they forwarded my email to, might be able to help. I followed up with an email of my own to the new company (Advanced Radiation Corporation - ARC) and received a reply that they, more than likely, could make this bulb. My heart raced!
I quickly emailed Dons Bulbs and asked him to terminate his search and to mail the bulb to this company. After they received the bulb, they had some technical questions which I tried to answer the best I could. We were talking about bulb dimensions and arc location and it became apparent to me that in order to do this right, I needed to take the light up to them so they could see physically see the bulb and how all the parts worked together to position the bulb in proper focal point of the reflector. Part of the problem was that the Anode base was damaged to the point where it was not possible to know its' original critical dimensions.
A tiny bit of Anode electrode connector ribbon sticking out of the quartz. I saw that the Anode base endcap had been ground down and separated from the ribbon
There was a similar problem with the Cathode base adapter but there was barely enough original material to obtain the needed dimensions.
Luckily, ARC is located within a reasonable driving distance from me.
I arrived at 8:15 and was immediately greeted by John, one of the owners. He ushered me into the offices where I got to talk with Ray, his dad, the founder of the business, now retired (but shows up every day, M-F and works for free). This man probably knows everything there is to know about gas discharge lamps. (This company makes the OEM lamps for Spectrolab's NightSun and Starburst short arcs and the original stick Maxabeam bulb among hundreds of other bulbs. I got to hold a NightSun bulb! I had sent many macro photos and measurements to them the day before, and believe it or not, they had new bases already made when I got there in preparation for making a new lamp. No order had been placed, no money given, yet they were already working on it! I had expected this to take 2 – 3 weeks to accomplish, but WOW, they were already on it.
As you can see in the pic above, the Anode end of the original quartz bulb still had about .030" of the electrode sticking out so Ray, the founder said why don't we go out back in the shop and test the bulb. If it works, just silver solder on the new base, re-pot it and call it a day – NO CHARGE. Well, a couple hours later, I was re-assembling the light with the original working bulb as tested in their test rig! This was WAY more than I had ever expected! I had brought my tools and portable 28 Volt power supply just in-case and that proved to be a good move.
Unfortunately, the light did not fire up. Lots of arc strikes as it should be doing but it did not light off. Well, after having taken up 4 hours of the two owners time and receiving machining services from three of their employees for free, I did not feel it was right to take up any more of their time. I thanked them profusely and headed for home. After all, I knew the bulb worked after their repairs because it tested out fine.
I got home and started to trouble shoot the problem. In darkness I could see arcing taking place but it was not between the Anode and Cathode tips. It was somewhere further back in the light. I kept trying to ignite it so I could tell where the short was. Surprise! Just before I was ready to stop for the evening, the light started up four different times after about 30 tries.
I eventually decided that the arcing was occurring from the Anode base to the wall of a large, thick ceramic bushing the bulb Anode base sits in. When I looked very closely at the bulb base, I could see what I thought were arc traces on it. How could the spark jump through the ceramic bushings' 3/16" wall to ground? I kept Ray and John updated with my troubleshooting and they offered many suggestions and technical info. (I now know the purpose for the tiny wire that wraps around the arc chamber. It's called the Trigger Wire and in some uses, is electrically connected to the cathode base, then wraps around the arc chamber but obviously does not connect to the Anode. During ignition, High Voltage is present in the wire which Ionizes the Xenon gas in the arc chamber so it can then be ignited when the spark jumps the gap inside the bulb).
The next morning, unprompted from me, I got a call from Ray and John. Ray told me that the ceramic bushing is most likely Aluminum Oxide and if it's dirty enough, it could be conducting. The bushing did have quite a bit of metal tracings in it from bulb movement made during the focusing operation. I had tried to clean it the night before but it is one tough piece of material and I could not do much. He said the only two ways to clean it are in a bath Hydrofluoric acid, which is unobtainable by most people or to heat it in an industrial oven to about 1100C. He then offered to clean it for me if I would mail it to him. Again, NO COST! That being done, the light still failed to start but I could still see the arcing taking place. It turns out that the arcing was actually coming from a very loose fitting front/Cathode bulb adapter. (The ground brass adapter in the pic above) I saw this when I took the light apart. There is a small spring between the adapter and the bulb base. Because of the loose adapter fit, the arc was finding its' way thru the small gauge spring which could not handle the power and was beginning to melt in half. There were arc track marks on the bulb base. Oh well, I thought at the time, I'll have to wait for the new bulb which will have threaded studs on both ends for a positive fit. At the time, I had no thoughts of buying a lathe so I figured I'd have to go to a local machine shop to get some adapters made.
ARC suggested that when they make the new bulb, that I have them shorten the arc gap a little to make starting easier and to provide more surface brightness from the bulb with just a bit more power consumption. It will have better throw, too with the smaller light source. A few weeks after my last communication with them, I had decided to buy the lathe so I told them to hold off making anything until my lathe arrived and I set it up. This was early August.
Fast forward to this week… My new PM1236 lathe arrived about 5 weeks ago. It took me a few weeks to get it set up and adjusted. Last week, I horsed around just turning shafts, doing my first threading and some practice boring. Last week, I figured that since I'm still waiting for the new bulb, why not try to make a special adapter for the working bulb I have now. It will be good practice and if it works, I'll have two working bulb/adapater setups for this old light. I spent a total of about 10 hours making the adapter in the pics below. It doesn't look like much for 10 hours of work and it would probably take a machinist less than an hour to make, but I'm just learning. There were so many calculations that I needed to nail down in my mind. Bore diameter of the adapter for a very, very light "press fit" over half the length of the old bulb base. OD for the end of the adapter that goes into the split retainer clip/ground contact, OD for the shell since it sits in another larger bore, taper angles, how to make the tapers, remaining wall thickness of the shell – will it be strong enough to support boring down to about a .028" wall thickness, (this because I needed to use my parting tool to cut down the shaft behind the adapter to a very small diameter so I could get in there and create the taper. I should have done the boring first!). What order should I do the different cutting operations in?. All this and trying to insure that the arc gap ends up in the same place as it did with the old adapter.
I'm so pleased that I got all the machining done without destroying the part or any tooling. I had visions of the adapter breaking away from the original shaft material due to forces beyond which it could handle or boring thru the shell because the walls were getting thin. I assembled the light and it works like it should! Ignition is very rapid now with the solid ground contact.
Here's the Communicator
Here's how the original bulb mounting parts lay out in the light
Original Cathode adapter loose on bulb base. Original adapters "clipped" onto the rounded base ends and did not fit over the cylindrical part of the base.
Front light window ***'y where the Cathode base adapter is located
The adapter bore and split ring seat
New adapter exterior. My Very First part made on my new lathe!
New adapter interior. The small hole is threaded to 8-32 so I can use a screw to pull the adapter out of the split ring
Question: When parting off, is there a technique to not ending up with a nub needing to be removed?
Just for info: The ballast mounted on the inside of back cover. Two, double layered IC boards.
The Ignitor – located on the back side of the light body, next to the ballast.
The control panel on the back of the light. Forgot to show the focusing knob where the focusing shaft comes thru the center hole. The "blank" is where the audio receiver/transmitter used to connect.
Beamshots:
CAI Communicator 350 Yrds
Maxabeam Gen3 350 Yrds
CAI Communicator 900 Yrds
Maxabeam Gen3 900 Yrds
CAI Left Maxabeam Gen3 right, 350 Yrds
This is a 150 Watt (Input Rated) light. About 123 Watts goes to the bulb. I'm a little disappointed that the 85 Watt Gen3 Maxabeam focuses narrower and throws further. Well, it's only 1970's technology. It's still quite a machine for its time and I love having it.
")
