ShortArc
Enlightened
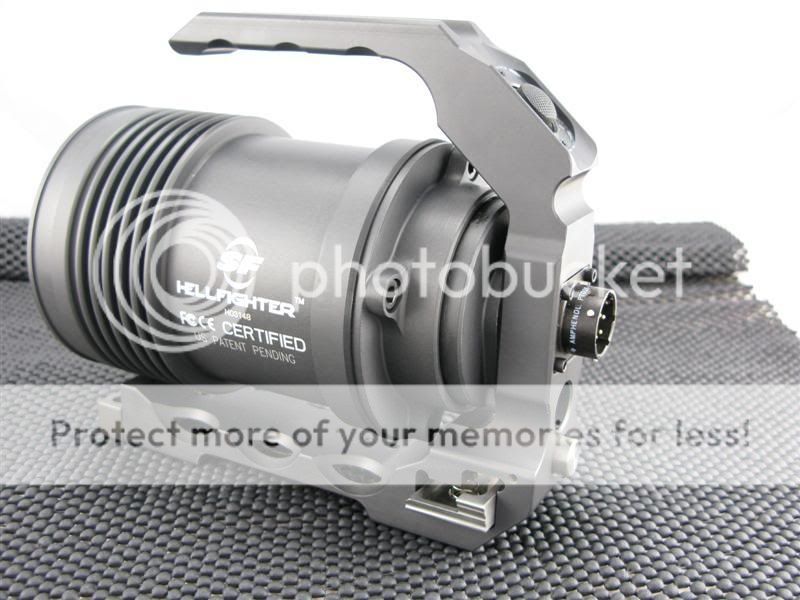
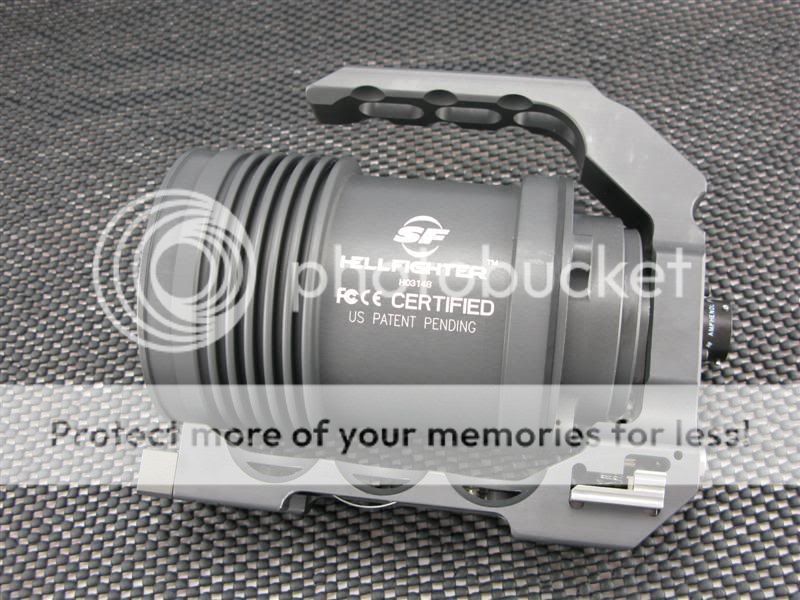
Very light weight and compact - no battery ofcourse!
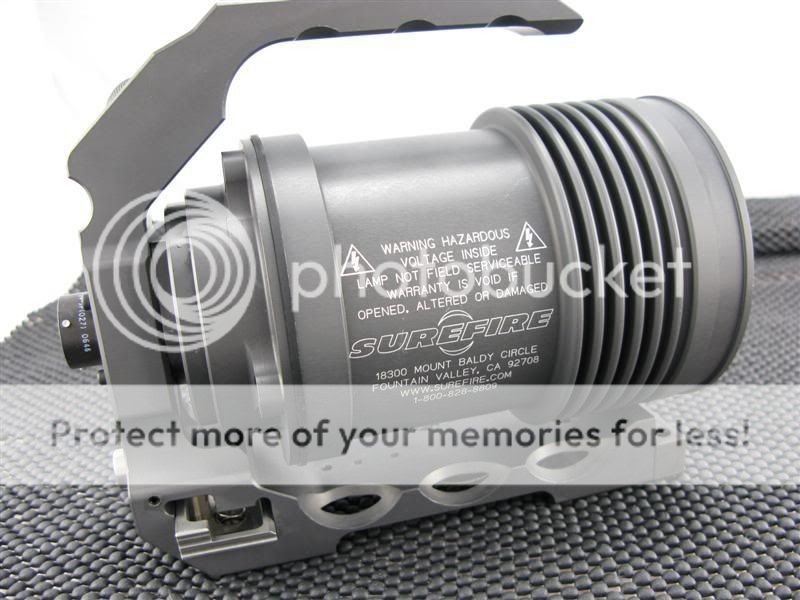
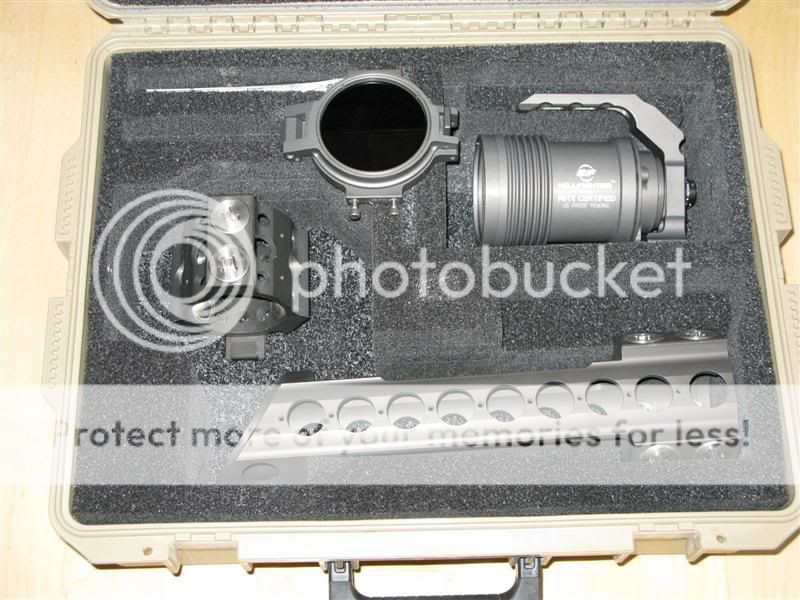
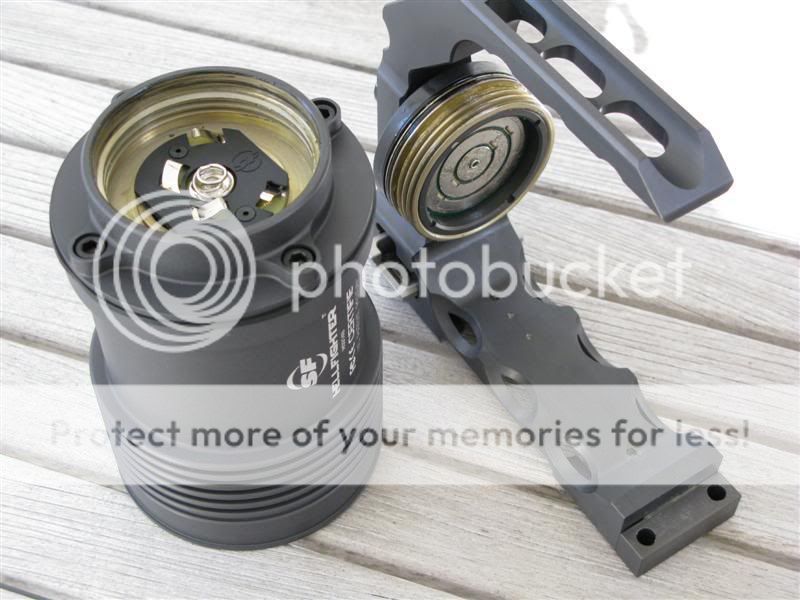
Surefire Lego
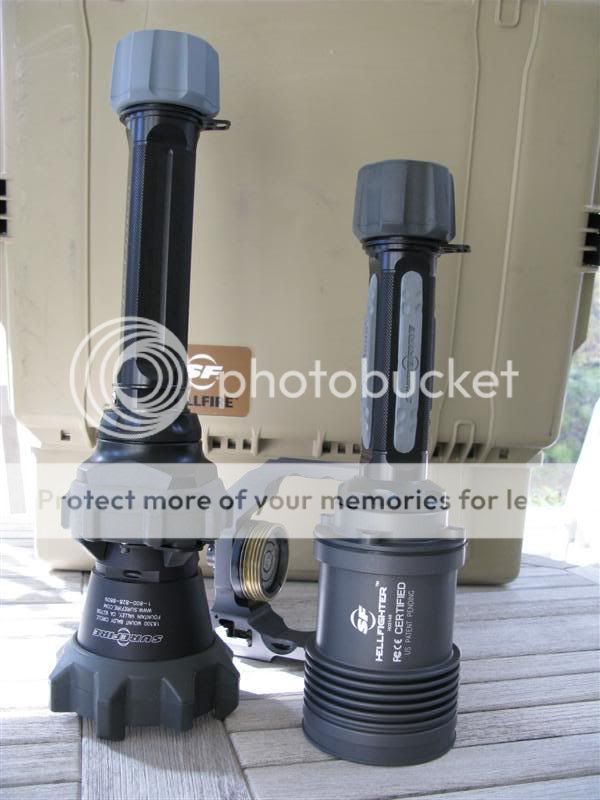
Cheers.
-----------------------------------------------------------------------
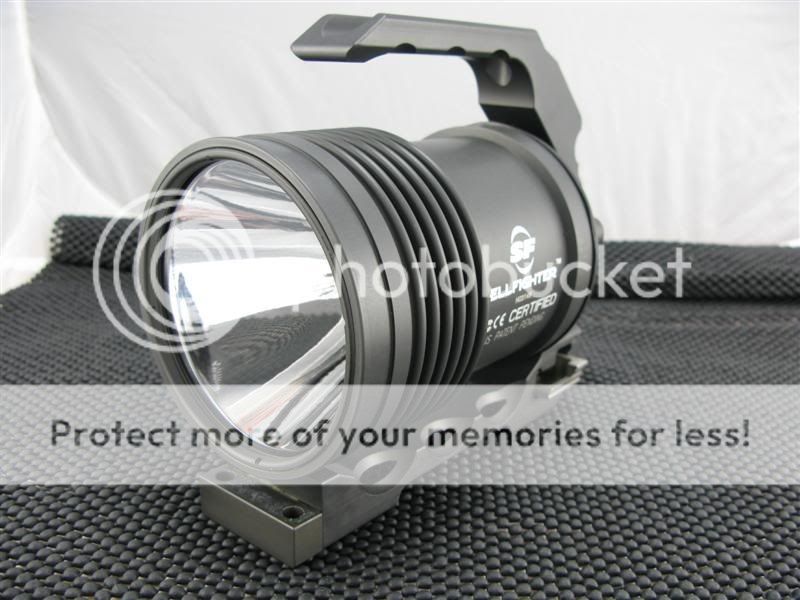
Here are two more showing the reflector and side view with tape measure for size reference.
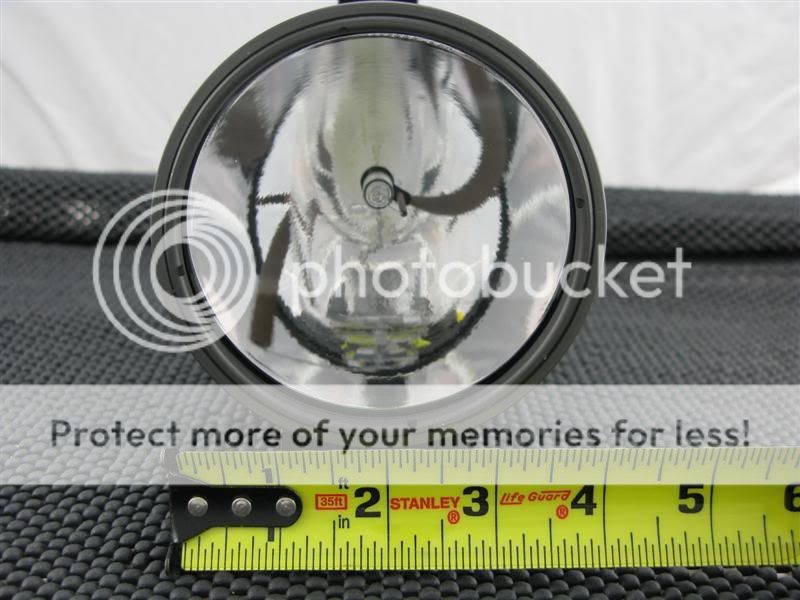
Approx Dia: 4 inches.

Approx lenght: 7.75 inches overall.
Approx weight: 4.25 lbs.
-----------------------------------------------------------------------
Hellfighter w/ Beast II head. Kind of interesting looking...ready for another episode of...
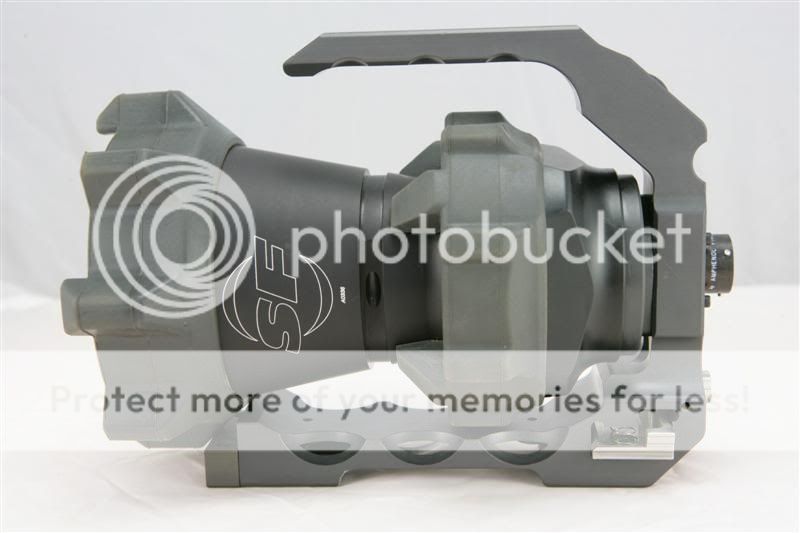
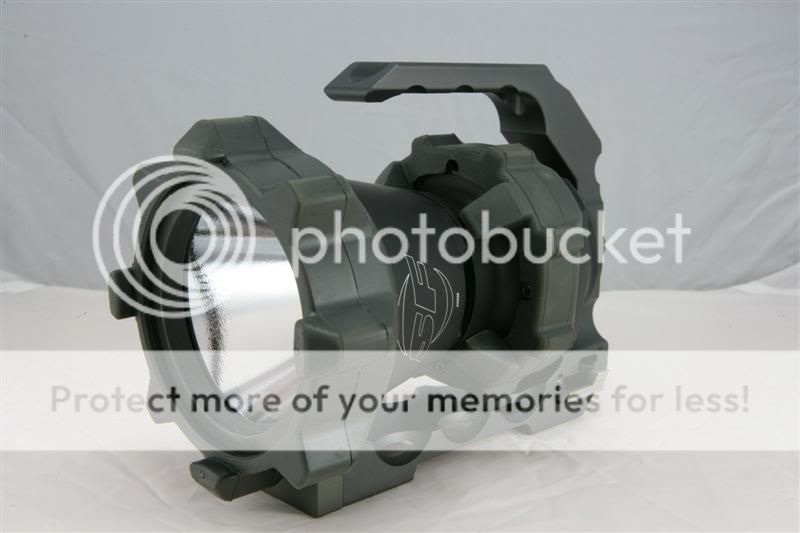
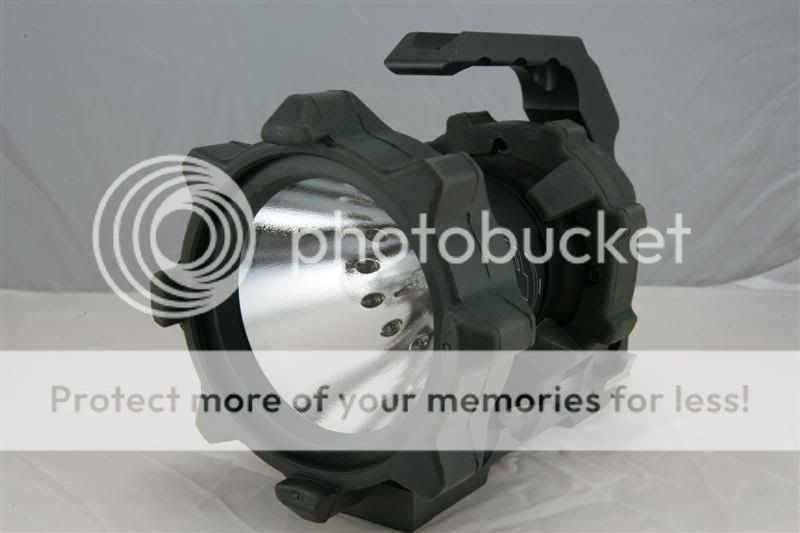
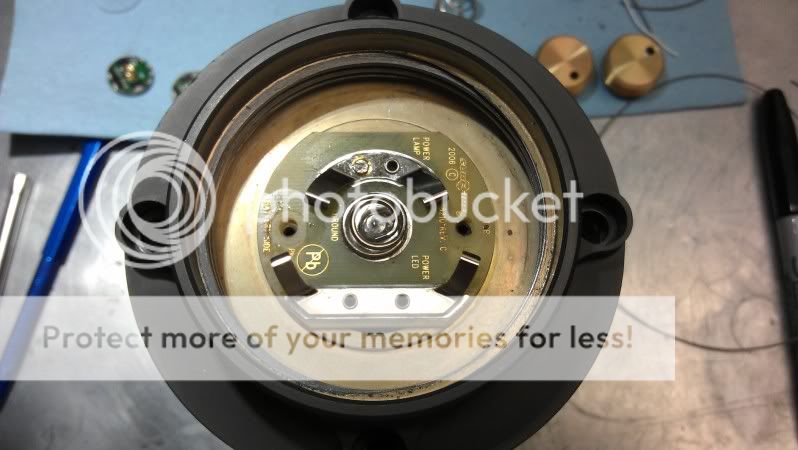
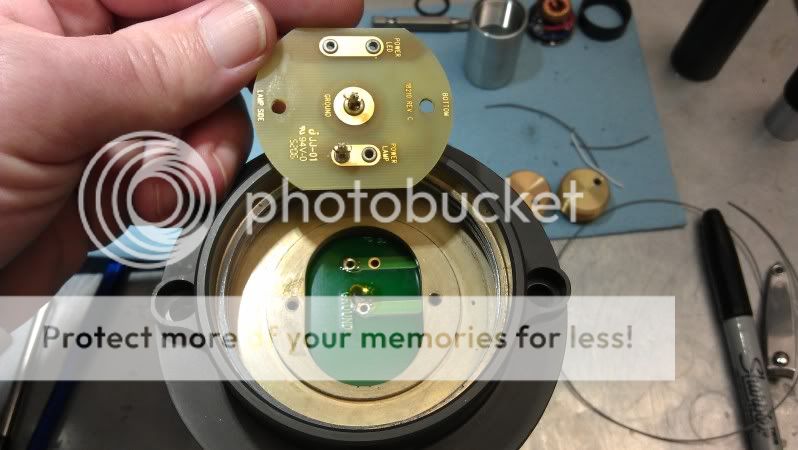
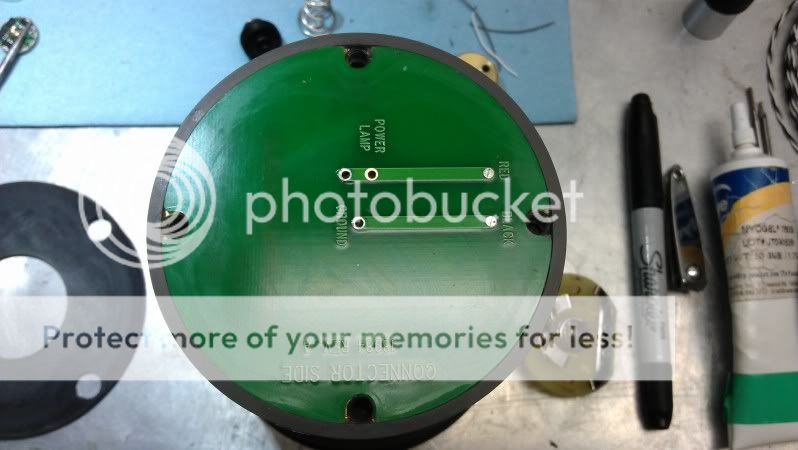
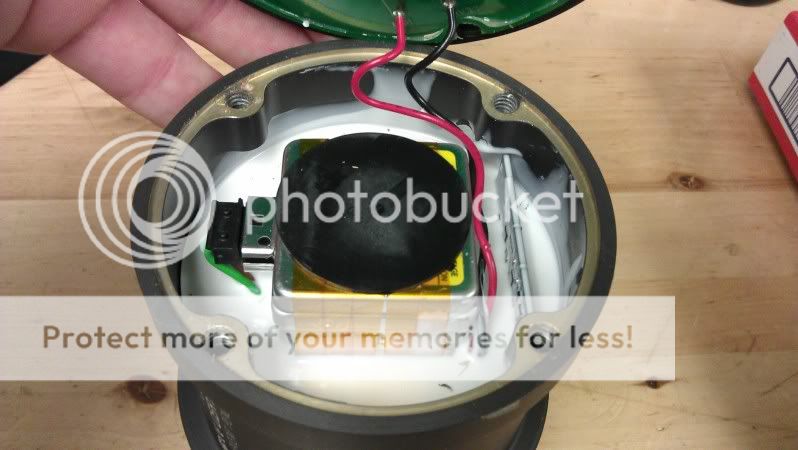
Summarized/added info as requested by a few CPF members who are going the HF path :devil:
SURFIRE HELLFIGHTER INFO
HellFighter Overview:
"The HellFighterTM target illuminator is designed primarily for use on .50 caliber machine guns. Its shock-isolated 35W HID lamp has an output of approximately 3,000 lumens and is powered by either two 5590 military batteries or the cigarette lighter adapter. HellFighter also can be used as a portable, handheld light by detaching it from the T-mount and using the integrated handle.": Quote from SF prochure. See SF for more info.
Some measured data:
Runtime on one (1) BB-2590/U battery: 3 hours 54 minutes
Startup current: 7A
Steady state current: 3A
Temperature distribution front to back (at room temp): 145-116 degrees Fahrenheit.
HellFigher Plug , Wiring and cable:
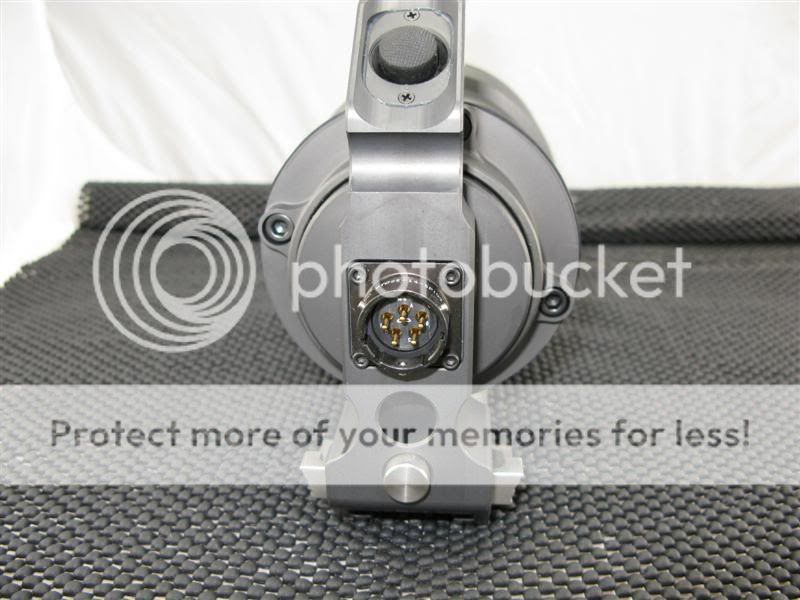
The receptacle on the back to the HF is a Amphenol PTO3E-14-5P.
Essentially it is Class E, size 14, with 5 conductors.
The mating plug is an Amphenol :
PT08E-14-5S (connector, right angle plug, class e, size 14, 5 #16 solder socket contact)
Allied Electronics Part number: 233-6110 (approx $67). This one is on the SF wiring harness.
Or you can get the straight plug for less money
PT06E-14-5S(SR) (connector, metal circ, class e, str plug w/cable clamp, sz14, 5#16 solder socket cont)
Allied Electronics Part number: 714-6228 (approx: $26).
HF has pins labeled A, B, C, D and E. A and C are used for those cables that have Grip switch. B and E are used for battery BB2590 or cigarette adapter. D is not used. In other words: Pin B is + Input and E is - Input 12V-15V DC Pin A and Pin C is for switch. To turn on the HF there has to be a closed circuit between A and C. If you don't have a switch, jumper.
As the current draw is rather low you don't need much of a wire.
If you are not going to use a remote switch, I would use 18AWG 2/C SOOW. You could still bring out two leads (connected from A to C) from the plug for later use. I did that with one of my coiled cable assemblies. One source for cable (including coiled) is McMaster Carr. Here is the info for the coiled cable: McMaser Part #7520K51 (Thermoplastic Rubber Jacket Retractile Cord Black SJEOW, 18/2 Awg, 300 VAC, 2' Retracted) $26.11 Each.
A word on Amphenol Class F connectors.
"E/F – Environmental Resisting with Strain Relief – designed for applications where the connector will be exposed
to moisture, vibration, and rapid changes in pressure and temperature."
The connector comes with a rubber sleeve which fits over the contacts. The idea is to slip the leads through the holes in the sleeve, solder the connections and then slip the sleeve over the contacts. This process requires you to strip back so much of the outer jacket that the strain relief clamp often will catch the wires and not the jacket. I have found two solutions to this problem. One, discard the rubber plug and use hot glue melted over the contacts. Two, use 3m Scotch Rubber Mastic Tape (#2228) to wrap the wire bundle.
Bren-Tronics BB-2590 Rechargeable Li-Ion General Info.
These batteries can be purchased directly from Bren-Tronics (via sales rep) or you can find an alternate manufacture. They all pretty much make the same product and are approx $300-$350 each. Sometimes you can find them on ebay but make sure you know where they have been an how old they are!
SPEC from Brentronics Website:
Description . . . . . . . . Rechargeable, Lithium Ion Battery with "State of Charge Display"
National Stock Number . . . . . 6140-01-490-4316
For Use In . . . . . . . . SINCGARS & ATCS (AN/PRC-104, 119) FALCON (AN/PRC-138
117) KY-57, MXF430 (V), AN/PSC-5, M22.
Replacement for or Compatible with . . . BB-590/U, BB-390A/U, BB-690/Y, BA-3590/U & BA-5590/U.
Nominal Dimensions . . . . . . Length: 4.40 in (111.76mm)
Width: 2.45 in (62.23 mm)
Height: 5.00 in (127.00 mm)
Nominal Weight . . . . . . . 3.10 Lb (1.4 Kg)
MaximumVoltage . . . . . . . 33.0 V, Two (2) 16.5 V Section
NominalVoltage . . . . . . . 28.8 V, Two (2) 14.4 V Section
Nominal Capacity . . . . . . . 6.2 Ah @ 28.8 V — 12.4 Ah @ 14.4 V
Cutoff Voltage . . . . . . . . 20.0 V———-10.0 V
Operating Temperature Range . . . . -20ºC to +55ºC (-4ºF to +131ºF)
Storage Temperature Range . . . . . -20ºC to +55ºC (-4ºF to +131ºF)
Case Material & Color. . . . . . . Modified ABS plastic, Sand Color with Yellow printing.
Connector . . . . . . . . Floating Type Per U.S. Army DWG# SC-C-179495
Recommended Charger s. . . . . . PP-8498/U (SPC), PP-8481A/U (COTM)
Standard Charge . . . . . . . Charge each section independently at constant voltage of 16.5V
3 A (max) for 5 Hr
BB-2590/U Connector Info.
You can purchase separate BA5590/u connectors, model BAI-10G, at: http://www.battaxx.com
Jay Willmott is the President of the company and is very helpful.
"Pins 1 & 2 are Ground (-15VDC); pins 4 & 5 are Positive (+15VDC). In BA-5590/U (non-rechargeable) batteries, pins 3 & 6 are -not- connected.
Wiring the connector in parallel will provide nominally 15 volts (for a fresh battery); wiring in series will provide nominally 30 volts. The "old school" method of wiring in parallel dictates installing diodes for each leg, to prevent possible self-charging between the cells (something that may cause the cells to burst), but this was more of an issue for earlier generations of BA5590s, and really should not be a concern for you in your application.
The easiest way we have found to wire in series is to simply solder on a buss wire jumper between pins 1 & 5. We use a pair of round-nosed wire- forming pliers to create a loop in the wire, which may then be slid over the pins, then soldered in place. This works well for the power hookups, too.
Most applications are fine using ~22 gauge wire, but larger diameters will fit. For assembly, we recommend using a ~650 degree soldering iron and thin-gauge rosin core solder. It's best not to let the iron dwell for too long, otherwise the shell material will soften. Some of our customers use a "dead" (make sure!) battery as a fixture for soldering, to serve as a heatsink as well as to ensure that the pins remain aligned during assembly.
After assembling and verifying correct polarity and voltage, we usually recommend potting the soldered connections with hot melt glue. We usually also suggest filling the backshell ~2/3rds full with hot melt glue, then quickly installing it onto the connector; the glue will flow around the inside and bond the backshell to the connector, as well as provide a vibration-resistant and watertight seal for reliable operation, even in tactical applications.
Other, more sophisticated (and, more expensive!) potting compounds are available (Devcon makes some) but hot melt glue is commonly available and seems to be working just fine for most of our customers. If for some reason you decide not to pot the assembly, a small drop of cyanoacrylate ("super glue") on each of the backshell's four plastic pins should retain it securely; this technique -sometimes- permits removal for later rework, too.". Information provided by Jay WIllmott of Battery Axxessories Inc.
Brentronics BB-2590/U Charging Info.
Regarding charging of BB2590-- there is a trick to it. The Brentronics batteries have a text on their side telling you how to do it, but it is a little cryptic. What you need to do is the following:
The battery has two separate sides as we know. Each side should be charged separately since you cannot be sure that the 2 sides are equally discharged or that they will take the charge at the same pace. So, charge them one at a time, or with 2 separate power sources.
Yes, you could probably get away with hooking them up in parallel and charging them together most of the time. But, the operative word(s) here are "Most of the time"!.
Here is the trick:
- To allow charging, a separate +5VDC supply must be connected to the pad labeled SW through a 470 ohm 0.25W resistor. The SW pad is one of the 3 pads below the main connector. NOTE! THE 5V MUST BE CONNECTED BEFORE YOU TURN ON THE 16.5v SUPPLY IN THE NEXT STEP!!!
- Connect a 16.5VDC power supply between pin 1(-) and 4(+). Turn up the current limiter (yes, you should use a power supply with an adjustable current limiter) to a max of 3A.
- Terminate the charging when the current drops to <100mA.
ANOTHER NOTE: Do NOT disconnect the 5V supply to the SW pad while charging. Something really weird happens to the voltage and though I am not sure what is going on it cannot be healthy!
To secure that the +5V is constantly connected to the SW pad, you should make some sort of device with a spring loaded connection point that applies pressure down on the SW pad.
SURFIRE HELLFIGHTER 4 INFO
 [/IMG]
 [/IMG]
 [/IMG]
 [/IMG]
(random notes & thoughts)
Surefire uses a different class of Amphenol Connector: PT05-14-5S-027
Pin B is still positive and E is still negative.
Pin A & C are now open. Shorting A & C will shut the light off.
Pin A & C are negative when Remote Switch is ON
Pin D is momentary negative on Hi/Low & Strobe when Remote Switch is ON
Pin D is momentary negative on Strobe when Remote Switch is OFF
Internal Lithium Battery charges when connected to a 12V (or greater) power source.
Charge rate is 2.2A at 16VDC. Runtime 30 min or so.
Beam pulses approx. 1/sec when on internal battery (kinda annoying but I understand its purpose).
Beam of HF 4 has a tighter hot spot yielding more throw.
The light source and internal battery are now user replaceable.
Output is the same as previous generations but the Grip Switch now allows for Low (approx 1000 lumens), High (approx 3000 lumens), and strobe (9 Hz).
I still have not metered the corresponding pin outs but will eventually.
The KIT02 I purchased now includes a good quality soft case, though I would have preferred the Storm case.
Beamshots later...
************* More info to follow as I have time ****************


Surefire Lego

Cheers.
-----------------------------------------------------------------------
Here are two more showing the reflector and side view with tape measure for size reference.

Approx Dia: 4 inches.

Approx lenght: 7.75 inches overall.
Approx weight: 4.25 lbs.
-----------------------------------------------------------------------
Hellfighter w/ Beast II head. Kind of interesting looking...ready for another episode of...


Summarized/added info as requested by a few CPF members who are going the HF path :devil:
SURFIRE HELLFIGHTER INFO
HellFighter Overview:
"The HellFighterTM target illuminator is designed primarily for use on .50 caliber machine guns. Its shock-isolated 35W HID lamp has an output of approximately 3,000 lumens and is powered by either two 5590 military batteries or the cigarette lighter adapter. HellFighter also can be used as a portable, handheld light by detaching it from the T-mount and using the integrated handle.": Quote from SF prochure. See SF for more info.
Some measured data:
Runtime on one (1) BB-2590/U battery: 3 hours 54 minutes
Startup current: 7A
Steady state current: 3A
Temperature distribution front to back (at room temp): 145-116 degrees Fahrenheit.
HellFigher Plug , Wiring and cable:
The receptacle on the back to the HF is a Amphenol PTO3E-14-5P.
Essentially it is Class E, size 14, with 5 conductors.
The mating plug is an Amphenol :
PT08E-14-5S (connector, right angle plug, class e, size 14, 5 #16 solder socket contact)
Allied Electronics Part number: 233-6110 (approx $67). This one is on the SF wiring harness.
Or you can get the straight plug for less money
PT06E-14-5S(SR) (connector, metal circ, class e, str plug w/cable clamp, sz14, 5#16 solder socket cont)
Allied Electronics Part number: 714-6228 (approx: $26).
HF has pins labeled A, B, C, D and E. A and C are used for those cables that have Grip switch. B and E are used for battery BB2590 or cigarette adapter. D is not used. In other words: Pin B is + Input and E is - Input 12V-15V DC Pin A and Pin C is for switch. To turn on the HF there has to be a closed circuit between A and C. If you don't have a switch, jumper.
As the current draw is rather low you don't need much of a wire.
If you are not going to use a remote switch, I would use 18AWG 2/C SOOW. You could still bring out two leads (connected from A to C) from the plug for later use. I did that with one of my coiled cable assemblies. One source for cable (including coiled) is McMaster Carr. Here is the info for the coiled cable: McMaser Part #7520K51 (Thermoplastic Rubber Jacket Retractile Cord Black SJEOW, 18/2 Awg, 300 VAC, 2' Retracted) $26.11 Each.
A word on Amphenol Class F connectors.
"E/F – Environmental Resisting with Strain Relief – designed for applications where the connector will be exposed
to moisture, vibration, and rapid changes in pressure and temperature."
The connector comes with a rubber sleeve which fits over the contacts. The idea is to slip the leads through the holes in the sleeve, solder the connections and then slip the sleeve over the contacts. This process requires you to strip back so much of the outer jacket that the strain relief clamp often will catch the wires and not the jacket. I have found two solutions to this problem. One, discard the rubber plug and use hot glue melted over the contacts. Two, use 3m Scotch Rubber Mastic Tape (#2228) to wrap the wire bundle.
Bren-Tronics BB-2590 Rechargeable Li-Ion General Info.
These batteries can be purchased directly from Bren-Tronics (via sales rep) or you can find an alternate manufacture. They all pretty much make the same product and are approx $300-$350 each. Sometimes you can find them on ebay but make sure you know where they have been an how old they are!
SPEC from Brentronics Website:
Description . . . . . . . . Rechargeable, Lithium Ion Battery with "State of Charge Display"
National Stock Number . . . . . 6140-01-490-4316
For Use In . . . . . . . . SINCGARS & ATCS (AN/PRC-104, 119) FALCON (AN/PRC-138
117) KY-57, MXF430 (V), AN/PSC-5, M22.
Replacement for or Compatible with . . . BB-590/U, BB-390A/U, BB-690/Y, BA-3590/U & BA-5590/U.
Nominal Dimensions . . . . . . Length: 4.40 in (111.76mm)
Width: 2.45 in (62.23 mm)
Height: 5.00 in (127.00 mm)
Nominal Weight . . . . . . . 3.10 Lb (1.4 Kg)
MaximumVoltage . . . . . . . 33.0 V, Two (2) 16.5 V Section
NominalVoltage . . . . . . . 28.8 V, Two (2) 14.4 V Section
Nominal Capacity . . . . . . . 6.2 Ah @ 28.8 V — 12.4 Ah @ 14.4 V
Cutoff Voltage . . . . . . . . 20.0 V———-10.0 V
Operating Temperature Range . . . . -20ºC to +55ºC (-4ºF to +131ºF)
Storage Temperature Range . . . . . -20ºC to +55ºC (-4ºF to +131ºF)
Case Material & Color. . . . . . . Modified ABS plastic, Sand Color with Yellow printing.
Connector . . . . . . . . Floating Type Per U.S. Army DWG# SC-C-179495
Recommended Charger s. . . . . . PP-8498/U (SPC), PP-8481A/U (COTM)
Standard Charge . . . . . . . Charge each section independently at constant voltage of 16.5V
3 A (max) for 5 Hr
BB-2590/U Connector Info.
You can purchase separate BA5590/u connectors, model BAI-10G, at: http://www.battaxx.com
Jay Willmott is the President of the company and is very helpful.
"Pins 1 & 2 are Ground (-15VDC); pins 4 & 5 are Positive (+15VDC). In BA-5590/U (non-rechargeable) batteries, pins 3 & 6 are -not- connected.
Wiring the connector in parallel will provide nominally 15 volts (for a fresh battery); wiring in series will provide nominally 30 volts. The "old school" method of wiring in parallel dictates installing diodes for each leg, to prevent possible self-charging between the cells (something that may cause the cells to burst), but this was more of an issue for earlier generations of BA5590s, and really should not be a concern for you in your application.
The easiest way we have found to wire in series is to simply solder on a buss wire jumper between pins 1 & 5. We use a pair of round-nosed wire- forming pliers to create a loop in the wire, which may then be slid over the pins, then soldered in place. This works well for the power hookups, too.
Most applications are fine using ~22 gauge wire, but larger diameters will fit. For assembly, we recommend using a ~650 degree soldering iron and thin-gauge rosin core solder. It's best not to let the iron dwell for too long, otherwise the shell material will soften. Some of our customers use a "dead" (make sure!) battery as a fixture for soldering, to serve as a heatsink as well as to ensure that the pins remain aligned during assembly.
After assembling and verifying correct polarity and voltage, we usually recommend potting the soldered connections with hot melt glue. We usually also suggest filling the backshell ~2/3rds full with hot melt glue, then quickly installing it onto the connector; the glue will flow around the inside and bond the backshell to the connector, as well as provide a vibration-resistant and watertight seal for reliable operation, even in tactical applications.
Other, more sophisticated (and, more expensive!) potting compounds are available (Devcon makes some) but hot melt glue is commonly available and seems to be working just fine for most of our customers. If for some reason you decide not to pot the assembly, a small drop of cyanoacrylate ("super glue") on each of the backshell's four plastic pins should retain it securely; this technique -sometimes- permits removal for later rework, too.". Information provided by Jay WIllmott of Battery Axxessories Inc.
Brentronics BB-2590/U Charging Info.
Regarding charging of BB2590-- there is a trick to it. The Brentronics batteries have a text on their side telling you how to do it, but it is a little cryptic. What you need to do is the following:
The battery has two separate sides as we know. Each side should be charged separately since you cannot be sure that the 2 sides are equally discharged or that they will take the charge at the same pace. So, charge them one at a time, or with 2 separate power sources.
Yes, you could probably get away with hooking them up in parallel and charging them together most of the time. But, the operative word(s) here are "Most of the time"!.
Here is the trick:
- To allow charging, a separate +5VDC supply must be connected to the pad labeled SW through a 470 ohm 0.25W resistor. The SW pad is one of the 3 pads below the main connector. NOTE! THE 5V MUST BE CONNECTED BEFORE YOU TURN ON THE 16.5v SUPPLY IN THE NEXT STEP!!!
- Connect a 16.5VDC power supply between pin 1(-) and 4(+). Turn up the current limiter (yes, you should use a power supply with an adjustable current limiter) to a max of 3A.
- Terminate the charging when the current drops to <100mA.
ANOTHER NOTE: Do NOT disconnect the 5V supply to the SW pad while charging. Something really weird happens to the voltage and though I am not sure what is going on it cannot be healthy!
To secure that the +5V is constantly connected to the SW pad, you should make some sort of device with a spring loaded connection point that applies pressure down on the SW pad.
SURFIRE HELLFIGHTER 4 INFO


(random notes & thoughts)
Surefire uses a different class of Amphenol Connector: PT05-14-5S-027
Pin B is still positive and E is still negative.
Pin A & C are now open. Shorting A & C will shut the light off.
Pin A & C are negative when Remote Switch is ON
Pin D is momentary negative on Hi/Low & Strobe when Remote Switch is ON
Pin D is momentary negative on Strobe when Remote Switch is OFF
Internal Lithium Battery charges when connected to a 12V (or greater) power source.
Charge rate is 2.2A at 16VDC. Runtime 30 min or so.
Beam pulses approx. 1/sec when on internal battery (kinda annoying but I understand its purpose).
Beam of HF 4 has a tighter hot spot yielding more throw.
The light source and internal battery are now user replaceable.
Output is the same as previous generations but the Grip Switch now allows for Low (approx 1000 lumens), High (approx 3000 lumens), and strobe (9 Hz).
I still have not metered the corresponding pin outs but will eventually.
The KIT02 I purchased now includes a good quality soft case, though I would have preferred the Storm case.
Beamshots later...
************* More info to follow as I have time ****************
Last edited:


