nailbender
Flashlight Enthusiast
A member contacted me telling me that he had a M1 Hunter by Lumapower with a Q5 and that it needed a little jazzing up.
We discussed several LED's and options and after a couple of conversations it was decided to put a neutral binned MC-E in the light and use a direct drive with 5 levels board to control the LED.
1st off I want to thank Netkidz for some timely advice and a few pictures in a thread where he modded a light.
This is a nice well built light that comes with both a MOP & a smooth reflector.
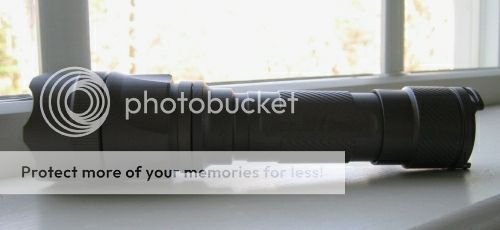
After removing the head the light source is clearly visible. Once the light engine is removed the first thing that has to be done is to remove a black plastic cover that protects the led contacts and centers the led.
How to do this is not clearly visible. The way to do it is to drill a small hole on each side of the led just barely through the cover.
Once this is done I inserted a paper clip bent in a U and each end was bent in an L. Once you have the paper clip bent insert each end into the two holes you drilled being careful of inner components. You can now with some force remove the plastic cover
The results leave this. Now push wires as shown down through holes
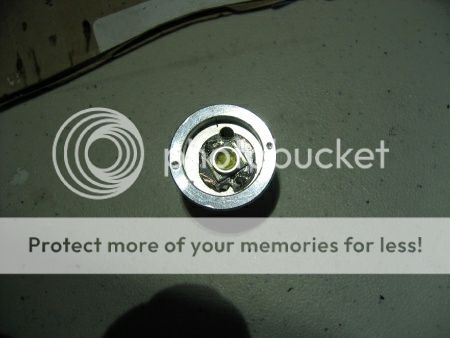
Turning the LE upside down you need to unbend the four braded over aluminum clips knowing that they will break off so that the contact can move down and out with the driver in the next step. (care must be used to catch bottom contact and inner spring).
Once that is done you can easily pry the led up and then take an object and insert through hole and carefully start to push the retaining clip with the driver in it down. You need to work a little at a time working from both holes trying to keep the clip even on its way down.
bottom contact with spring
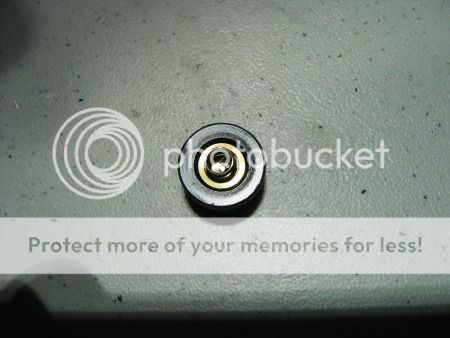
Once the bottom contact falls out the driver will still be recessed
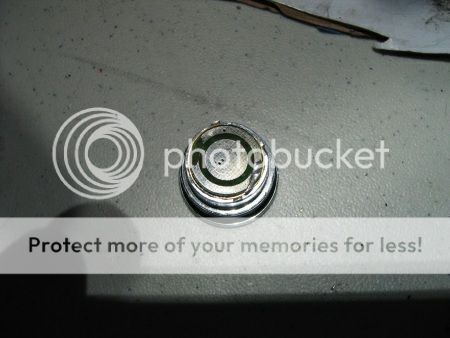
continuing pushing down from the top will finally push the driver out the bottom.
Once the driver is removed it is time to clean the compound that was under the led and start the installation.
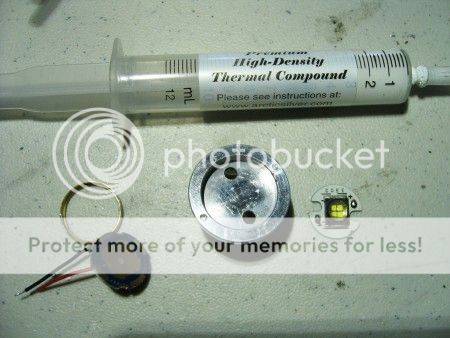
Materials needed to start re-installation
Solder the drivers negative outer ring to the brass retaining clip
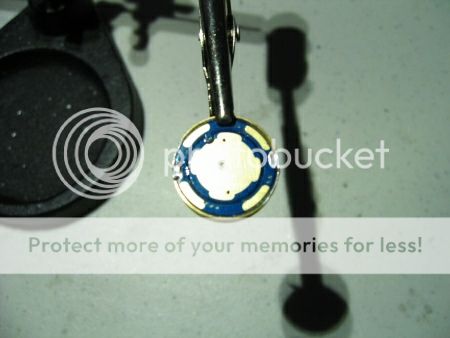
Re-insert board from the bottom
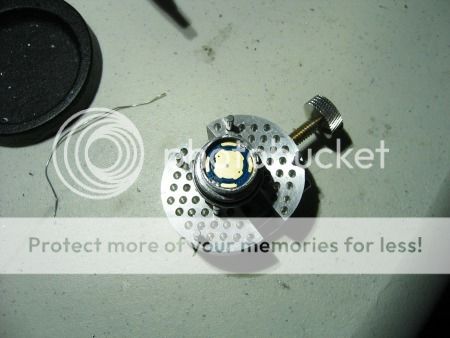
I had previously reflowed the MC-E to a thin XR-E board which will allow the MC-E to run in Parrallel, I now put the arctic ceramique under the board and put in place on the top of the LE and soldered corresponding leads to the led's board.
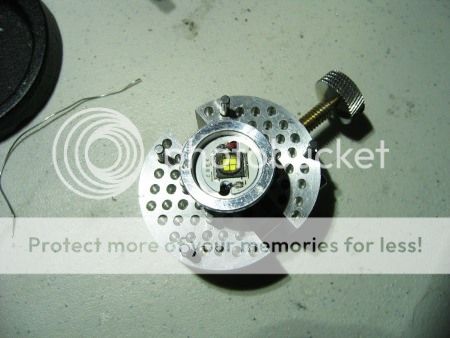
All through this process i have been testing led and board and now it is time to check one last time. Once that is done reinsert the bottom contact and don't forget the spring.
This leaves the plastic cover to replace after testing again now that the contact is in place.
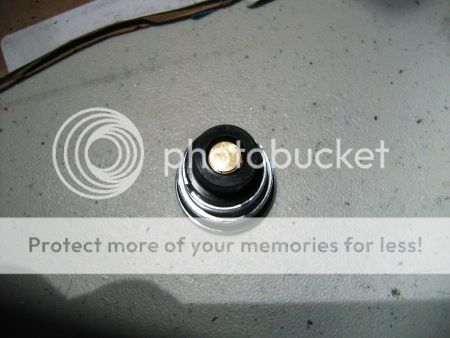
I now put the plastic cover back in place. I had to shave the inside circumfrance down until it would fit down between the led board and the side of the housing, it must fit flat in the pocket not on the board or else the light will not close up properly and the led will not have the exposure it should. This gives you a finished module
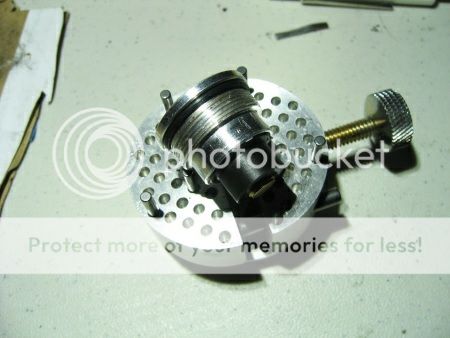
I now replaced the module in the body.
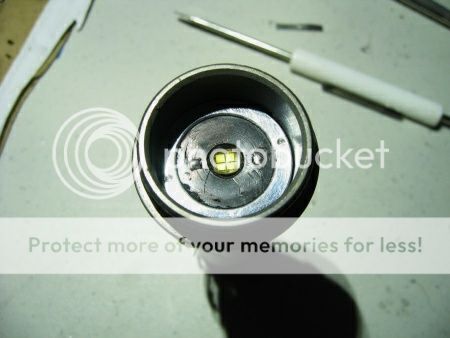
You can see that the cover protects the contacts and centers the led.
I used some arctic silver adhesive and filled the holes that had been drilled to remove the cover. I then used a black magic marker to color the epoxy so that it all matched to some extent.
Here we have the flashlight after removing the reflector and cleaning the lense and shining everything up. The led is perfectly centered and I think it looks great.
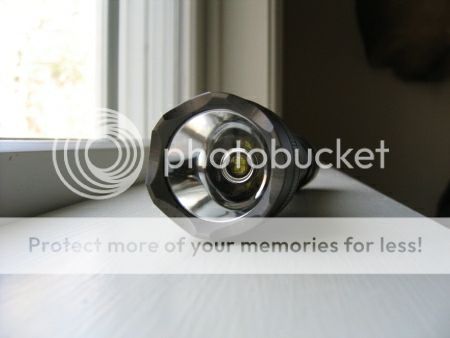
Beam shot with smooth reflector @ about 6 feet.

I thought that the mod came out quite good. I cleaned and nyogeled all the threads, used pro gold on the switch basically gave the member back a renewed light ready to used on a daily basis.
I was amazed at how good the beam came out with a smooth reflector using an MC-E I only had to adjust the module slightly for it to focus in with few rings and basically no X in the center or doughnut.
On high the light is a real thrower especially with the smooth reflector, it warms up quickly on high but transfers the heat through out the body well, quite a nice light.
I hope this might help someone else if they ever try this mod.
Dave
We discussed several LED's and options and after a couple of conversations it was decided to put a neutral binned MC-E in the light and use a direct drive with 5 levels board to control the LED.
1st off I want to thank Netkidz for some timely advice and a few pictures in a thread where he modded a light.
This is a nice well built light that comes with both a MOP & a smooth reflector.

After removing the head the light source is clearly visible. Once the light engine is removed the first thing that has to be done is to remove a black plastic cover that protects the led contacts and centers the led.
How to do this is not clearly visible. The way to do it is to drill a small hole on each side of the led just barely through the cover.
Once this is done I inserted a paper clip bent in a U and each end was bent in an L. Once you have the paper clip bent insert each end into the two holes you drilled being careful of inner components. You can now with some force remove the plastic cover
The results leave this. Now push wires as shown down through holes

Turning the LE upside down you need to unbend the four braded over aluminum clips knowing that they will break off so that the contact can move down and out with the driver in the next step. (care must be used to catch bottom contact and inner spring).
Once that is done you can easily pry the led up and then take an object and insert through hole and carefully start to push the retaining clip with the driver in it down. You need to work a little at a time working from both holes trying to keep the clip even on its way down.
bottom contact with spring

Once the bottom contact falls out the driver will still be recessed

continuing pushing down from the top will finally push the driver out the bottom.
Once the driver is removed it is time to clean the compound that was under the led and start the installation.
Materials needed to start re-installation

Solder the drivers negative outer ring to the brass retaining clip

Re-insert board from the bottom

I had previously reflowed the MC-E to a thin XR-E board which will allow the MC-E to run in Parrallel, I now put the arctic ceramique under the board and put in place on the top of the LE and soldered corresponding leads to the led's board.

All through this process i have been testing led and board and now it is time to check one last time. Once that is done reinsert the bottom contact and don't forget the spring.
This leaves the plastic cover to replace after testing again now that the contact is in place.

I now put the plastic cover back in place. I had to shave the inside circumfrance down until it would fit down between the led board and the side of the housing, it must fit flat in the pocket not on the board or else the light will not close up properly and the led will not have the exposure it should. This gives you a finished module

I now replaced the module in the body.

You can see that the cover protects the contacts and centers the led.
I used some arctic silver adhesive and filled the holes that had been drilled to remove the cover. I then used a black magic marker to color the epoxy so that it all matched to some extent.
Here we have the flashlight after removing the reflector and cleaning the lense and shining everything up. The led is perfectly centered and I think it looks great.

Beam shot with smooth reflector @ about 6 feet.

I thought that the mod came out quite good. I cleaned and nyogeled all the threads, used pro gold on the switch basically gave the member back a renewed light ready to used on a daily basis.
I was amazed at how good the beam came out with a smooth reflector using an MC-E I only had to adjust the module slightly for it to focus in with few rings and basically no X in the center or doughnut.
On high the light is a real thrower especially with the smooth reflector, it warms up quickly on high but transfers the heat through out the body well, quite a nice light.
I hope this might help someone else if they ever try this mod.
Dave


